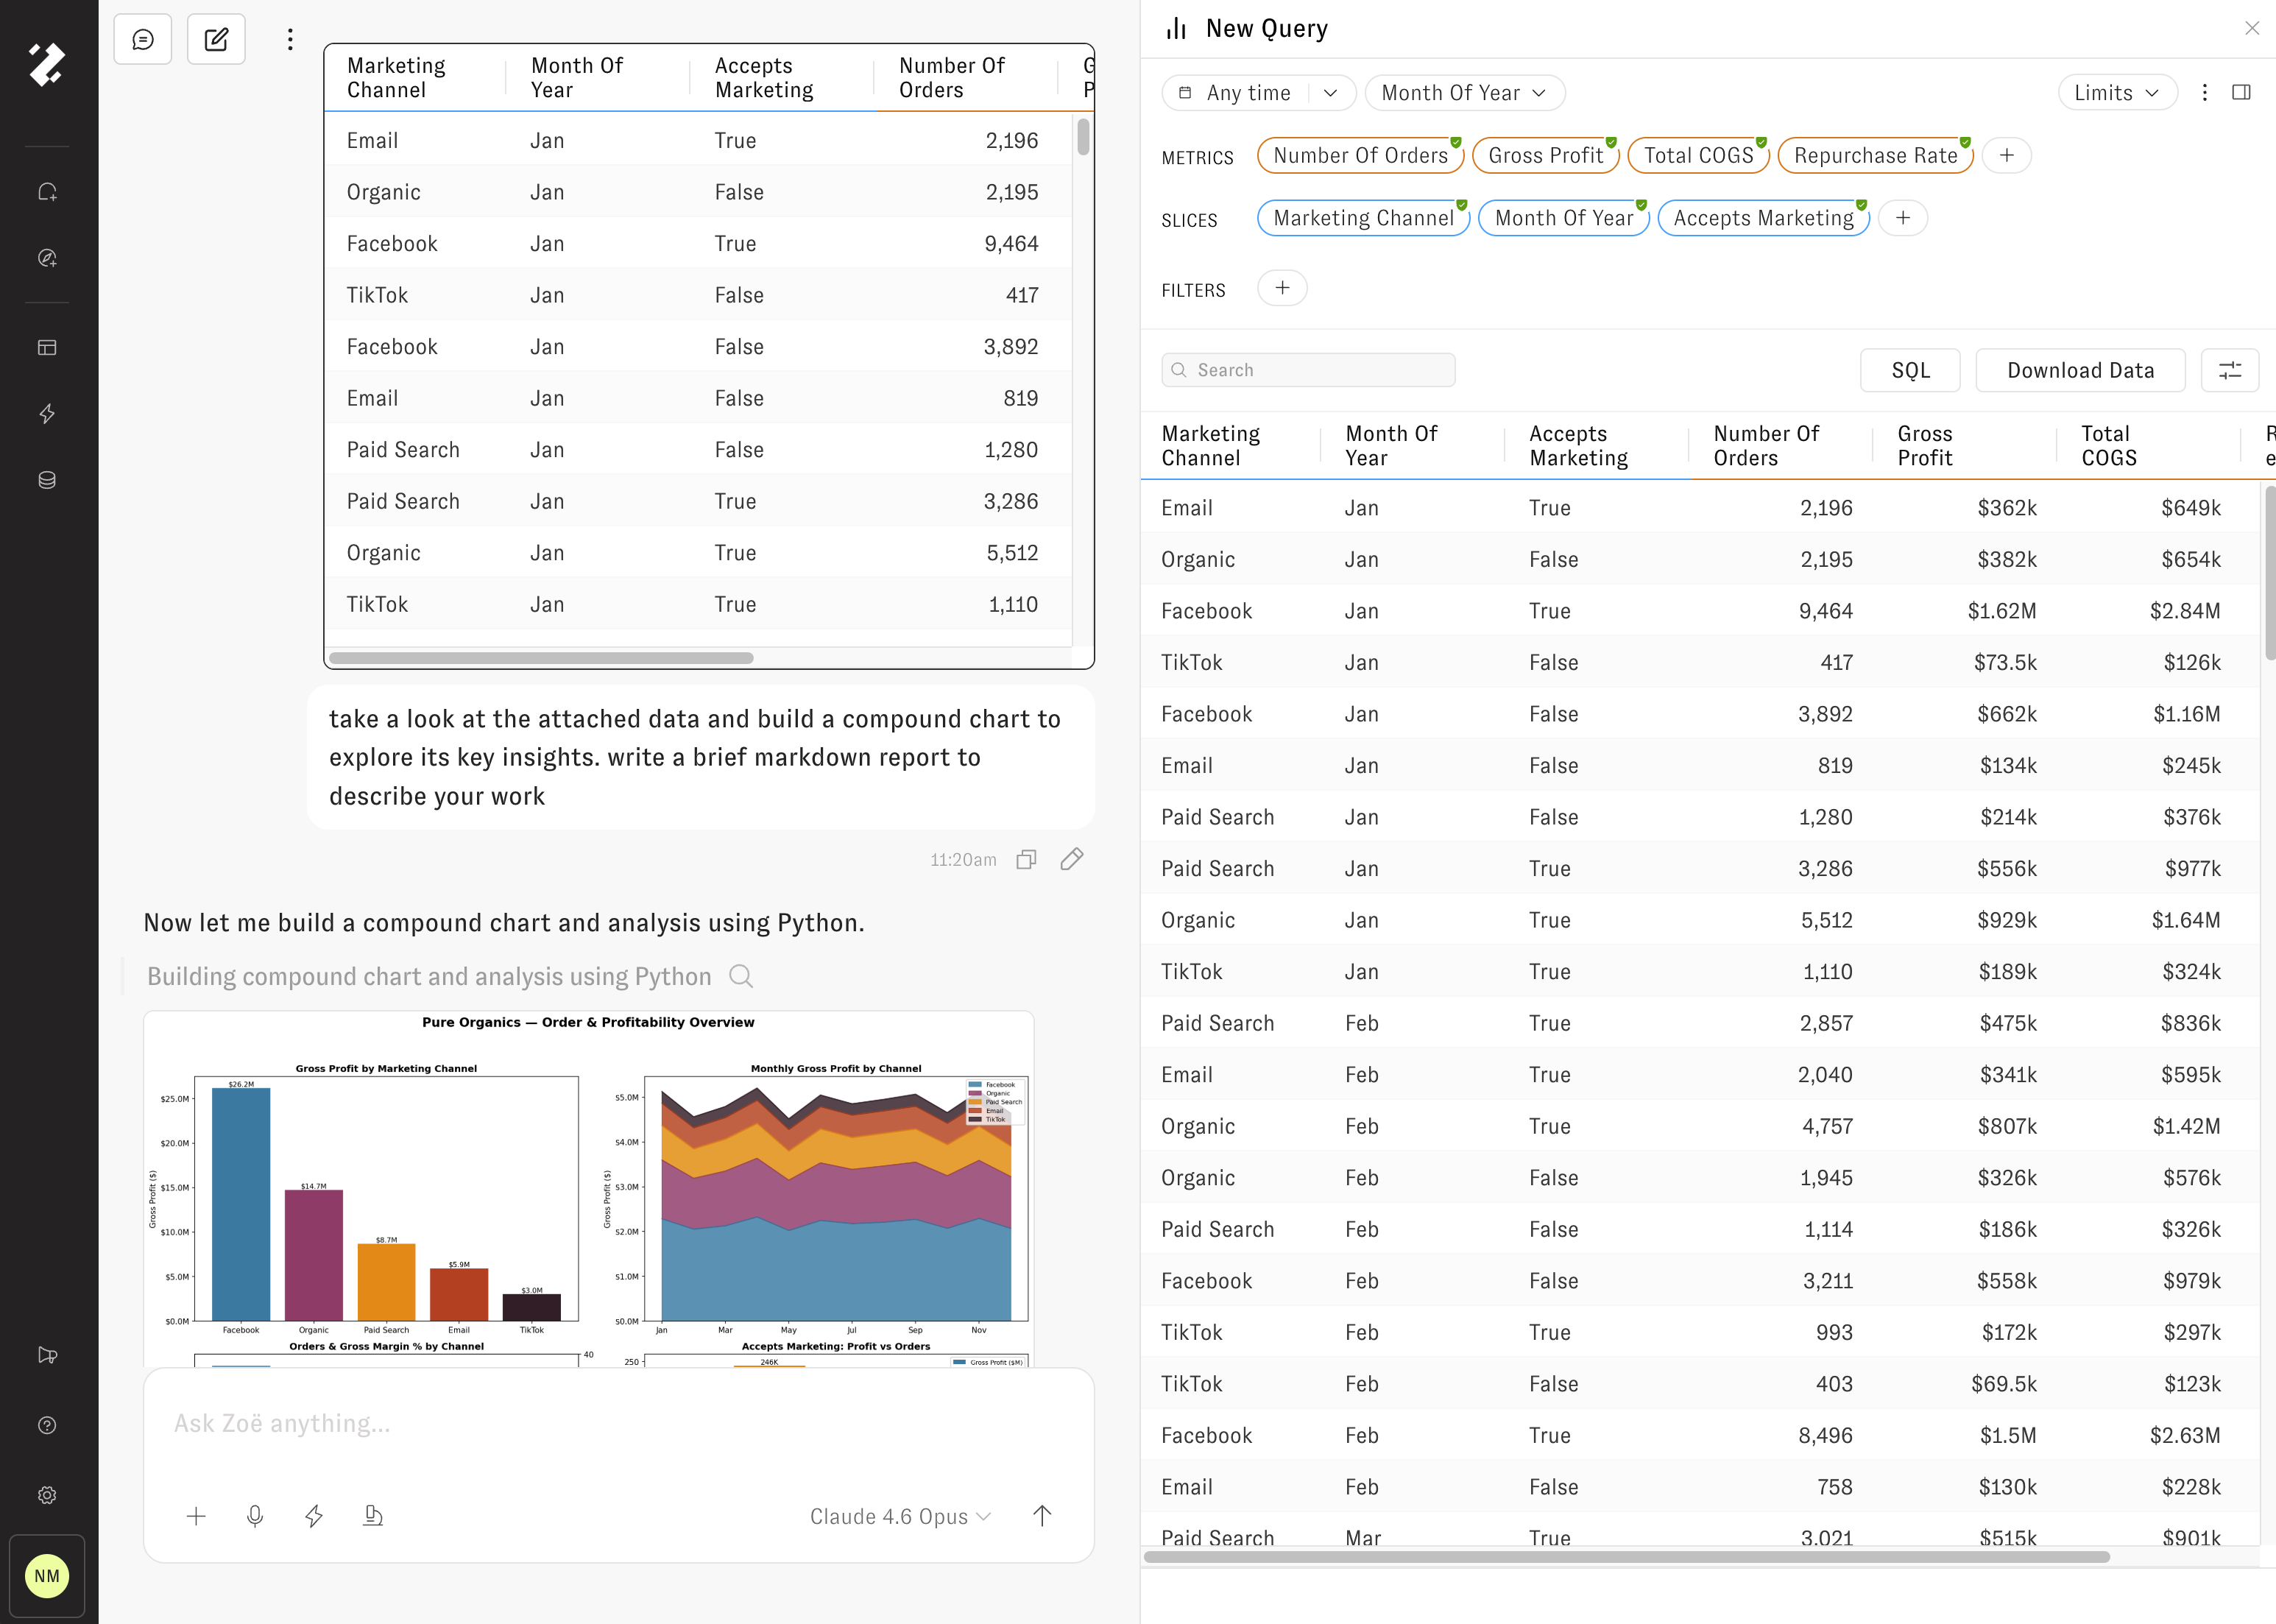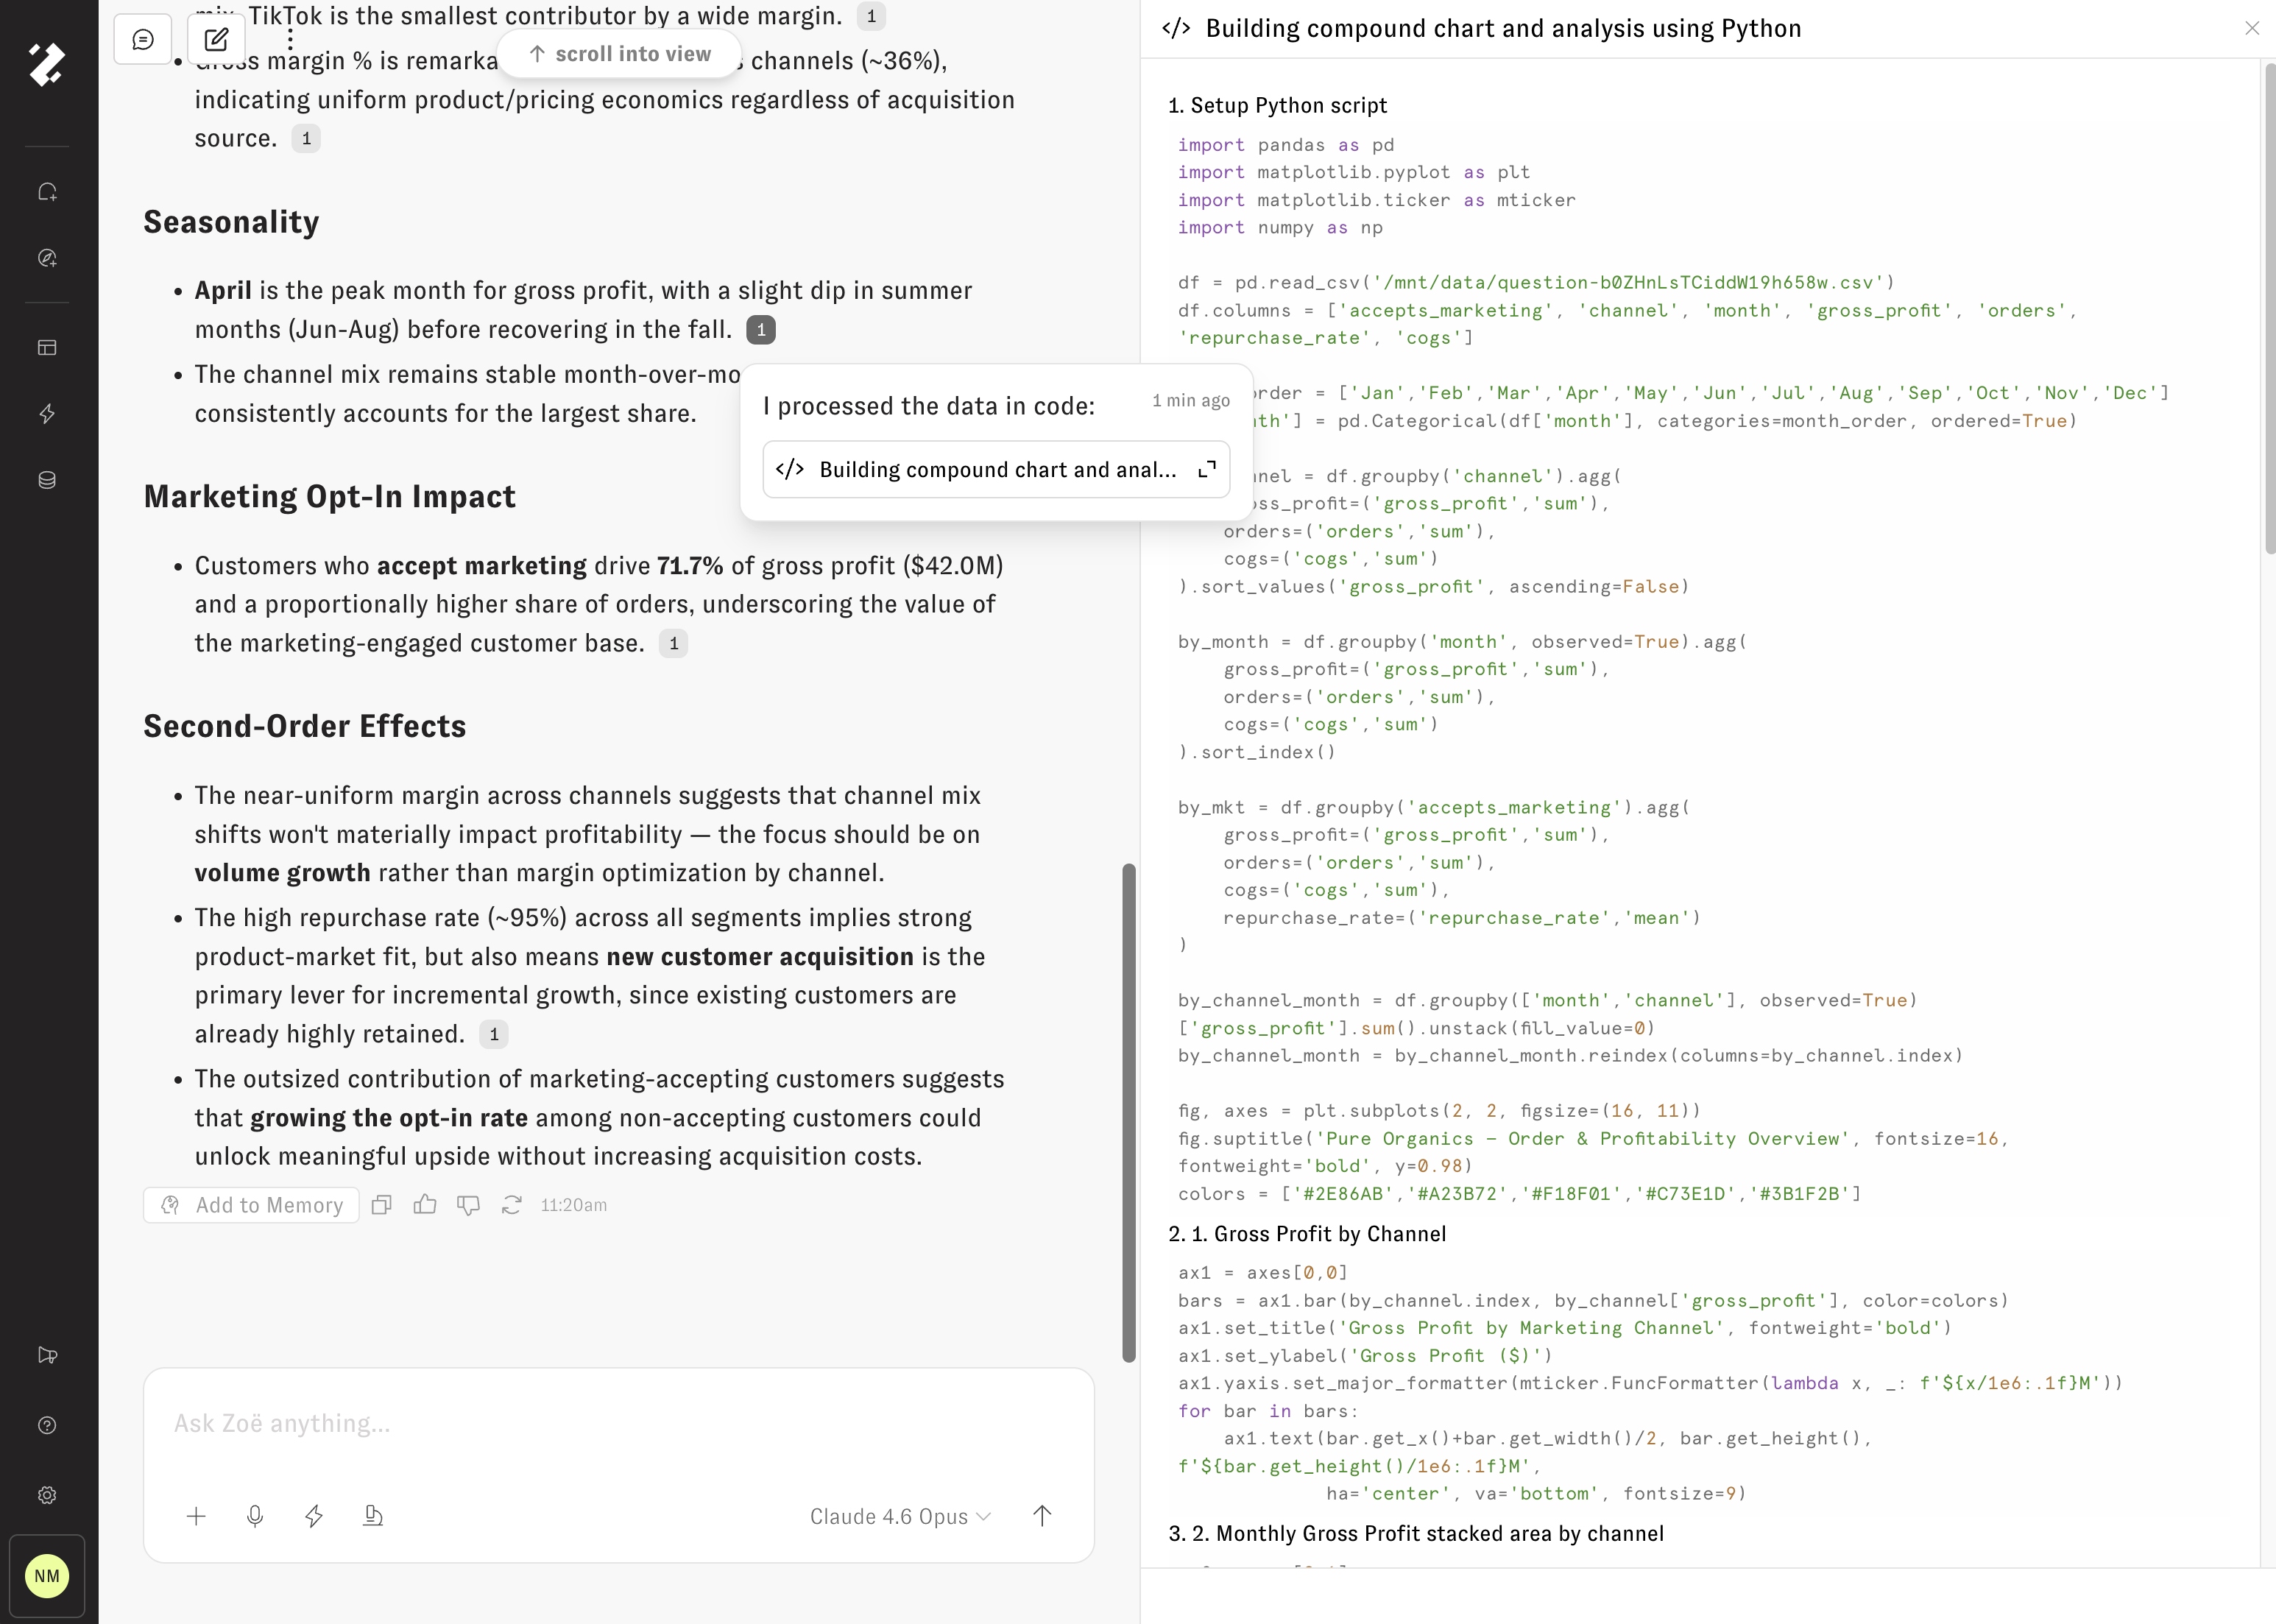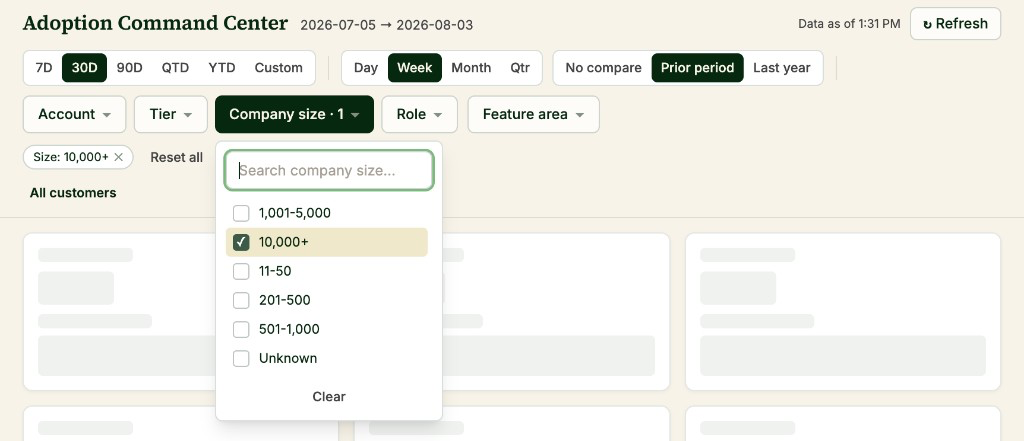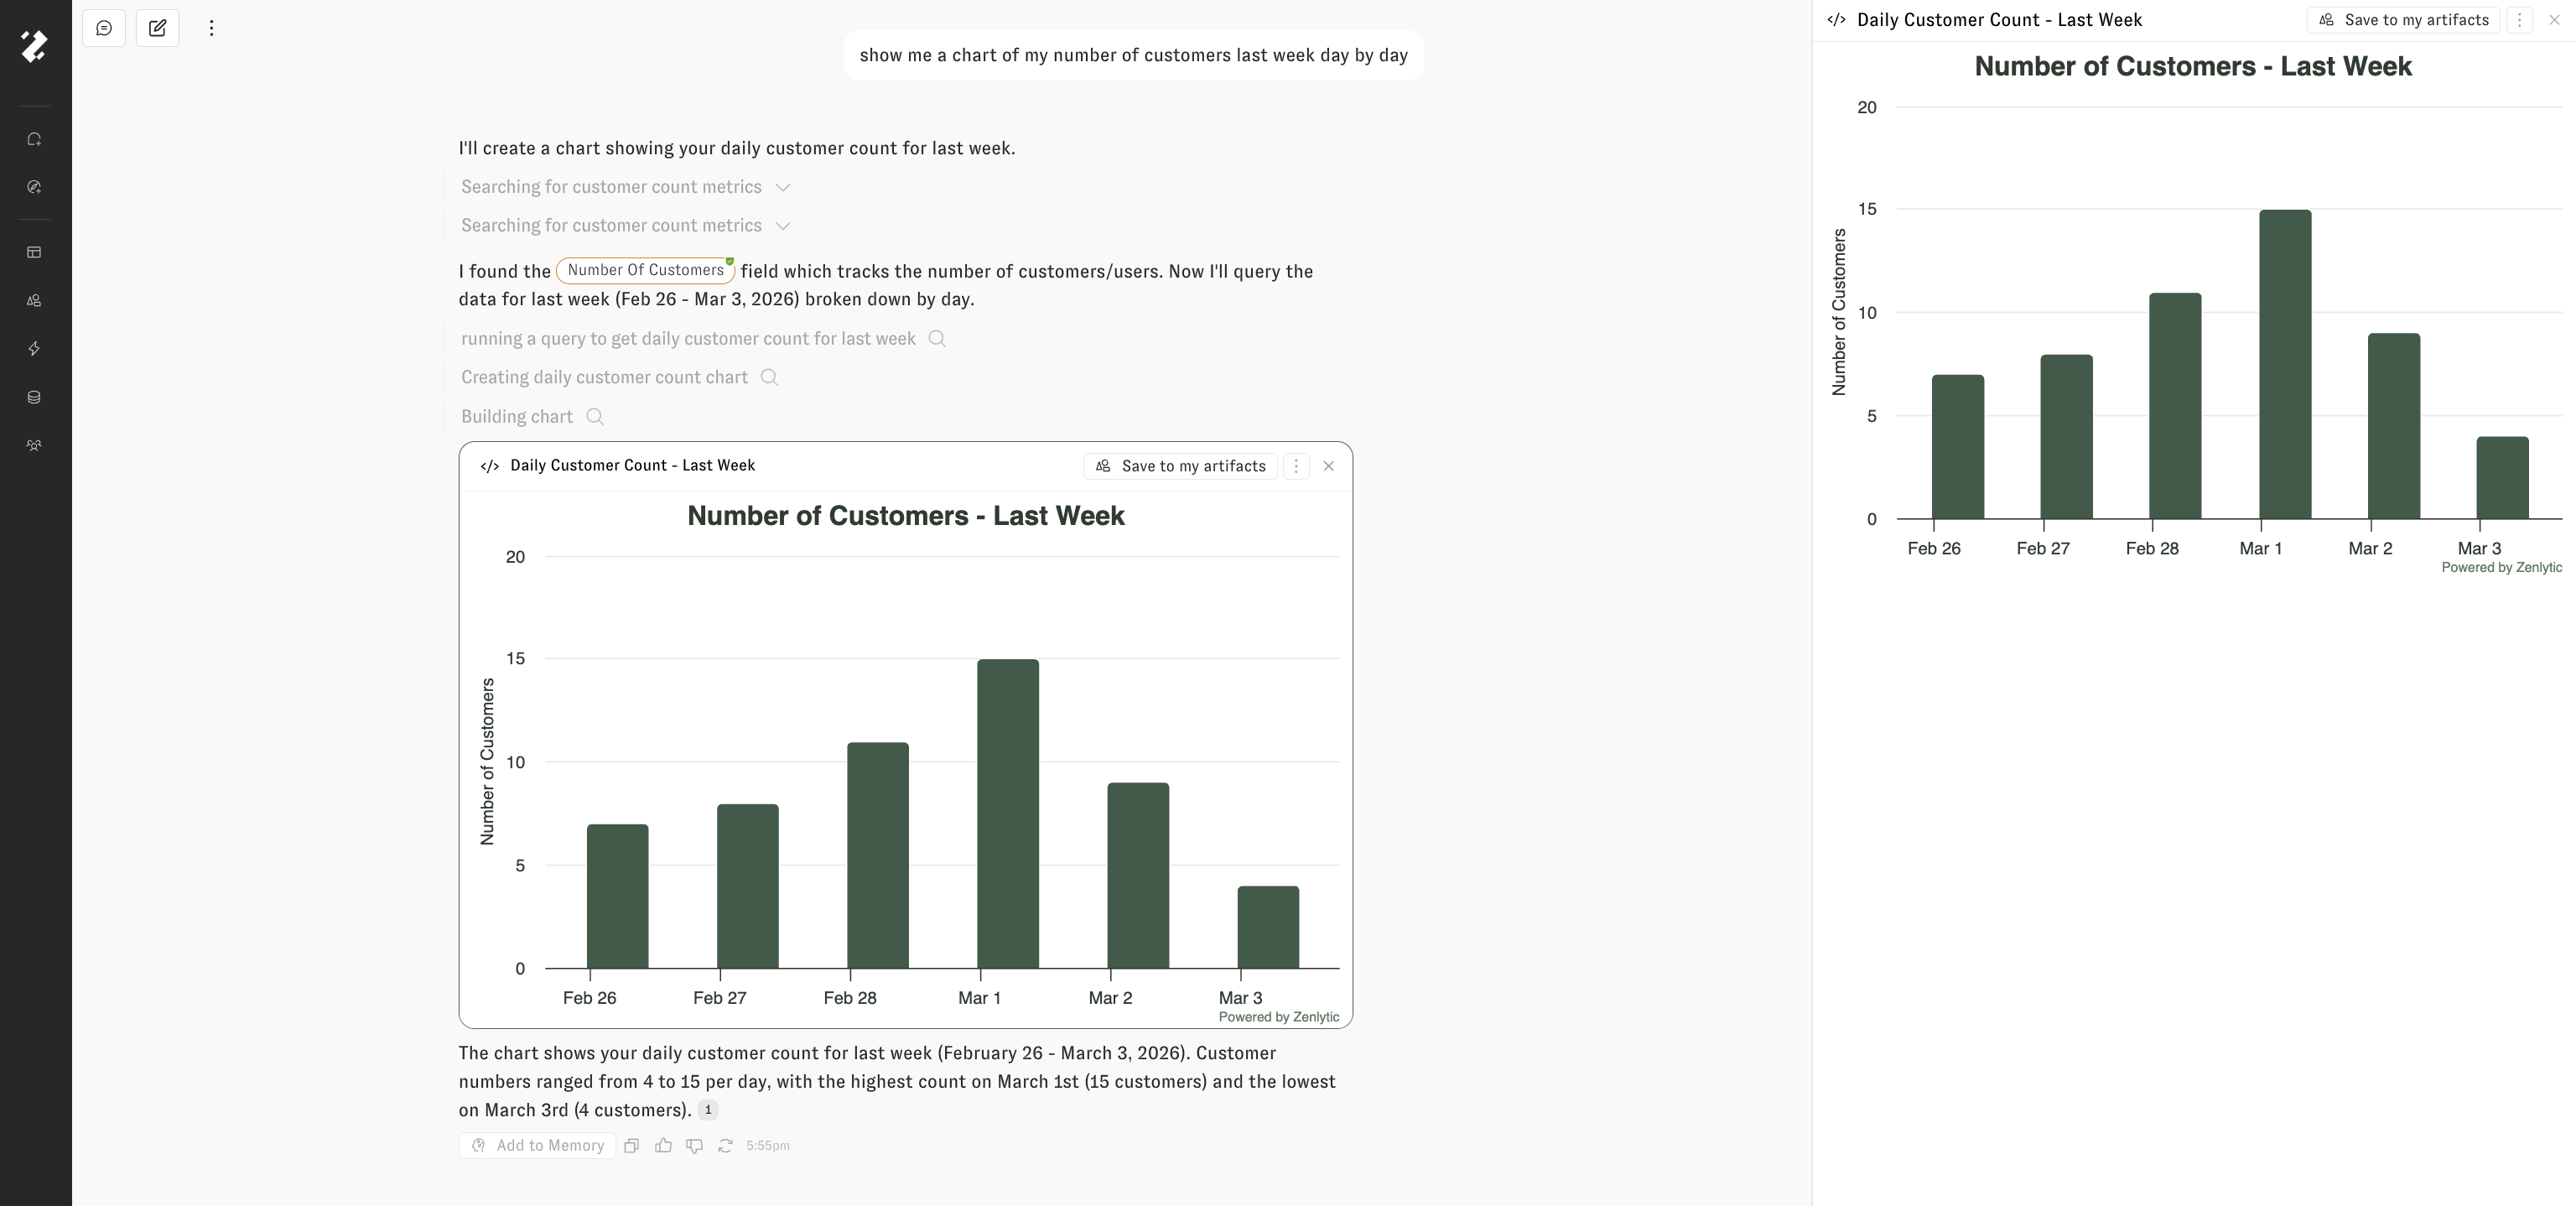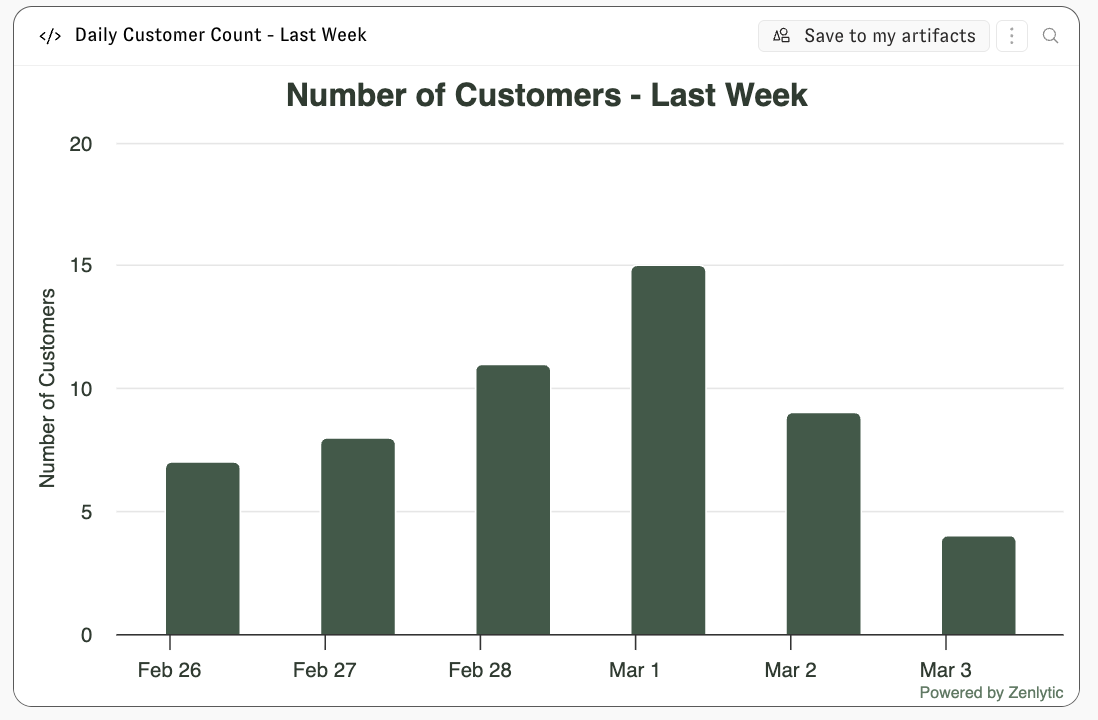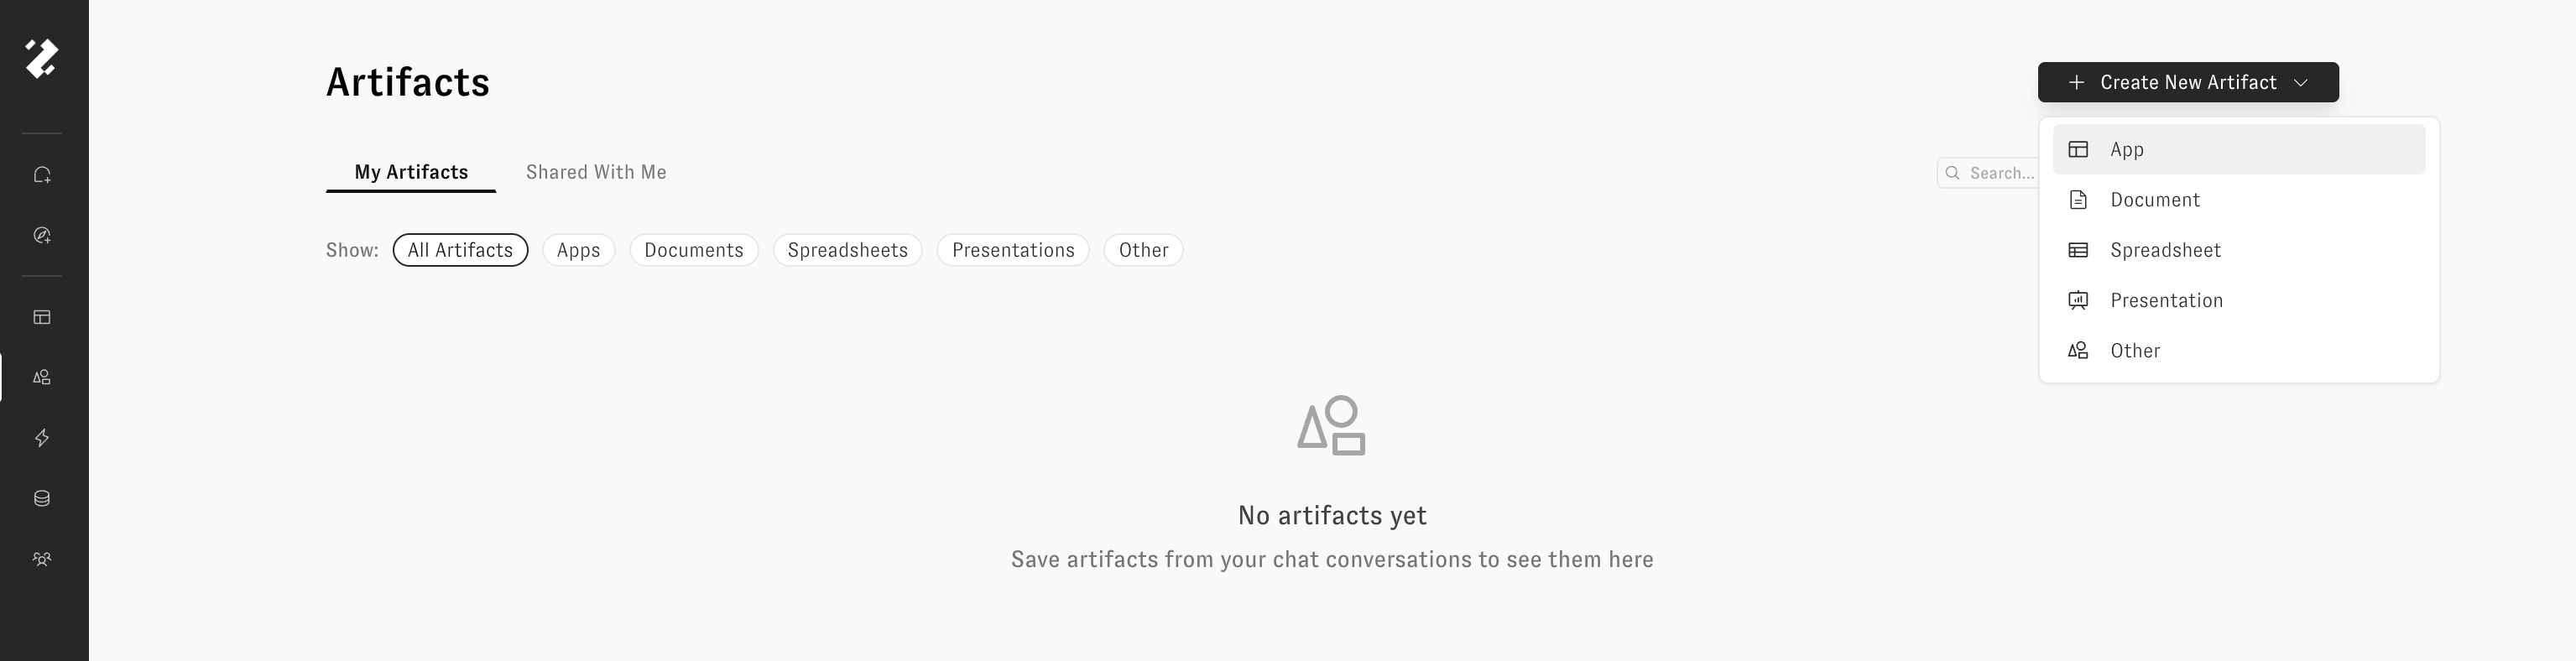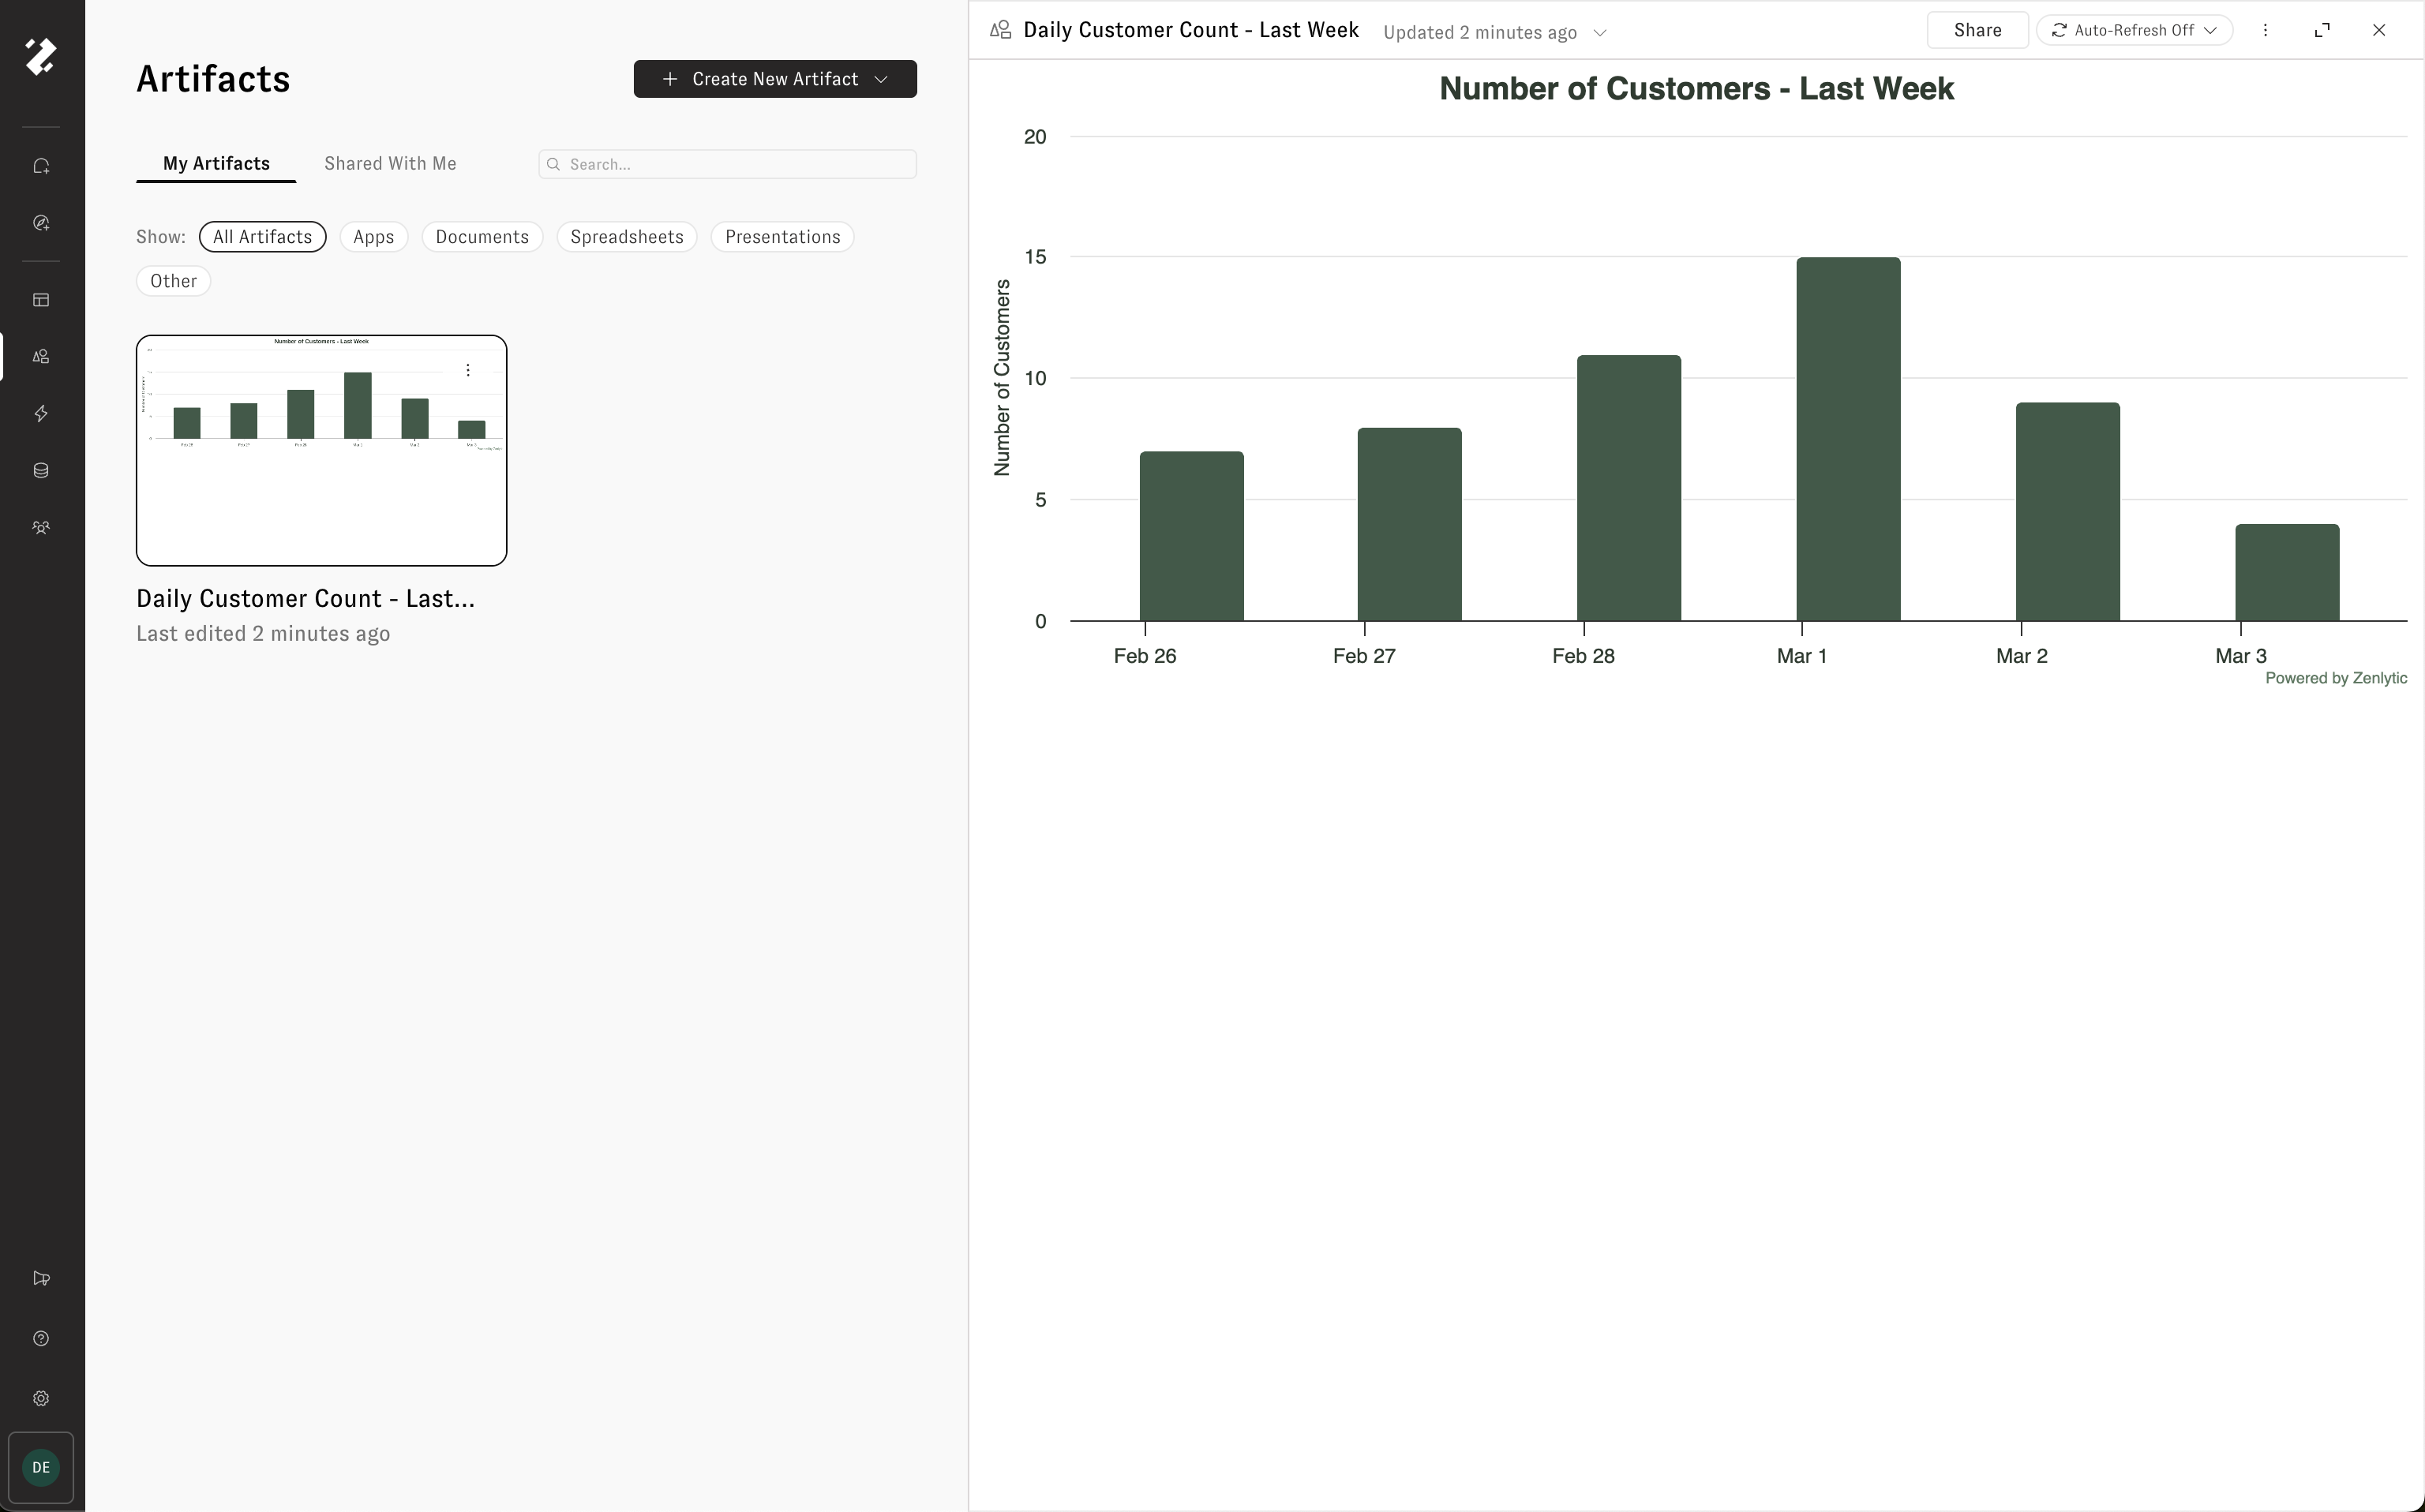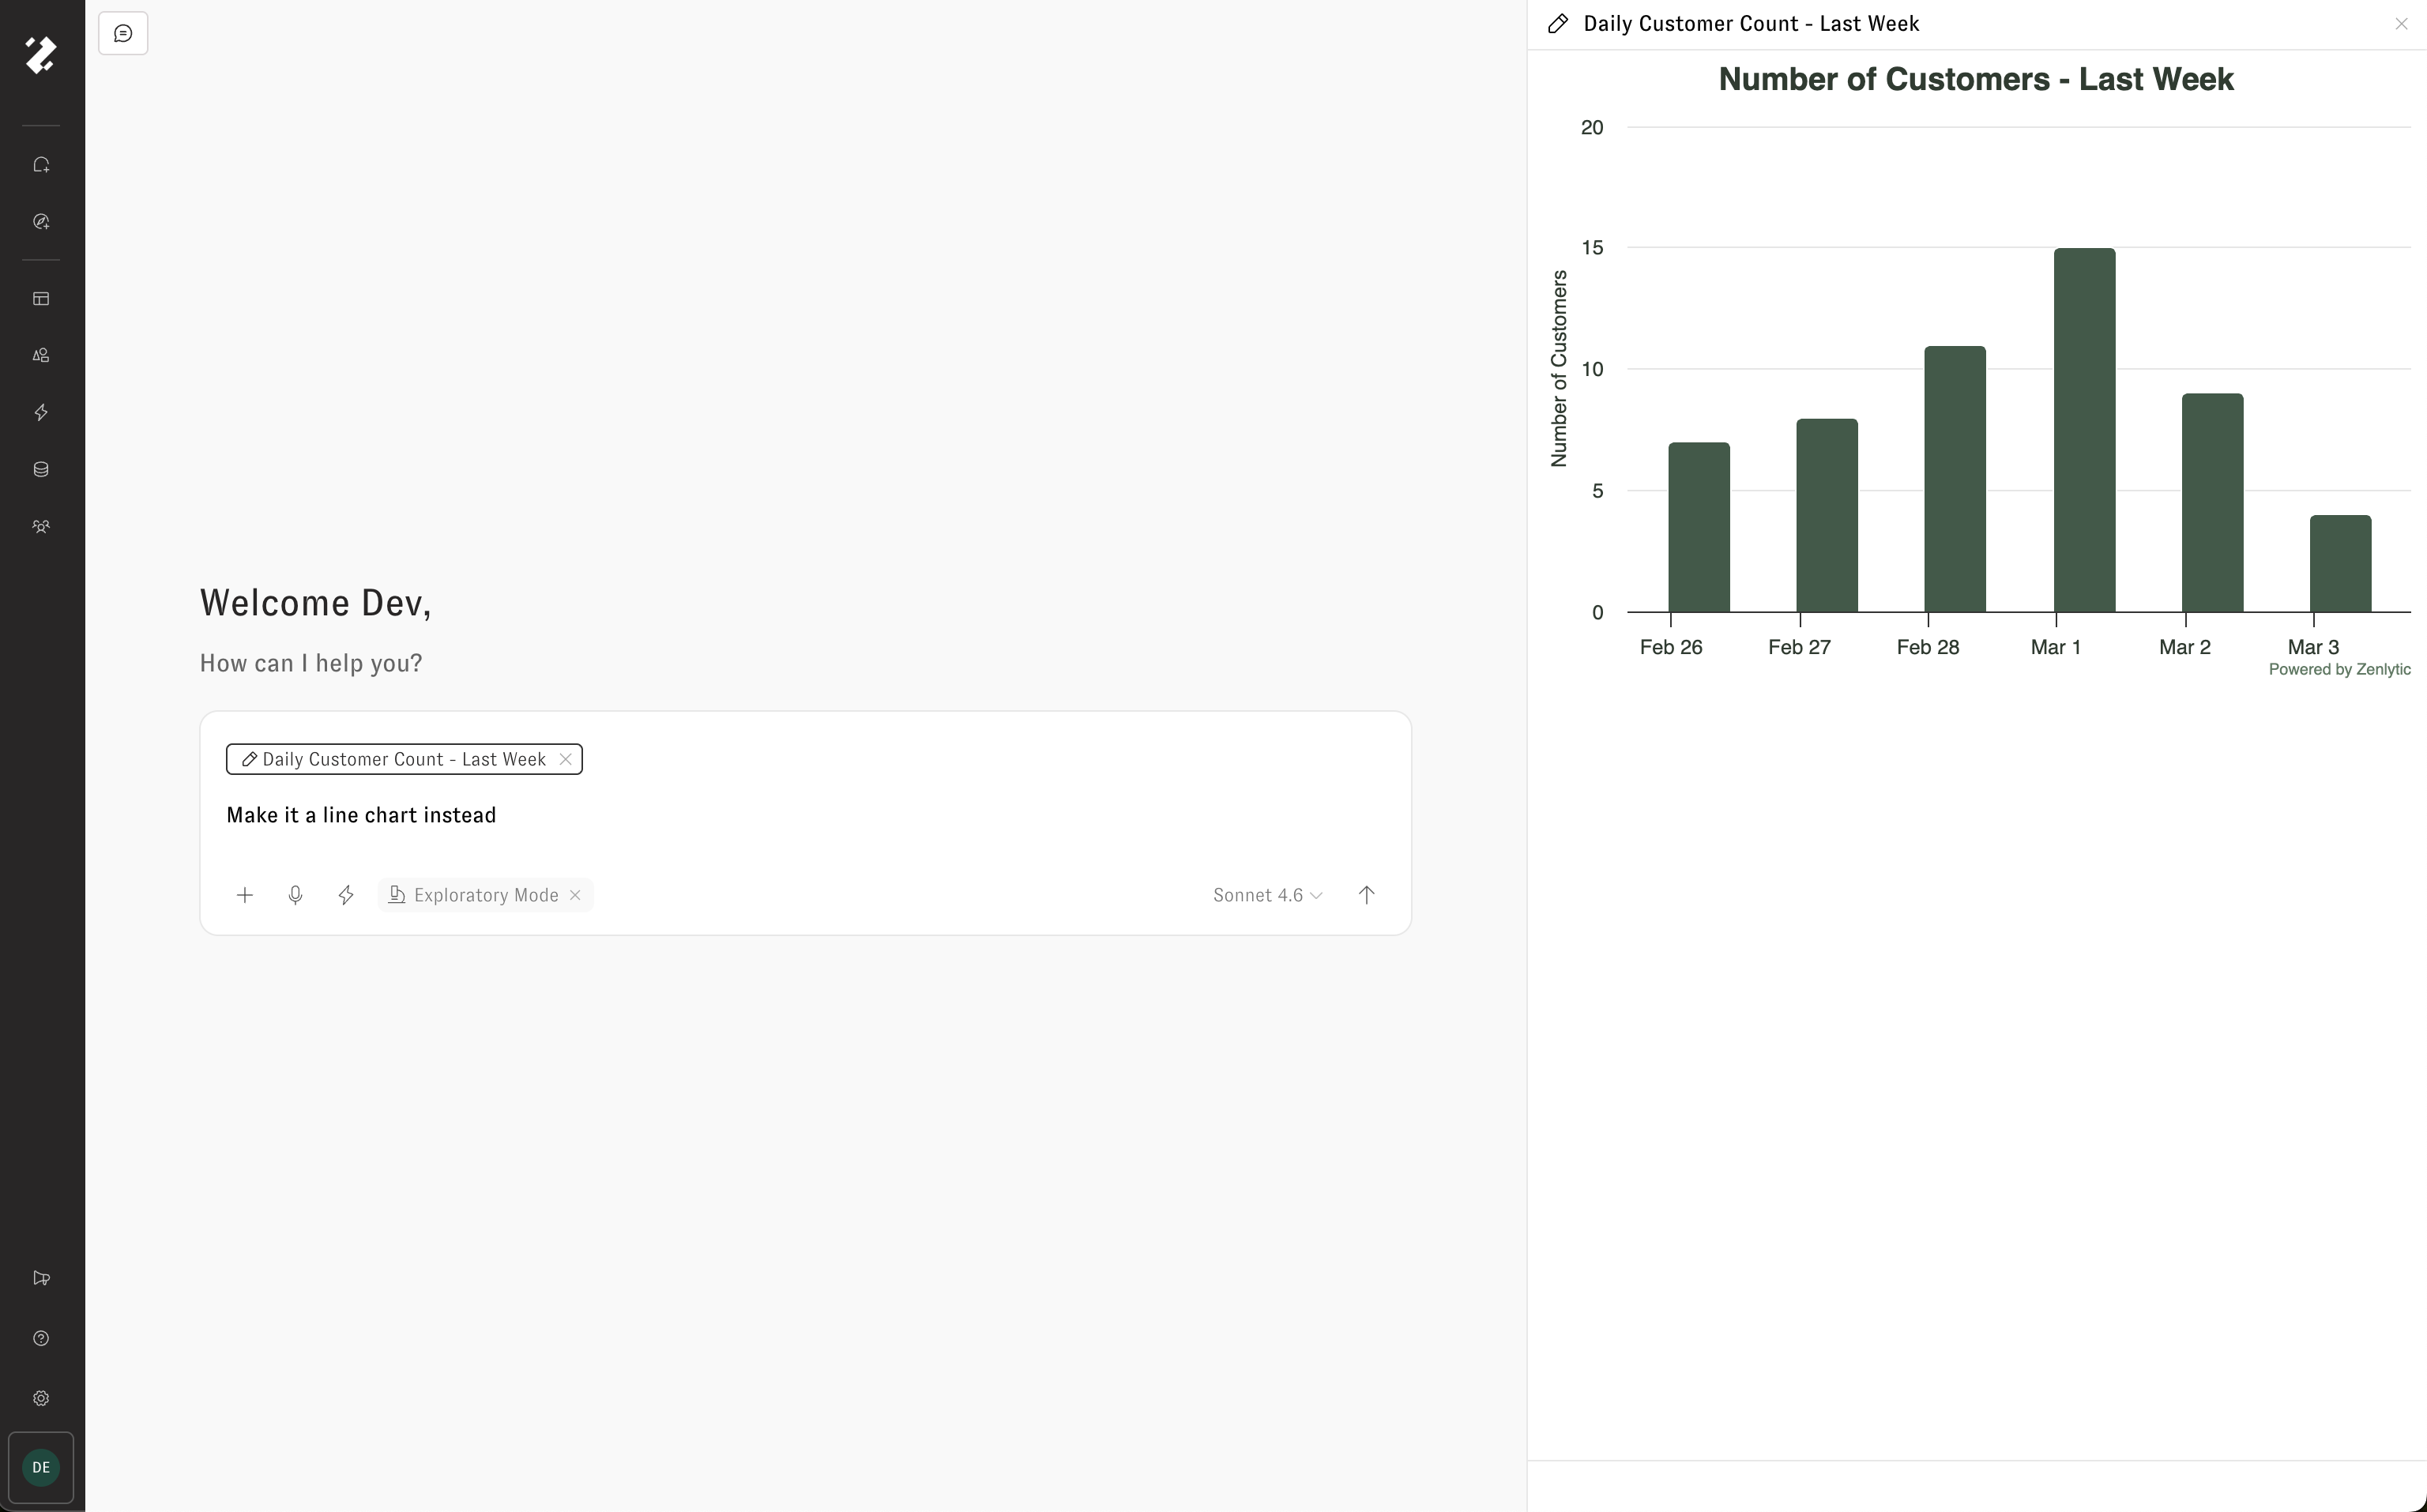
# Overview

Browse the key docs paths for setup, modeling, analysis, administration, and advanced workflows.

### Meet your new Senior Data Analyst - Zoë

Zenlytic is a powerful business intelligence platform leveraging LLM technology to enable self-serve analytics via a conversational data interface. Its robust cognitive layer allows data teams to model company metrics, such as revenue or conversion, ensuring consistent data usage across the organization.

<table data-view="cards"><thead><tr><th></th><th></th><th data-hidden></th><th data-hidden data-card-target data-type="content-ref"></th><th data-hidden data-card-cover data-type="image">Cover image</th></tr></thead><tbody><tr><td><strong>Getting Started</strong></td><td>Connect, import, first question</td><td></td><td><a href="/pages/JK7dqlosOyAIoODamEYG">/pages/JK7dqlosOyAIoODamEYG</a></td><td><a href="/files/7OXrFSPCTVBJhKu7iiWk">/files/7OXrFSPCTVBJhKu7iiWk</a></td></tr><tr><td><strong>Tips &#x26; Tricks</strong></td><td>Help first steps and tricks</td><td></td><td><a href="/pages/lsObHNWe3wFxSyQpTCMX">/pages/lsObHNWe3wFxSyQpTCMX</a></td><td><a href="/files/2jGpaQOuyyfHFUTbhFRU">/files/2jGpaQOuyyfHFUTbhFRU</a></td></tr><tr><td><strong>Using Zenlytic</strong></td><td>Chat, Clarity Engine, Artifacts, Skills</td><td>Use Zoë, the Clarity Engine, skills, artifacts, and app integrations.</td><td><a href="/pages/IQYho9nzuVpe7lh8OY1P">/pages/IQYho9nzuVpe7lh8OY1P</a></td><td><a href="/files/6voWvVNMfAjQGHZwd2hR">/files/6voWvVNMfAjQGHZwd2hR</a></td></tr><tr><td><strong>Administration</strong></td><td>Users, roles, groups, workspaces</td><td>Manage roles, user attributes, workspace groups, and workspace settings.</td><td><a href="/pages/Jl84U5cr1cD4MnqnXyJQ">/pages/Jl84U5cr1cD4MnqnXyJQ</a></td><td><a href="/files/XDZ7gHoTdaSHKD4xzA3b">/files/XDZ7gHoTdaSHKD4xzA3b</a></td></tr><tr><td><strong>Data Modeling</strong></td><td>Semantic layer reference</td><td>Define models, views, fields, relationships, filters, formatting, and access grants.</td><td><a href="/pages/mQen9Jl576TRtNzCzbk4">/pages/mQen9Jl576TRtNzCzbk4</a></td><td><a href="/files/vsXFT402nrEtBFgjb6KW">/files/vsXFT402nrEtBFgjb6KW</a></td></tr><tr><td><strong>Proactive Agents</strong></td><td>Scheduled agents</td><td>Build reusable multi-step conversations with inputs, schedules, publishing, and run history.</td><td><a href="/pages/g3OBRT0qQVEdpfLZu0j2">/pages/g3OBRT0qQVEdpfLZu0j2</a></td><td><a href="/files/G6fhb7d1gESHLmFB4c1R">/files/G6fhb7d1gESHLmFB4c1R</a></td></tr><tr><td><strong>Data Sources</strong></td><td>Warehouse connections</td><td>Set up warehouse connections for BigQuery, Snowflake, Redshift, Databricks, and more.</td><td><a href="/pages/VKUoqPC3Qbxanv07Yyqq">/pages/VKUoqPC3Qbxanv07Yyqq</a></td><td><a href="/files/r0ljsYOxb6KgXWoHgMND">/files/r0ljsYOxb6KgXWoHgMND</a></td></tr><tr><td><strong>MCP</strong></td><td>Integrations</td><td>Configure SSO, IP allowlists, deploy keys, workload identity, and login troubleshooting.</td><td><a href="/pages/RmRdYls8Cs6KUCXxv2ua">/pages/RmRdYls8Cs6KUCXxv2ua</a></td><td><a href="/files/YlqDoRv6WN5BejlALCiG">/files/YlqDoRv6WN5BejlALCiG</a></td></tr><tr><td><strong>Authentication &#x26; Security</strong></td><td>SSO, IP, deploy keys</td><td></td><td><a href="/pages/xM8MRbJw9hmh2aYvp0cv">/pages/xM8MRbJw9hmh2aYvp0cv</a></td><td><a href="/files/cVIoYg6MLMgzhlIA3Nxx">/files/cVIoYg6MLMgzhlIA3Nxx</a></td></tr></tbody></table>

## Popular entry points

* [Start Here](/getting-started/start_here) — the fastest path from blank workspace to first answer.
* [Fixing Zoë's Mistakes](/getting-started/fixing-zoes-mistakes) — diagnose errors and add the smallest useful context.
* [Embedding Overview](/embedding/embedding_overview) — ship Zenlytic inside your own product.
* [Data Modeling Overview](/data-modeling/data_modeling) — learn the model structure behind accurate answers.

As always, feel free to reach out to your Zenlytic contact or [email Zenlytic Support](mailto:support@zenlytic.com) if you have questions that aren't answered in the documentation.


# Start Here

Connect your warehouse, import tables, and ask your first Zoë question in a new workspace.

Welcome to Zenlytic. The shortest path from a blank workspace to a working AI analyst:

1. **Connect** your data warehouse.
2. **Import a few tables** — or ask Zoë which ones to start with.
3. **Ask Zoë a real question** — and check her work.
4. **Ask Zoë how to make herself better** — and let her recommend (or apply) the changes.

The whole onboarding is a conversation. You don't need to build a finished data model before getting value, and you don't have to author context from scratch — Zoë can recommend, and with permission save, most of the changes you'd otherwise write by hand.

## Step 1 — Connect your data warehouse

Click **+ Add Connection** under **Database Connections** in the Settings menu. Pick your warehouse type, give the connection a name, and fill in the credentials.

The name matters. It's how Zenlytic links your credentials to your data model — the name here must match the `connection` property on your [model](/data-modeling/model) file (or your dbt `profile` if you're integrating via dbt MetricFlow without a Zenlytic model file).

For a reference, see the [demo data model](https://github.com/Zenlytic/demo-data-model). It uses the connection name `demo` because that's the value of `connection` on the [model file](https://github.com/Zenlytic/demo-data-model/blob/master/models/pure_organics_model.yml).

![Finish Connection](/files/rXxBkoIVvyOEYszEJMgV)

## Step 2 — Import tables (or ask Zoë to)

The traditional path: open [Context Manager](/data-modeling/context_manager), click **Add → Add view → Add from a database connection**, and pick the tables you want.

The faster path: **just ask Zoë.** Once your warehouse is connected, Zoë can read your `information_schema` — she sees every table available through that connection, not just the ones already imported. Try:

* "Which tables should I import to answer questions about retention?"
* "Add the orders, customers, and shipments tables to my model."
* "What's a good first set of tables to start with for revenue analysis?"

### Migrating from another BI tool

If you're moving from Power BI, Tableau, Looker, or another reporting platform, you don't have to figure out the mapping yourself. **Paste a screenshot of an existing report into chat and ask Zoë what data she'd need to recreate it.** She'll match the report's metrics and dimensions to your warehouse tables, tell you what to import, and — with edits enabled — do the import.

You can also describe the question without a screenshot — *"what data would I need to track new vs. repeat customer revenue by channel?"* — and Zoë will identify the relevant tables and fields the same way.

See [Ask Zoë for Data Model Recommendations](/data-modeling/asking-zoe-for-recommendations) for the full workflow.

### Once tables are imported

Each imported table becomes a [view](/data-modeling/view) with dimensions auto-generated from the columns. **Set `default_date` on any time-series views** — that one property has an outsized effect on temporal questions and is the highest-leverage thing you can do early.

You don't need to define every metric or write every description before testing. Raw tables with decent names will get you surprisingly far. The full walkthrough for the editor, branch workflows, diffs, and deployment lives on the [Context Manager](/data-modeling/context_manager) page.

## Step 3 — Ask Zoë a real question (and check her work)

Open Zoë and ask something you actually want answered:

* "What was revenue last quarter compared to the quarter before?"
* "Which products had the biggest YoY drop in margin?"
* "Show me sessions by channel for the last 30 days."

When she responds, **check her work**. Every chart and table has citations showing which fields and joins backed the answer. Click into them. Does the SQL match what you expected? Is she using the right field? Joining the right tables?

If something looks off, that's the signal for Step 4.

## Step 4 — Ask Zoë how to improve

When Zoë gets something wrong — and she will, at first — **don't guess at a fix**. Ask her:

* "Why did you pick that field?"
* "What context would help you answer this correctly next time?"
* "How should I model the join between orders and shipments?"
* "Add a measure for repeat purchase rate."
* "Create a skill for our fiscal calendar."

She'll diagnose the specific cause and recommend the smallest change that prevents the same mistake — a better `zoe_description`, a synonym, a missing measure, a new relationship, a system-prompt rule, or a skill for complex domain logic. With edits enabled, she can apply the change directly to your repo on the current branch.

This is the loop:

> Ask → check → ask Zoë what would help → save the fix → ask again.

Over time your model ends up configured exactly where it matters, not in places that turned out not to. **There is no separate "training" step for Zoë.** Your data model grows in response to real questions.

For shortcuts:

* **Wrong field picked?** Add `synonyms` for the term your users said.
* **Right field, used wrong?** Add a `zoe_description` clarifying when to use it vs. alternatives.
* **Wrong join or fan-out?** Define a [Relationship](/data-modeling/relationships) on the model file, or add join-path guidance to the view `description`.
* **Wrong date or date range?** Check `default_date`; use `canon_date` sparingly on individual measures.
* **Invalid measure?** Check the valid/invalid patterns on the [Measures](/data-modeling/measure) page.

See [Progressive Enrichment](/getting-started/progressive-enrichment) for the priority order of what to reach for, [Context Surfaces](/getting-started/context-surfaces) for where each kind of context lives, and [Fixing Zoë's Mistakes](/getting-started/fixing-zoes-mistakes) for the full diagnostic flow.

## Step 5 — Ship it

When your changes are on a development branch and you're ready to make them live, use the **Deploy to production** action in [Context Manager](/data-modeling/context_manager). That publishes the branch so Zoë (and the rest of your org) is using the latest version. Resolve any validation errors first.

If changes were pushed to git directly rather than through the UI, use [Pull from Remote](/data-modeling/cache-refresh) to rebuild the cache.

## Git for your data model

Git is connected by default. Keep using Zenlytic's **Managed Repo** unless you have a reason to switch — it requires zero setup. If you later need to switch to your own repo, contact support.

## FAQ

**Not seeing metrics in the Zenlytic interface?**

* If you have the `hidden` property set to `true`, you won't see those metrics or dimensions anywhere in the UI. Make sure you remove the hidden property or set it to `false` if you want those metrics to show up in the UI.

```yaml
# This metric won't show up in the UI because hidden is set to true
- name: number_of_orders
  field_type: measure
  type: count_distinct
  sql: ${order_id}
  description: "The unique number of orders placed"
  value_format_name: decimal_0
  hidden: true
```

## Where do I go from here?

* [Ask Zoë for Data Model Recommendations](/data-modeling/asking-zoe-for-recommendations) — the most important page if you want Zoë to help you build context
* [Context Surfaces](/getting-started/context-surfaces) — where each kind of context lives
* [Fixing Zoë's Mistakes](/getting-started/fixing-zoes-mistakes) — diagnostic flow when answers are off
* [Zoë](/using-zenlytic/zoe) — the rest of the chat experience
* [Data Modeling Overview](/data-modeling/data_modeling) — for hands-on data model authoring

As always, feel free to reach out to your Zenlytic contact or [email support](mailto:support@zenlytic.com) if anything here doesn't match what you're seeing.


# How Zoë Works

How Zoë answers data questions end to end — the agentic loop, the tools she uses, and how every query stays governed and auditable.

Zoë answers data questions by writing and running SQL against your warehouse in real time. Every query is grounded in **governed, verified field definitions** from your semantic model rather than free-form generation, so answers stay accurate, auditable, and consistent. The output isn't just numbers — she can deliver rich documents, spreadsheets, presentations, and interactive dashboards as [Artifacts](/using-zenlytic/artifacts).

Dashboards, charts, and other HTML Artifacts don't store the numbers Zoë pulled. They use [Live Queries](/using-zenlytic/artifacts#live-queries): they store the queries and re-run them through the same permission-enforced path every time someone opens the artifact, so the data is current and scoped to whoever is looking at it.

This page walks through the architecture: the agentic loop she runs on every question, the tools she has access to, and why the result is trustworthy.

## The agentic loop

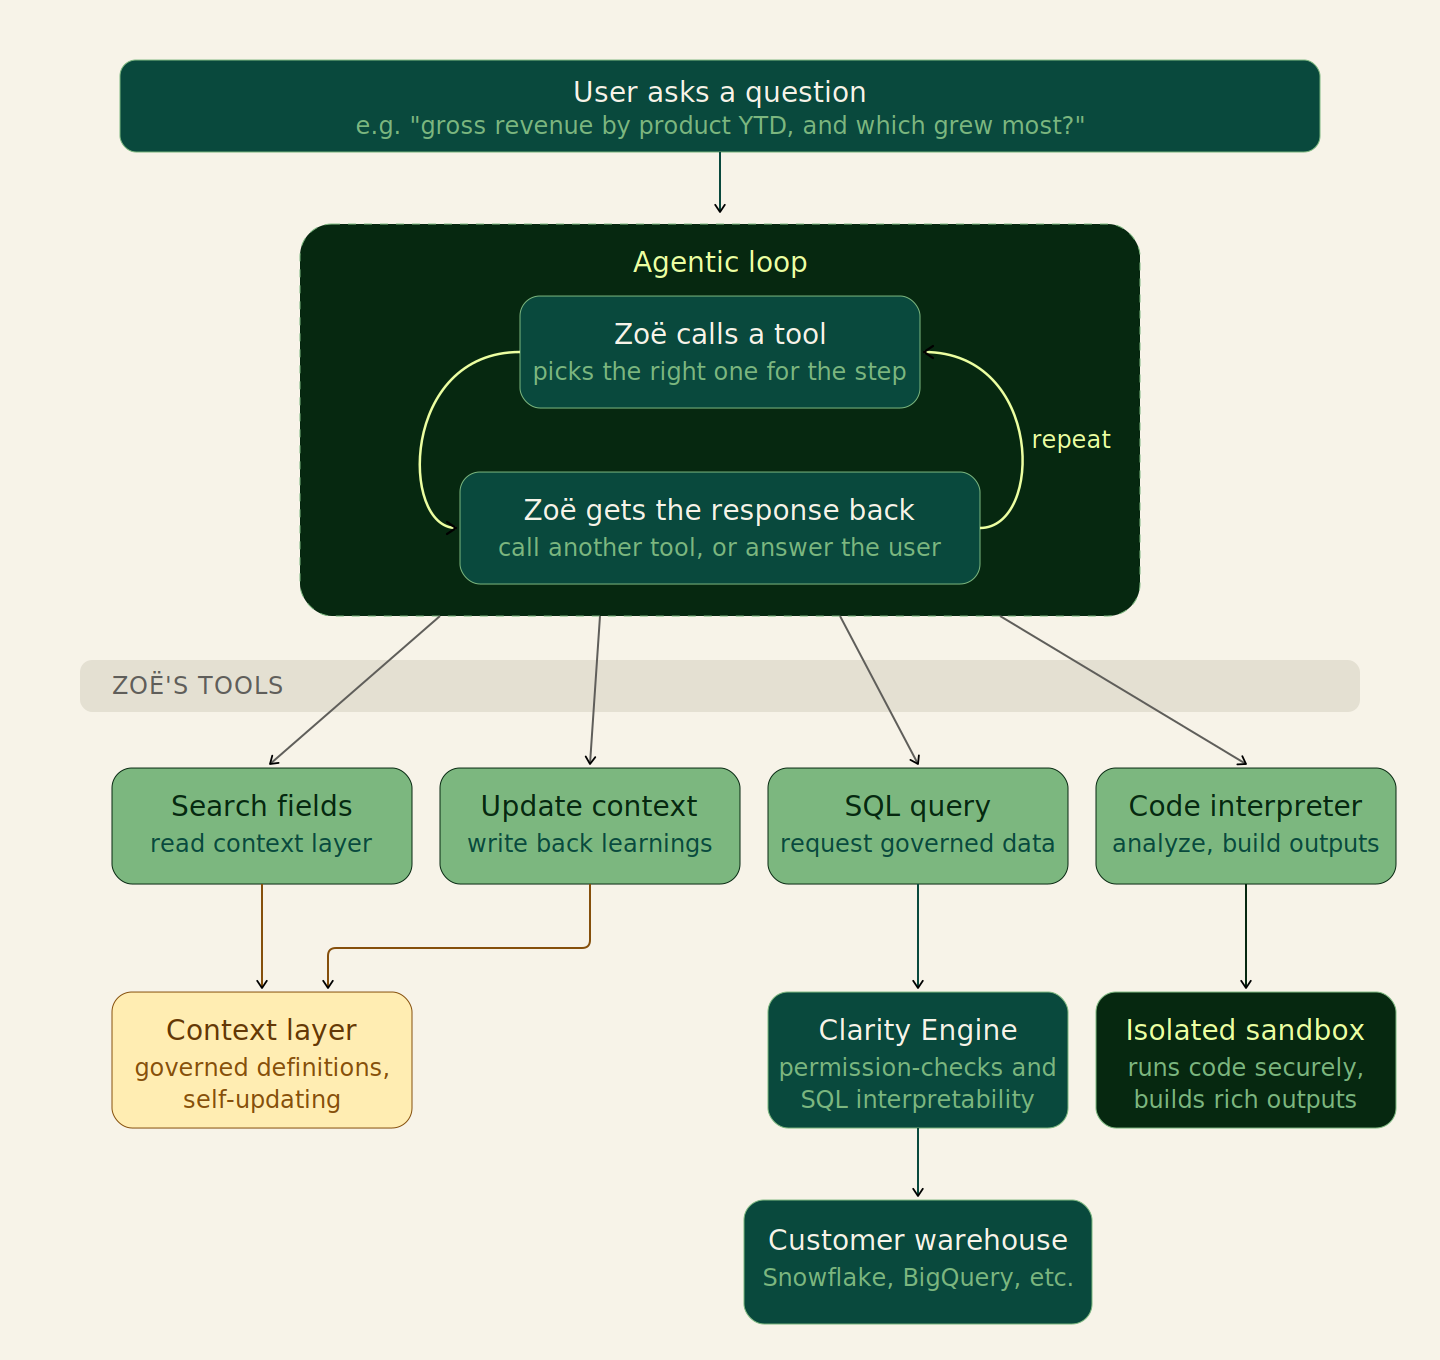
Zoë operates with an **agentic architecture**. At each step of answering a question, she chooses between calling a tool from her toolset and responding directly to the user.

When Zoë calls a tool, Zenlytic runs the tool and returns the result to her. She then makes a new decision — call another tool, or respond. The loop continues until she responds directly.

<figure><img src="/files/HgzaLPn3bPxNP0r8PBiH" alt="Zoë&#x27;s agentic question-answering architecture: a user question feeds the agentic loop where Zoë picks a tool, reads the response, and decides whether to call another tool. Tools include Search fields (reads the Context layer), Update context (writes back learnings to the Context layer), SQL query (governed data requests routed through the Clarity Engine to the customer warehouse), and Code interpreter (runs in an isolated sandbox that builds rich outputs)."><figcaption><p>Zoë's end-to-end question-answering architecture. The agentic loop runs until Zoë decides to respond directly.</p></figcaption></figure>

Three things keep this loop trustworthy:

* **Field definitions are governed.** Every measure, dimension, and join Zoë uses comes from your semantic model — the **Context layer** — not from improvisation.
* **SQL goes through the** [**Clarity Engine**](/using-zenlytic/clarity_engine)**.** Every query Zoë writes is validated against your model and your row- and column-level security rules before it ever reaches the warehouse.
* **Every step is visible.** You can see which tools Zoë called, the SQL she ran, and the fields she referenced. Citations on her output link back to the underlying definitions.

## Zoë's tools

The toolset Zoë chooses from on every step. The four shown in the diagram cover most question-answering work:

* **`search fields`** — reads the Context layer to find measures, dimensions, and joins relevant to the question. Returns SQL definitions and metadata so Zoë can build a correct query rather than guess at field names.
* **`update context`** — writes back to the Context layer. When Zoë learns something new — a better synonym, a clearer description, a new measure that should exist — she can persist it so future questions benefit. See [Ask Zoë for Data Model Recommendations](/data-modeling/asking-zoe-for-recommendations) for the user-facing workflow this powers.
* **`sql query`** — sends a SQL request to the warehouse. The query is routed through the [Clarity Engine](/using-zenlytic/clarity_engine), which enforces permissions and validates against the semantic model before execution.
* **`code interpreter`** — runs Python in an isolated sandbox. This is what builds the rich, interactive outputs that get delivered to you as [Artifacts](/using-zenlytic/artifacts) (dashboards, documents, spreadsheets, presentations).

Other tools exist for searching workspace content, web search, and similar — but the four above are the load-bearing ones for analytical questions.

### The Context layer is self-updating

The Context layer holds your governed field definitions, descriptions, synonyms, skills, and system prompt rules. It's read by `search fields` on every question and written to by `update context` when Zoë (with permission) saves a learning. Over time the model keeps current with your business without requiring a separate "training" pass.

## A worked example

Take a non-trivial question:

> *"Can you show me gross revenue by product YTD and tell me which product had the highest growth from last YTD to this YTD?"*

Here's the loop Zoë runs end to end:

1. **Zoë reads the question** and decides she needs to find the relevant fields. She calls `search fields` with search terms `"gross revenue"`, `"ytd"`, `"product"`.
2. **The tool returns matches** like `order_lines.total_gross_revenue`, `order_lines.order_date`, and `products.product_title`, along with their metadata and SQL definitions.
3. **Zoë constructs SQL** referencing those field definitions and calls `sql query`.
4. **The Clarity Engine checks the SQL** for permissions, validates it against the semantic model, and produces a step-by-step breakdown so business users can see exactly what was queried.
5. **The query runs** on the customer warehouse (Snowflake, BigQuery, Redshift, etc.) and the result is returned to Zoë.
6. **Zoë decides to visualize the result.** She writes Python code that builds an interactive dashboard and passes it to `code interpreter`.
7. **The sandbox runs the code** in isolation, builds the rich output, and Zenlytic delivers it to you as an [Artifact](/using-zenlytic/artifacts).
8. **Zoë writes a text summary** of what she found, decides she's done, and responds — ending the loop.

Throughout, you can inspect every tool call, every SQL query, and every field reference. Nothing about Zoë's reasoning is hidden.

## Why this architecture matters

The agentic loop gives Zoë **flexibility** — she can decompose complex questions and pick the right tool for each piece, in any order, as many times as needed. The governance layer keeps her **grounded** — every answer ties back to definitions your data team has reviewed, and every query passes through the same row- and column-level security rules that govern the rest of the platform. Together they're what make Zoë both useful for ad-hoc analytical questions and safe to deploy across an organization.

## Related

* [Clarity Engine](/using-zenlytic/clarity_engine) — the SQL interpretation and validation layer
* [Context Surfaces](/getting-started/context-surfaces) — what context Zoë uses and where it lives
* [Ask Zoë for Data Model Recommendations](/data-modeling/asking-zoe-for-recommendations) — how to ask Zoë to update the Context layer
* [Artifacts](/using-zenlytic/artifacts) — the rich outputs Zoë produces
* [Fixing Zoë's Mistakes](/getting-started/fixing-zoes-mistakes) — diagnostic flow when an answer isn't right


# Context Surfaces

Choose the right place for Zoë instructions based on when the context appears and how visible it is.

When users ask "where do I put instructions for Zoë?", the answer depends on **when** Zoë needs to see the context. There's no strict hierarchy — Zoë sees all of your context and uses it as appropriate — but there is a visibility difference. Some context is present on every question, some appears only when a particular view is in scope, and some surfaces only after a field search.

This page is the canonical reference for which surface to reach for, how visible each one is, and how much you can fit in it.

{% hint style="info" %}
**A useful heuristic.** Could a talented data analyst, on their first day, answer real business questions using only your data model — with no other context? If yes, Zoë will do great. If not, the gap between "what the model says" and "what an analyst would need to know" is exactly the context you need to encode.
{% endhint %}

## Surfaces at a glance

| Surface                               | Visibility                               | Best for                                                                      | Char limit             |
| ------------------------------------- | ---------------------------------------- | ----------------------------------------------------------------------------- | ---------------------- |
| **System prompt** (Settings → Prompt) | Every question, always                   | Universal rules, default behaviors, data freshness, join routing, terminology | 20,000 chars           |
| **Skills** (Settings → Skills)        | On demand — Zoë decides when relevant    | Complex analysis patterns, fiscal calendars, domain-specific workflows        | No hard limit          |
| **View `description`**                | When the view is in context              | Table-level business context shown to both users and Zoë                      | 10,000 chars           |
| **View `zoe_description`**            | When the view is in context              | Agent-only table-level instructions (join paths, pitfalls, edge cases)        | 10,000 chars           |
| **Field `description`**               | After a field search; shown to users     | User-facing field documentation                                               | 1,024 chars            |
| **Field `zoe_description`**           | After a field search; not shown to users | Agent-only field instructions and calculation notes                           | 1,024 chars            |
| **Field `synonyms`**                  | During search; boosted +20 in ranking    | Alternative names users actually say for this field                           | N/A                    |
| **Field `searchable: true`**          | During search; category values indexed   | Status, type, and category columns where values matter for filtering          | 10k categories default |
| **Memories** (Settings → Memory)      | Top 5 semantically matched per question  | **Legacy — avoid.** Being replaced by Skills.                                 | N/A                    |

## `description` vs. `zoe_description`

This is the single most asked-about distinction in Zenlytic's data model, so it's worth being explicit:

* **`description` is shown to users.** It appears in the UI and is also visible to Zoë. Put user-facing documentation here — what the table or field represents, business context, things an end user should know.
* **`zoe_description` is shown only to Zoë.** Users never see it. Put agent-specific instructions here — which join paths to prefer, how to disambiguate similar fields, when to use this field vs. an alternative, calculation notes.

If both are set, Zoë sees `zoe_description` (not both). If only `description` is set, Zoë sees that.

Both properties are available on views, fields (dimensions, measures, dimension groups), and topics. The character limits differ by level:

* **View-level** `description` and `zoe_description`: up to **10,000 characters** each.
* **Field-level** `description` and `zoe_description`: up to **1,024 characters** each.

If you need to write more than 1,024 characters about a single field, move the broader context up to the view's `description` or `zoe_description`, or into a skill.

A concrete example — a `description` that encodes both the user-facing meaning and a disambiguation rule:

```yaml
- name: gross_aov
  field_type: measure
  type: average
  sql: ${TABLE}.revenue
  description: |>
      This is the gross average order value. This just covers
      DTC revenue, and is sometimes internally referred
      to as 'the magic'. This is the metric that
      should be used when someone asks about AOV, generally speaking.
```

With that description, Zoë can answer "what's the magic this month?" or a generic "what's our AOV?" and pick `gross_aov` — the description gives her both the synonym (`magic`) and the default-pick rule.

### `synonyms` — what users actually call the field

Use `synonyms` for alternative phrasings that don't belong in the field name or description prose. For example, if users ask about "existing customers" or "loyalty," you want a `new_vs_repeat` dimension on order lines to surface even though the name doesn't mention "customer":

```yaml
- name: new_vs_repeat
  field_type: dimension
  type: string
  sql: ${TABLE}.new_vs_repeat
  description: The new vs repeat status of the purchaser
  synonyms:
  - customer
  - loyalty
```

Synonyms get a +20 boost in search ranking, so they are the highest-impact lever for discoverability. See [Descriptions and Synonyms](/tips-and-tricks/descriptions-and-synonyms) for more patterns.

## How to pick a surface

Use the following mental model:

1. **Is the rule universal — true for every question, not just ones about a particular table?** → **System prompt.** Examples: default time range for "this year", default to net revenue over gross, data freshness ("our warehouse is updated nightly at 2am UTC"), terminology mapping.
2. **Is it a complex pattern that only applies sometimes — a fiscal calendar, an industry-specific analysis, a multi-step workflow?** → **Skill.** Skills load on demand. They're for long-form, situational context.
3. **Is it about a specific table — which joins are valid, fan-out pitfalls, data caveats?** → **View `description` / `zoe_description`.**
4. **Is it about a specific field — how it's calculated, when to use it vs. an alternative?** → **Field `description` / `zoe_description`.**
5. **Is it about what users call the field — alternative phrasings, industry terms?** → **`synonyms`** on the field. Boosts search ranking +20.
6. **Is it about what values exist in a column — statuses, categories, types?** → **`searchable: true`** on the dimension. Skip this on high-cardinality columns like IDs or timestamps.

## Principles for placing context

* **Don't shy away from putting important logic in the system prompt.** It's appropriate for always-applicable rules: default time ranges, terminology definitions, data freshness rules, assumption guidelines, join-routing preferences.
* **Field-specific instructions belong on the field, not in the system prompt.** If an instruction only applies to one field or one view, put it there. The system prompt should be for universally applicable guidance.
* **Skills are for complex patterns you decide when to load.** They are optional context, not always-on.
* **Memories are legacy.** Any memories you already have will be migrated to skills automatically. For new context, create a skill.

## Memories (legacy)

Memories are retained for backward compatibility and will be migrated to skills in a future release. Do not add new context to memories. See [Memories](/legacy/memories) for the existing reference and [Migrating from Memories and Topics](/migrations/migrating-from-memories-and-topics) for the recommended replacement.

## Letting Zoë edit context for you

Zoë can also write to these surfaces, not just read them. When enabled for your workspace, you can ask her to add a field, update a view or field description, edit the system prompt, or create and update skills, and she'll commit the change to your repository for you.

The full feature, including how to turn it on or off, the role-based permission rules, and how production-branch edits are handled, is documented in [Ask Zoë for Data Model Recommendations](/data-modeling/asking-zoe-for-recommendations).

## Related pages

* [Ask Zoë for Data Model Recommendations](/data-modeling/asking-zoe-for-recommendations): how Zoë can write to these surfaces for you
* [Skills](/using-zenlytic/skills) — how to create and use skills
* [Views](/data-modeling/view) — view-level descriptions
* [Dimensions](/data-modeling/dimension) — field-level descriptions, synonyms, searchable
* [Measures](/data-modeling/measure) — measure-level descriptions and calculation notes
* [How to Steer Zoë's Answers](/tips-and-tricks/zoe_context_ingestion) — the older tips-and-tricks entry point for this same material


# Progressive Enrichment

Start with raw tables, then add the smallest modeling changes that fix real mistakes and improve Zoë over time.

You do not need to build out a full semantic layer before asking Zoë questions. The fastest way to get value from Zenlytic is to import raw tables, start asking questions, observe where Zoë makes mistakes, and add targeted context to fix those specific errors.

Use this list as a priority order when you're adding context, not as a checklist to complete before starting. Each rung up this ladder has higher cost and narrower impact — start at the top and only add the next layer when you hit a problem it would solve.

## 1. Start with raw table imports

Import tables into [Context Manager](/data-modeling/context_manager) and start asking questions. If your tables have sensible names and obvious primary/foreign keys, Zoë can often answer without any additional configuration.

**Don't build everything before testing.** Ask real questions, see what breaks, and let that drive what you add next.

## 2. Set `default_date` on every view with time-series data

This is the single most impactful structural change you can make. Without `default_date`, temporal questions like "revenue this quarter" don't have a date field to scope against. Set it once per view and you'll correctly scope most time-series queries going forward.

See [Views](/data-modeling/view).

## 3. Add `synonyms` to your most important fields

Synonyms are the single highest-impact change for field-level discoverability. They get a **+20 boost in search ranking**, which makes it dramatically more likely Zoë finds the right field.

Add the terms users actually say — not just the technical column names. "Income", "sales", "top-line" might all be synonyms for `total_revenue`.

See [Descriptions and Synonyms](/tips-and-tricks/descriptions-and-synonyms).

## 4. Write view `description` on your key tables

Explain what the table represents, which join paths are valid, and any data caveats. `description` is shown to both users and Zoë, so it doubles as end-user documentation.

Use `zoe_description` when you need to say something to Zoë only — typically things like "join to `customers` through `orders`, never directly" or "this table only has data since 2023-01-01."

Both are capped at 10,000 characters per view. See [Views](/data-modeling/view) and [Context Surfaces](/getting-started/context-surfaces).

## 5. Add universal business rules to the system prompt

Default time ranges, terminology definitions, data freshness, join-routing preferences — anything that applies to **every** question, not just questions about a specific table.

The system prompt is always visible to Zoë, so putting something here guarantees she'll consider it. The tradeoff is that everything here costs attention on every question, so keep it focused on truly universal rules.

See [Context Surfaces](/getting-started/context-surfaces).

## 6. Define `relationships` for non-obvious joins

Obvious foreign-key/primary-key joins (`orders.customer_id` → `customers.customer_id`) don't need to be stored — Zoë figures those out. Focus [Relationships](/data-modeling/relationships) on:

* Joins where column names don't match across views
* Multi-column joins
* Joins that need a specific cardinality or join type
* Self-joins and repeated joins (via `join_as`)

Over-documenting obvious joins can decrease performance. Less is more.

## 7. Set `searchable: true` on status, type, and category columns

When the **values** in a column determine how users filter or group — statuses like "active/churned", types like "B2B/B2C", categories — set `searchable: true` so Zoë can see the values during field search.

**Do not** set `searchable` on high-cardinality columns. The default limit is 10,000 categories per dimension; IDs and timestamps blow past that and produce no useful context.

See [Dimensions](/data-modeling/dimension).

## 8. Write `zoe_description` on measures with non-obvious logic

For measures that exclude certain rows, use a non-obvious formula, or are easy to confuse with a similar measure, write a `zoe_description` that explains:

* What the measure calculates
* Any exclusions or filters baked in
* When to use it vs. alternatives

This is capped at 1,024 characters per field. For longer guidance, move it to the view `description` / `zoe_description` or a skill.

See [Measures](/data-modeling/measure).

## 9. Create skills for complex recurring analysis patterns

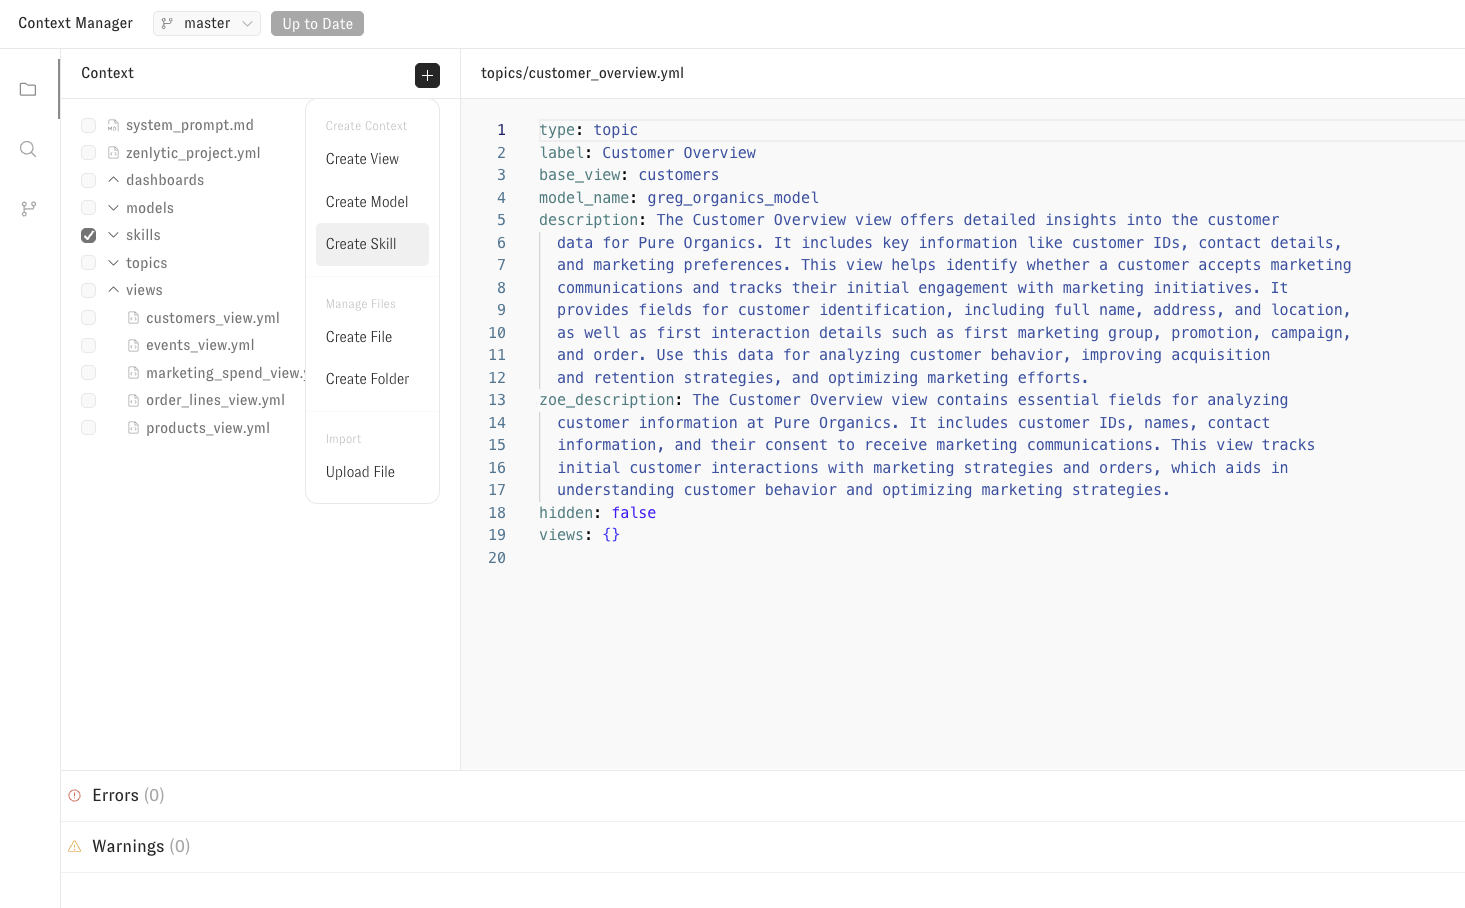
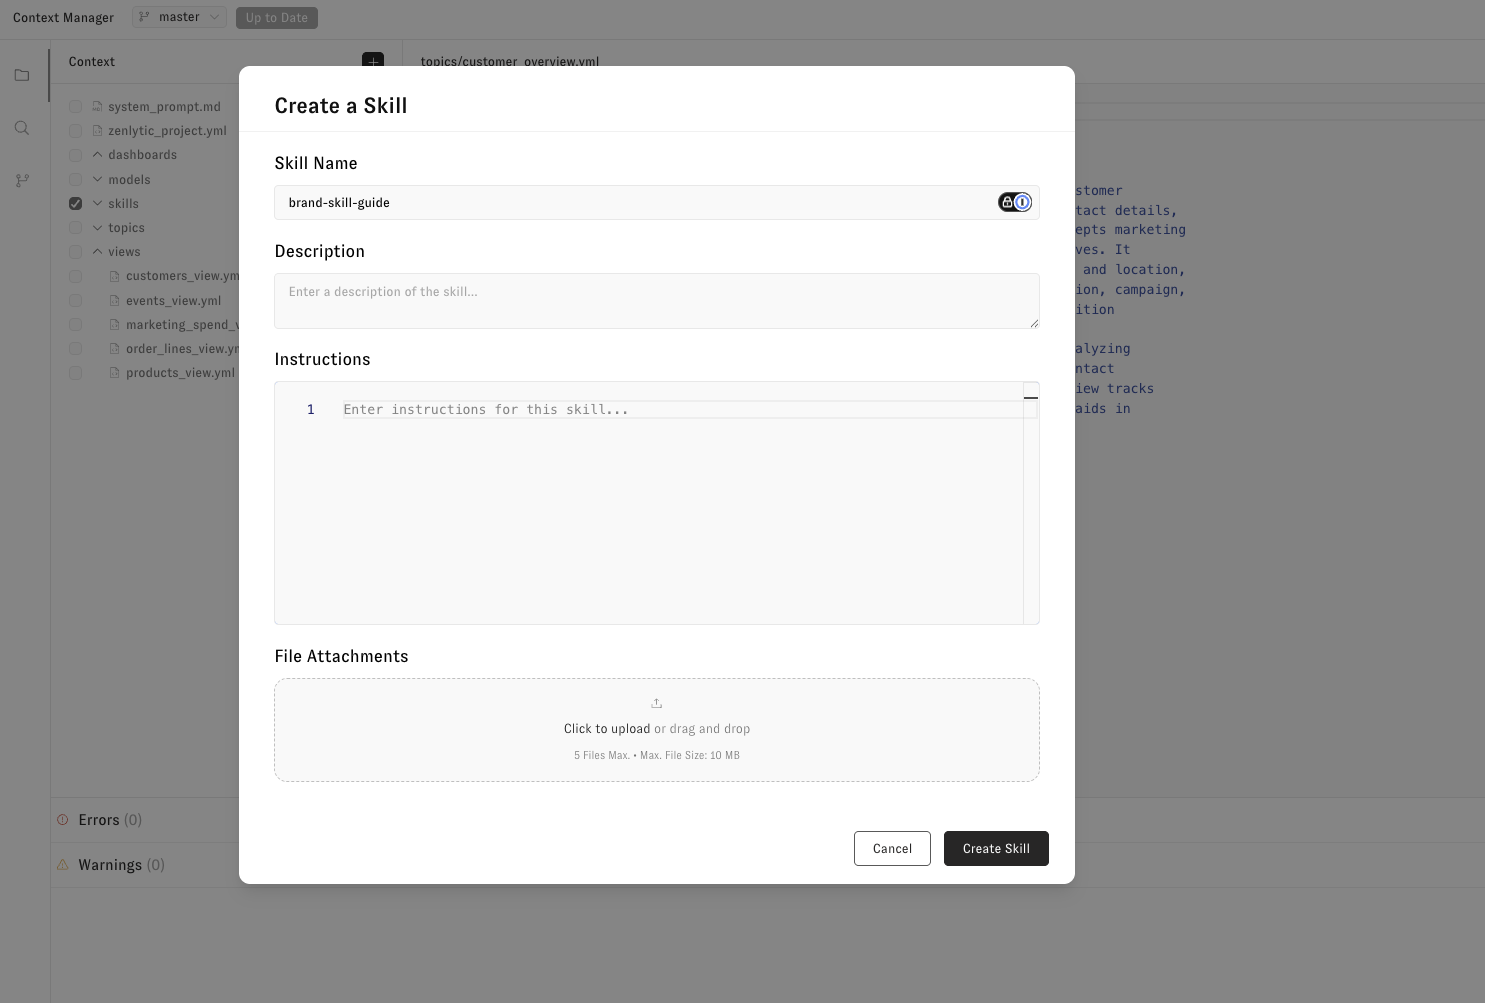
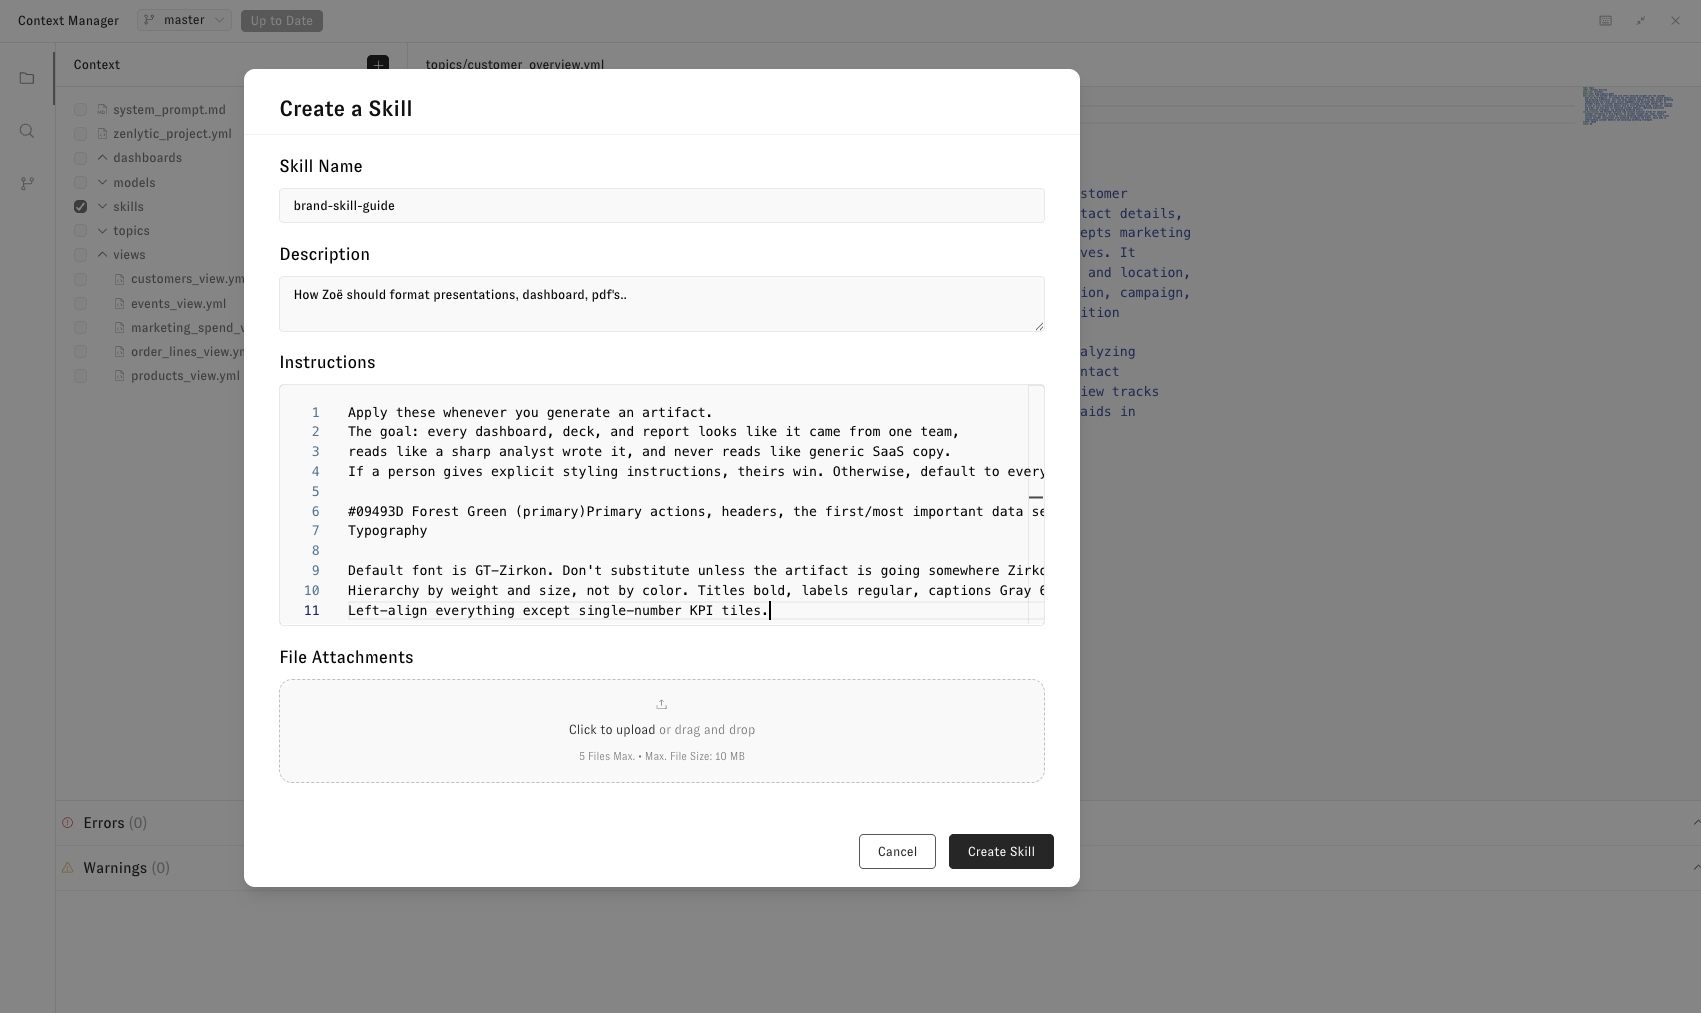
Use a [Skill](/using-zenlytic/skills) when you have a multi-step workflow, a fiscal calendar, an industry-specific analysis pattern, or brand/style guidance that's sometimes relevant but shouldn't run on every question.

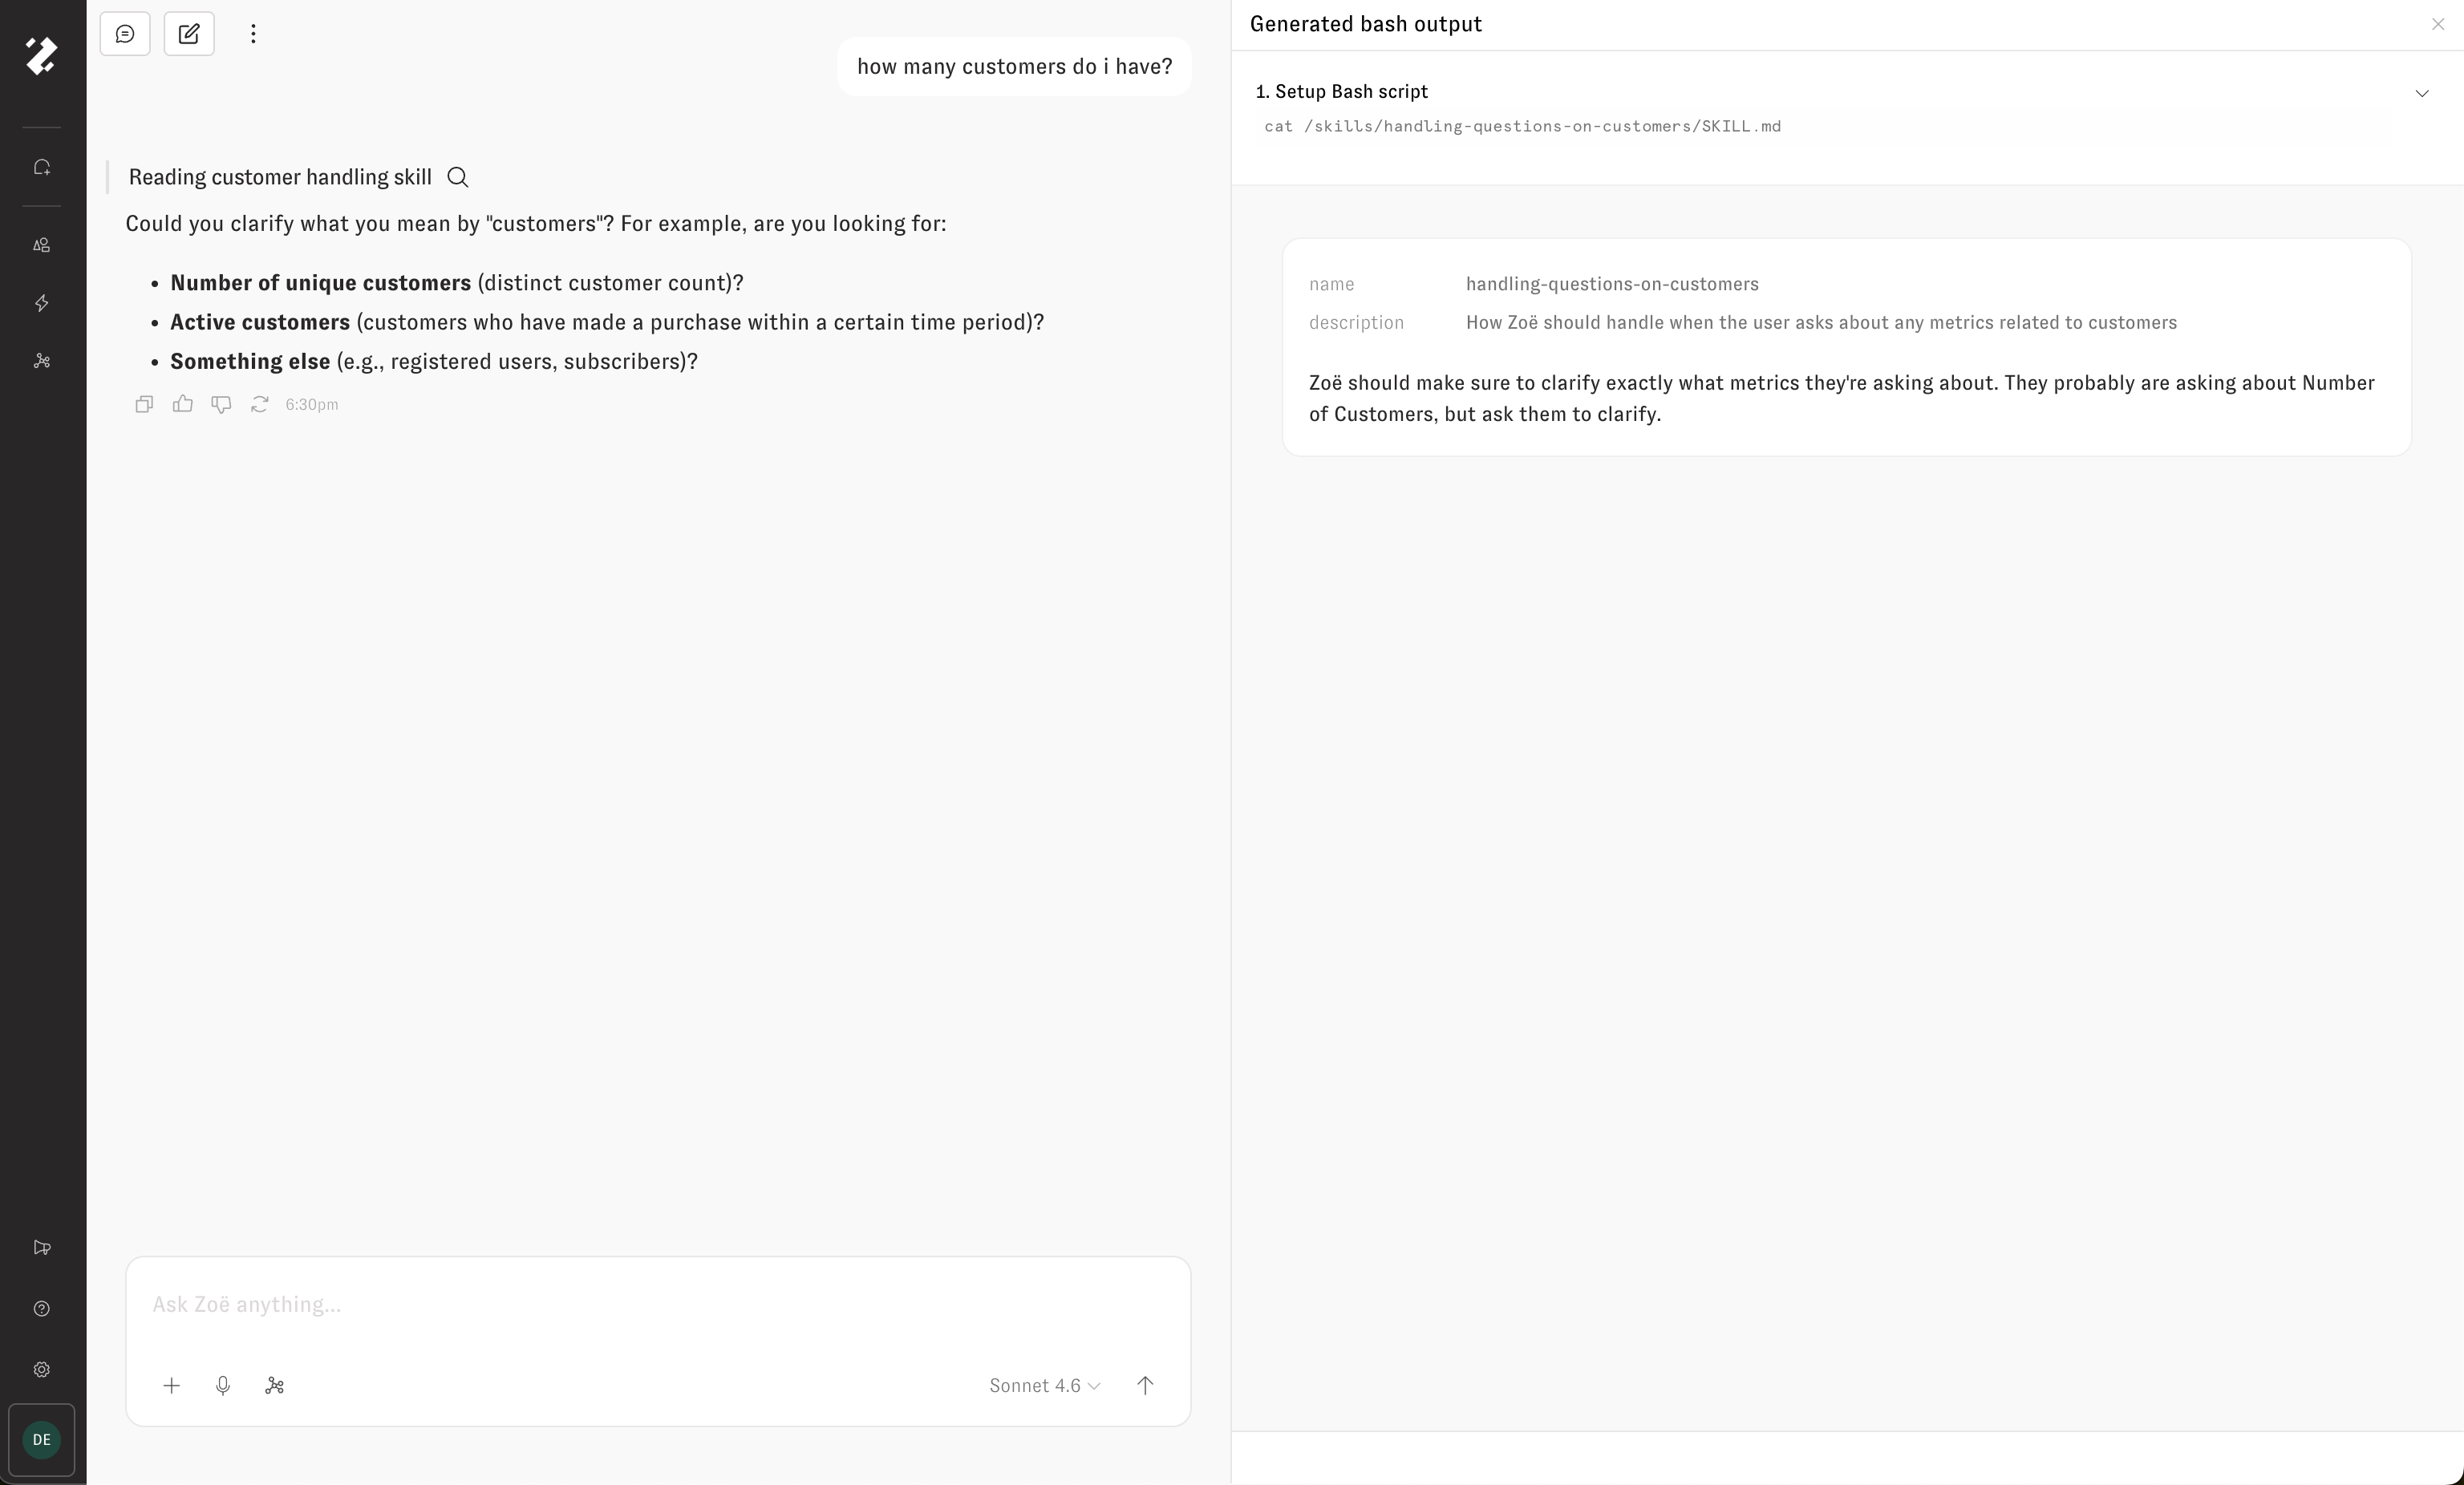
Skills are loaded on demand based on their description, so they're the right home for long, situational context that would bloat the system prompt if it were always-on.

## Iterate, don't boil the ocean

Configure what you need to fix observed problems. Don't try to anticipate every edge case up front — it's slower and usually produces context that's never needed. When Zoë gets something wrong, classify the error (see [Fixing Zoë's Mistakes](/getting-started/fixing-zoes-mistakes)) and add the minimal context that prevents that class of error. Over time, the model gets smarter in exactly the places where it matters.


# Fixing Zoë's Mistakes

Diagnose wrong answers by error type, then add the smallest context or modeling change that fixes the issue.

When Zoë produces a wrong answer, resist the urge to guess at a fix. Classify the error first, then add the smallest piece of context that prevents that class of error in the future. This page is a diagnostic router — pick the category that matches what went wrong and follow the link to the specific fix.

## The diagnostic process

1. **Look at what happened.** What question did the user ask? What fields did Zoë search for? What SQL did she write?
2. **Identify where she went wrong.** Wrong field? Wrong join? Missing filter? Wrong aggregation? Wrong date?
3. **Classify the error** into one of the categories below.
4. **Make the minimal context addition** that prevents that class of error. Don't try to anticipate every edge case — fix observed problems.
5. **Re-ask the original question** to verify the fix works.

## Error categories

### Discoverability — Zoë couldn't find the right field

Symptom: Zoë answered using the wrong field, or said she couldn't find a metric you know exists.

Most common fixes, in order:

* **Add `synonyms`** to the field with the terms your users actually say. This is the single highest-impact change — synonyms get a +20 boost in search ranking.
* **Check `hidden`.** The field may be hidden when it shouldn't be.
* **Improve `description` or `zoe_description`** so the field's description mentions the concept using the user's vocabulary.

See [Descriptions and Synonyms](/tips-and-tricks/descriptions-and-synonyms) and [Dimensions](/data-modeling/dimension).

### Reasoning — Zoë found the field but used it wrong

Symptom: Zoë picked a plausible field but it's the wrong one for this question (e.g., used gross revenue when net was meant).

Fixes:

* **Add `zoe_description`** clarifying when to use this field vs. alternatives. "Use this for net revenue after returns. For gross revenue before returns, use `gross_revenue`."
* **Set `searchable: true`** if the issue is about not knowing what values exist in a status/type/category column.
* **Add to the system prompt** if the rule is universal across all questions (e.g., "always default to net revenue unless the user asks for gross").
* **Add to the field's `zoe_description`** if the instruction is specific to one field.

See [Context Surfaces](/getting-started/context-surfaces) for picking the right surface.

### Join — wrong joins or fan-outs

Symptom: Zoë joined the wrong tables, or the result is inflated because of a fan-out.

Fixes:

* **Define a** [**Relationship**](/data-modeling/relationships) on the model file for non-obvious joins.
* **Add prose context** in the view `description` / `zoe_description` or the system prompt explaining which join paths are valid, which are invalid, and what pitfalls exist.
* **Improve view labels and descriptions** if table names are cryptic — Zoë needs readable names to reason about joins correctly.
* **For one-to-many or many-to-many joins**, aggregate in separate CTEs to avoid fan-outs. Document this pattern in the view `zoe_description` or the system prompt.
* **For time-granularity mismatches** (daily vs. hourly), explain in prose that the tables must be aggregated to a common level before joining.

### Time and date handling

Symptom: Zoë used the wrong date field, scoped the wrong date range, or produced an off-by-one fiscal result.

Fixes:

* **Set `default_date` on every view** with time-series measures. This is the single most impactful structural property for temporal queries.
* **Check the dimension group** — verify `type`, `timeframes`, `datatype`, and `convert_tz` are correct. See [Dimension Groups](/data-modeling/dimension_group).
* **If a date was imported as `type: string`**, cast it in `sql` and convert the field to a dimension group.
* **Use `canon_date` sparingly** — only on individual measures that genuinely need a different date than the view default. Overuse causes problems.
* **For fiscal calendars**, especially 4-5-4 or other non-standard ones, create a [Skill](/using-zenlytic/skills) with the fiscal logic.
* **Avoid reserved words** in dimension group names (`__time`, `date`, `time`) — they produce reserved-word aliases that break SQL. Use `order_date` or `created_at` instead.

### Metric — wrong aggregation or invalid measure

Symptom: Zoë produced a sum when you expected a distinct sum, or verification failed on a new measure.

Fixes:

* **Check the measure pattern.** Only two are valid: `type: sum` + `sql: field`, or `type: number` + `sql: SUM(field)`. See the valid/invalid table on [Measures](/data-modeling/measure).
* **If the KPI can't fit in a single SELECT aggregate**, add calculation guidance to the view `description` or the relevant measure's `zoe_description` rather than forcing it into a single measure.
* **Document the measure's meaning** in `zoe_description` — what it excludes, when to use it, what to compare it to.

## Related pages

* [Context Surfaces](/getting-started/context-surfaces) — where context lives and when Zoë sees it
* [Relationships](/data-modeling/relationships) — structured join definitions
* [Skills](/using-zenlytic/skills) — on-demand context for complex patterns
* [Measures](/data-modeling/measure) — valid measure patterns and `canon_date` guidance


# How to Steer Zoë's Answers

Quickly choose between prompts, skills, descriptions, synonyms, and searchable fields to guide Zoë.

{% hint style="info" %}
**This page has moved.** The canonical home for how Zoë ingests context — the surfaces, their visibility, character limits, and when to use each — is now [Context Surfaces](/getting-started/context-surfaces).
{% endhint %}

Zoë uses multiple sources of context to answer questions accurately — the system prompt, skills, view and field descriptions, synonyms, and searchable values. Each source has different visibility and different character limits.

For the full reference, see [Context Surfaces](/getting-started/context-surfaces), which covers:

* The complete surfaces/visibility/char-limits table
* When to reach for each surface
* The `description` vs. `zoe_description` distinction with char limits per level
* How Skills fit alongside the system prompt and view/field context
* Why Memories are being retired in favor of Skills

## Quick reference

The shortest version:

* **Universal rules?** System prompt.
* **Complex, sometimes-relevant patterns?** A [Skill](/using-zenlytic/skills).
* **Table-specific guidance?** View `description` (user-facing) or `zoe_description` (agent-only).
* **Field-specific guidance?** Field `description` or `zoe_description`.
* **What users call the field?** `synonyms` on the field.
* **What values exist in a column?** `searchable: true` on the dimension.

See [Context Surfaces](/getting-started/context-surfaces) for the detailed version.


# Naming Conventions

Name measures and dimensions clearly so Zoë can distinguish similar fields and choose the right one.

Clearly naming your metrics (measures) and dimensions is key for Zoë to perform well for you. If you have two revenue metrics defined as `Revenue first` and `Revenue second`, Zoë, like a human analyst, will have no idea which one to pick.

However, if you define those two values as `Gross revenue` and `Net revenue` Zoë will have no problem distinguishing between them and when to use one vs. the other. If an outside analyst could read all your metric definitions and understand which ones to use in the right cases, Zoë would also be able to.


# Descriptions and Synonyms

Use descriptions and synonyms to improve field discoverability and help Zoë pick the right fields.

Descriptions and synonyms are two of the most impactful properties you can set on a field. Descriptions tell Zoë what a field means and when to use it; synonyms boost the field's search ranking by +20 for terms your users actually say. Together they're the fastest way to improve field-level discoverability and reasoning.

For the full picture of where context goes and why, see [Context Surfaces](/getting-started/context-surfaces).

## Descriptions help steer Zoë's decisions

You can add a `description` to your metrics (measures) like this:

```yaml
- name: gross_aov
  field_type: measure
  type: average
  sql: ${TABLE}.revenue
  description: |
    This is the gross average order value. This just covers 
    DTC revenue, and is sometimes internally referred 
    to as 'the magic' This is the metric that 
    should be used when someone asks about AOV, generally speaking
```

In the description above, we're adding a lot of useful context that the model will be able to use to improve its performance. For example, if someone now asks for the "magic" or nebulously asks for AOV without specifying gross or net, Zoë will know which metric to choose based on the description.

Writing good descriptions will help your end users better understand what they're looking at and it will boost Zoë performance.

## Synonyms help Zoë find metrics

You can use the `synonyms` tag to specify keywords for Zoë so she can find the the right field. For example, you might have a LOT of "customers" fields but you want to make sure Zoë always sees the `new_vs_repeat` field on order lines , even though the name of the view doesn't have a reference to a customer by name.

In this example, we've added the synonyms `customer` and `loyalty` to the `new_vs_repeat` field to make sure if Zoë users are asking about "existing customers" or repeat behavior like "loyalty" this field will show up in context for Zoë.

```yaml
- name: new_vs_repeat
  field_type: dimension
  type: string
  sql: ${TABLE}.new_vs_repeat
  description: The new vs repeat status of the purchaser
  synonyms: 
  - customer
  - loyalty
```


# Entity Drills

Define drillable entities so Zoë can recognize key business objects and include the right detail fields.

You can use drills/entities in Zenlytic to let Zoë know about important entities in your data. Entities can be any group of fields that you want, and they can describe anything from `products` to `users` to `transactions` to `sales_reps`. Let's look at an example of defining one of those entities for `sales_reps`:

```yaml
version: 1
type: view
name: sales_reps
model_name: my_company
sql_table_name: PROD.SALES_REPS
default_date: joined_at

fields:
...
- name: sales_rep_id
  field_type: dimension
  type: string
  sql: ${TABLE}.id
  tags: ['Sales Rep']
  drill_fields: [first_name, last_name, email, status]

- name: first_name
  field_type: dimension
  type: string
  sql: ${TABLE}.first_name

- name: last_name
  field_type: dimension
  type: string
  sql: ${TABLE}.last_name

- name: email
  field_type: dimension
  type: string
  sql: ${TABLE}.email

- name: status
  field_type: dimension
  type: string
  sql: ${TABLE}.status

- name: joined_at
  field_type: dimension_group
  type: time
  timeframes:
  - raw
  - date
  - week
  - month
  - quarter
  - year
  sql: ${TABLE}.JOINED_AT
```

This will let Zoë know that you have an entity called a "Sales rep" and that entity should typically include the fields `first_name`, `last_name`, `email`, and `status` when that entity is referenced.

This will also give you a drop down option on all Zenlytic plots for "Drill into sales reps" when it's possible to join these fields into your data.


# Time Metrics

Use \`default\_date\` and \`canon\_date\` so Zoë trends each metric against the correct time dimension.

Each metric in Zenlytic should be associated with a time dimension group. The associated dimension group with a metric is called that metric's `canon_date`.

> ⏱️ This let's Zoë apply time periods correctly and trend metrics over time while guaranteeing that we're using the right time dimension.

You can associate a time dimension with a view using the `default_date` property.

```yaml
version: 1
type: view
name: google_ad_stats
model_name: my_company 
sql_table_name: PROD.GOOGLE_AD_STATS
default_date: ad_stat_recorded_at

fields:
- name: ad_stat_recorded_at
  field_type: dimension_group
  type: time
  datatype: date
  timeframes:
  - raw
  - date
  - week
  - month
  - quarter
  - year
  sql: ${TABLE}.DATE
```

Under the default date property you'll just reference the `name` of the time you want to use as the default date.

The default date will be the default `canon_date` for all metrics in that view unless their `canon_date` is set on the metric explicitly.

> 🛠 You can also use a `canon_date` or `default_date` that is not in the same table as your metric. To use that date, just make sure it is possible to join that field in, and reference it like `default_date: google_record_stats.recorded_at`, using the view name before the field name.

Using an example from subscription management:

{% code overflow="wrap" %}

```yaml
version: 1
type: view
name: subscriptions
model_name: my_company
sql_table_name: PROD.SUBSCRIPTIONS
default_date: created_at

fields:
- name: created_at
  field_type: dimension_group
  type: time
  timeframes:
  - raw
  - date
  - week
  - month
  - quarter
  - year
  sql: ${TABLE}.CREATED_AT

- name: canceled_at
  field_type: dimension_group
  type: time
  timeframes:
  - raw
  - date
  - week
  - month
  - quarter
  - year
  sql: ${TABLE}.CANCELED_AT

- name: new_subscriptions
  field_type: measure
  type: count_distinct
  sql: ${subscription_id}
  description: "This is the unique number of subscriptions by the date created"

- name: canceled_subscriptions
  field_type: measure
  type: count_distinct
  sql: ${subscription_id}
  canon_date: canceled_at
  description: "This is the unique number of subscriptions by the date canceled"
```

{% endcode %}

The first measure inherits the `canon_date` of `created_at` from the `default_date` on the view, and the second one is set explicitly to be `canceled_at` because its definition needs to use another date to derive its meaning.


# Voice Commands

Ask Zoë questions by voice with the microphone or the \`cmd + i\` keyboard shortcut.

You can also ask Zoë questions verbally as well as with text. You can do this by clicking on the microphone to start Zoë recording and clicking again to stop her listening. You can also use the keyboard shortcut `cmd + i` to start and stop Zoë's recording.


# Data Indexing

Enable searchable dimensions so Zoë can index category values and apply the right filters.

Let Zoë know about categorical values

Zoë will *never* index your data unless you explicitly tell her to. This protects your privacy and makes sure we never index sensitive or regulated data.

Many times you'll want to be able to ask questions like "How many orders do we have in fulfillment placed more than a week ago?" But if the `fulfillment` category is hidden in a field nebulously called `status`, Zoë won't know how to find the right filter.

Add the `searchable` property to the `status` dimension like:

```yml
- name: status
  field_type: dimension
  type: string
  sql: ${TABLE}.status
  searchable: true
```

This will tell Zoë to index the categories in this dimension (this works up to 10,000 categories, contact support for a use case with >10,000 unique categories).

Now Zoë will be able to answer the question "How many orders do we have in fulfillment placed more than a week ago?" by applying the right `status = 'fulfillment'` filter using the capitalization in the database to the query.

{% hint style="info" %}
If the index hits the 10k default row limit, it will *not* index any of the values in the column, you can override the limit using the `allow_higher_searchable_max` property, which will increase the indexing to 500k rows.
{% endhint %}

```yml
- name: status
  field_type: dimension
  type: string
  sql: ${TABLE}.status
  searchable: true
  allow_higher_searchable_max: true
```


# Plot Configuration

Configure charts with natural-language prompts for colors, axes, labels, series, and annotations.

## Overview

In this document, you'll find tips and tricks for configuring your plots using natural language commands with Zoë, Zenlytic's AI Analyst. This will help you make the most of the plot settings feature, enabling you to create insightful and visually appealing charts. Here are some common use cases and example prompts to help you get started.

## Best Practices

1. **Be Specific**: Use exact field names and be clear about which elements you want to modify. For example, instead of saying "change the line color," specify "change the 'Revenue' line color to blue."
2. **Use Clear Terminology**: Use standard chart terminology that Zoë can understand. Terms like "axis," "legend," "series," "labels," and "background" work well.
3. **Check for Compatibility**: Some plot configurations may not be available for all chart types. If a command doesn't work, try rephrasing or check if the feature is supported for your current chart type.

## Example Prompts for Common Tasks

### Changing the Color of Elements

Lines:

* "Change the color of the 'Total Marketing Spend' line to red."
* "Set the 'Number of Events' line color to Facebook."

Background:

* "Set the plot background color to light gray."
* "Change the chart background to white."

### Adjusting Axis Settings

Adding More Padding to the Axes:

* "Add more padding to the X-axis."
* "Decrease padding for the Y-axis."

Removing Axis Labels:

* "Remove labels from the X-axis."
* "Bold the Y-axis labels."

### Modifying Series Types

Changing the Series Type:

* "Change the 'Total Gross Revenue' line to a bar chart."
* "Make the 'Number of Events' series a scatter plot."

### Adjusting Label Settings

Making Labels Bigger:

* "Increase the font size of the axis labels."
* "Make the legend text bigger."

### Customizing Series Appearance

Making Series Bigger:

* "Make the lines thicker."
* "Increase the thickness of the 'Total Marketing Spend' line."

Changing Line Styles:

* "Change the 'Total Gross Revenue' line to a dashed style."
* "Make the 'Number of Events' line dotted."

### Adding Annotations and Formatting

Adding Annotations:

* "Add a note on the peak of the 'Total Gross Revenue' line."
* "Place an annotation at the highest 'Number of Events' point."

Formatting Dates and Numbers:

* "Show Y-axis values in millions."

Using these tips and example prompts, you can use Zoë to configure your plots quickly and effectively, making your data visualizations more insightful and tailored to your needs.


# Zoë

Ask questions in natural language, inspect queries and tool calls, and use Zoë to build charts, artifacts, and follow-up analysis.

Zoë is an AI data analyst who uses your data to answer questions for you. This section will describe some of her capabilities, and how to get best results.

## Just ask!

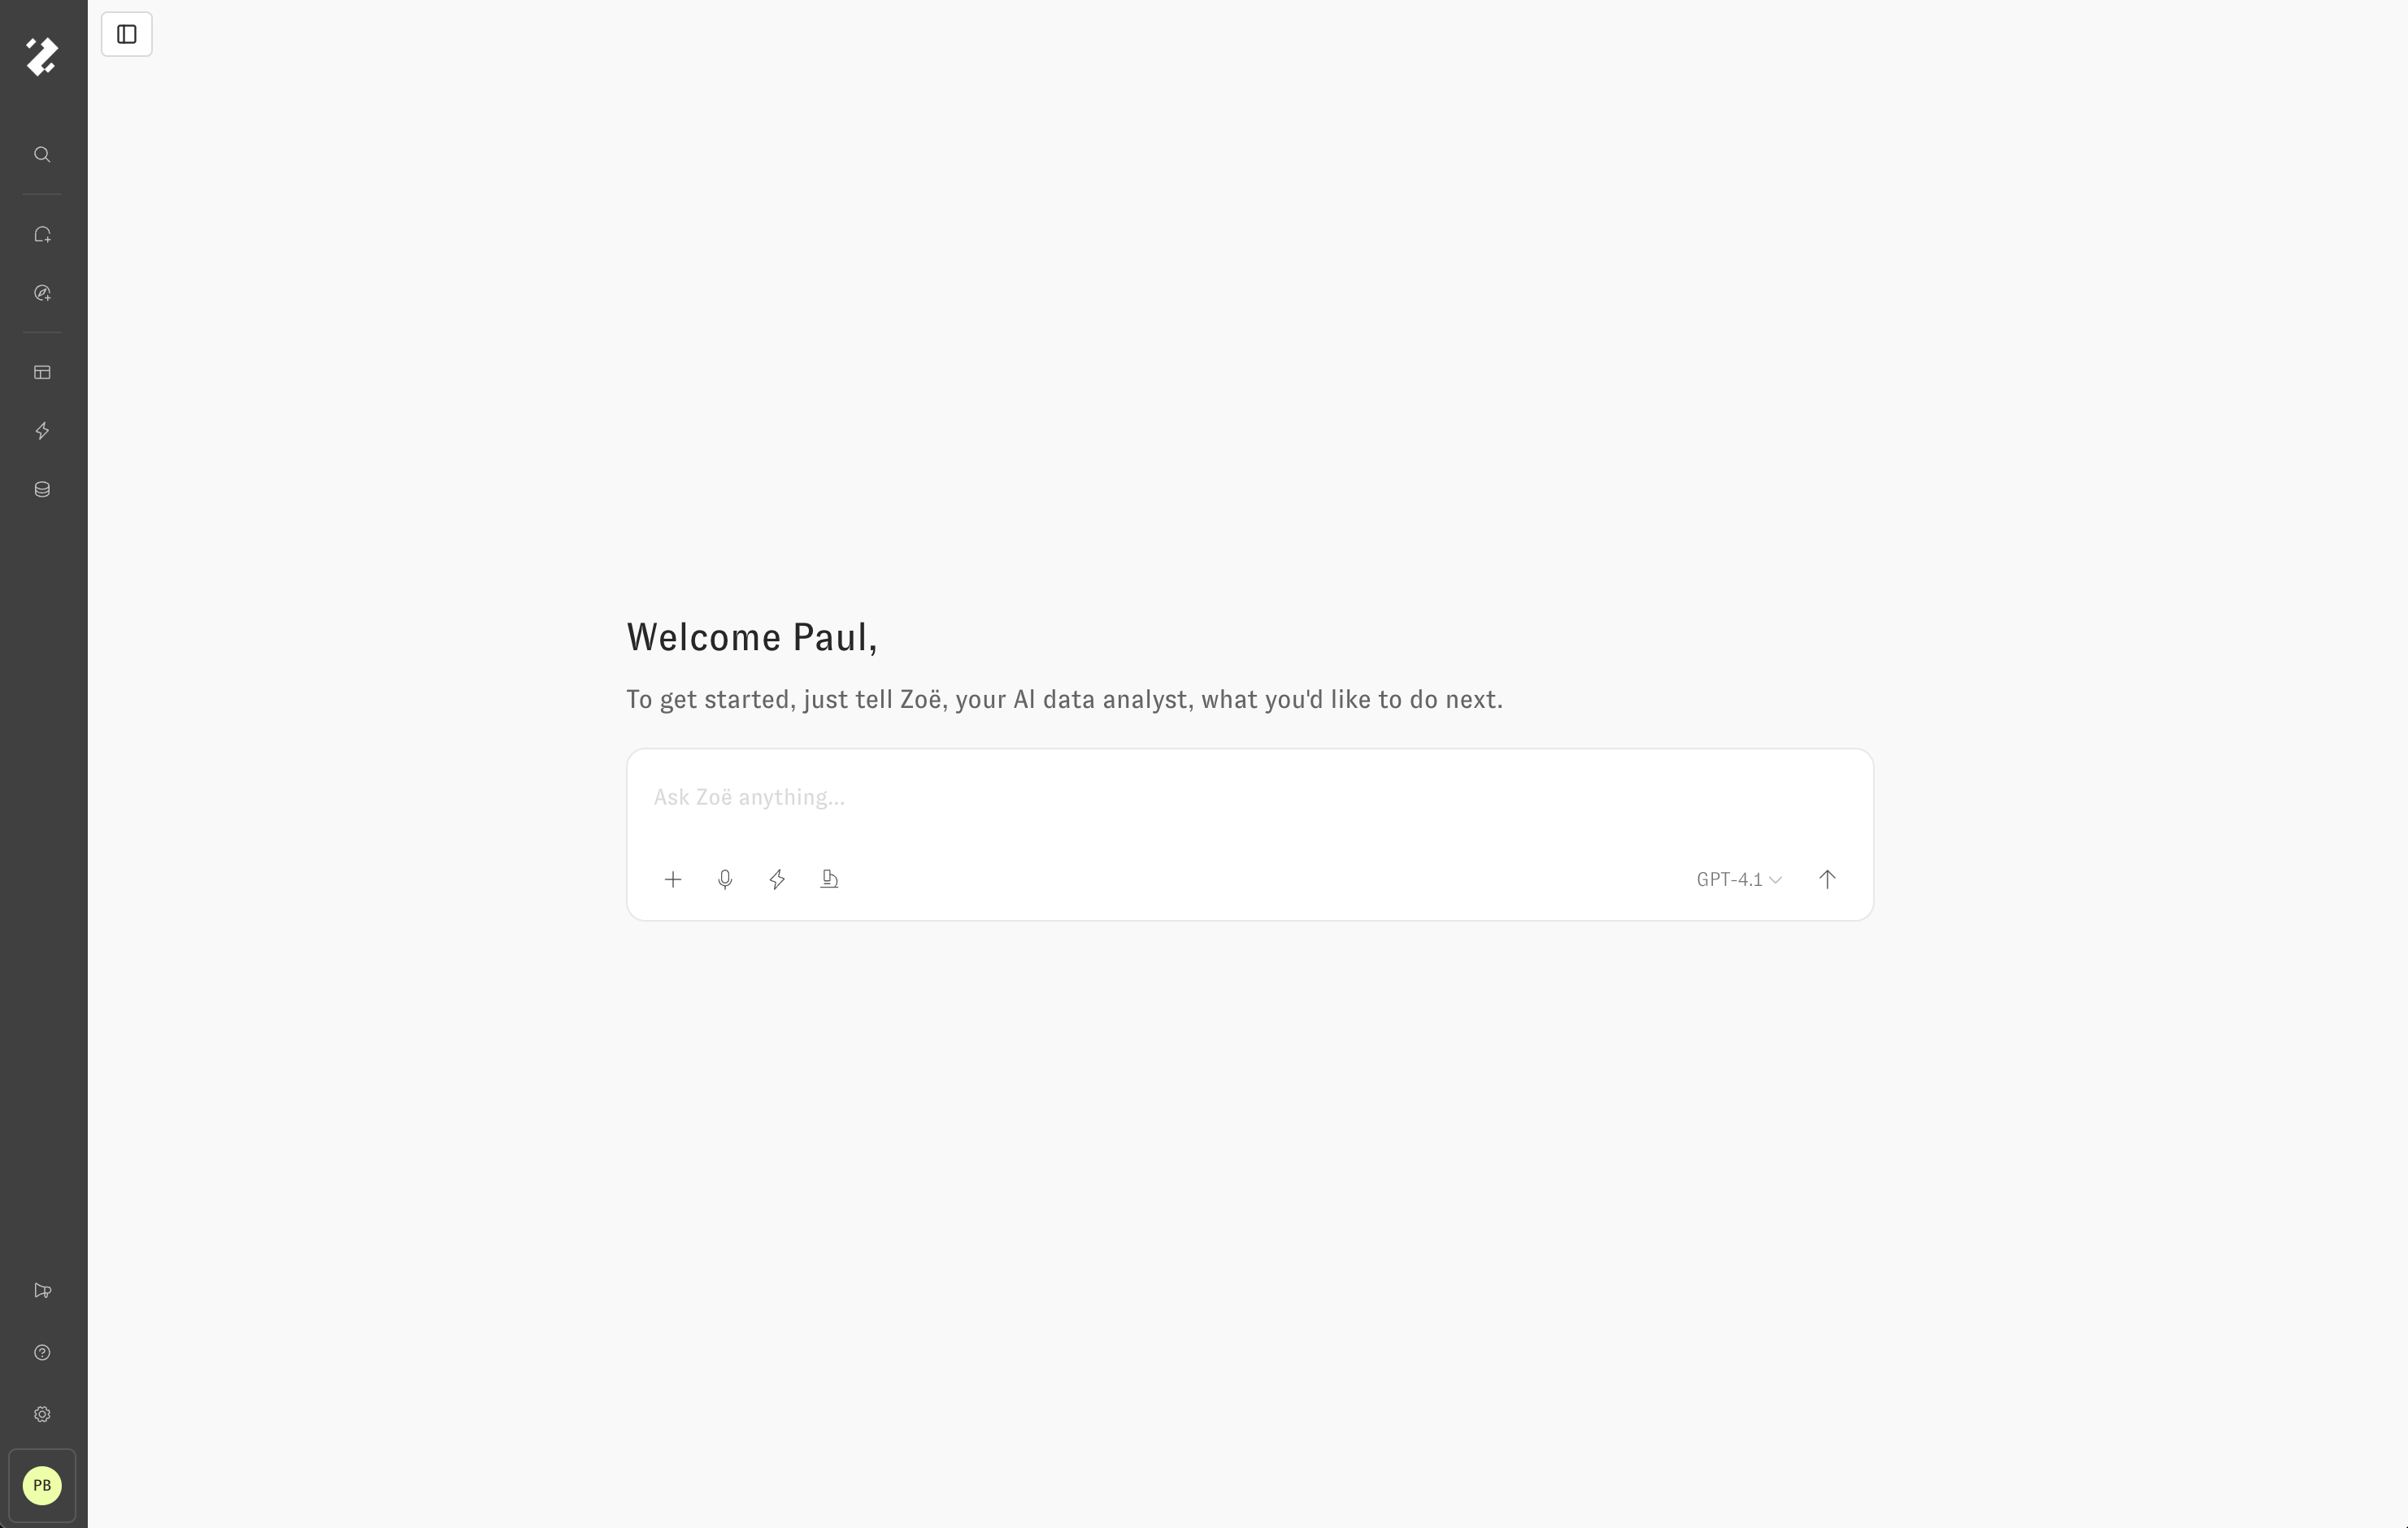
To get started using Zoë, just ask her a question. If you don't know what you can ask about, simply ask what data she can see, or what would be a great question to ask next. She will be even more helpful if you share your job title and more context about what you're trying to accomplish.

<figure><img src="/files/W0nBAhwg3mtxSZkfmFXD" alt=""><figcaption><p>Starting a new chat with Zoë</p></figcaption></figure>

When you're asking for data, you can be specific (e.g. "Show me sales YTD compared to the prior YTD, broken out by product type") or general (e.g. "I don't really know what I want to see, but tell me about channel and campaign performance"). Zoë can handle both type of questions, and will ask you follow up questions if she isn't able to make reasonable assumptions about what you intend from your question.

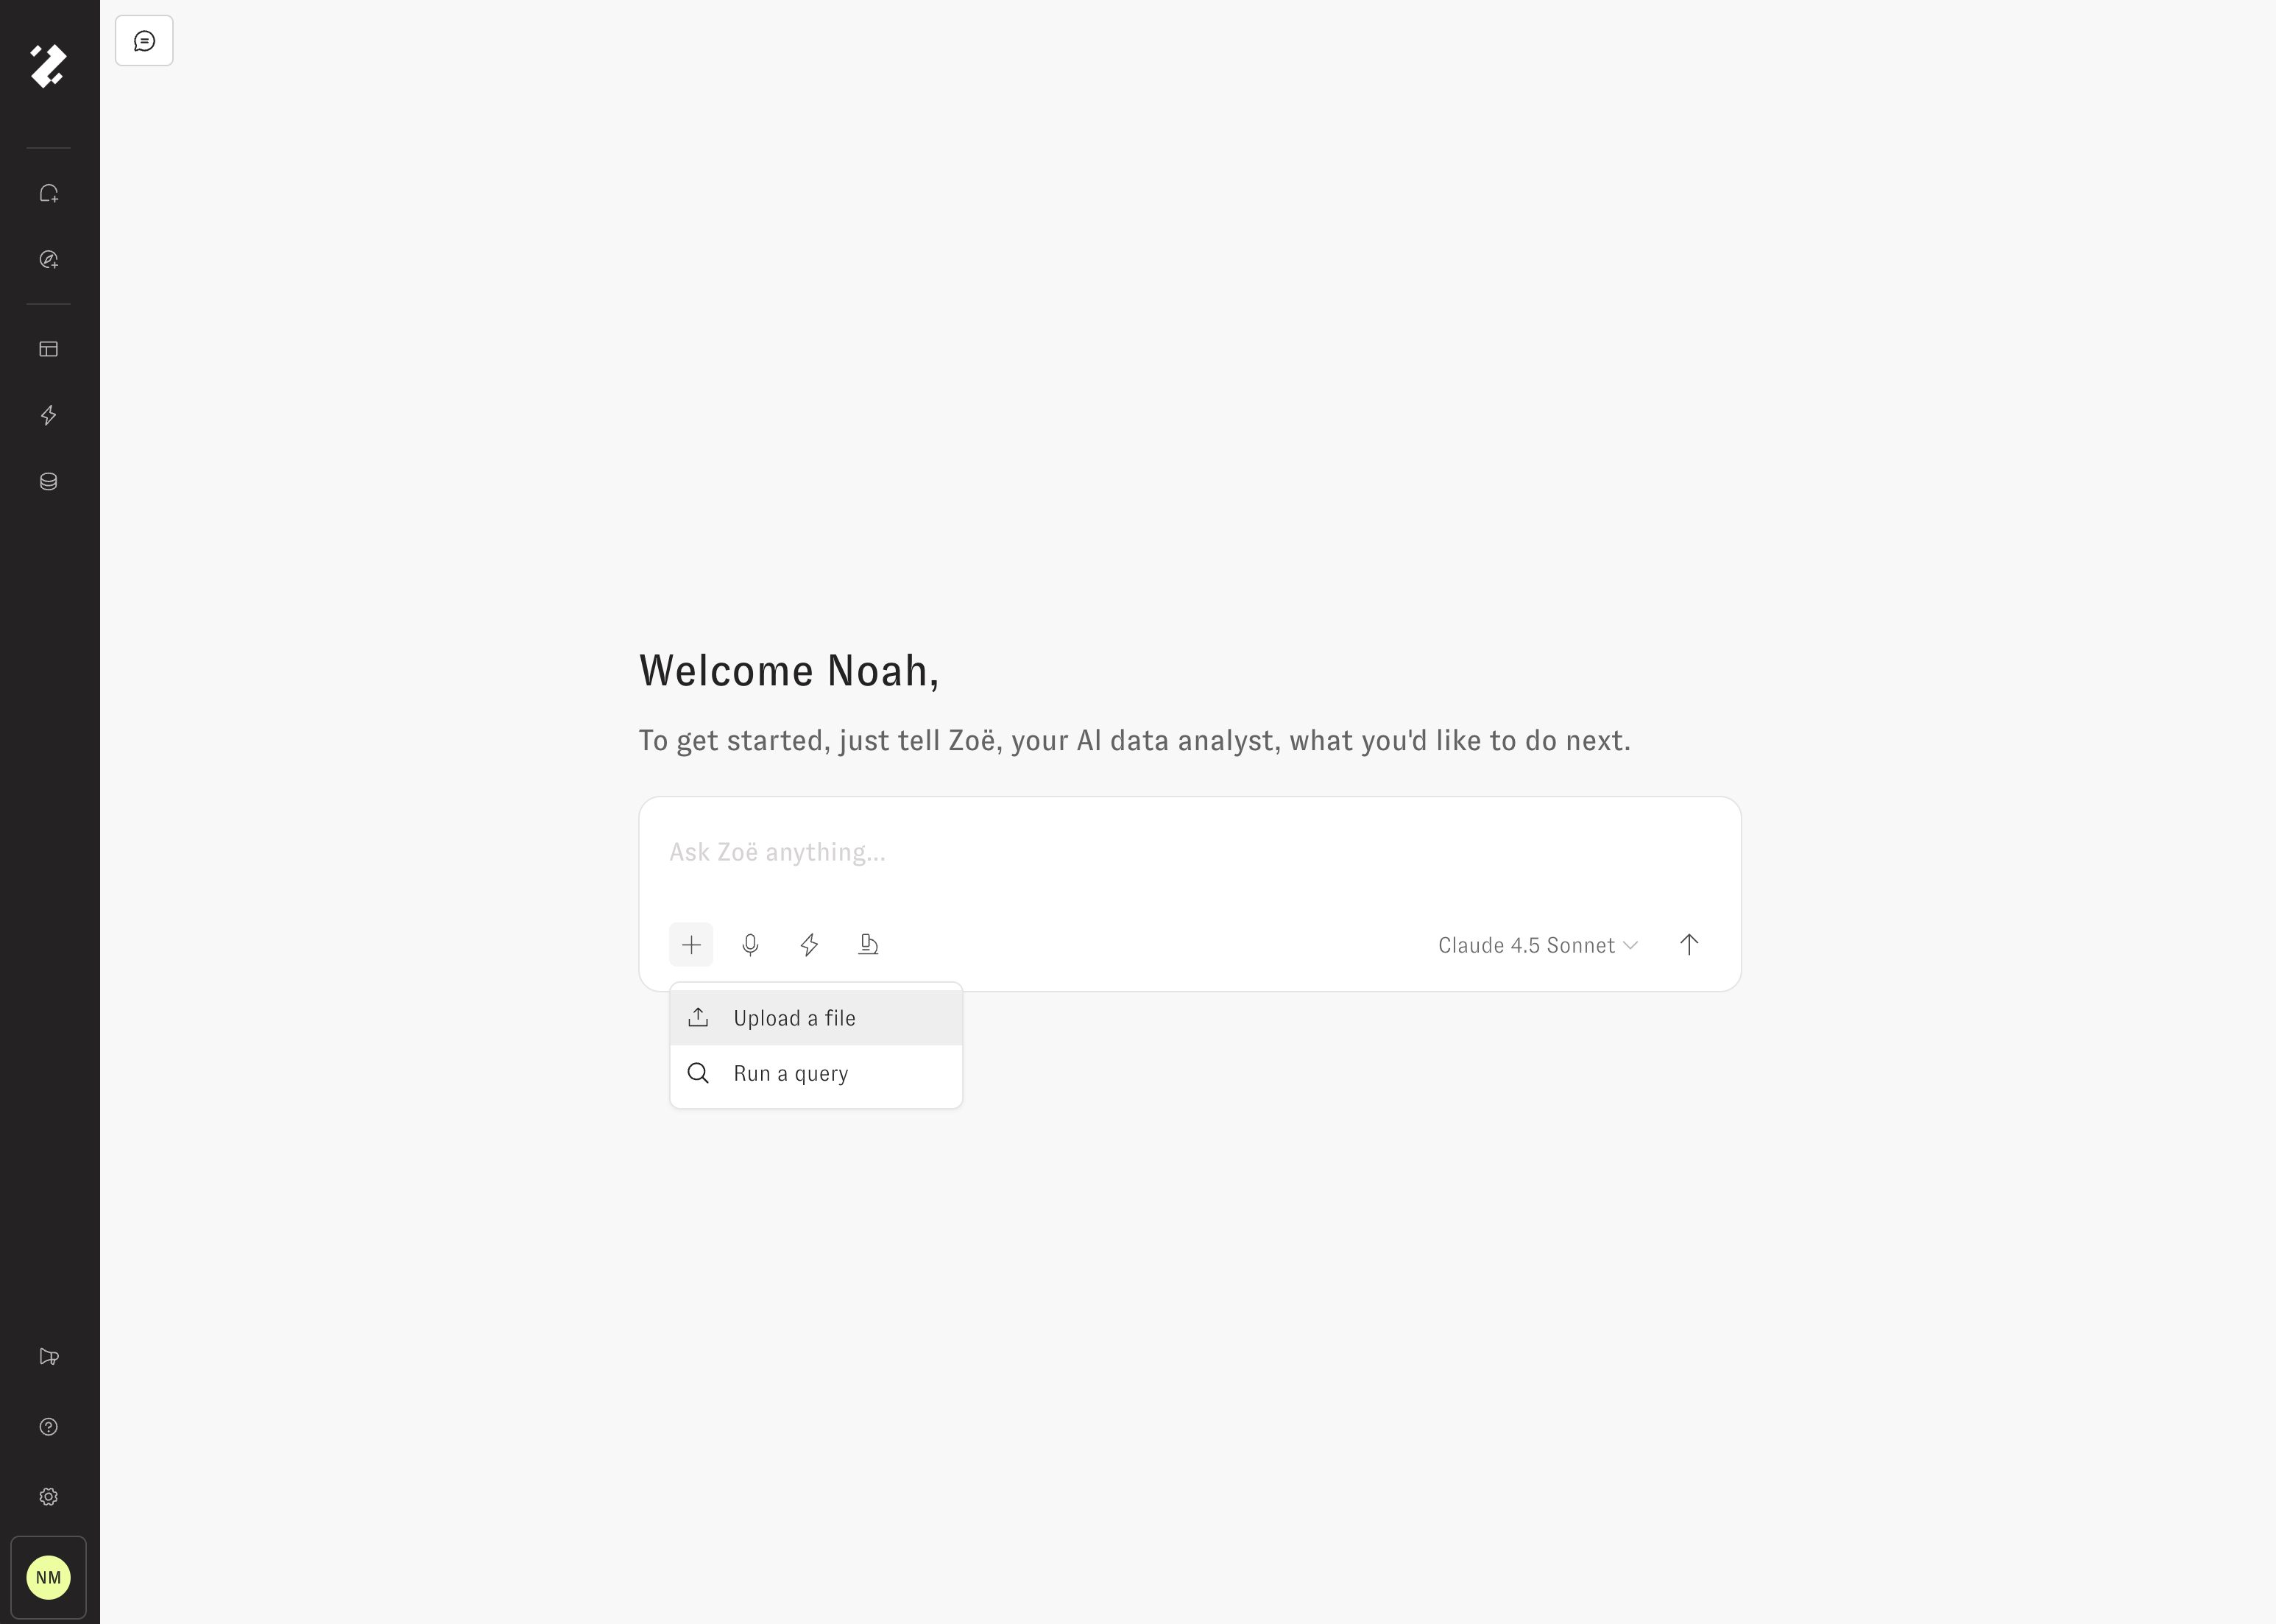
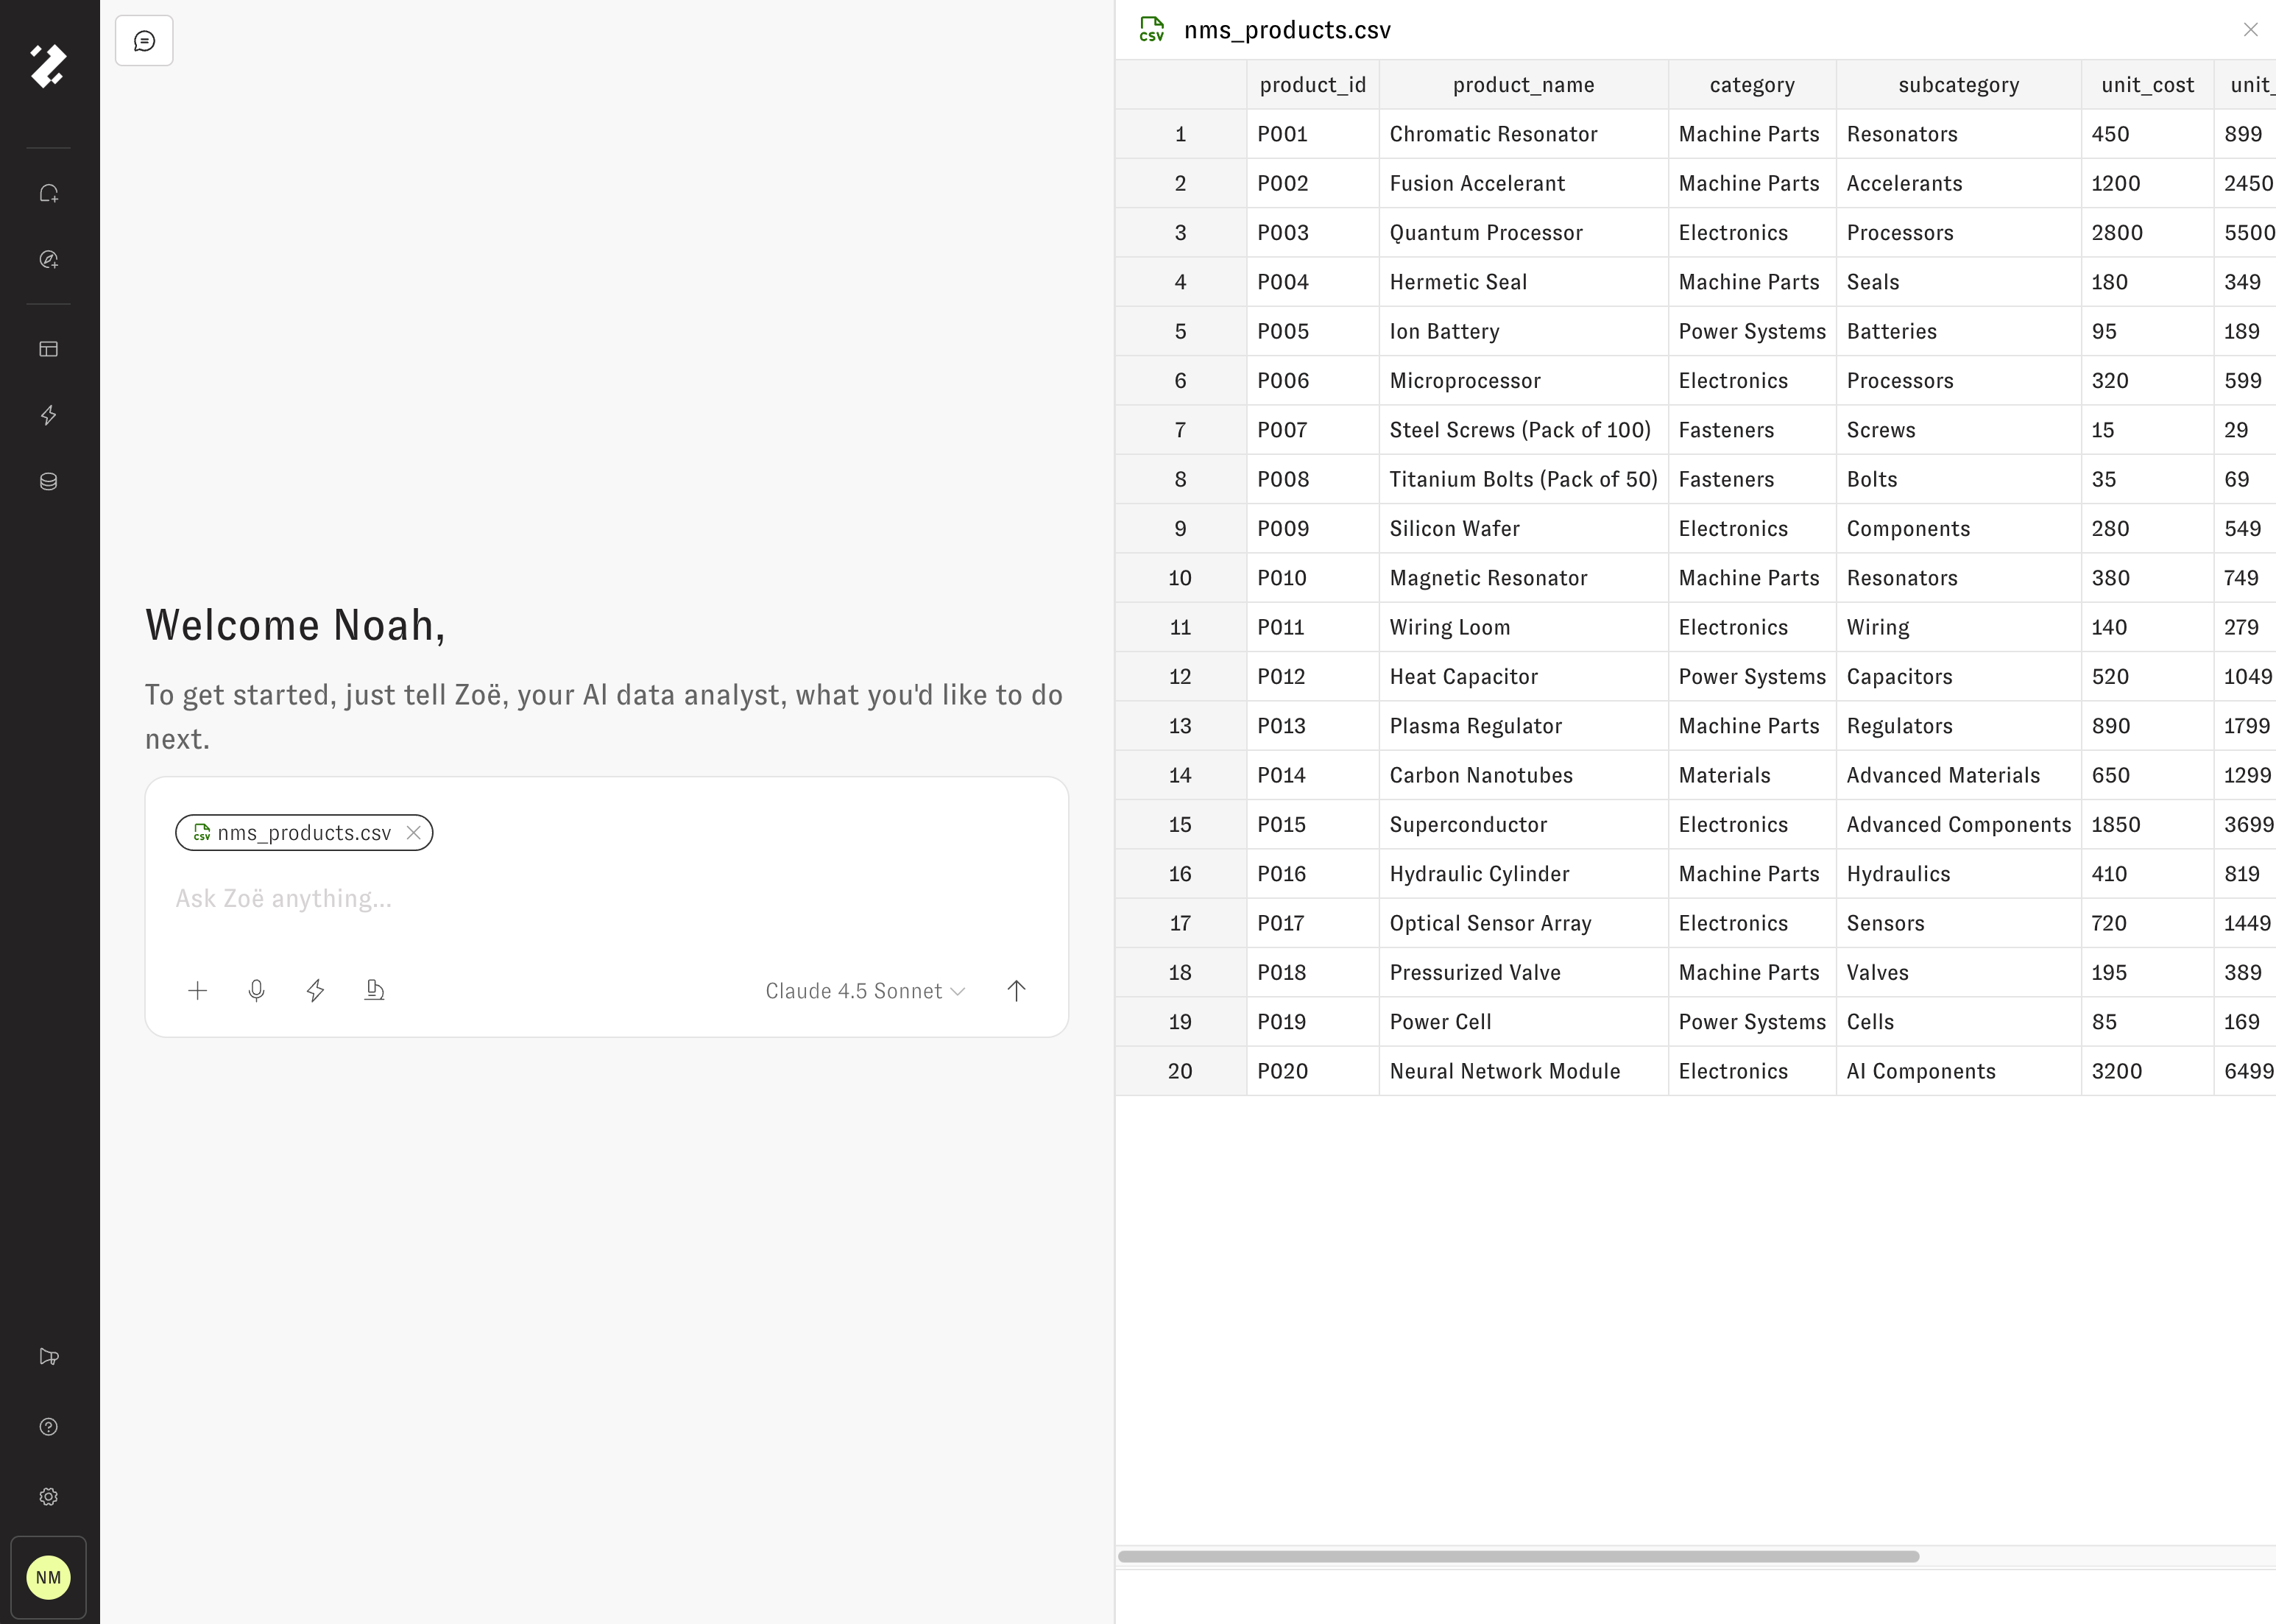
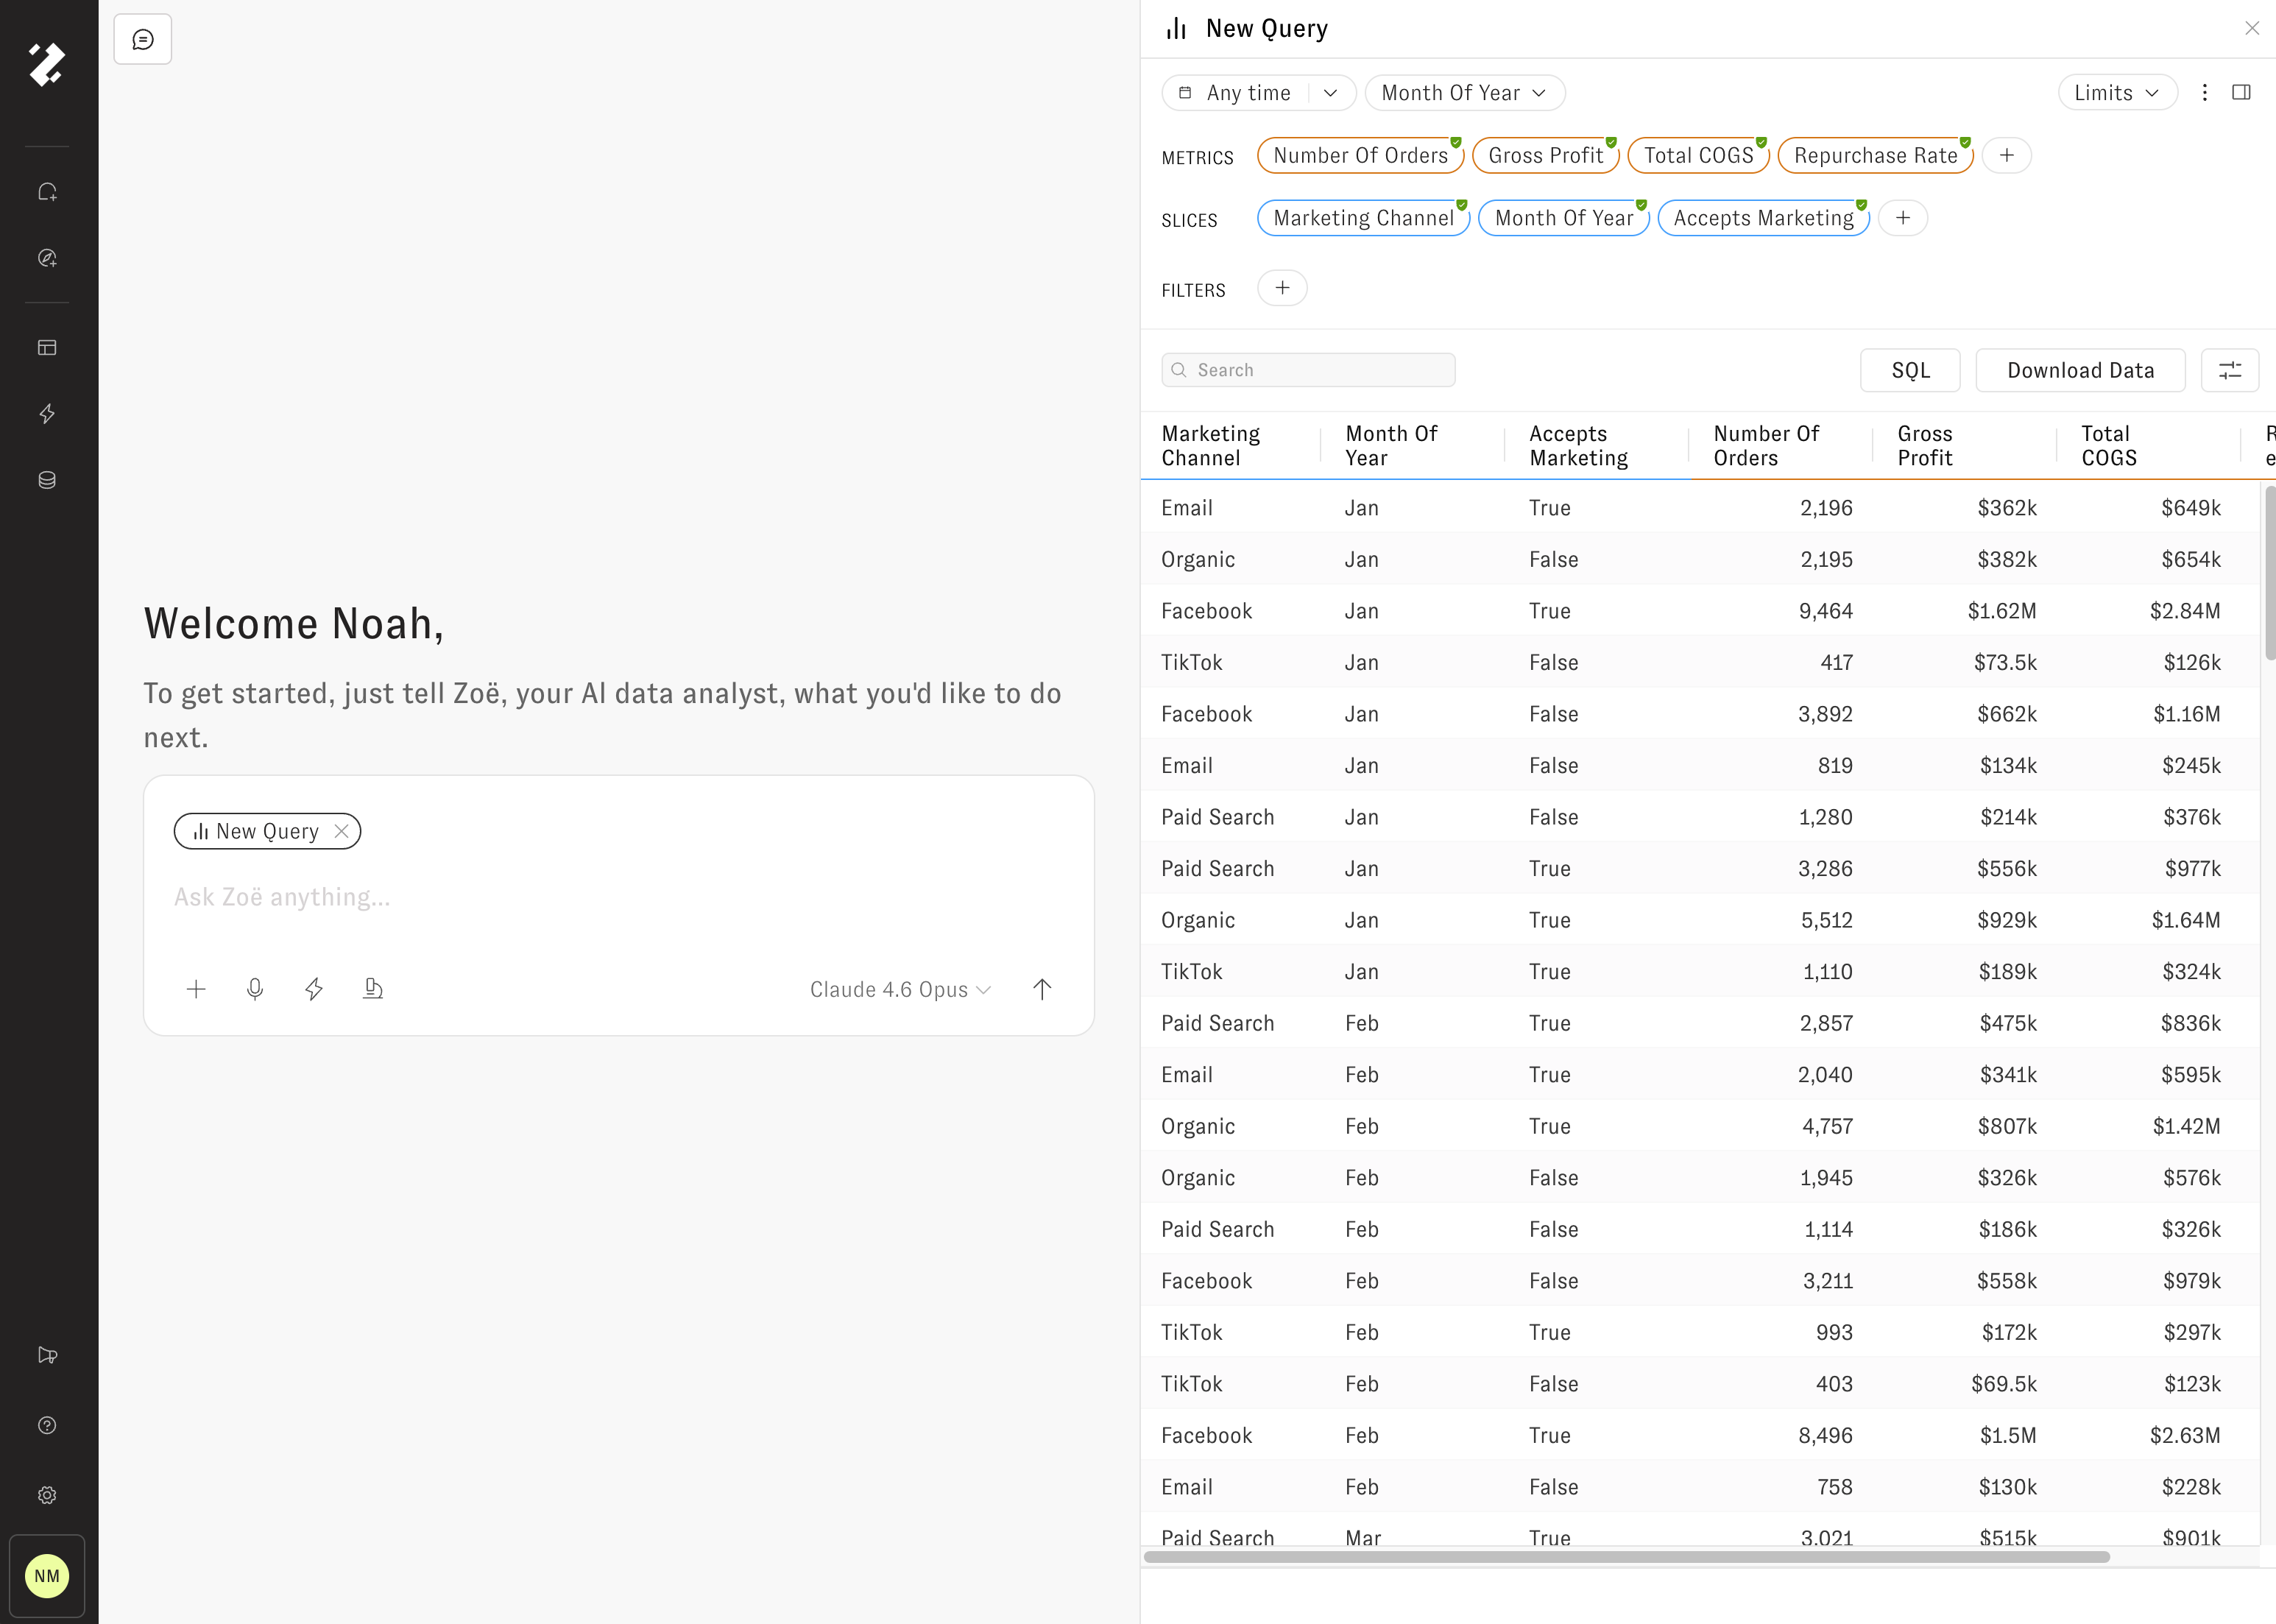
By pressing the Microphone icon, Zoë will listen through the web browser to capture your prompt through realtime voice transcription. The Lightning icon opens a panel for selecting a Proactive Agent to run. The Plus icon supports adding file or query attachments to the message, like images, CSVs, and PDFs (limit 5). A dropdown on the right side of the user input supports changing the LLM model that will be used for the new conversation. Press "Enter" or click the Up Arrow button to submit the message.

## Querying

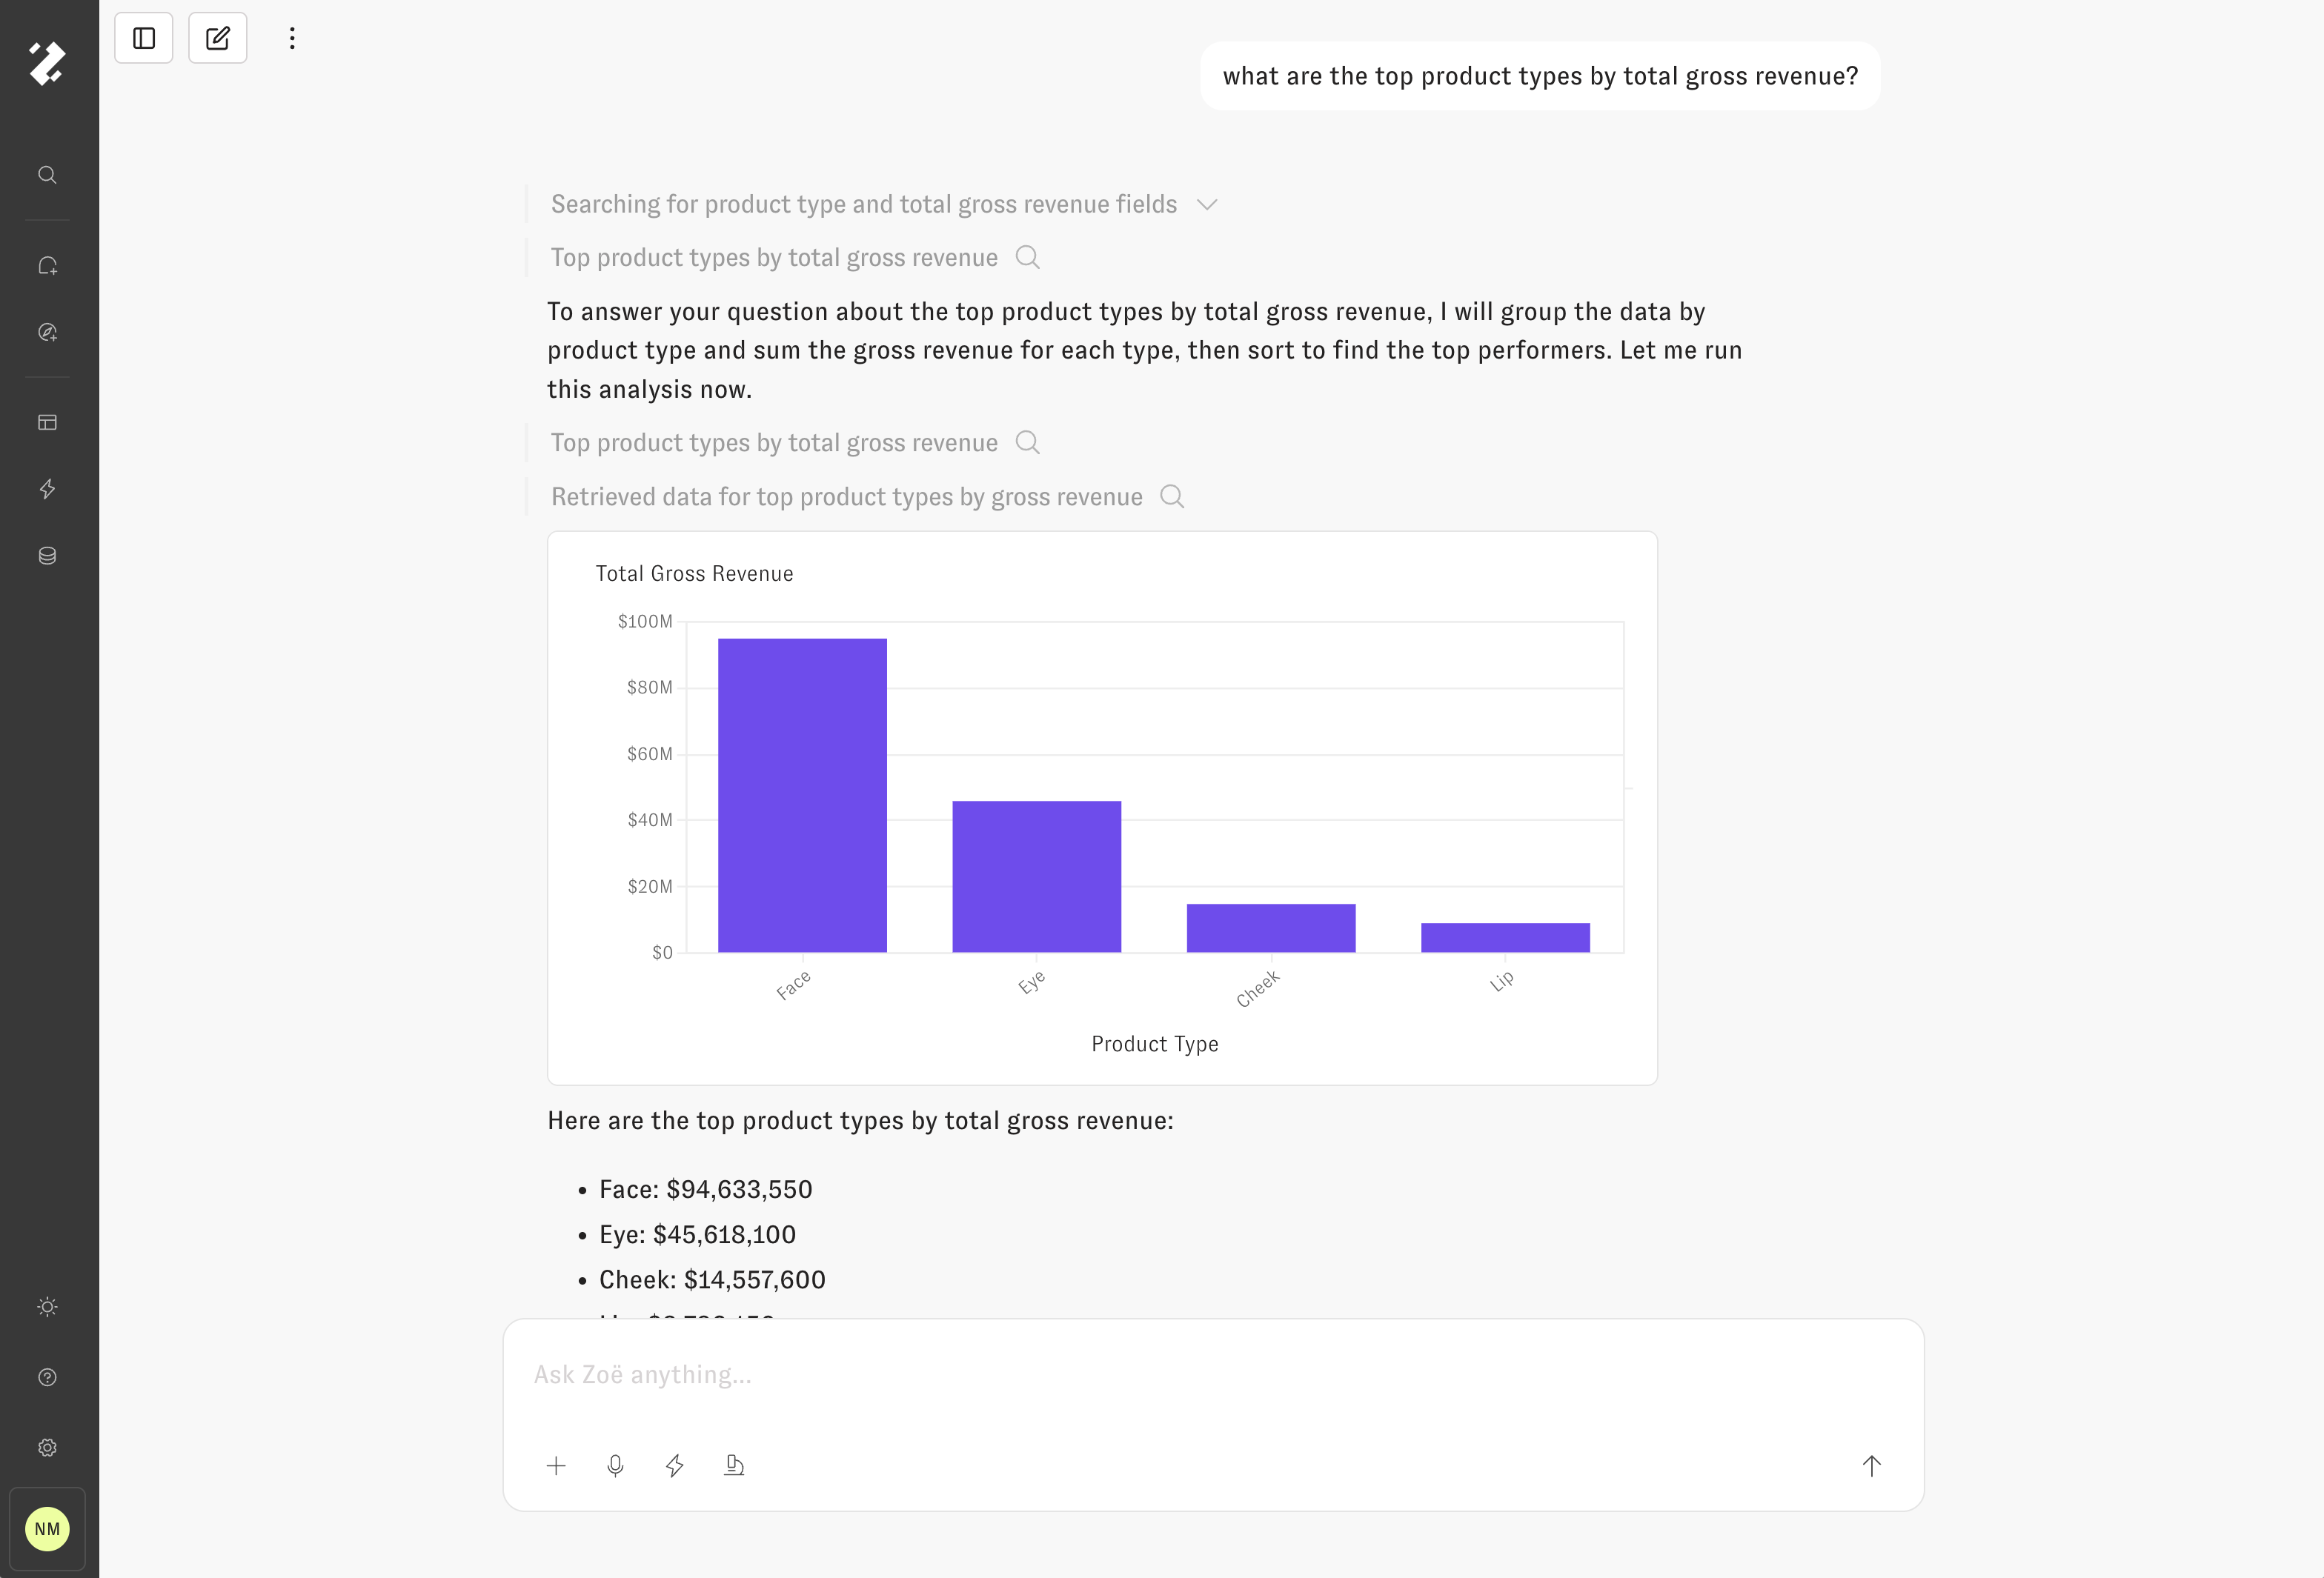
Zoë searches across the governed measures and dimensions to use existing fields and know when to create new ones to answer your data questions with compelling summaries and insightful visualizations. She was built on an agentic architecture that gives her ability to plan approaches to problems, to use tools to answer questions on your behalf, and memory to get better over time: all in service of helping you understand complex data. At times she may misunderstand what you are asking about, but you can see exactly what steps she is taking to respond, the reasoning behind her thinking, and the data she queries.

<figure><img src="/files/3uAuHZYAbeM9L5vEv6PO" alt="Ask Zoe for a bar chart"><figcaption><p>Asking Zoë for a bar chart</p></figcaption></figure>

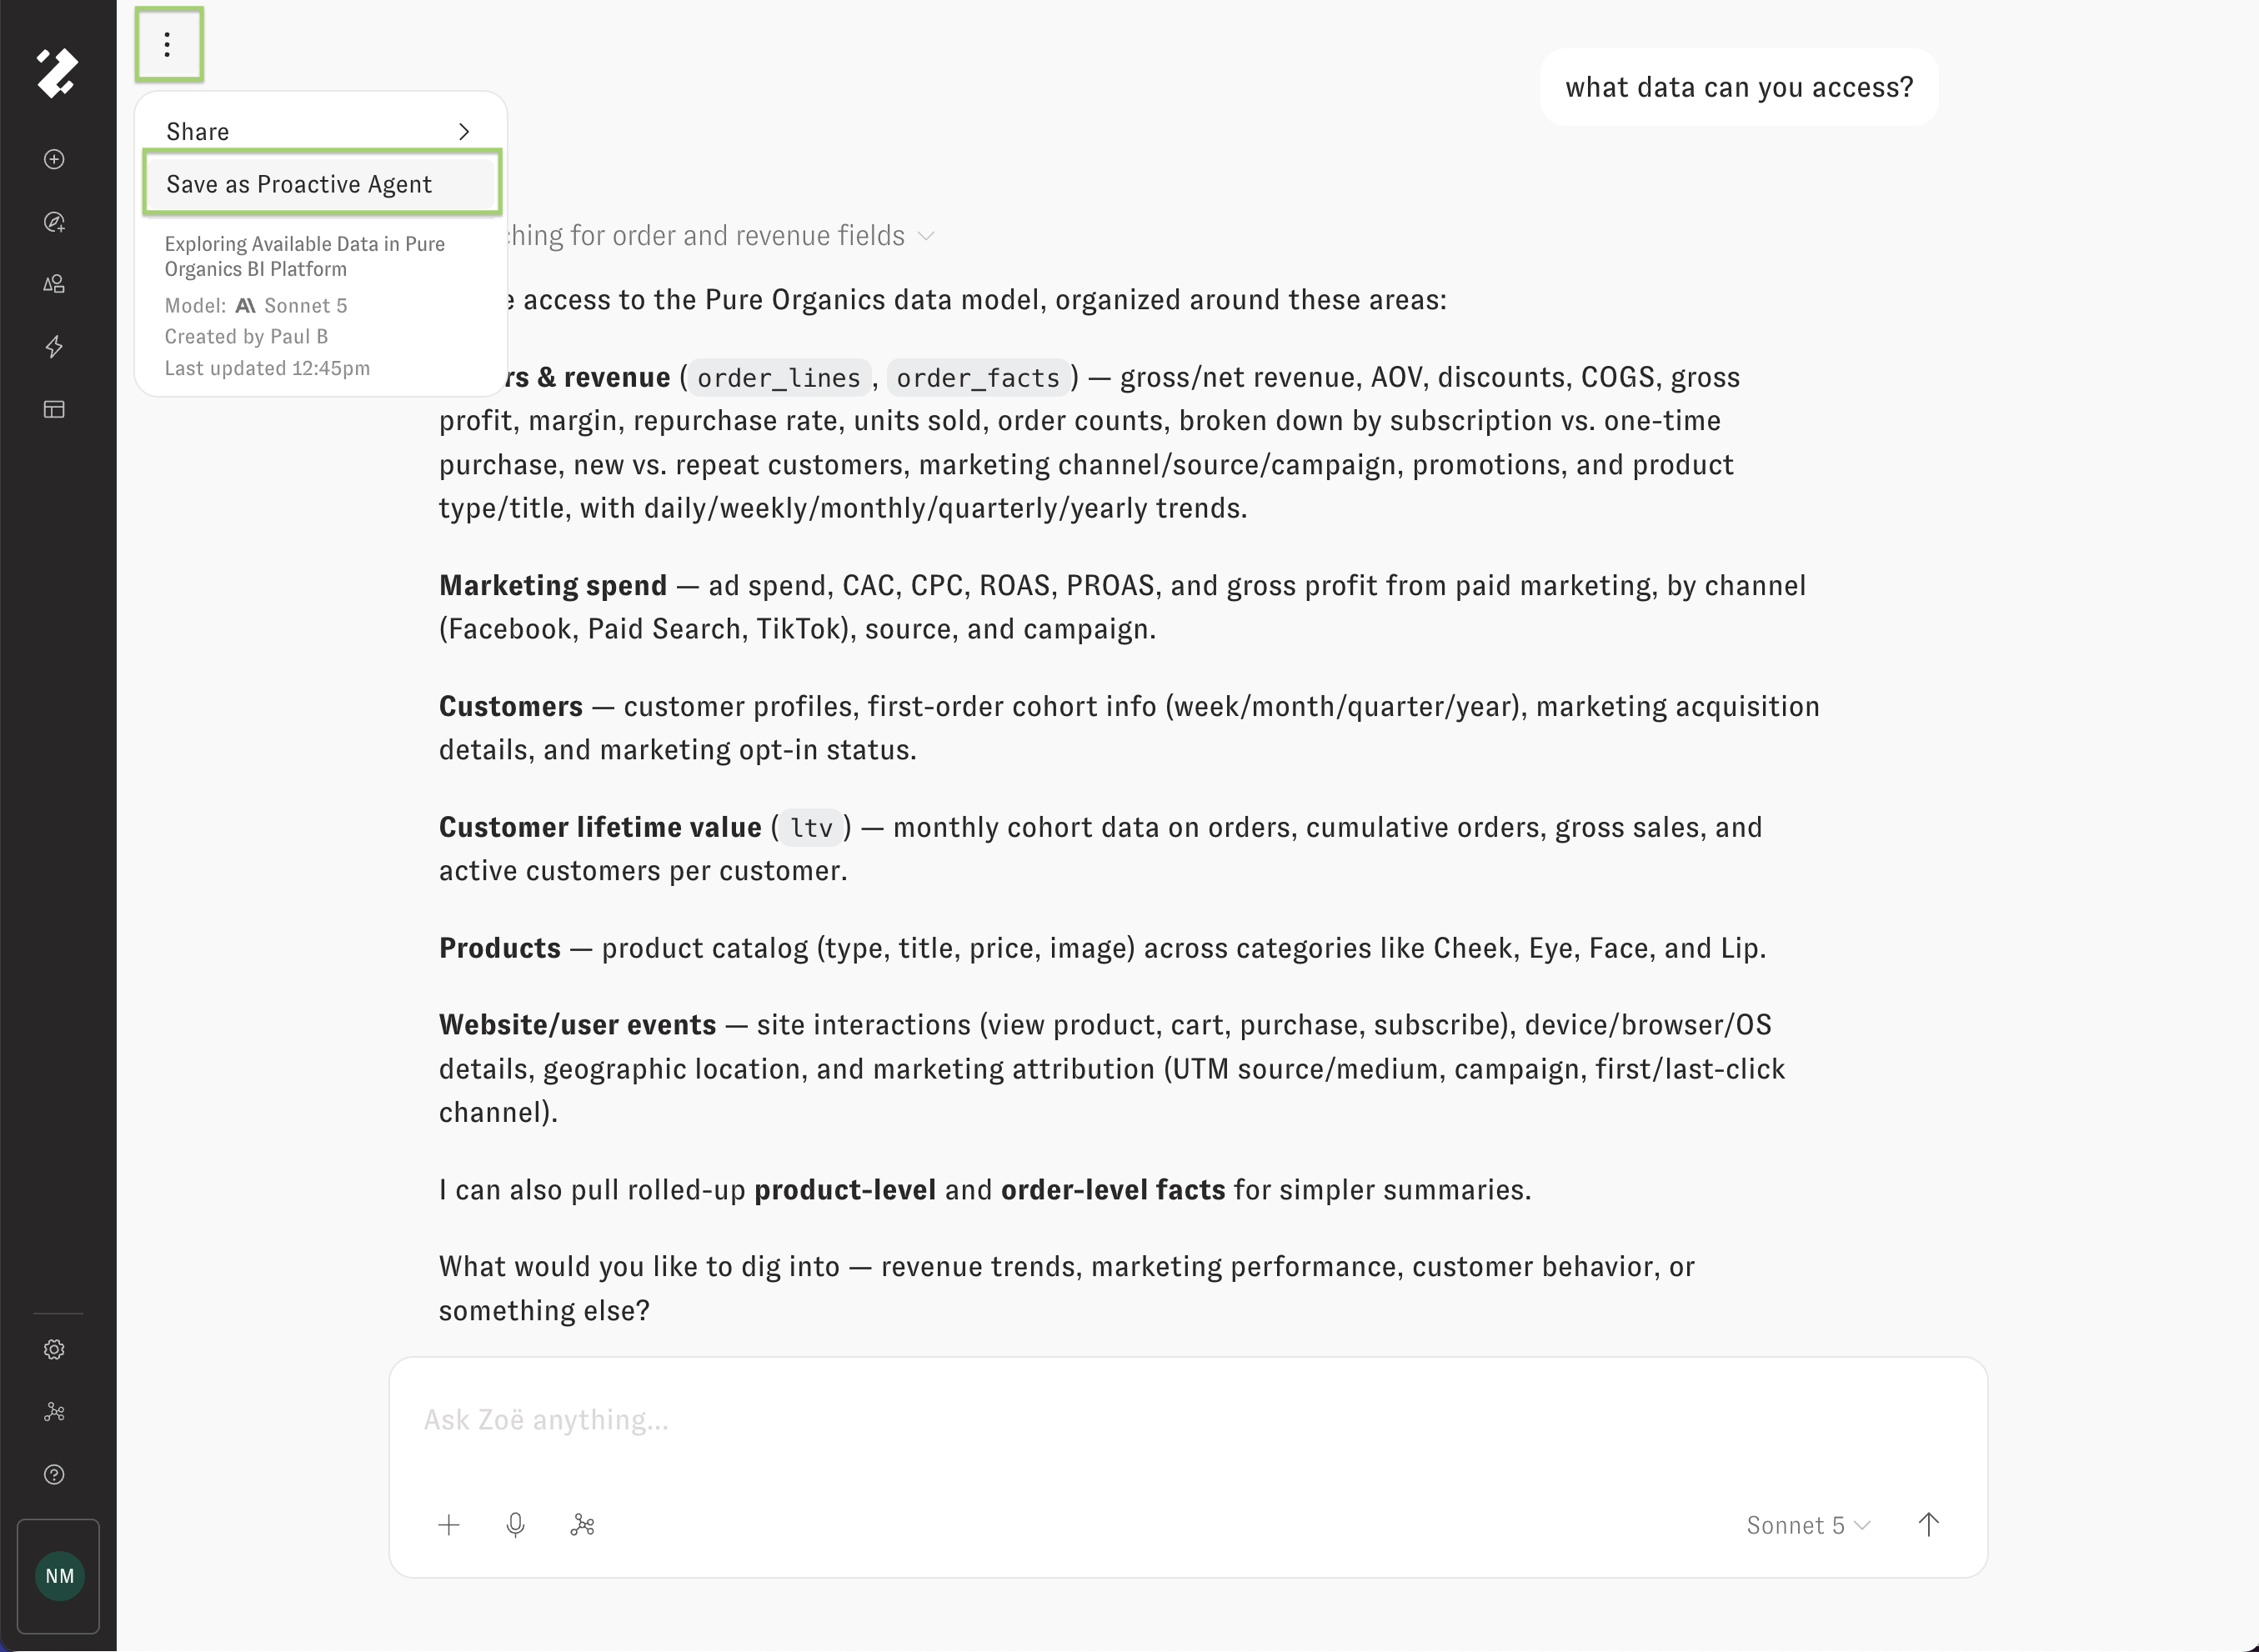
The left sidebar displays the Chat history, sorted by recent activity, and a button to create a new chat. In the upper left of the main content area, there's a button to collapse the left sidebar, a button to create a new chat, and the 3-Dot options menu that supports link sharing and "Save as Proactive Agent" options.

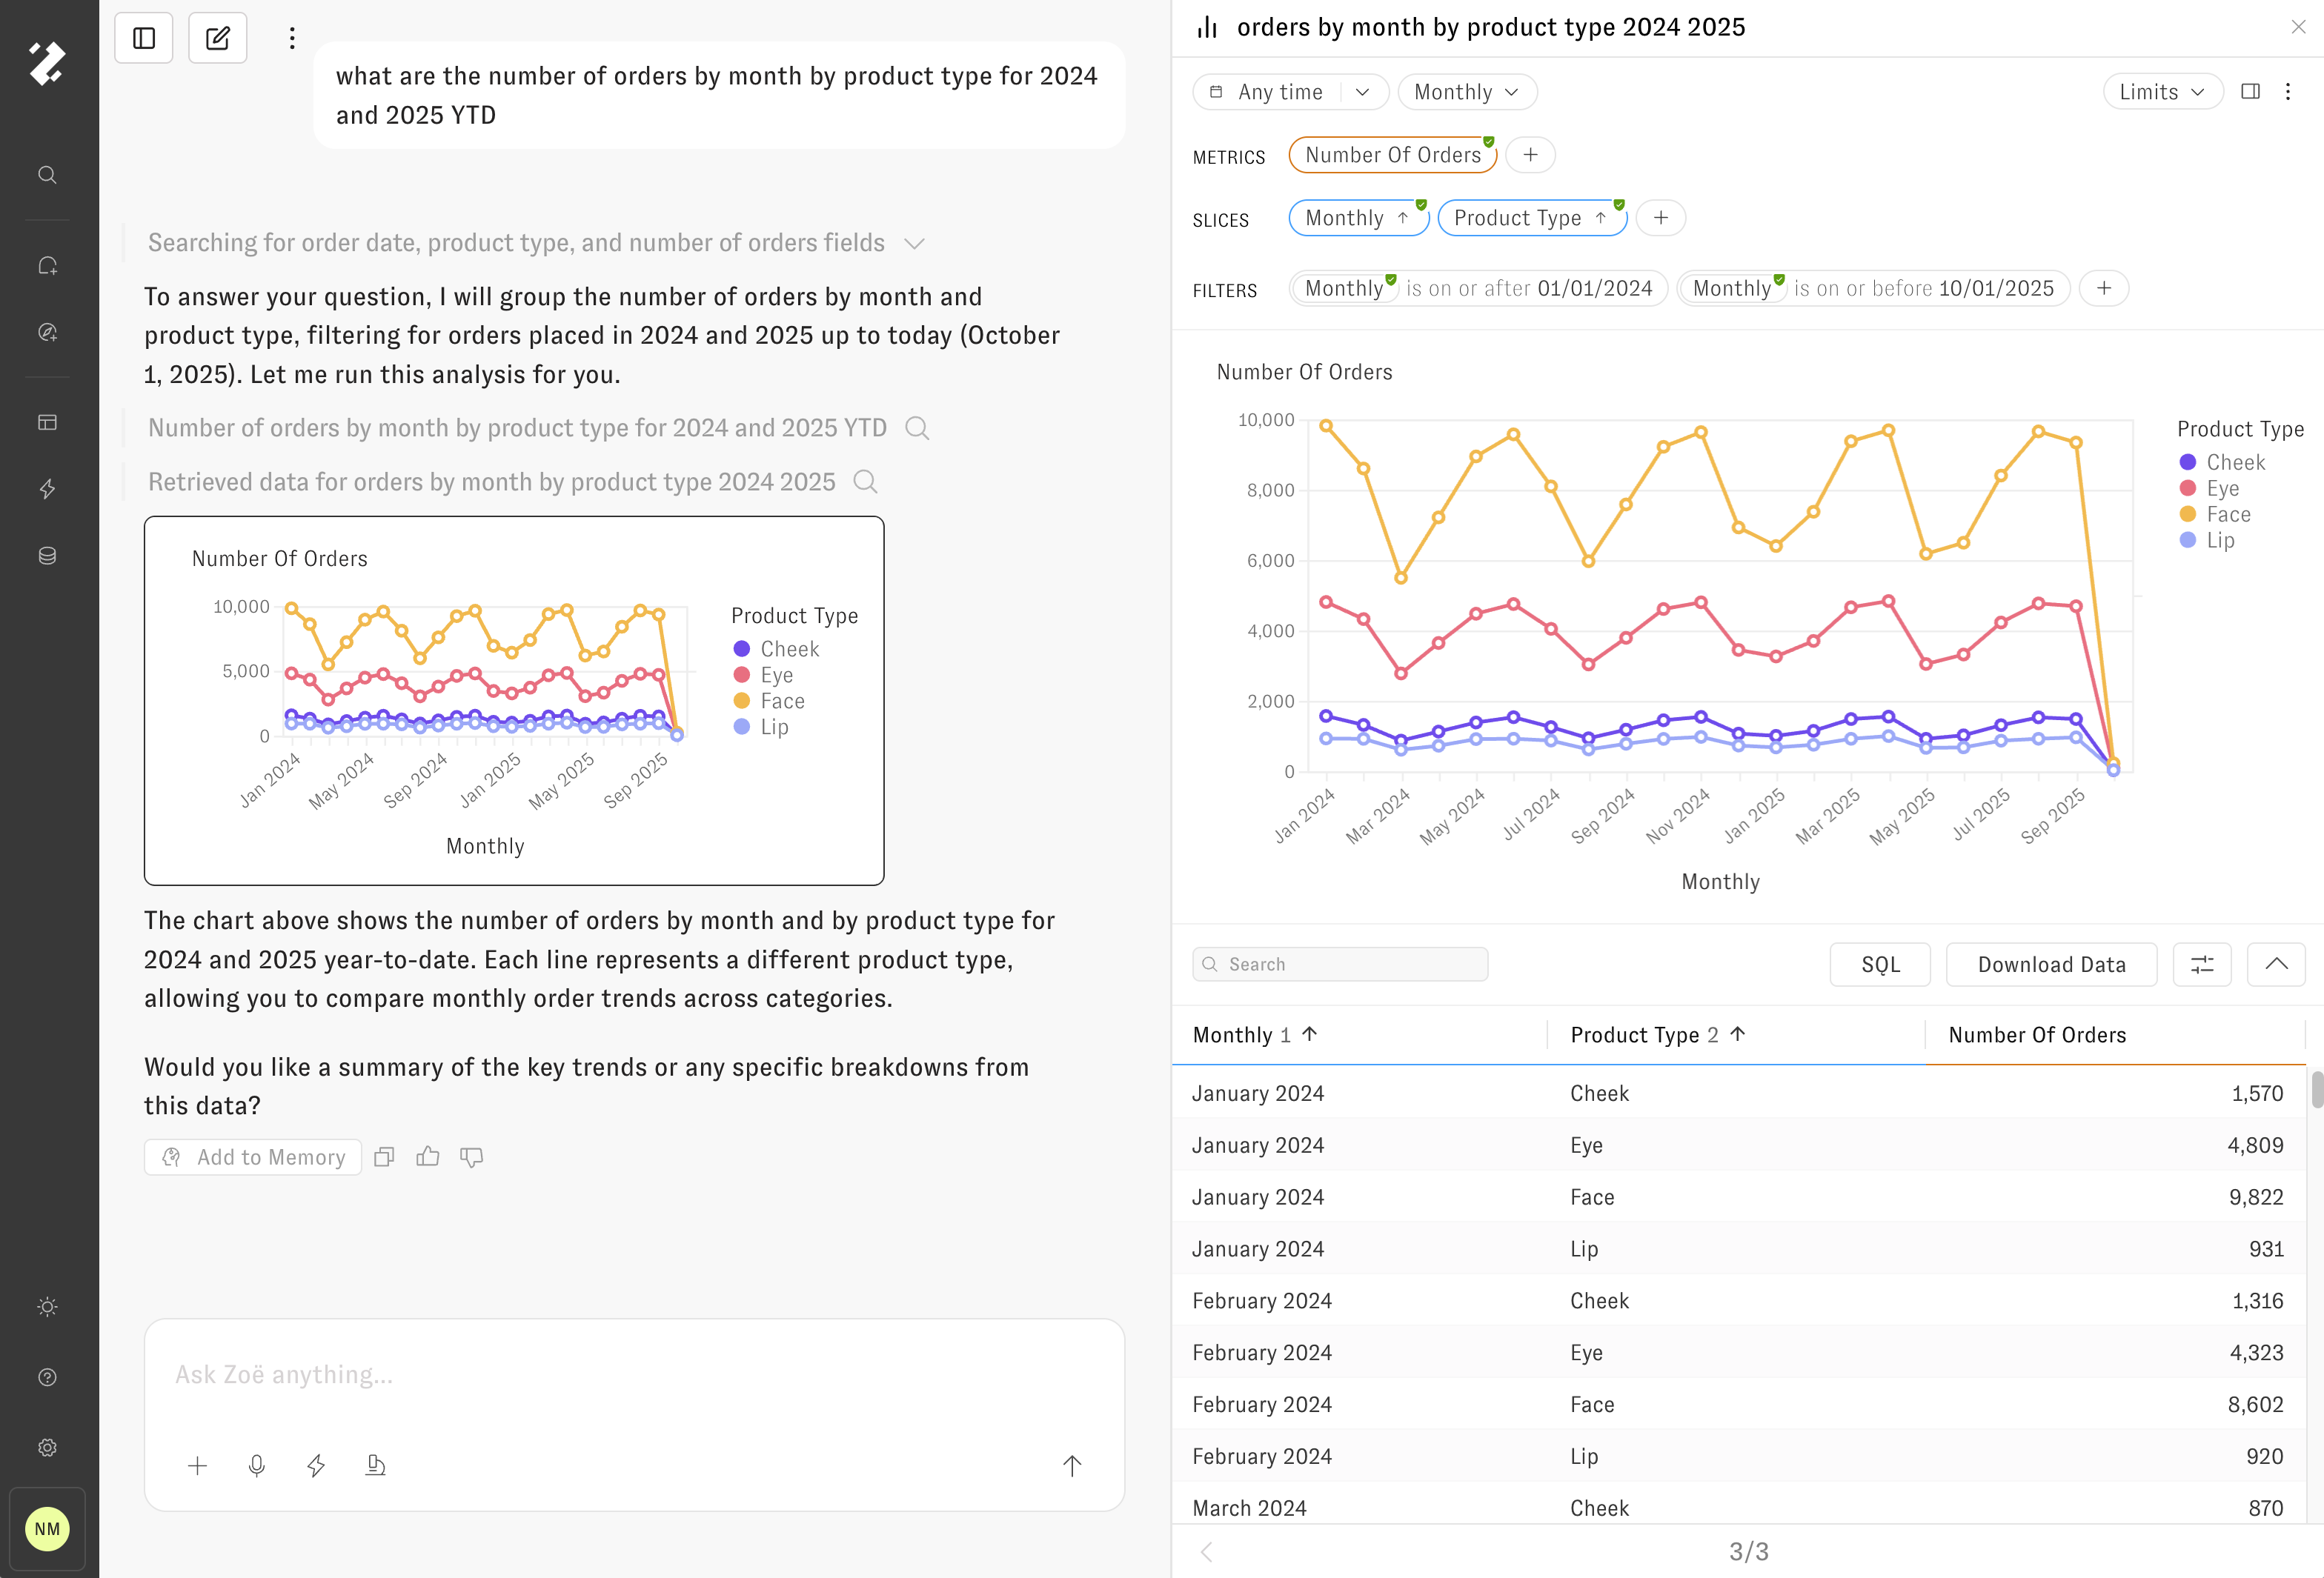
<figure><img src="/files/O6RCw9zHTq0uCZzDR8L2" alt="Clicking into the Query drawer"><figcaption><p>Clicking into the Query drawer</p></figcaption></figure>

Every chart that Zoë creates on your behalf can be clicked into, inspected and explored via the drawer, and added back to the conversation with follow up questions or tasks. The Magnifying glass icon represents that a component will open in the drawer when clicked. The query drawer header contains the label description of the query, a toggle between data and code, and an icon to close the drawer. The drawer content itself provides a form for exploring the query options available from this starting point. You can either click the buttons in the drawer or ask Zoë to change the question's chart type, fields, filters & sorts, limits, etc.

## Dynamic Fields

In addition to creating queries on your existing measures and dimensions, Zoë can (for Develop and above roles, and when the feature is turned on) create Dynamic Fields, which are measures and dimensions that are assigned to the person who created them, instead of the global data model. Those Dynamic Fields can be "promoted" into the global data model, but *Zoë cannot promote them*. You must do that in the UI.

We, very intentionally, have not given Zoë the ability to automatically modify the global cognitive layer, to ensure your end users are always getting a consistent and governed experience.

## Interactive Tool Calls

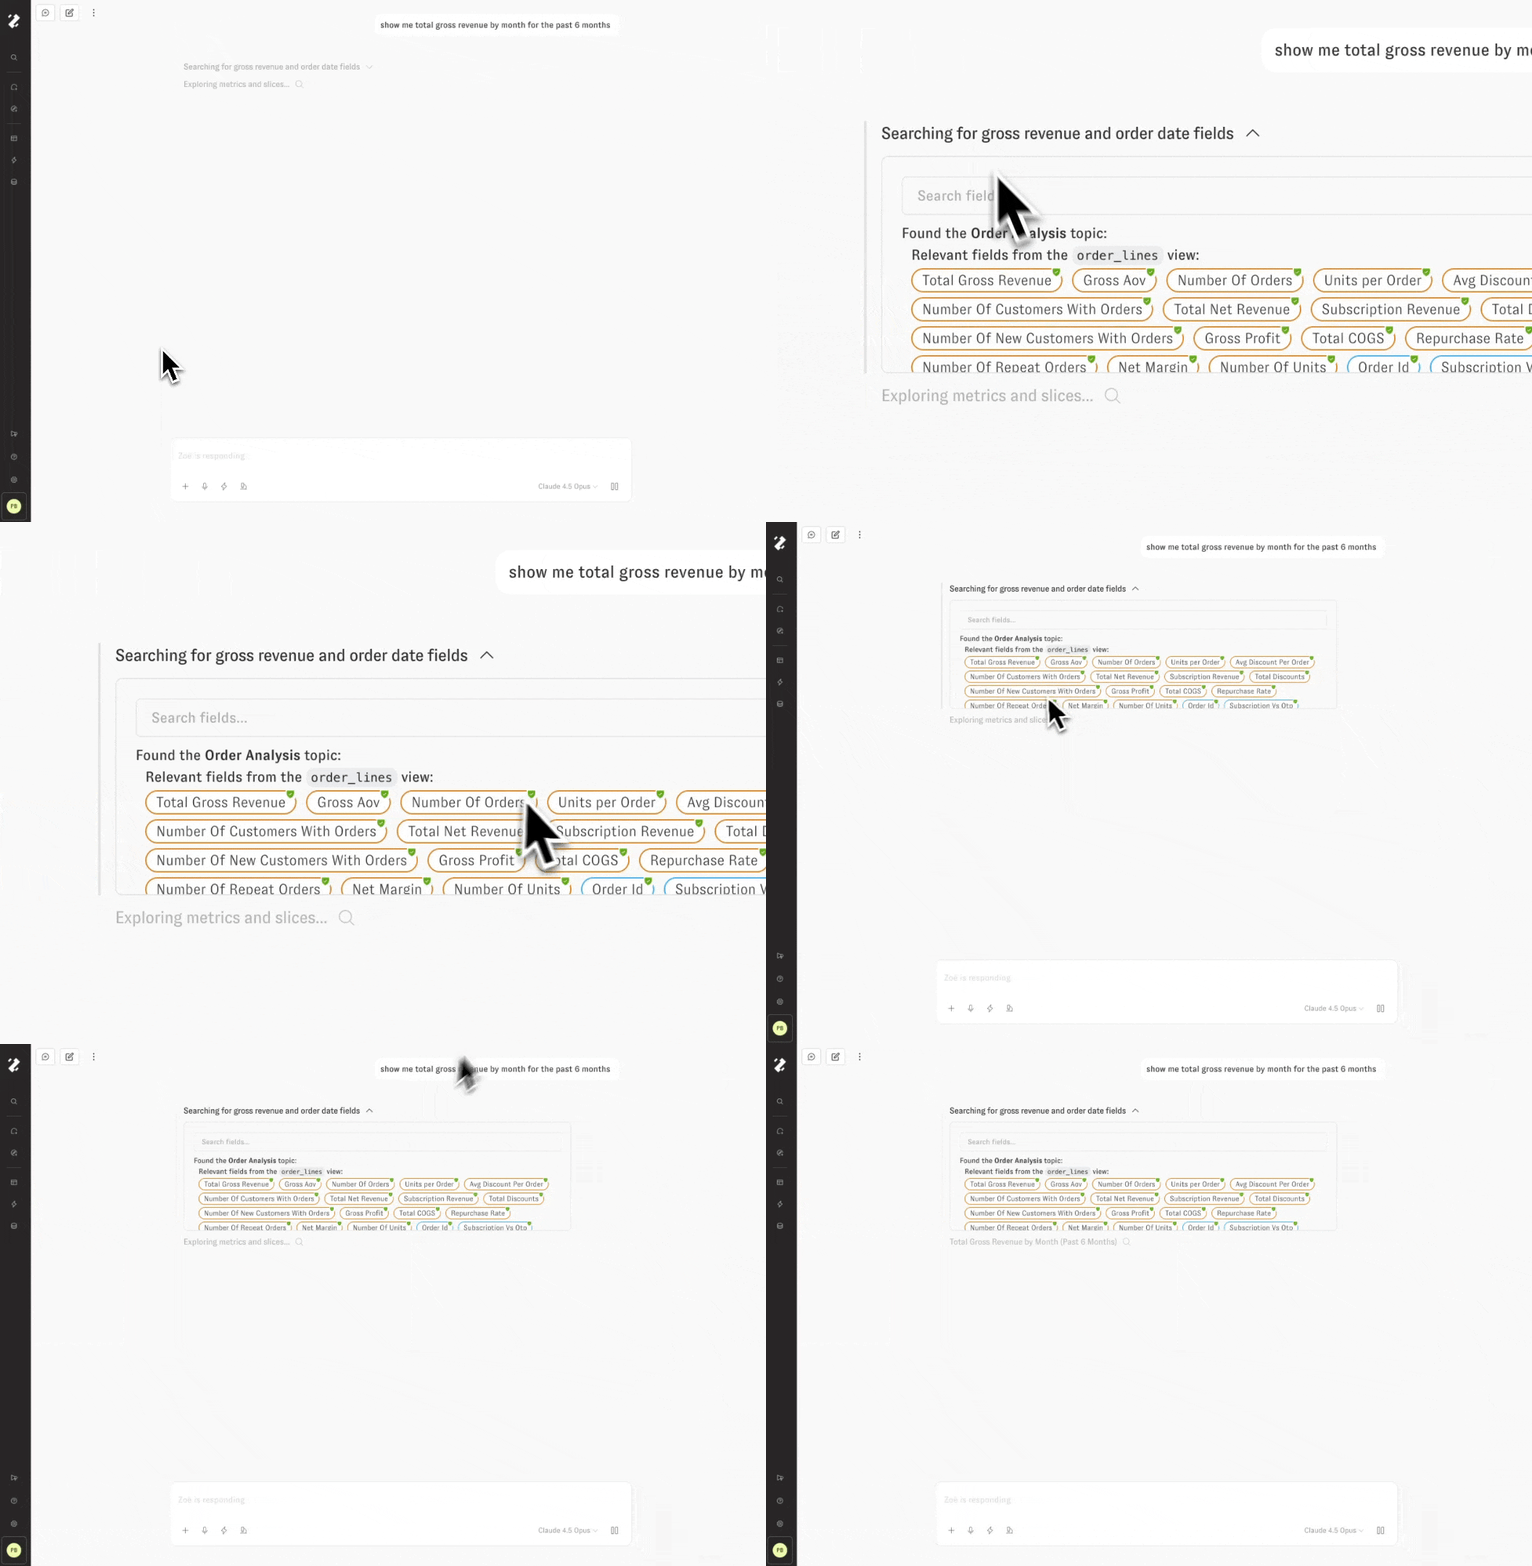
<figure><img src="/files/hyaB81EzgNYK5ofb59V0" alt="Opening the search fields accordion"><figcaption><p>Opening the search fields accordion</p></figcaption></figure>

Like chart tiles, every tool call that Zoë dispatches on your behalf while analyzing the data can be clicked into, inspected, and explored via the drawer. Click on rows of text in the chat thread with the Magnifying glass icon to see that tool call's details opened in the drawer. Some examples of tools that Zoë uses in chat:

* Search across data model fields, memories, and external sources
* Generate and run SQL queries, or compile SQL from semantic model code
* Build interactive charts and accurate text summaries from data
* Write and run Python scripts for complex data analysis tasks
* Search across workspace dashboards and create new ones

## Citations

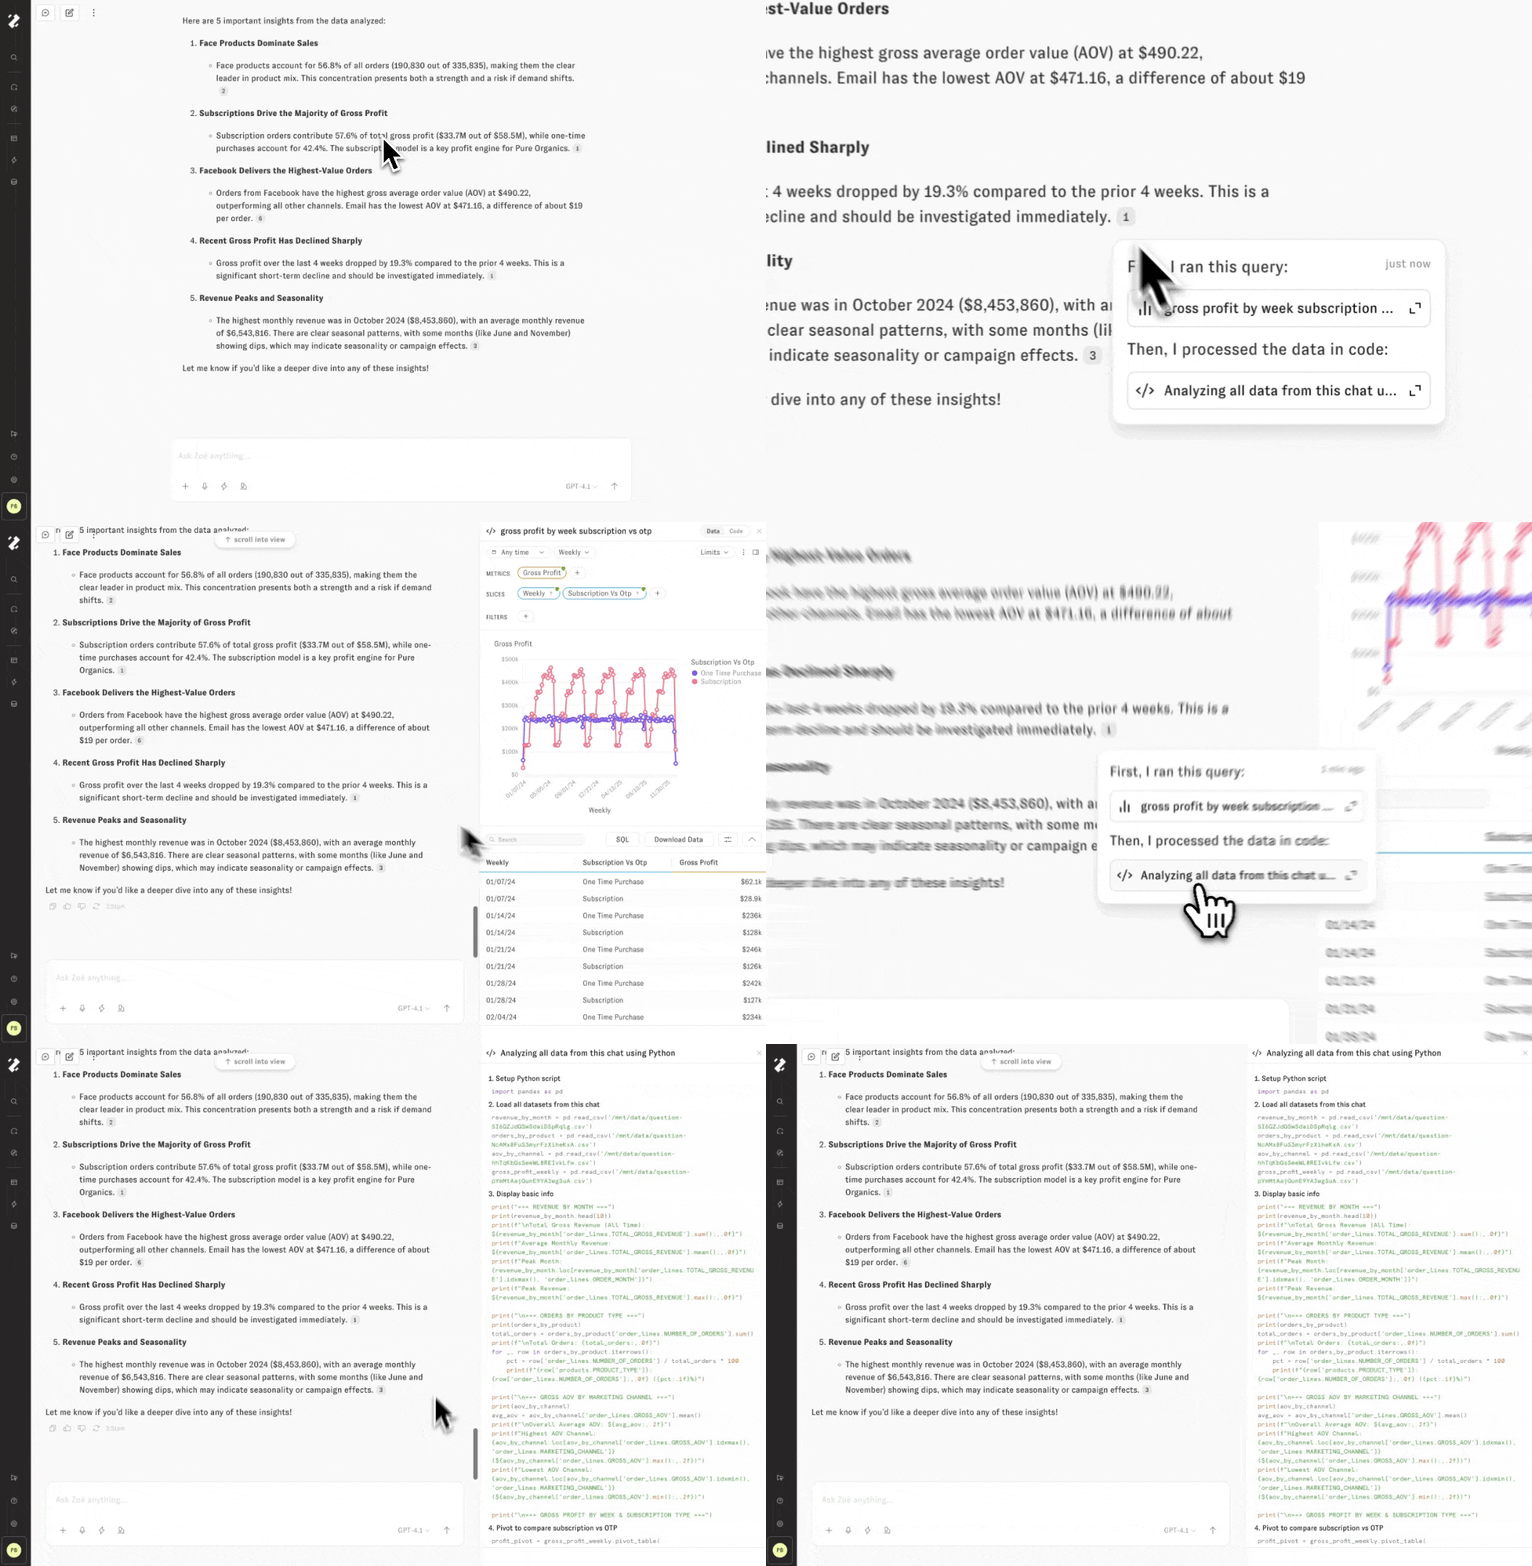
When users understand the data, they can trust the data: any numbers or query values that Zoë references in text summaries will be cited by a serially indexed element at the end of the paragraph. By interacting with the citation, users can understand the data lineage: where and how the value was calculated.

<figure><img src="/files/ke29Gxoi4itGnUaSgLb6" alt="Interacting with citations"><figcaption><p>Interacting with citations</p></figcaption></figure>

## Switching Agent Models

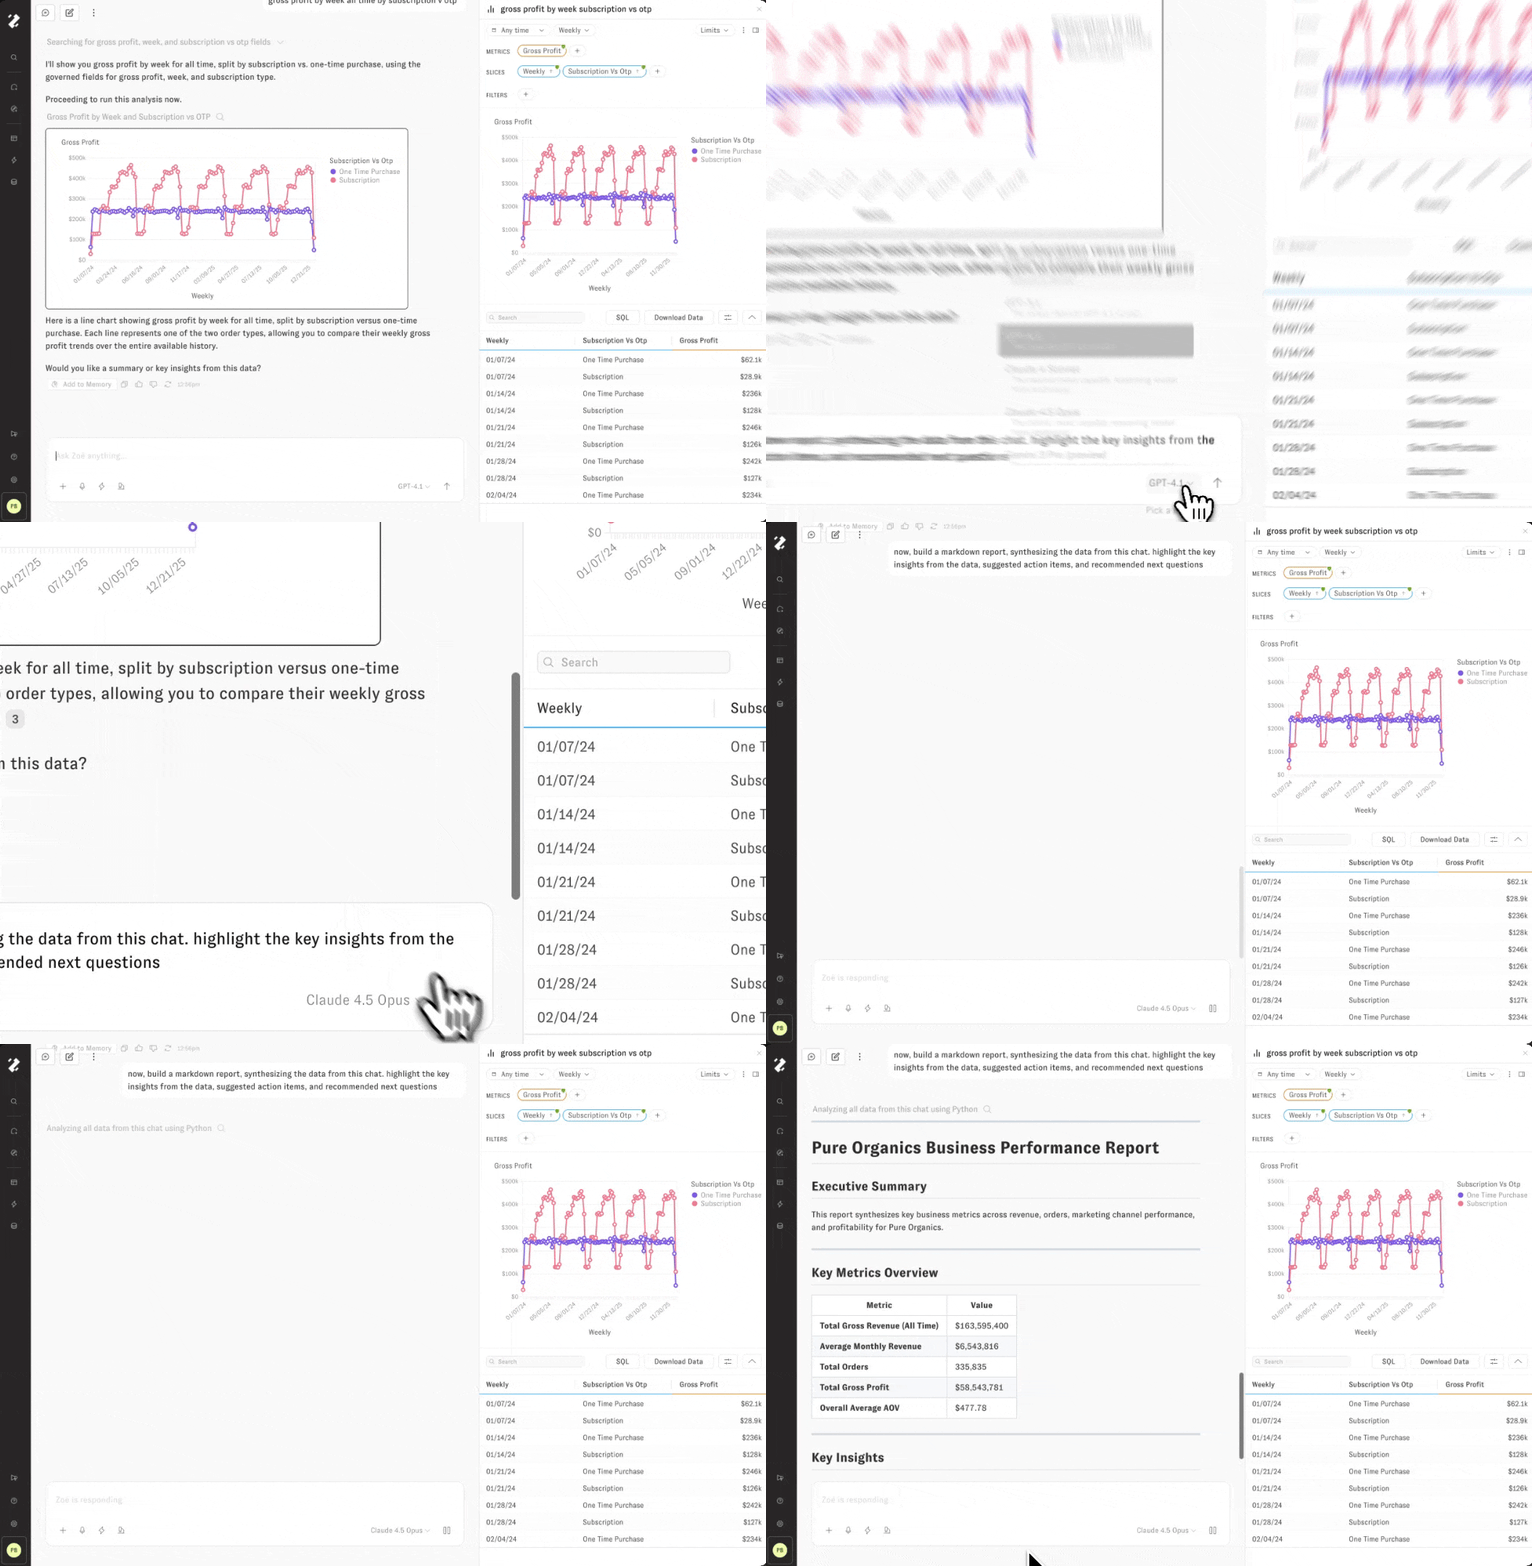
Use the LLM model dropdown menu in the lower right of the Chat input to pick the right-sized large language model for your current task. You can even change the model mid-conversation, which is particularly useful when following up to Proactive Agent runs with a faster model after letting a slower, more contemplative model build the initial report.

<figure><img src="/files/UJjRSMvXRNRAk3rRHtJH" alt="Switching agent models mid-conversation"><figcaption><p>Switching agent models mid-conversation</p></figcaption></figure>

## Streaming

Zoë leverages streaming, so that incremental updates from the LLM model are shown to the user as soon as they are available. Tool calls can take up to several minutes to finish, while streaming text is available so quickly it looks like Zoë is using your keyboard directly. Feel free to start other chats simultaneously, navigate around the app, or refresh the page while your conversation is loading: whenever you return, the most recent updates will be streamed into the chat.

The figure from the previous section shows how each message submitted by the user is pinned to the top of the screen while Zoë is responding, with automatically scrolling to follow the response as it streams onto the page. By scrolling up and away from the recent updates, the user can dismiss this automatic scroll behavior. While the conversation is running, click the "follow live updates" pill when it appears to restore the automatic scroll behavior.

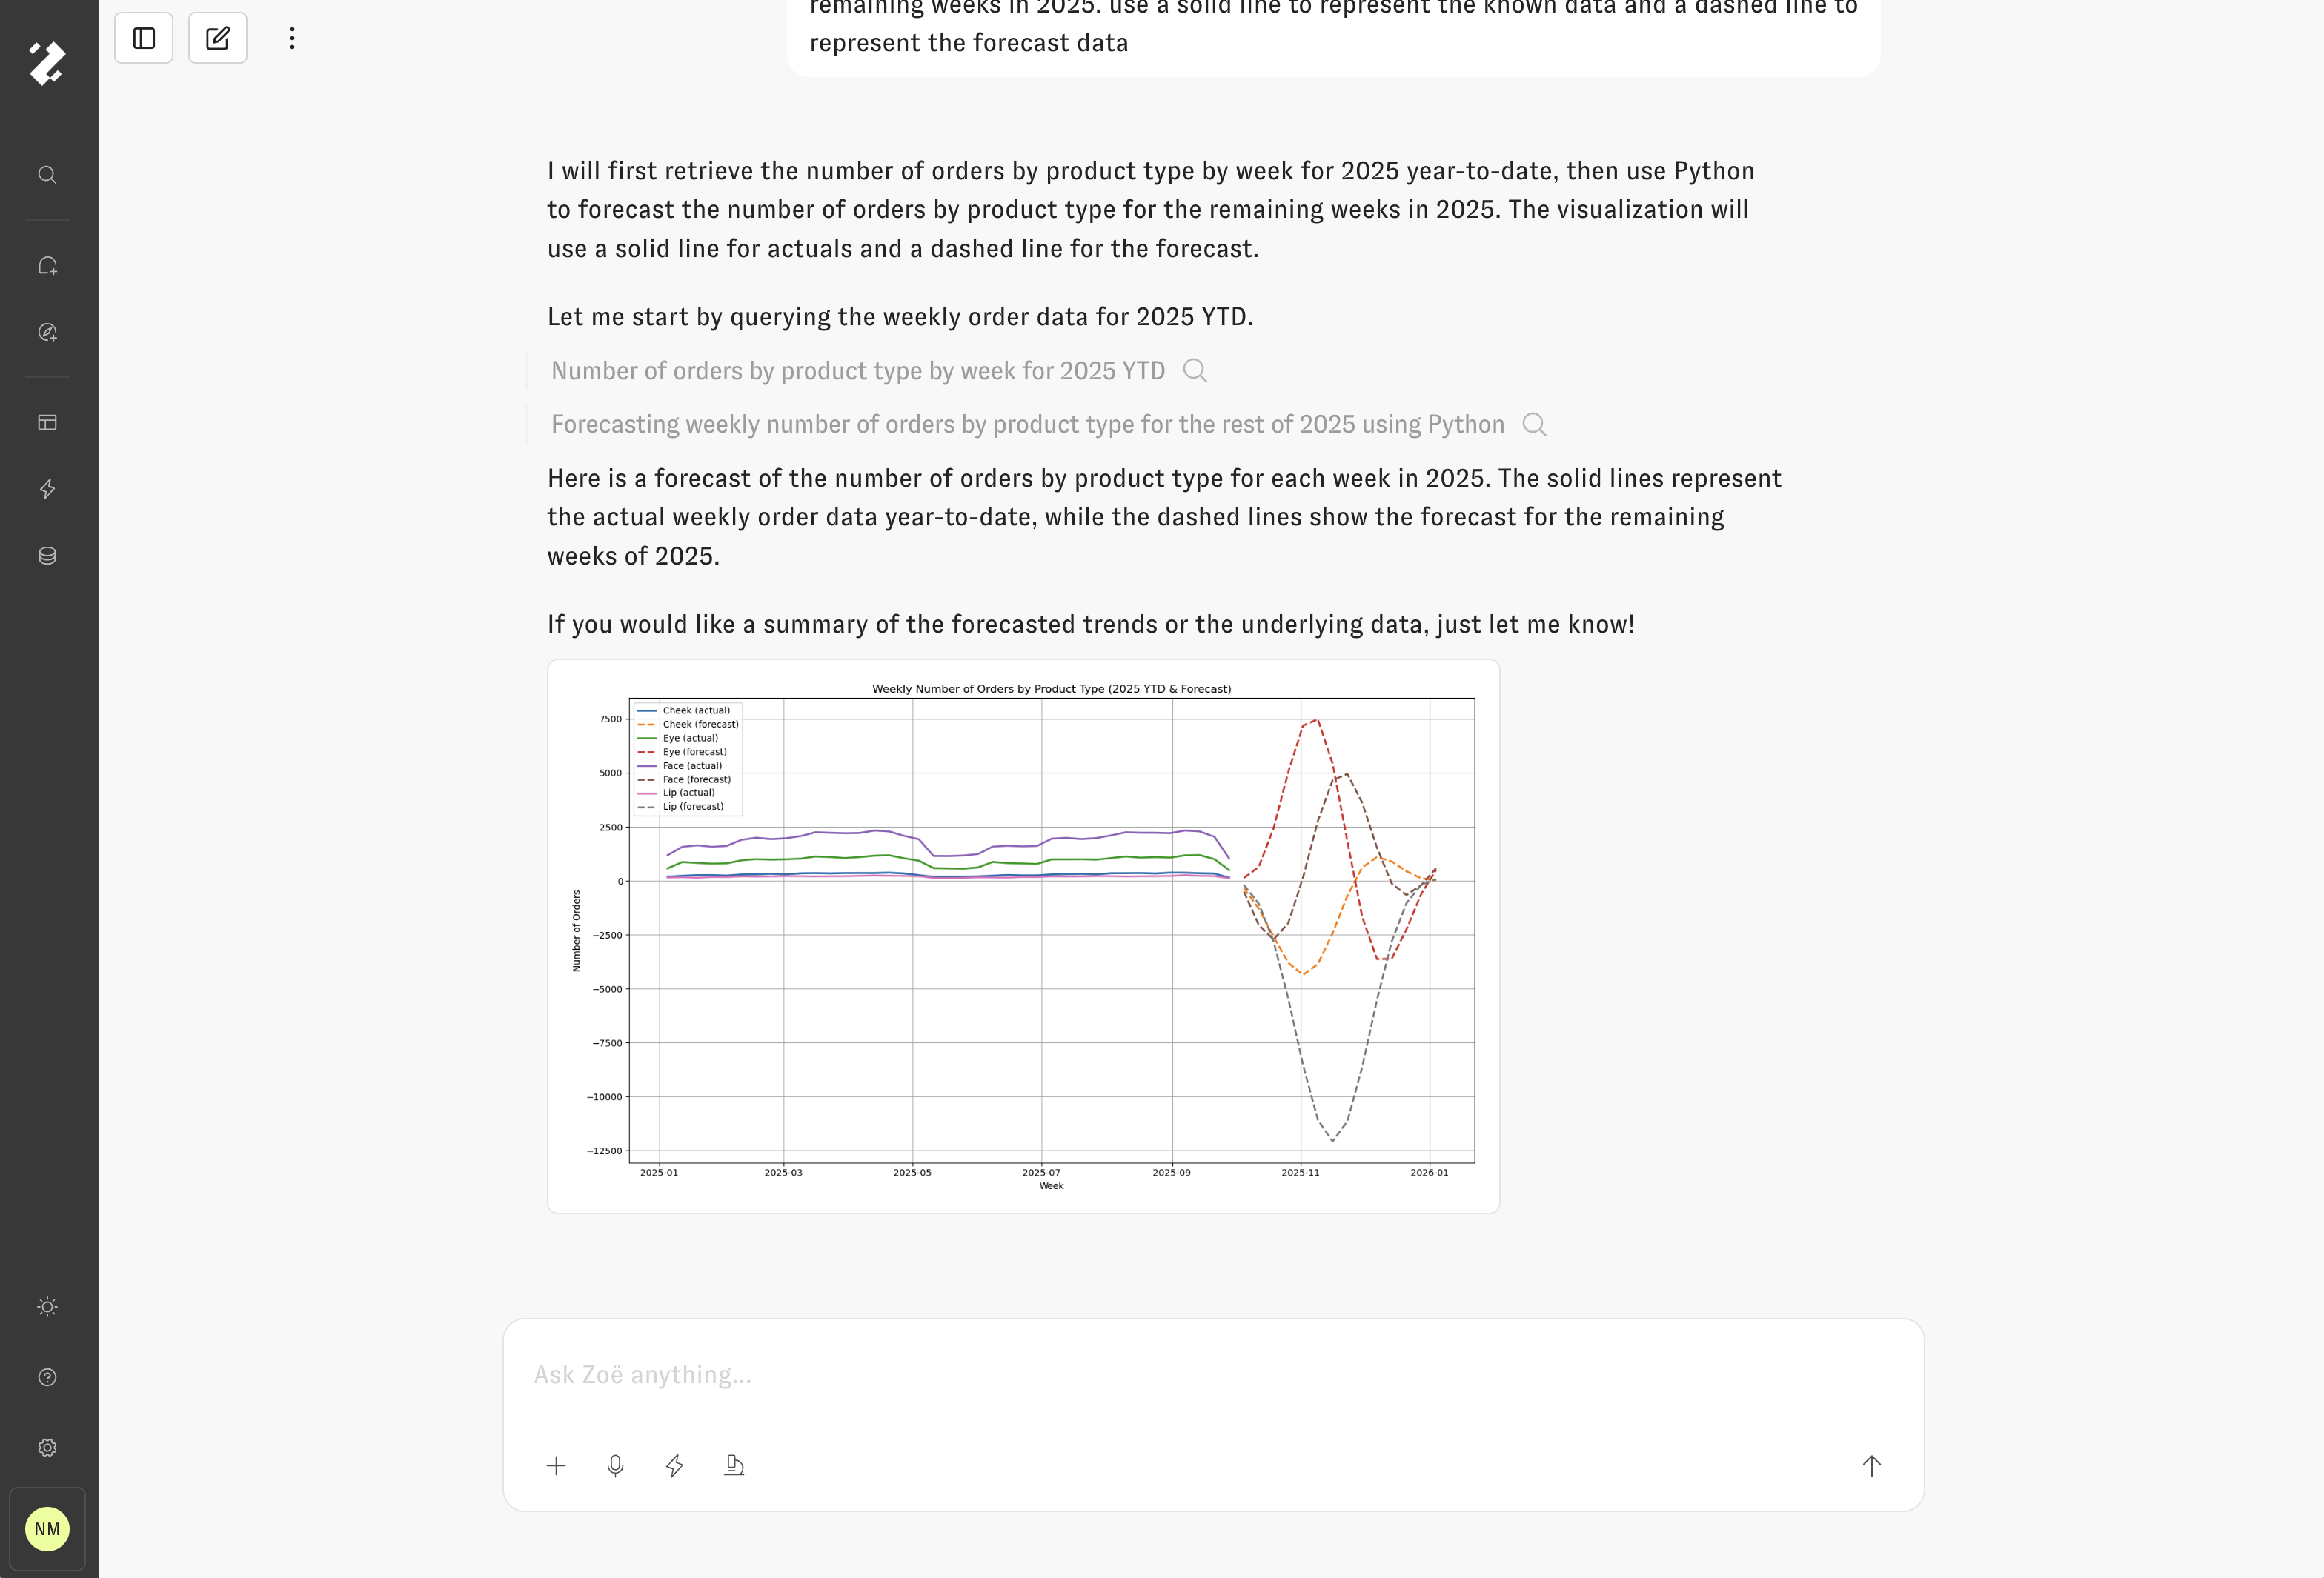
## Artifacts

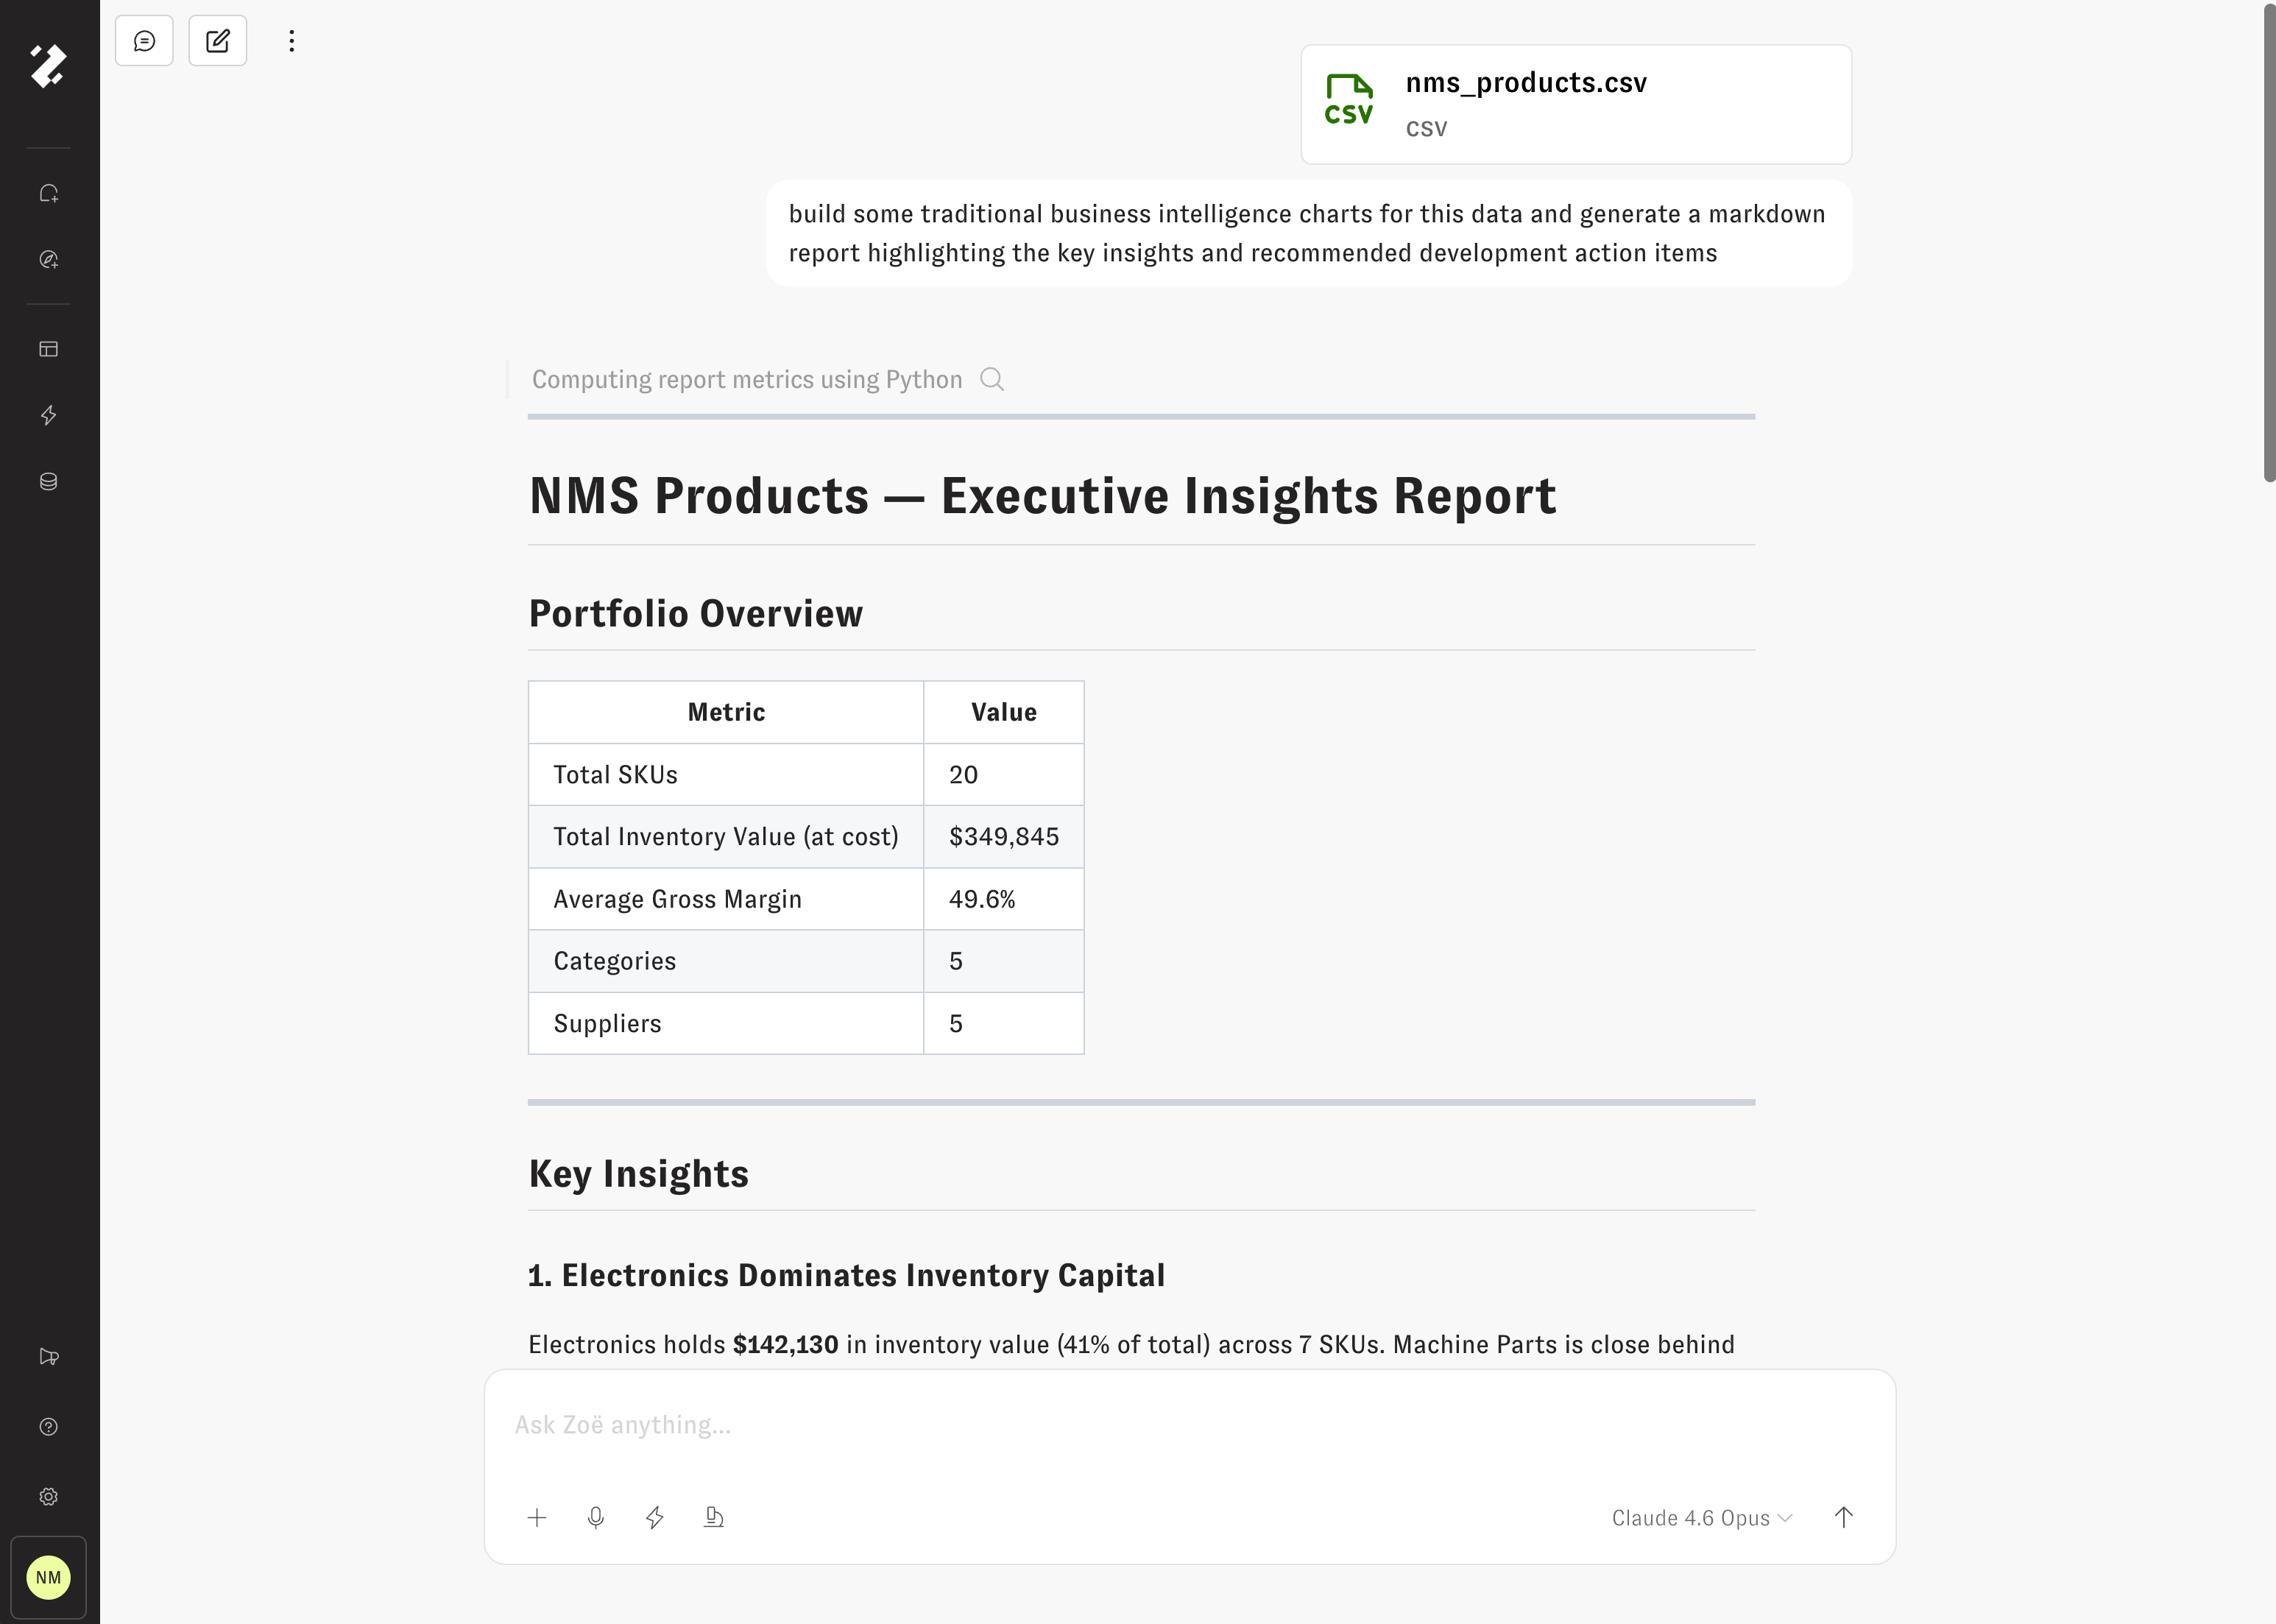
Zoë can write and evaluate Python code in a secure sandbox and delivers the results as [Artifacts](/using-zenlytic/artifacts): rich, interactive outputs like apps, documents, spreadsheets, presentations, and charts. Artifacts give Zoë the flexibility to answer complex questions that involve merging results from multiple queries, plugging in assumptions, building custom visualizations, and running advanced clustering, correlation, regression, and forecasting analysis. Dashboards, charts, and other HTML Artifacts use [Live Queries](/using-zenlytic/artifacts#live-queries) — they re-query your warehouse every time you open them, using your own permissions. Each Artifact has versioned history, can rebuild on a schedule, and can be shared. See [Artifacts](/using-zenlytic/artifacts) for the full feature set.

<figure><img src="/files/WCyYhyJR8EBLmFDL2ODY" alt="Zoë running advanced analysis"><figcaption><p>Zoë delivering an Artifact with a forecast analysis</p></figcaption></figure>

## Web Search

Zoë can search the web for real-time information to supplement her data analysis — for example, comparing your metrics against industry benchmarks or referencing recent market trends. Web Search is currently available only with Anthropic models (e.g. Sonnet 4.6, Opus 4.6). An admin must first enable it in **Settings > Zoë**, after which users can toggle it on per conversation via the **Globe icon** in the Chat input toolbar. See [Web Search](/using-zenlytic/web-search) for full setup instructions and details on how cited sources work.

## Edit and Retry Messages

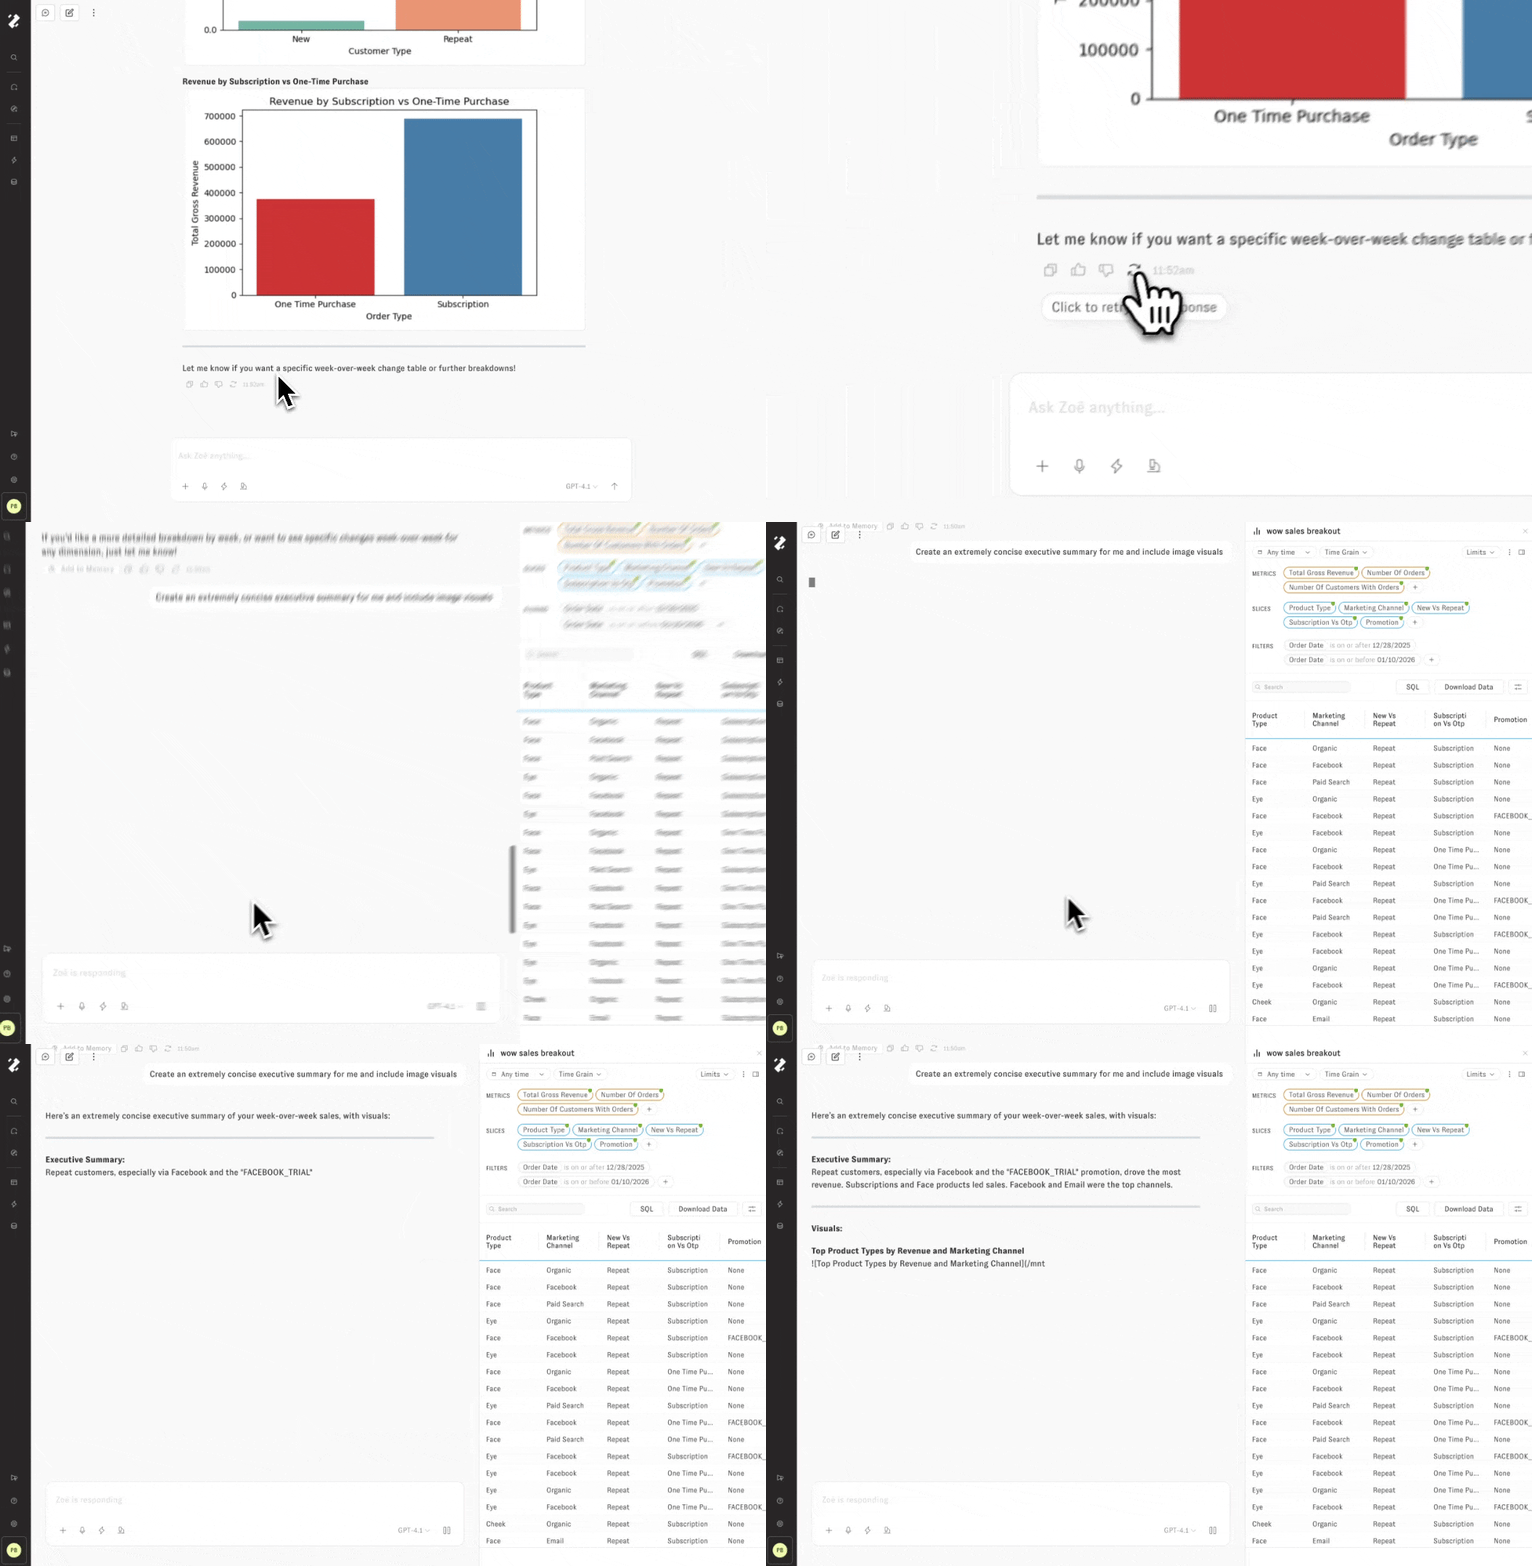
If Zoë has finished responding but the answer did not meet your expectations, use the Edit button under user messages to modify the prompt before running again, or the Retry button under assistant messages to re-run the response with the same prompt.

<figure><img src="/files/Tgw89rXxmX1qophBAOQ4" alt="Retry a response to re-run the last user message"><figcaption><p>Retry a response to re-run the last user message</p></figcaption></figure>

At any point while Zoë is responding, click the Pause button in the lower right of the Chat input to cause Zoë to quickly exit out of the current task and allow submission of a new user message.

## Dashboards (legacy)

Dashboards have been replaced by [Artifacts](/using-zenlytic/artifacts) for new visual outputs. Existing dashboards continue to work — Zoë can still search them and answer questions like "What dashboards do we have for revenue and plan?" — but new work should be built as Artifacts, which support richer output types, [Live Queries](/using-zenlytic/artifacts#live-queries), versioning, scheduled rebuilds, and delivery.

## Slack & Teams

Zoë integrates with both Slack and Microsoft Teams. You can ask questions, and she will respond to them in either interface.

### Slack

To set up the Slack integration, you can install it from the "Slack Integration" tab of the Workspace Settings menu.

To make Zoë receive a message you must tag `@Zenlytic` in every message you want Zoë to see. Unfortunately, Zoë does not automatically see messages that are added to a thread without that tag.

Additionally, you can schedule dashboards for delivery in Slack, through the scheduled reports functionality in the dashboard options or the admin panel.

### Teams

To set up the Teams integration, contact Zenlytic support, following [these instructions](/using-zenlytic/microsoft_teams_bot)

Zoë is available in DMs and in channels, but not in group DMs.


# Clarity Engine

See how the Clarity Engine validates Zoë’s SQL, enforces governance, and turns ad hoc questions into secure, reusable analysis.

The Clarity Engine is the layer of Zenlytic that interprets the SQL Zoë's LLM produces. Whenever Zoë writes a query, the Clarity Engine sits between her output and your warehouse: it validates the SQL against your semantic model, enforces your row- and column-level security, and surfaces exactly which parts of the answer came from your governed model versus which were generated on the fly to answer this question.

This is what makes Zoë's flexibility compatible with your data team's governance. The LLM produces SQL freely; the Clarity Engine doesn't let any of that SQL bypass the rules.

## Just ask!

To start using Zoë, navigate to the chat interface and simply ask her a question. If you're unsure where to begin, ask what data she has access to, or request a good follow-up question based on your prior analysis within the conversation.

Note: Providing more context about the task you're trying to accomplish, your team, and job title will make Zoë even more helpful.

![Starting a new chat with Zoë](/files/HKLzTGXapA4uxy5GiW8E)

You can ask Zoë specific questions (e.g. "Show me sales YTD compared to the prior YTD, broken out by product type") or general ones (e.g. "I don't really know what I want to see, but tell me about channel and campaign performance"). Zoë handles both, and will ask follow-up questions when she can't make reasonable assumptions about your intent.

The chat interface includes several interactive elements:

* **Plus icon**: Add attachments to your message, including images (5MB limit), CSVs, and PDFs (maximum 5 files, 25MB total), and data via the query builder
* **Microphone icon**: Click to use voice input — Zoë will capture your prompt through real-time voice transcription via your web browser
* **Lightning icon**: Opens a panel to select and run a Proactive Agent
* **Model dropdown**: Located on the right side of the input area, this allows you to change the base LLM used for Zenlytic's LLM-based agent
* **Submit**: Press "Enter" or click the up arrow button to send your message

## How the Clarity Engine interprets Zoë's SQL

Every query Zoë writes — whether against existing measures and dimensions or new ones she creates on the fly — passes through the Clarity Engine before it reaches your warehouse. The Clarity Engine does four things to that SQL:

1. **Validates against your semantic model.** Every field reference, join, and aggregation is checked against what your model defines. If Zoë references a measure or dimension that exists, the Clarity Engine uses that governed definition rather than re-deriving it.
2. **Enforces row- and column-level security.** Access filters from your model are applied to the SQL before it runs. Columns you don't have permission to see are filtered out of the query, regardless of whether Zoë used an existing field or wrote a new one.
3. **Identifies and surfaces reuse.** When Zoë's SQL leverages existing components of your semantic model, the Clarity Engine highlights it inline. You can see exactly which parts of the answer came from governed definitions and which were generated for this question only.
4. **Explains the approach.** The Clarity Engine produces a plain-English explanation of what Zoë did, including which parts of your semantic model contributed.

### Security

* **Row-level security**: Access filters defined in your data model are automatically applied to every query the Clarity Engine processes.
* **Column-level security**: Only columns you have permission to view appear in the generated SQL.
* **Semantic model integration**: Existing measures and dimensions are reused whenever possible, preserving the governance attached to them.

Expanded analytical capability never bypasses your data security and governance policies.

### Context reuse highlighting

When Zoë's SQL references components of your existing semantic model, the Clarity Engine highlights those references inline so you can see what was reused and what was new.

![The Clarity Engine highlighting re-use](/files/tJn82bYQM6f8HKQbQeMg)

Hover any highlighted reference to see exactly which measure, dimension, or relationship it came from. This is how the Clarity Engine bridges governed and ad-hoc analysis: you get the flexibility of LLM-generated SQL with the auditability of a semantic layer.

## Dynamic Fields

When Zoë needs to answer a question that the existing semantic model can't cover directly — a new ratio, a new bucketization, a new derived dimension — she creates a **Dynamic Field**. Dynamic Fields are field definitions that the Clarity Engine validates and runs alongside your governed measures and dimensions, even though they aren't (yet) part of your permanent model.

The Clarity Engine treats Dynamic Fields the same way it treats any governed field: they're validated against your semantic model, they inherit the same row- and column-level security, and they can reference your existing measures and dimensions as building blocks.

### Permissions in Dynamic Fields

The Clarity Engine follows a **component accessibility** model for security: when you have access to a measure or dimension, Zoë can use any underlying column referenced in that field's definition to create Dynamic Fields.

Consider this measure in your semantic model:

```yaml
- name: count_unique_emails
  field_type: measure
  type: count_distinct
  sql: ${TABLE}.email
  required_access_grants: [marketing_team]
```

If you have access to `count_unique_emails` through the `marketing_team` access grant, the Clarity Engine can use the underlying `email` column in multiple ways:

* **Counting**: "How many customers have Gmail addresses?"
* **Filtering**: "Show me customers who signed up with work emails"
* **Grouping**: "Break down results by email domain"
* **Custom logic**: Create new measures that reference the email column

This maintains strict access controls while giving Zoë maximum flexibility to answer your questions using the data components you're already authorized to access.

### Identifying Dynamic Fields in your results

When Zoë returns results, the Clarity Engine marks every field with a visual indicator showing whether it's governed or dynamic:

![The Clarity Engine analyzing your request](/files/bU42s4oy4pyyJTck1glH)

* **Green checkmark**: A verified field from your semantic model — governed and reusable across the platform.
* **No checkmark**: A Dynamic Field created within the context of the current question.

The Clarity Engine uses an intelligent agent-based architecture that allows Zoë to plan approaches to complex problems, use multiple tools to gather information, maintain context throughout your conversation, and update her memory to provide increasingly relevant answers.

### Promoting Dynamic Fields

When Zoë creates Dynamic Fields to answer your questions, you can promote these fields into your semantic model for reuse across the platform. Dynamic Fields appear without a green checkmark, indicating they were generated in the context of your current question and haven't yet been validated by the data team.

Note: Promoting Dynamic Fields requires developer-level permissions or above.

**To promote a Dynamic Field:**

1. Click on the Dynamic Field in your results
2. Click the three-dot menu on the right side of the field
3. Select "Promote"

![The Clarity Engine promoting a metric](/files/VNt7jHCCBpkzAnDYDuxa)

This promotion workflow transforms ad-hoc analysis into governed, reusable components that become available in [Artifacts](/using-zenlytic/artifacts), explores, [Proactive Agents](/proactive-agents/getting-started), and future conversations with Zoë. By building your semantic model this way, you create measures and dimensions based on real analytical needs rather than trying to anticipate every possible field upfront.

## Artifacts

Outputs produced through the Clarity Engine are delivered as [Artifacts](/using-zenlytic/artifacts) — rich, interactive results including apps, documents, spreadsheets, presentations, charts, and more. When Zoë's answer goes beyond a single table or chart — merging results from multiple queries, applying external assumptions, building custom visualizations, or running statistical analysis like clustering, correlation, regression, or forecasting — the result is delivered as an Artifact you can save, share, and rebuild on a schedule.

Dashboards, charts, and other HTML Artifacts use [Live Queries](/using-zenlytic/artifacts#live-queries): they re-run those queries through the Clarity Engine every time you open them, so you always see current data enforced against your own permissions.

See [Artifacts](/using-zenlytic/artifacts) for the full feature set: Live Queries, saving and organizing artifacts, update history and versioning, Auto-Rebuild, scheduled delivery to email or Slack, sharing and permissions, and web publishing.


# AI Model Selection Guide

Choose the right Zoë model based on your data complexity, speed needs, and preference for autonomy versus transparency.

Zoë supports multiple AI models that you can switch between using the model dropdown in the chat interface. Each model has different strengths, and the best choice depends on your data model complexity, the types of questions your team asks, and your preference for speed versus depth.

{% hint style="info" %}
**Default model:** Claude Sonnet 5 is the default for all workspaces.
{% endhint %}

<figure><img src="/files/tGxSQ5LvOnbHNfqwKhFh" alt=""><figcaption></figcaption></figure>

## Recommended Models

### **Claude Sonnet 5 (Default)**

The best balance of speed, accuracy, and analytical depth for most workspaces. Sonnet 5 is the default model and the recommended starting point for all users.

Strengths:

* Self-correcting — detects data quality issues mid-query and fixes them automatically without user intervention
* Strong instruction adherence — reliably follows guidance in field descriptions, topic descriptions, and system prompts
* Proactive interpretation — flags data anomalies, provides contextual narratives, and suggests follow-up analysis
* Handles complex multi-step queries including CTEs, window functions, and cross-table comparisons, with improved consistency on longer analytical chains over the previous default

Best for: General-purpose analytics, business reporting, trend analysis, and most day-to-day questions across any data model.

### Claude Opus 4.8

The most capable model available. Opus 4.8 delivers the deepest analysis and the most autonomous error recovery, making it ideal for complex data models and messy data.

**Strengths:**

* Fully autonomous — makes reasonable assumptions and delivers answers without asking clarifying questions
* Systematic error recovery — when a query returns unexpected results (nulls, zero values, broken data), Opus investigates the root cause across multiple queries and resolves the issue without user intervention
* Domain-aware — discovers business context like fiscal calendar boundaries and applies them automatically
* Highest SQL complexity ceiling — handles the most sophisticated analytical queries

**Best for:** Complex data models with many joins, workspaces with known data quality issues (null values, promotional records, inconsistent categorization), strategic analysis, and advanced analytical questions like price elasticity or forecasting.

**Trade-off:** Slower and more expensive per query than Sonnet models. For simple, well-structured data models with straightforward queries, Sonnet 5 may be equally effective and faster.

## Additional Available Models

### Claude Sonnet 4.6

The best balance of speed, accuracy, and analytical depth for most workspaces. Sonnet 4.6 is the default model and the recommended starting point for all users.

**Strengths:**

* Self-correcting — detects data quality issues mid-query and fixes them automatically without user intervention
* Strong instruction adherence — reliably follows guidance in field descriptions, topic descriptions, and system prompts
* Proactive interpretation — flags data anomalies, provides contextual narratives, and suggests follow-up analysis
* Handles complex multi-step queries including CTEs, window functions, and cross-table comparisons

**Best for:** General-purpose analytics, business reporting, trend analysis, and most day-to-day questions across any data model.

### GPT 5.5

Available for teams that prefer or require an OpenAI model.

**Strengths:**

* Highest methodology transparency — structures responses with clear sections explaining what data was queried, what issues were found, and what limitations exist
* Functional for standard reporting queries, metric extraction, and straightforward analytics

**Considerations:** GPT 5.5 may ask clarifying questions before executing when it encounters ambiguity, which adds round-trips to the conversation. It also provides less autonomous error recovery — when queries fail or return unexpected results, it tends to explain the problem and ask for user guidance rather than self-correcting. Longer field descriptions and complex multi-paragraph guidance may be followed less reliably than with Anthropic models.

**Best for:** Teams that prefer OpenAI, or users who value detailed methodology explanations over speed-to-answer.

### GPT 5.1

Available for teams that prefer or require an older OpenAI model. We would recommend using GPT 5.5 instead of this model in most scenarios.

## How to Choose

| Scenario                                                 | Recommended Model      |
| -------------------------------------------------------- | ---------------------- |
| The best combination of speed and intelligence           | **Sonnet 5** (default) |
| Complex data model with many joins                       | **Opus 4.8**           |
| Data has known quality issues (nulls, edge cases)        | **Opus 4.8**           |
| Speed is the top priority, data model is clean           | **Sonnet 4.6**         |
| Advanced analysis (elasticity, forecasting, statistical) | **Opus 4.8**           |
| Team prefers OpenAI                                      | **GPT 5.5**            |
| Not sure which to pick                                   | **Sonnet 5** (default) |


# Skills

Give Zoë persistent, on-demand instructions and reference material for complex workflows, style guides, and domain context.

Skills let you give Zoë persistent instructions, reference material, and complex analysis patterns that she loads on demand. Use skills for anything that's sometimes relevant — a fiscal calendar, a brand style guide, a multi-step reporting workflow — rather than context that needs to apply to every question.

Skills are the recommended replacement for Memories. Memories you already have will migrate to skills automatically in a future release; for new context, prefer skills from the start. See [Migrating from Memories and Topics](/migrations/migrating-from-memories-and-topics) for side-by-side examples.

## When to use a skill

Skills sit alongside the system prompt and view/field descriptions as one of several ways to give Zoë context. The right surface depends on when Zoë should see the context:

| Surface                                     | Visibility                               | Best for                                                                       |
| ------------------------------------------- | ---------------------------------------- | ------------------------------------------------------------------------------ |
| **System prompt**                           | Every question, always                   | Universal rules, default behaviors, terminology, data freshness, join routing  |
| **Skills**                                  | On demand — Zoë loads them when relevant | Complex analysis patterns, fiscal calendars, brand style, multi-step workflows |
| **View `description` / `zoe_description`**  | When the view is in context              | Table-level guidance — join paths, data caveats                                |
| **Field `description` / `zoe_description`** | After a field search                     | Field-level disambiguation and calculation notes                               |
| **Memories** (legacy)                       | Top 5 semantically matched per query     | Legacy — prefer skills. Existing memories will migrate automatically.          |

Good candidates for a skill:

* **Fiscal calendars**, especially non-standard ones like 4-5-4 retail calendars.
* **Industry-specific analysis patterns** — e.g., funnel analyses for SaaS, cohort analyses for consumer, contribution margin for marketplaces.
* **Multi-step workflows** — e.g., weekly business review, monthly board deck, QBR preparation.
* **Brand style and visual preferences** — via the built-in Brand Style Guide skill (see below).

Skills have no hard character limit, so they're a good fit for detailed instructions that don't belong in the system prompt.

## Accessing skills

You can access skills in two ways:

* **Context Manager** — Open the Context Manager from any chat to view and manage your skills.

<figure><img src="/files/vx3VZnJCS8xb6WzAKVuT" alt=""><figcaption></figcaption></figure>

## Setting up your Brand Style Guide

The best way to get started with skills is to set up your **Brand Style Guide**. This is a built-in skill where you describe your brand's colors, aesthetic, typography, and any other visual preferences you want applied to your artifacts. In a single sentence, you can completely change the look of everything Zoë creates.

For example, you might write:

> Use a dark navy (#1B2A4A) and gold (#D4A843) color palette with clean, modern typography and minimal borders.

Once saved, Zoë will apply your brand style to dashboards, presentations, apps, and every other artifact she builds.

<figure><img src="/files/NzV3tSB1Ks2l548eXtOS" alt=""><figcaption></figcaption></figure>

## Uploading reference files

In any skill, you can upload up to **5 files** to give Zoë reference material. This is useful for assets like logos, style sheets, or example documents that Zoë should use when creating artifacts.

For example, try uploading your company logo. Give it a description like "Our company logo — place it in the upper left corner of presentations and dashboards." Zoë will then have access to your logo for artifact creation and can include it in PowerPoint presentations, dashboards, and more.

## Creating a new skill

To create a new skill:

1. Open skills from the Context Manager.
2. Click **Create Skill** (or the equivalent button).
3. Give the skill a **name** — something descriptive like "Weekly Report Format" or "Brand Style Guide."
4. Write a **description** — a short summary of what the skill does. Zoë uses the description to decide when to load the skill, so be specific about the kinds of questions or requests that should trigger it.
5. Add **instructions** — detailed directions for Zoë on what she should do when this skill is active. Be as specific as you like.
6. Optionally, upload up to 5 reference files.
7. Save the skill.

<figure><img src="/files/STRNdaD9UJLj4QxXRg5J" alt=""><figcaption></figcaption></figure>

## Skill properties

Each skill is a markdown file with YAML front matter at the top:

```yaml
---
name: Weekly Report Format
description: How to structure and format the weekly business review.
enabled: true
---
```

* **`name`** (required) — the skill's display name.
* **`description`** (required) — a short summary of what the skill does. Zoë uses the description to decide when to load the skill, so be specific about when it should apply.
* **`enabled`** (optional) — controls whether Zoë can see the skill. Set `enabled: false` to hide the skill from Zoë. If `enabled: true` is set, or the property is omitted, Zoë sees the skill.

Skills migrated from memories may also include metadata like a skill ID, migration ID, and migration timestamp. You can safely remove these, but we recommend leaving them in place as a record of when the content was migrated.

## Who can create skills?

Skill management is gated by role. Only **Developer** and **Admin** tier users (Develop, Develop without Deploy, Admin, and Organization Admin) can create, edit, or delete skills, since skills affect context for the entire organization. Users in the **Explorer** tier (Explore, View, Restricted, Embed, Embed with SQL, Embedded with Scheduling) cannot manage skills, but they can still use skills that Developer and Admin users have set up.

## Skills vs. the system prompt

Both are ways to give Zoë instructions, but they serve different roles:

* **The system prompt is on every question.** Put universal rules there — default time ranges, terminology definitions, data freshness rules, "always prefer net revenue over gross" — anything Zoë should always consider.
* **A skill is loaded on demand.** Zoë decides when a skill is relevant based on its description and the user's question. Put context there that's only sometimes relevant.

A common pattern: keep the system prompt short and focused on always-on rules, and use skills for longer, situational playbooks.

## Skills vs. Memories

Memories and skills overlap in purpose — both capture reusable context — but skills are strictly more capable:

* Memories retrieve the top few by semantic match; skills are selected based on a description you write.
* Memories are tied to chat responses; skills are standalone documents you can iterate on.
* Memories have no hierarchy; skills can be as long and structured as you need.

Memories you have today will migrate to skills automatically. You don't need to convert them manually. For new context, create a skill.

## Verifying skill usage

Once a skill is created, you can see it in action by reading Zoë's tool calls in any conversation. Look for **skill usage** in the tool call details to confirm that Zoë is applying your skill's instructions.

<figure><img src="/files/RahbkT4ApaNLhnuCkmCH" alt=""><figcaption></figcaption></figure>


# Attachments

Attach files and queries in chat so Zoë can analyze external data and use structured results as context.

Attachments let you bring external files and structured queries directly into your conversation with Zoë. Use them to ground your analysis with specific data — whether that's a CSV from a colleague, a PDF report, or a query against your data model.

## Attachments dropdown

Click the **+** icon in the chat input to open the attachments dropdown. From here, choose one of two options:

* **Upload a file** — Attach CSVs, images, PDFs, and other supported file types (up to 5 files per message, 25 MB each).
* **Run a query** — Build a query from your data model's metrics and slices, or write raw SQL, and attach the results.

<figure><img src="/files/QAjICgpVa0z2NCnVKyLt" alt=""><figcaption><p>The attachments dropdown in the chat input</p></figcaption></figure>

## File attachments

Upload files when you need Zoë to work with data that lives outside your warehouse — spreadsheets, exported reports, screenshots, or reference documents.

### CSV example

Select a CSV from the upload dialog to attach it to your message. Zoë reads the file contents, infers the schema, and treats the data as first-class context for the rest of the conversation.

{% hint style="info" %}
**CSV attachments in chat don't persist to your data model.** Files uploaded in a chat conversation are used only within that conversation (including in any [Artifacts](/using-zenlytic/artifacts) Zoë creates) — they don't create views or fields that Zoë can query later. For persistent data, upload the file through [Context Manager](/data-modeling/context_manager) instead; that creates a proper view that Zoë can reference from any question.
{% endhint %}

<figure><img src="/files/ikdsQz01qtJgE4pxjoWh" alt=""><figcaption><p>Attaching a CSV file to the conversation</p></figcaption></figure>

Once the file is attached, ask Zoë to chart the data, compute summary statistics, or surface trends. She has full access to the file contents and can reference specific rows and columns in her responses.

<figure><img src="/files/Yo6nTOHDRGyV0JIl4Exi" alt=""><figcaption><p>Zoë analyzing an attached CSV with charts and narrative insights</p></figcaption></figure>

## Query attachments

Query attachments let you build and run structured queries against your data model without leaving the conversation. Select metrics, apply slices and filters, review the results, and then ask Zoë follow-up questions — all in one place. In Exploratory mode, you can also write or paste raw SQL instead of selecting metrics and slices.

### Beyond the Explore page

If you're familiar with a traditional BI Explore page, think of query attachments as the conversational equivalent of an Explore page. Rather than context-switching to a separate query builder, you compose the same kind of query — metrics, dimensions, filters — right inside the chat input.

To start a fresh exploration, click the **New Explore** button in the navigational sidebar. This opens a new chat with a blank query attachment pre-loaded and selected, so you can immediately begin defining your query. From there, run the query, review the results, and continue the conversation with Zoë to refine your analysis, add visualizations, or drill into the data.

### Building a query attachment

Select **Run a query** from the attachments dropdown, then search for metrics and slices from your workspace to assemble a query. Zoë uses the returned results as context when answering your message.

<figure><img src="/files/Js8bq7ILbOJBnh5joQTD" alt=""><figcaption><p>Selecting metrics and slices for a query attachment</p></figcaption></figure>

### Visualizations

After you attach a query, Zoë can generate charts and visualizations from the results. She identifies the appropriate chart type based on the data shape and highlights key takeaways automatically.

<figure><img src="/files/xT1DkaZKtByEKJgCyzO9" alt=""><figcaption><p>Zoë generating a visualization from attached query results</p></figcaption></figure>

### Citations

When Zoë references specific values from an attached query in her written analysis, each value includes a citation. Click any citation to trace it back to the exact row and calculation in the source data — giving you full transparency into how every number was calculated.

<figure><img src="/files/9RKpDDh3YXdDFMM1JGS9" alt=""><figcaption><p>Inline citations linking narrative text back to query results</p></figcaption></figure>


# Web Search

Enable Zoë to search the web for real-time context and cite external sources alongside your internal data.

Zoë can search the web for real-time information to supplement her data analysis. This is useful when you need external context alongside your internal data — for example, comparing your metrics against industry benchmarks, understanding market trends, or referencing recent events.

> **Note:** Web Search is currently available only when using Anthropic models (e.g. Sonnet 4.6, Opus 4.6). If a non-Anthropic model is selected for the conversation, the Web Search toggle will not appear.

## Enabling Web Search for the Workspace

Web Search must first be enabled at the workspace level by an admin. Navigate to **Settings > Zoë** and toggle **Web Search** on. Once enabled, all users in the workspace will have the option to activate Web Search in their conversations.

<figure><img src="/files/BEw04VqwCXkKtvieRUev" alt="Enabling Web Search in the Zoë workspace settings"><figcaption><p>Enabling Web Search in the Zoë workspace settings</p></figcaption></figure>

## Enabling Web Search per Conversation

Once the workspace-level setting is enabled, Web Search can be toggled on or off for each individual conversation. Click the **Globe icon** in the toolbar below the Chat input to reveal the Web Search toggle, then switch it on for that conversation. When enabled, Zoë will be able to search the web as part of her response.

<figure><img src="/files/5OXvG08zF6hEHkpLt1vi" alt="Toggling Web Search on for an individual conversation"><figcaption><p>Toggling Web Search on for an individual conversation</p></figcaption></figure>

The toggle is persistent for the conversation — once turned on, Zoë will have access to web search for all subsequent messages in that thread until you turn it off.

## How It Works

When Web Search is active and Zoë determines that external information would help answer your question, she will search the web before composing her response. You will see a "Searching the web for..." indicator in the chat while the search is in progress. Zoë synthesizes the search results into a coherent answer, combining external context with any data she pulls from your governed data model.

Common use cases include:

* **Industry benchmarks** — "How does our 15% churn rate compare to the SaaS industry average?"
* **Market context** — "What macroeconomic trends might explain the drop in Q4 sales?"
* **Product research** — "What are the latest best practices for customer onboarding?"
* **Current events** — "Are there any recent supply chain disruptions that could affect our forecast?"

## Cited Sources

When Zoë uses web search to answer a question, she cites the sources she found directly in her response. Each piece of externally sourced information is accompanied by a domain-level citation badge (e.g. `docs.zenlytic.com`, `snowflake.com`) so you can see exactly where the information came from and verify it yourself.

<figure><img src="/files/DlBuJXV0uPFGbekgvtNq" alt="Zoë citing web sources in a response"><figcaption><p>Zoë citing web sources in a response</p></figcaption></figure>

These web citations are separate from Zoë's existing data citations, which reference specific query results from your governed data model. When both are present in the same response, you can easily distinguish between externally sourced context and internally queried data.


# Patterns

Index past analytical queries so Zoë can reuse proven SQL patterns when the semantic model alone is not enough.

{% hint style="info" %}
**Beta:** Patterns is currently in beta. During the beta period, only Snowflake connections are supported. Expanded warehouse support is in development.
{% endhint %}

Every analytical query your team has run — across dashboards, reports, and ad hoc analysis — reflects institutional knowledge about your data: trusted tables, correct joins, proper filters, and how raw columns map to business metrics.

Patterns index that query history so Zoë can use it. When the governed data model fields aren't enough to fully answer a question, Zoë searches your indexed patterns for similar SQL, adapts the best match, and uses it to generate an accurate result. Governed field definitions always take precedence — Patterns complement your data model, not replace it.

### How it works

{% stepper %}
{% step %}
**Sync**

Zenlytic connects to your data warehouse and pulls recent analytical queries. Queries are normalized, deduplicated, and indexed using semantic embeddings so they can be searched by meaning, not just keyword.
{% endstep %}

{% step %}
**Search**

During a conversation, when Zoë determines that the data model fields alone can't answer a question, she automatically searches the indexed patterns for similar queries. She selects the most relevant matches, adapts them to the current question, and uses them to generate SQL.
{% endstep %}
{% endstepper %}

### Where Patterns fits

Patterns, memories, and system prompts each serve a different role in shaping how Zoë answers questions.

* **Patterns** are the lowest-effort starting point — especially early in your Zenlytic setup when institutional knowledge lives implicitly in your query history rather than in a formal data model. No curation required; Zoë starts learning from SQL your team has already written. As your workspace matures, Patterns keeps filling the gaps for concepts that haven't been formalized yet.
* **Memories** are for explicit, curated knowledge — when you've seen a correct answer and want Zoë to reproduce it consistently. Best for pinning specific metric definitions or query patterns that matter enough to deliberately save.
* **System prompts** shape how Zoë behaves globally — tone, response format, and general business context that should apply to every conversation.

### Setting up Patterns

{% stepper %}
{% step %}
Go to **Settings → External Context**.
{% endstep %}

{% step %}
Under the **Query History** tab, you'll see a table of all your workspace connections.
{% endstep %}

{% step %}
Toggle on the connection(s) you want to use as a source for Patterns.
{% endstep %}

{% step %}
Click **Sync** to run the first sync for that connection.

Once a connection is enabled, Zenlytic automatically syncs new queries from that connection every 24 hours.

> **Note:** The connection role must have access to `ACCOUNT_USAGE` in Snowflake.
> {% endstep %}
> {% endstepper %}

### What gets synced

Zenlytic only indexes analytical queries — specifically, `SELECT` and `WITH` statements that reference tables in your workspace's data model. All other query types are filtered out during sync, including:

* DDL and DML statements (`CREATE`, `INSERT`, `UPDATE`, `DELETE`, etc.)
* Queries from ETL and data pipeline service accounts (Fivetran, Airbyte, dbt, and similar)
* Queries against system and metadata schemas (`INFORMATION_SCHEMA`, `ACCOUNT_USAGE`, etc.)
* Queries referencing staging, temporary, or dbt-intermediate tables
* Trivial or non-analytical queries (e.g. `SELECT 1`)
* Queries that don't reference any table in your data model

During the beta, Zenlytic indexes up to 10,000 query patterns per workspace. When the limit is reached, the oldest and least-frequently-run patterns are pruned automatically to make room for newer ones.

### Managing syncs

The Query History table shows the sync status and last successful sync time for each enabled connection. You can manually trigger a sync at any time by clicking **Sync** — useful after a major schema change or when you want to pull in a recent batch of queries without waiting for the next automatic sync.

Sync status options:

* **Never synced** — the connection has been enabled, but no sync has run yet.
* **Syncing** — a sync is currently in progress.
* **Last Successful Sync: \[time]** — the most recent sync completed successfully.

### How Zoë uses Patterns in chat

When Patterns is active, Zoë automatically decides when to use it — no prompting required. If she determines that the data model fields available aren't sufficient to answer the question, she searches your indexed patterns.

In the chat thread, this appears as an interactive tool call labeled **Searching for \[topic] queries and definitions**. Click it to expand and see which keywords Zoë searched for, which patterns were returned, and a plain-language description of what each query does.

Zoë then adapts the most relevant pattern — preserving the correct joins, aggregations, and filters — to match the exact question being asked.

### Limitations

<details>

<summary>View limitations</summary>

* **Beta:** Only Snowflake connections are supported during the beta period.
* **Query coverage:** Patterns is only as useful as the queries your analysts have run. If a question requires SQL that no one on your team has written before, Patterns won't have a relevant match.
* **Access-controlled:** Zoë won't surface a pattern to a user if that user doesn't have access to the fields or tables referenced in the query.
* **Capacity:** Up to 10,000 query patterns are indexed per workspace during the beta. Older and less-frequently-used patterns are pruned automatically when the limit is reached.

</details>


# Artifacts

Create, organize, share, and rebuild the artifacts Zoë builds across your conversations.

Artifacts are rich, interactive outputs that Zoë creates for you. They can be a wide variety of types — interactive apps, written documents, data spreadsheets, slide presentations, and more. Use the Artifacts page to organize, revisit, and share everything Zoë has built across your conversations.

## What makes up an artifact

Each artifact bundles together four components:

* **Output file** — The document you see and share (an HTML dashboard, chart, spreadsheet, PDF, or image).
* **Source code** — The code Zoë used to generate it.
* **Data** — The [Live Queries](#live-queries) an artifact runs to get its data, and any CSVs or uploaded files included in it.
* **Memory** — An auto-generated summary of the artifact's purpose, context, and change history.

## Live Queries

Live Queries keep an artifact's numbers current. Dashboards, charts, and other HTML artifacts don't store the results Zoë pulled — they store the queries behind them and re-run those queries against your warehouse every time you open the artifact. Open a dashboard Zoë built last month and you see this morning's data, with no action on your part.

Artifacts created before Live Queries were available don't gain them on their own, and rebuilding one won't convert it. To add Live Queries to an existing artifact, ask Zoë to do it.

{% hint style="info" %}
**Live Queries run with your permissions.** When you open an artifact, its Live Queries run as you, scoped to the data you're allowed to see. Two people can open the same artifact and see different numbers, and you will never see data in an artifact that you couldn't query yourself.
{% endhint %}

Because Live Queries only run inside Zenlytic, an artifact that uses them can't be [published to the web](#publishing-to-the-web).

### Interactive controls

Zoë can build controls into an artifact and templatize the SQL behind it, so the controls feed the query directly instead of just filtering numbers that were already fetched. Change a control and the Live Queries it drives re-run with your new selections, and every tile fed by those queries reloads in place.

Ask for the controls you want and Zoë wires them into the SQL — date ranges and presets, time granularity, a comparison period, or filter menus for the dimensions you care about. In the example below, the artifact offers date range presets, a **Day**/**Week**/**Month**/**Qtr** granularity toggle, a **Prior period** or **Last year** comparison, and searchable multi-select menus for account, tier, company size, role, and feature area.

<figure><img src="/files/uQup9LrD1mmdaTCooPIz" alt="An artifact header with date range presets, a granularity toggle, comparison options, and filter menus, with a company size filter open and the tiles below reloading"><figcaption><p>Changing a filter re-runs the Live Queries behind every affected tile</p></figcaption></figure>

Selections you've made appear as chips beneath the controls, so you can see the current state of the artifact at a glance and remove any one of them, or click **Reset all** to start over. The header shows a **Data as of** timestamp with a **Refresh** button, so you can re-run everything without changing a selection.

Because the queries are parameterized rather than rewritten, you're exploring inside the analysis Zoë already built — no new chat turn, and no rebuild. When you want the analysis itself to change, ask Zoë in a chat instead.

### Making a query static

Live Queries are the default for HTML artifacts. Unless you say otherwise, Zoë builds dashboards, charts, and apps to re-query when they open.

If you'd rather have fixed numbers, ask Zoë to make the query static. She bakes the results into the artifact when she builds it, so it shows the same numbers every time anyone opens it. Reach for this when you want a snapshot that can't move underneath you — a month-end figure you're circulating for review, or an artifact you want to [publish to the web](#publishing-to-the-web), which only works without Live Queries.

Asking Zoë to make a static query live again works the same way. Either change is an edit to the artifact, so it creates a new version in the [update history](#update-history).

### Output types without Live Queries

Presentations (`.pptx`), spreadsheets (`.xlsx`), PDFs, and images are finished files — they can't run a query when someone opens them, so their numbers are captured when Zoë builds them. Reopening a presentation next quarter shows the same numbers it showed the day it was created.

To bring one up to date, use [Auto-Rebuild](#auto-rebuild) to regenerate it on a schedule, or click **Rebuild Now** to regenerate it immediately.

## Organizing artifacts with folders

Artifact folders let teams organize saved artifacts into shared workspace areas. A personal artifact can be shared directly with users or groups; once it is moved into a folder, the folder controls who can access it.

For more on how folders work, see [Artifact Folders](/using-zenlytic/artifacts/artifact-folders). For access levels, direct shares, groups, and troubleshooting, see [Artifact Folder Permissions](/using-zenlytic/artifacts/artifact-folder-permissions).

## Artifacts in chat

Zoë creates artifacts automatically whenever a visual output would be helpful — or when you ask her to build something. Artifacts appear inline in the chat, and you can click on one to expand it in the side drawer.

<figure><img src="/files/s8N3FdD9PswP3iyi22Tn" alt=""><figcaption></figcaption></figure>

If an artifact is something you'd like to keep and come back to, click **Save to my artifacts**. The artifact will then appear in your Artifacts gallery alongside everything else you've saved.

<figure><img src="/files/csqy1MOBs4oh7SOdIxIU" alt=""><figcaption></figcaption></figure>

## Creating a new artifact

You can also create artifacts directly from the Artifacts page. Click the **+ Create New Artifact** button in the upper right corner. A dropdown lets you choose the type of artifact to create:

* **App** — An interactive application.
* **Document** — A rich text document.
* **Spreadsheet** — A data spreadsheet.
* **Presentation** — A slide presentation.
* **Other** — Any other artifact type.

Selecting a type opens a new chat with Zoë where you can describe what you'd like to create.

<figure><img src="/files/k6e3XK1HMwQgdqzw9f1l" alt=""><figcaption></figcaption></figure>

## Opening and editing an artifact

Click any artifact on the Artifacts page to open it in a side drawer. From the drawer you can preview the artifact, share it with others in your organization, or schedule it to rebuild automatically.

<figure><img src="/files/47z1BjOv4GUaL6UEPzyv" alt=""><figcaption></figcaption></figure>

To edit an artifact, click **Edit in a new chat** from the three-dot menu in the drawer header. This opens a new chat with the artifact attached, so you can tell Zoë what you'd like to change. Zoë will update the artifact and a new version will appear in the [update history](#update-history).

<figure><img src="/files/Ph98bjZA6tXlGSu5GWvZ" alt=""><figcaption></figcaption></figure>

## Visual Editor

{% hint style="info" %}
**The Visual Editor is only available for HTML-based artifacts.** Use it for artifacts like dashboards, charts, and other custom apps.
{% endhint %}

Open the **Visual Editor** from the artifact menu bar to make targeted changes directly on the artifact. Move your mouse around the document to see a blue rectangle around the element you are selecting. Click the element you want to change, write a short description of the change, and click **Queue change**.

<figure><img src="/files/e6GcdrlvgcgxvNeaYkS7" alt="Visual Editor selection rectangle and Queue change prompt"><figcaption></figcaption></figure>

You can queue up to 20 changes before applying them. Open the queued changes menu to review everything you have queued, edit a change, or remove a change before applying it.

<figure><img src="/files/EUURNducZKdHaOToBaYv" alt="Queued changes menu with three pending edits"><figcaption></figcaption></figure>

When your queued changes are ready, click **Apply Queued Changes**. Review the updated artifact, then click **Save Changes** if you are happy with the result. Saving creates a new version of the artifact in the [update history](#update-history).

<figure><img src="/files/ke8niC2u3EwlVWgTpotK" alt="Updated artifact with unsaved changes and Save Changes button"><figcaption></figcaption></figure>

If you do not like the result, queue more changes and apply them again, or close the Visual Editor without saving.

## Update history

Every artifact uses immutable, append-only versioning — nothing is overwritten or deleted. New versions are created when you edit the artifact and save your changes, or when a scheduled [rebuild](#auto-rebuild) runs. Live Queries pulling fresh data do not create a version; only changes to the artifact itself do.

Click the **Updated** timestamp on an artifact to open its update history. The history panel displays every version of the artifact, letting you time-travel through past states. Each version includes an edit message describing what changed.

From the three-dot menu on any version, you can:

* **View Artifact Memory** — See the context Zoë used when creating that version.
* **Download** — Download the artifact as it existed at that point in time.
* **Edit from this version** — Start a new edit based on an older version of the artifact.

<figure><img src="/files/QTegf7HD16NSdPbT4PSb" alt=""><figcaption></figcaption></figure>

## Auto-Rebuild

Auto-Rebuild completely regenerates an artifact on a schedule — Zoë re-runs the analysis, regenerates the sources, and saves a new version.

Use it to keep [output types without Live Queries](#output-types-without-live-queries) current, since their numbers won't change on their own. You can also use it on an artifact that does use Live Queries when you want Zoë to revisit the analysis itself, not just the numbers — to simply see the latest data, reload the page.

Click the **Auto-Rebuild Off** button in the artifact drawer header to open the Auto-Rebuild settings. Toggle **Enable Auto-Rebuild**, then configure:

* **Frequency** — How often to rebuild (daily, weekly, monthly, or a custom cron expression).
* **Time** — What time of day to run the rebuild, shown in your local timezone.
* **Instructions** — Optional directions for Zoë to follow during each rebuild. For example: "Highlight any outliers in the data and write short blurbs about their trends."

Click **Save** to apply the schedule.

<figure><img src="/files/roL6PrNl9DMi78pHgYj4" alt=""><figcaption></figcaption></figure>

To rebuild immediately without waiting for the next scheduled time, click **Rebuild Now**.

Every rebuild appears in the artifact's [update history](#update-history), so you can see how the artifact has changed over time.

## Delivery

Artifacts can be delivered on a recurring schedule to **email** or **Slack**. A single artifact can have multiple delivery schedules — for example, email to leadership on Mondays and Slack to #data-team daily.

Before each delivery, Zenlytic re-runs any Live Queries in the artifact and renders it with the results, so recipients get current data. Those queries run as the person who owns the delivery schedule, using that person's permissions — so everyone on the schedule sees the schedule owner's view of the data. Keep that in mind when adding recipients whose own access is narrower.

### Email delivery

* Inline image preview of the artifact. Wide or scrollable content may be cropped in the preview.
* Optional attachment of the artifact’s current output file in its original format. Attachments are not converted; HTML remains HTML, and PDF is attached only when the output is already a PDF. Artifacts that use Live Queries are not attached — see [Delivering artifacts with Live Queries](#delivering-artifacts-with-live-queries).
* Optional “View in Zenlytic” link. Recipients must have access to the artifact.

### Slack delivery

* Message with the artifact name and description.
* Optional file upload to the channel.

### Delivering artifacts with Live Queries

An artifact's file can't run its Live Queries outside Zenlytic, so deliveries skip the attachment even when **Include attachments** is on. Recipients get the preview image and a **View in Zenlytic** link instead, along with a short note explaining why no file was attached. Opening the artifact from that link runs the Live Queries with the recipient's own permissions.

The preview image itself is rendered with the schedule owner's permissions. Deliveries go to email addresses and Slack channels rather than to verified Zenlytic accounts, so there's no recipient identity to scope those queries to.

### Run history

From the **Schedule Artifact Delivery** modal, click the **Run History** tab to review every past delivery run for the artifact. Use the run history to confirm that a scheduled delivery went out, troubleshoot a missed send, or jump back to the chat that produced a particular delivery.

Each row in the table represents a single run and shows:

* **Schedule** — The delivery schedule that triggered the run.
* **Triggered** — When the run started, in your local timezone.
* **Finished** — When the run completed, with the total duration in parentheses. A dash (`—`) means the run is still in progress.
* **Status** — The current state of the run: **Processing** while it is running, **Delivered** once it has been sent, or an error state if it failed. Hover over the "Failed" chip to see technical details about the issue.
* **Chat** — A **View chat** link that opens the Zoë conversation behind the run, so you can inspect what Zoë did to generate and send the delivery.

Use the search bar above the table to filter by schedule name, and use the column headers to sort or filter — for example, sort by **Triggered** to see the most recent runs first, or filter **Status** to show only failed runs.

Run history covers deliveries that rebuild the artifact. Deliveries that only re-run Live Queries and re-render the artifact have no Zoë conversation behind them, so they don't appear in the table.

<figure><img src="/files/nkdxQw8kRR9EmC7Frd6I" alt="Run History tab in the Schedule Artifact modal, listing past delivery runs with their triggered time, finished time, status, and a link to the originating chat"><figcaption><p>The Run History tab showing recent delivery runs for an artifact</p></figcaption></figure>

## Sharing and permissions

Click the **Share** button in the artifact drawer to share an artifact with others in your organization. From the Share tab, select a user group and assign a permission level. Click **+ Add Group** to grant access to additional groups.

<figure><img src="/files/2h6rvoJJo0YmhMAwDzdc" alt=""><figcaption></figcaption></figure>

### Access levels

| Role       | Capabilities                                                            |
| ---------- | ----------------------------------------------------------------------- |
| **Owner**  | Full control — edit, delete, share, configure Auto-Rebuild and delivery |
| **Editor** | Edit name and description, create new versions                          |
| **Viewer** | Read-only access                                                        |

You can share with workspace groups (including "All Users") or with individual users. Workspace admins always have access.

These access levels control who can open and manage an artifact. They don't widen anyone's data access: when someone opens an artifact, its [Live Queries](#live-queries) run with that person's own data permissions, so they only see data they could query themselves.

## Publishing to the web

{% hint style="warning" %}
**You can't publish an artifact that uses Live Queries.** A published artifact is served outside Zenlytic to people who may not have a Zenlytic account, so there is no way to run those queries or apply anyone's data permissions — it would publish as an empty shell. Publishing is disabled for artifacts that use Live Queries, and the **Publish** button explains why when you hover it.

To publish something to the web, ask Zoë for a version without Live Queries, or publish an [output type that doesn't use them](#output-types-without-live-queries).
{% endhint %}

To make an artifact publicly accessible, click the **Share** button and open the **Publish** tab. Click **Publish** to generate a unique public URL and an embed script that anyone can use to access the artifact — no Zenlytic account required.

<figure><img src="/files/mmImMyIP0xfplpN1LHHx" alt=""><figcaption></figcaption></figure>

Once published, the artifact displays a **Public** chip on the Artifacts page. A public link and an iframe embed script are provided so you can share the artifact or embed it on another site.

<figure><img src="/files/bqNCOuLVEKeTFsScAkfu" alt=""><figcaption></figcaption></figure>

Editing or rebuilding an artifact does not automatically update the published version. When you're ready for the latest version to go live, click **Publish latest version**. To remove public access entirely, click **Unpublish**.

If you edit a published artifact and the new version starts using Live Queries, the existing public link keeps working — it's a snapshot of the version you published — but **Publish latest version** is disabled, because the newer version can't run outside Zenlytic.

<figure><img src="/files/fMnWNd3tn8KwcyOzfsYZ" alt=""><figcaption></figcaption></figure>

## Artifact memory

Every artifact has an artifact memory — a detailed summary of the artifact's purpose, your instructions, version history, and key context. Zoë references this memory whenever you work with the artifact in a chat, so she understands what the artifact is, what you like and dislike about it, and how it has evolved over time.

To view an artifact's memory, click the three-dot menu in the artifact drawer header and select **View Artifact Memory**.

<figure><img src="/files/oumx2hUVOCowEAjJdA7a" alt=""><figcaption></figcaption></figure>

## Sources

Click the **Sources** button in the artifact drawer header to see every data source behind an artifact and how fresh each one is.

<figure><img src="/files/peN5S8Cko1zzTRHlh05U" alt="Sources panel open in the artifact drawer, listing the data sources behind the dashboard"><figcaption><p>The Sources panel listing an artifact's data sources</p></figcaption></figure>

Sources are grouped by how they get their data:

* **Live** — A [Live Query](#live-queries), re-run every time you open the artifact. Updates automatically, so no manual refresh is needed.
* **Static** — Data captured when the artifact was built, such as query result files, uploaded files, and intermediary files Zoë created. It does not refresh, so it may be outdated.

The panel header shows **Data as of** with the time the Live Queries last ran. Click the refresh icon to re-run every Live Query and pull current data without rebuilding the artifact.

### Inspecting a Live Query source

Open a Live Query source to see exactly what it asked your warehouse for. The **Explanation** tab describes the query in plain language and names every field it uses; switch to the **SQL** tab to read the SQL Zenlytic ran. Below the description:

* **Fields** — Each metric and dimension the query selected.
* **Filters** — The filters applied, including the date ranges that define the periods being compared.
* **Results** — The rows the query returned. Search within them, adjust which columns are shown, or click **Download Data** to export them.

The source also reports how many rows came back and how long ago it ran. If a query fails, the source shows the error and a red chip appears on the affected part of the artifact, so a single broken query doesn't take down the rest.

<figure><img src="/files/d4KaYNROeBsVygeZrVYM" alt="An open Live Query source showing its explanation, fields, filters, and returned rows, with the dashboard tile it feeds spotlighted and marked with a lettered chip"><figcaption><p>A Live Query source opened next to the tile it feeds</p></figcaption></figure>

### Inline sources

Every source is tied to the part of the artifact it powers, so you can trace any number on screen back to the query behind it:

* Hover a source in the list to outline the chart, table, or tile it feeds.
* Open a source to spotlight that element — everything else in the artifact dims, so you can see at a glance how much of the result one query is responsible for.
* While the panel is open, each connected element wears a lettered chip matching its source, letting you read the artifact and the source list side by side.

Because the mapping runs both directions, you can start from a number you want to check and open the source that produced it, or start from a source and see everything it feeds.

Inline sources appear only when the artifact supports them. An older artifact may still list its sources in the panel without tying them to individual elements — rebuild it, or ask Zoë to update it, to get the inline behavior.

### Editing a source

Click **Edit this data source** on a source to change the query behind it. Describe what you want and click **Queue change**. Source edits queue alongside your other [Visual Editor](#visual-editor) changes, so click **Apply Queued Changes** to run them and **Save Changes** to keep the result.

Use the Sources panel to review where an artifact's data came from, confirm how current it is, and verify the numbers behind any part of the result.

## Supported output types

These are formats Zoë can create as artifact outputs. They are not export or email-conversion options.

| Output type               | Data                                                          |
| ------------------------- | ------------------------------------------------------------- |
| HTML apps and dashboards  | [Live Queries](#live-queries) — re-run every time you open it |
| Charts and visualizations | [Live Queries](#live-queries) — re-run every time you open it |
| Spreadsheets (.xlsx)      | Captured at build time                                        |
| Presentations (.pptx)     | Captured at build time                                        |
| PDFs                      | Captured at build time                                        |
| Images                    | Captured at build time                                        |

Scheduled delivery attaches the output file as-is for output types without Live Queries. Artifacts that use Live Queries are delivered as a preview and a link instead — see [Delivering artifacts with Live Queries](#delivering-artifacts-with-live-queries).

## Limitations

* Artifacts that use Live Queries cannot be published to the web.
* An individual Live Query times out after about 2 minutes.
* Rebuild timeout is 1 hour per run.
* Public share links are pinned to a specific version — they do not auto-update when new versions are created.


# Artifact Folders

Organize shared artifacts into team folders and manage access through folder-level permissions.

Artifact folders help teams organize saved artifacts into shared workspace areas. Use folders for artifacts that should be managed by a team, department, project, or recurring business process.

Folders are part of the Artifacts page. They sit alongside personal artifacts, but they change how access works: once an artifact is in a folder, the folder controls who can access it.

## Personal artifacts and foldered artifacts

Artifacts can be in one of two states:

| State                 | What it means                                                                               | How access works                                                              |
| --------------------- | ------------------------------------------------------------------------------------------- | ----------------------------------------------------------------------------- |
| **Personal artifact** | The artifact does not live inside a folder. It can be shared directly with users or groups. | The creator, workspace admins, and direct shares can access it.               |
| **Foldered artifact** | The artifact has been moved into a workspace folder.                                        | The folder's permissions control access. Direct artifact shares do not apply. |

An artifact can only live in one folder at a time. Moving it to another folder changes which folder controls access.

{% hint style="warning" %}
When you move a personal artifact into a folder, Zenlytic removes its direct artifact shares. Anyone who needs access must have access to the destination folder.
{% endhint %}

## When to use folders

Use folders when an artifact should be managed as part of a shared collection instead of one person's personal artifact.

Common patterns include:

* **Department folders** such as Finance, Sales, Marketing, or Customer Success.
* **Executive reporting folders** for artifacts used in weekly or monthly business reviews.
* **Project folders** for artifacts connected to a launch, analysis sprint, or cross-functional initiative.
* **Operational folders** for dashboards, documents, and spreadsheets that several people need to revisit.

If an artifact is experimental, private, or only shared with a few people temporarily, keep it personal until it is ready for a shared folder.

## Folder structure

Artifact folders are flat in the current release. You can create workspace-level folders, but you cannot create folders inside folders.

This means:

* A folder can contain artifacts.
* A folder cannot contain another folder.
* Each artifact can be in one folder, or in no folder.
* Folder names should be clear enough to stand on their own, since there is no nested path for extra context.

## Creating folders

From the Artifacts page, create a folder when you want a shared place for a set of artifacts. Give the folder a short, recognizable name that matches how your team talks about the work.

Good folder names are specific and durable:

* **Finance**
* **Weekly Business Review**
* **Customer Health**
* **FY26 Planning**

Avoid vague names like **Reports**, **Stuff**, or **Shared** unless your workspace has a clear convention for them.

## Moving artifacts into folders

Moving an artifact into a folder means the folder controls access to that artifact. Before moving, check that the destination folder is shared with the right users and groups.

When an artifact is moved into a folder:

* The artifact appears in that folder.
* The artifact inherits the folder's access.
* Direct shares on the artifact are removed.
* Users who do not have folder access lose access to the artifact.
* Users who have folder access may gain access, depending on their folder level.

This is useful when you are promoting a personal artifact into a shared team space. It is also the main behavior to review before moving sensitive artifacts.

### Worked example

Suppose Dana creates a personal artifact called **FY26 Revenue Dashboard** and shares it directly with Marco.

Later, Dana moves the artifact into the **Finance** folder:

* The artifact becomes a foldered artifact.
* Marco's direct share is removed.
* Anyone with access to the **Finance** folder can access the artifact.
* Anyone without access to the **Finance** folder cannot access the artifact, even if they had a direct share before.

If Priya is an **Owner** on the **Finance** folder, Priya can manage the folder and its artifact permissions. If the **Finance Team** group is a **Viewer** on the folder, everyone in that group can open the artifact but cannot manage folder sharing.

If Dana later moves **FY26 Revenue Dashboard** into the **Executive Reporting** folder, the **Finance** folder permissions no longer apply. The artifact immediately uses the **Executive Reporting** folder permissions instead.

## Moving artifacts between folders

Moving an artifact from one folder to another switches which folder controls access. The artifact no longer uses the old folder's permissions and immediately uses the new folder's permissions.

Before moving between folders, confirm:

* The destination folder has the intended audience.
* Any users who still need access are included directly or through a workspace group.
* The new folder's access level is appropriate for what users should be able to do.

## Moving artifacts out of folders

Moving an artifact out of a folder makes it personal again. The person who moves it becomes the artifact owner, and folder permissions no longer apply.

Direct shares are not restored when an artifact is moved out of a folder. If other users still need access, share the personal artifact again after moving it.

## Deleting folders

You can delete a folder only after its artifacts have been moved elsewhere. This prevents accidental permission changes for artifacts that still need a home.

Before deleting a folder:

* Move artifacts to another folder if they should remain shared.
* Move artifacts out of folders if they should become individually owned.
* Confirm that the folder is no longer part of your team's reporting or review process.

## Related pages

* [Artifacts](/using-zenlytic/artifacts) - creating, editing, rebuilding, delivering, and publishing artifacts
* [Artifact Folder Permissions](/using-zenlytic/artifacts/artifact-folder-permissions) - how folder access levels work
* [Workspace Groups and Permissions](/administration/workspace_groups_and_permissions) - creating groups for shared access


# Artifact Folder Permissions

Control who can view and manage foldered artifacts with shared access levels for users and groups.

Artifact folder permissions control who can see and manage artifacts in workspace folders. They are designed for team-managed content: one folder, one access policy, many artifacts.

Use folder permissions when a group of artifacts should be managed together. Use direct artifact sharing when a personal artifact should be shared without moving it into a folder.

## The permission model

Zenlytic uses two related permission models for artifacts:

| Artifact state        | Who controls access                                              | What to manage                                                                                           |
| --------------------- | ---------------------------------------------------------------- | -------------------------------------------------------------------------------------------------------- |
| **Personal artifact** | The artifact owner, workspace admins, and direct artifact shares | Share the artifact with users or workspace groups. These are artifacts that do not live inside a folder. |
| **Foldered artifact** | The folder containing the artifact                               | Share the folder with users or workspace groups.                                                         |

When an artifact is moved into a folder, folder permissions control access to that artifact. Direct artifact shares are removed when the move happens.

{% hint style="info" %}
If someone could access a personal artifact before it was moved into a folder, they need access to the destination folder to keep seeing it after the move.
{% endhint %}

## Access levels

Folder permissions use three access levels you can assign: **Viewer**, **Editor**, and **Owner**. Workspace admins and organization admins may also see **Admin** access, which comes from their workspace role and is not assigned from the folder sharing UI.

| Level      | What users can do                                                                                        |
| ---------- | -------------------------------------------------------------------------------------------------------- |
| **Viewer** | View the folder and open artifacts in it.                                                                |
| **Editor** | View the folder, open artifacts, schedule artifacts, and add or move artifacts into the folder.          |
| **Owner**  | Do everything an Editor can do, plus rename or delete the folder and manage folder permissions.          |
| **Admin**  | Workspace or organization admin access. Admin is automatic and cannot be granted as a folder permission. |

Only **Viewer**, **Editor**, and **Owner** can be assigned to users or groups.

## Sharing with users and groups

You can grant folder access to:

* Individual workspace users.
* Workspace groups.
* An **All Users** group, if your workspace uses one.

Groups are usually the best way to manage folder access because they keep permissions aligned with how people join, leave, and move between teams. For example, give the **Finance** group access to a Finance folder instead of adding each finance team member individually.

For more on creating and maintaining groups, see [Workspace Groups and Permissions](/administration/workspace_groups_and_permissions).

## How folder access affects artifacts

For artifacts in a folder, the user's artifact access matches their folder access. If a user is a **Viewer** on the folder, they are a viewer on the artifacts in that folder. If they are an **Owner** on the folder, they have owner-level access to the artifacts in that folder.

This has a few important consequences:

* The artifact creator does not keep special access after the artifact is moved into a folder. The folder controls access.
* Sharing the folder grants access to the artifacts inside it.
* Removing folder access removes access to the artifacts inside it.
* Moving an artifact to another folder changes the artifact's access to match the new folder.

{% hint style="info" %}
**Folder access controls who can open an artifact, not what data they see inside it.** Dashboards, charts, and other HTML artifacts use [Live Queries](/using-zenlytic/artifacts#live-queries) — those queries re-run when someone opens the artifact, using that person's own data permissions. Granting folder access never widens anyone's data access, so two people with the same folder access may still see different numbers in the same artifact.
{% endhint %}

### Worked example

Suppose the **Finance** folder has these permissions:

| User or group      | Folder access |
| ------------------ | ------------- |
| Priya              | Owner         |
| Finance Team group | Viewer        |

Dana creates a personal artifact called **FY26 Revenue Dashboard** and shares it directly with Marco. At this point, Marco can open the artifact because of the direct artifact share.

When Dana moves **FY26 Revenue Dashboard** into the **Finance** folder:

* Priya can manage the folder and its permissions because she is an **Owner**.
* Members of the **Finance Team** group can open the artifact because they are **Viewers** on the folder.
* Marco can no longer open the artifact because his direct artifact share was removed and he does not have access to the **Finance** folder.
* Dana can only keep access if she also has access to the **Finance** folder, or if she is a workspace admin.

If Marco should keep access, add Marco directly to the **Finance** folder or add him to a group that has access to the folder.

## Direct artifact shares

Direct artifact shares are for personal artifacts. They let an owner share one artifact with specific users or groups without placing it in a folder.

Direct shares do not apply to artifacts in folders. If a personal artifact has direct shares and you move it into a folder, Zenlytic removes those shares because the folder is now responsible for access.

If you move that artifact out of the folder later, the old direct shares do not come back automatically. Share the artifact again if other people still need access.

## Workspace admins

Workspace admins and organization admins have automatic admin access to workspace folders and the artifacts inside them. This access comes from their role, so it does not appear as a normal folder grant that can be edited or removed.

Workspace admins also have access to personal artifacts, but only personal artifacts that have been shared with them appear on the Artifacts page. This keeps the Artifacts page manageable for admins.

## Visibility and errors

Zenlytic hides folders and artifacts a user cannot access. If a user opens a folder or artifact they do not have access to, it may appear as if the item does not exist.

This behavior prevents the system from revealing the names or existence of private content. It also means permission problems often look like missing folders or missing artifacts.

If a user can see an item but cannot perform an action, they need a higher access level. For example:

* A **Viewer** may be able to open a folder but not move artifacts into it.
* An **Editor** may be able to add artifacts but not manage sharing.
* A user without folder access may not see the folder or its artifacts at all.

## Troubleshooting

### Someone lost access after an artifact was moved

Check the destination folder's permissions. Moving a personal artifact into a folder removes direct artifact shares, so the user needs access through the folder.

### The artifact creator cannot see their own artifact in a folder

Check the folder's permissions. Once an artifact is moved into a folder, the folder controls access; the creator does not keep access unless they also have folder access or are an admin.

### A group has access but a user does not

Confirm the user is a member of the workspace group that was granted access. If your workspace uses multiple groups with similar names, confirm the correct group was selected.

### A user can view a folder but cannot manage sharing

The user likely has **Viewer** or **Editor** access. Grant **Owner** if they should manage folder permissions.

### A folder or artifact appears to be missing

The user may not have access. Ask a folder owner or workspace admin to confirm the folder permissions.

## Related pages

* [Artifact Folders](/using-zenlytic/artifacts/artifact-folders) - organizing artifacts into shared folders
* [Artifacts](/using-zenlytic/artifacts) - the main artifacts workflow
* [User Roles](/administration/user_roles) - workspace-level role permissions
* [Workspace Groups and Permissions](/administration/workspace_groups_and_permissions) - grouping users for access management


# Installing Zenlytic in Microsoft Teams

Install the Zenlytic bot in Microsoft Teams so users can ask Zoë questions and explore data without leaving Teams.

The Zenlytic Bot brings the power of Zoë, Zenlytic's flagship natural language BI assistant, directly into Microsoft Teams. This integration allows users to effortlessly explore and query their organization's data, check available fields, views, and dashboards on specific topics, and even create or modify dashboards - all without ever leaving the convenience of Teams.

Whether you're collaborating within a team or seeking insights in a one-on-one scope, the Zenlytic Bot provides a seamless, intuitive interface for engaging with your data. By integrating directly with Teams, we aim to streamline workflows, foster data-driven decision-making, and enhance productivity across your organization.

This guide provides step-by-step instructions for IT teams on how to install the Zenlytic Bot within their organization's Microsoft Teams environment.

## Step 1: Access your Microsoft Tenant ID

* Sign in to the Azure portal
* Browse to "Microsoft Entra ID" > "Properties"
* Scroll down to the "Tenant ID" section and you will find your tenant ID in the box
* Send your tenant ID to **`support@zenlytic.com`** to connect your Zenlytic workspace to your Teams workspace

## Step 2: Access the Microsoft Teams Admin Center

* Navigate to the [Microsoft Teams Admin Center](https://admin.teams.microsoft.com/dashboard) and log in using your admin credentials

## Step 3: Upload the Zenlytic Bot

* From the left-hand panel, select "Teams apps" > "Manage apps"
* In the upper-right corner, click on "Actions" and select "Upload new app" from the dropdown menu

![Microsoft Teams Bot Setup 1](/files/n2Ntsai9cWUThbf52p8q)

* Navigate to your **zenlytic\_bot.zip** file, select it and proceed with the upload.

## Step 4: Verify the App Publishing

* Upon successful upload, a confirmation message should appear. If a verification link is provided in the pop-up window, you can use it to directly verify that the app has been published correctly. If no pop-up window appears or you prefer to manually confirm the app's presence, navigate back to "Manage apps" within the Teams Admin Center. Here, search for "Zenlytic" in the app list to ensure it has been published successfully.

## Step 5: Add the Zenlytic Bot to your Team

* Open the Microsoft Teams app, and you should find the Zenlytic app listed under "Apps" in the left-hand menu

![Microsoft Teams Bot Setup 2](/files/yzhnMlEsJlivFzrc9Bts)

* Note that it might take a few hours for the app to become visible in your Teams app after publishing (based on our testing this could be up to 24 hours)
* Click on the Zenlytic app icon, then select "Add". Choose the appropriate team to which you want to add the Zenlytic Bot

![Microsoft Teams Bot Setup 3](/files/RHOvs9A0scipDw3p3Qqa)

## Step 6: Chat with your Data

The Zenlytic Bot should also be accessible for one-on-one and team conversations. It can be found under "Chat"/"Teams" in the left-hand menu of the Teams app.

![Microsoft Teams Bot Setup 4](/files/k11gZ8EtxxpDrJxSEwA0)

You have successfully installed the Zenlytic Bot in your Microsoft Teams environment. Enjoy exploring the features and capabilities it brings to your team 🥳


# Inviting and Managing Users

Invite people to a workspace, assign their role, and manage existing members from the Team page.

Every person who uses Zenlytic belongs to one or more workspaces. You add them from **Workspace Settings → Team**.

## Invite someone

1. Go to **Workspace Settings → Team**.
2. Click **+ Team Member**.
3. Enter their **email address**.
4. Choose a **role**. This is required — there's no default.
5. Optionally add them to one or more **groups**.
6. Click **Submit**.

They receive an email with a link to join the workspace. Until they accept, the invitation sits under the **Invites** tab.

You don't have to get the role right at invite time. It can be changed later from **Team → Users**.

{% hint style="info" %}
**Who can invite:** Admins and Organization Admins. Other roles don't see the **+ Team Member** button.
{% endhint %}

## Access is granted per workspace

**Inviting someone to a workspace gives them access to that workspace only.** If your organization has three workspaces and someone needs all three, they have to be invited to each one, and their role is set separately in each.

**Organization Admin is the one exception.** It applies across every workspace in the organization automatically — grant it in one place and it takes effect everywhere. That's also why it's the only role that can create new workspaces.

For what each role can do, see [User Roles](/administration/user_roles).

## Manage existing members

**Team → Users** lists everyone in the workspace, with their role, login method, and whether MFA is enabled.

From here you can:

* **Change someone's role** — use the role dropdown on their row. The change takes effect immediately.
* **Change or remove several people at once** — select them with the checkboxes, then apply a role change or removal to the whole selection.
* **Remove someone** — this revokes their access to this workspace. It does not affect their access to any other workspace, and it does not delete their Zenlytic account.

Use [groups](/administration/workspace_groups_and_permissions) rather than per-person changes when you're managing access at any scale.

## New workspaces and SSO provisioning

Only Organization Admins can create workspaces, and the first step asks whether to enable **SSO User Provisioning**.

* **Enabled** — the new workspace inherits all the users from your main organization workspace. They arrive with access already granted.
* **Disabled** (the default) — the new workspace starts empty and every member has to be invited manually.

Turning it on is the difference between a workspace your team can use immediately and one you have to populate by hand, so decide deliberately at creation time.

Provisioning can also be toggled later for an existing workspace from [Workspace Manager](/administration/workspace-manager).

{% hint style="warning" %}
If your organization signs in through SSO, workspace access can also be driven by claims in the SSO assertion. Workspaces removed from a user's claim are revoked on their next sign-in **even if access was originally granted by invitation**. See the [SSO Custom Claims Reference](/authentication-and-security/sso-custom-claims-reference).
{% endhint %}

## Related pages

* [User Roles](/administration/user_roles) — what each role can do, and the permissions behind them
* [Workspace Groups and Permissions](/administration/workspace_groups_and_permissions) — grouping users and assigning access at scale
* [Workspace Manager](/administration/workspace-manager) — creating workspaces and managing them across an organization
* [User Attributes](/administration/user_attributes) — controlling which data a user can see


# User Roles

Compare roles, permissions, and ad-hoc SQL access so each user gets the right scope.

Permissions sets that give users the ability to take certain actions in Zenlytic. Each role bundles a set of underlying permissions; roles also determine how much latitude a user has to query data that isn't formally defined in the semantic layer.

## Tiered ad-hoc SQL access

Beyond the per-permission bundles below, Zenlytic enforces a tiered model for how much direct warehouse access each role has:

| Roles                                                                                     | Ad-hoc SQL access                                                                 |
| ----------------------------------------------------------------------------------------- | --------------------------------------------------------------------------------- |
| **Admin** (Organization Admin, Admin)                                                     | Full access, including ad-hoc SQL on any table the underlying SQL role can reach. |
| **Developer** (Develop, Develop without Deploy)                                           | Full access, including ad-hoc SQL on any table the underlying SQL role can reach. |
| **Explorer** (Explore, View, Restricted, Embed, Embed with SQL, Embedded with Scheduling) | Limited to tables defined in the semantic layer.                                  |

**Enforce permissions for admins toggle.** A workspace-level toggle controls whether Admins are also restricted to the semantic layer or retain full ad-hoc access. When the toggle is **off** (default), Admins can query any table their SQL role can reach, even ones not modeled in Zenlytic. When **on**, Admins follow the same semantic-layer restrictions as everyone else.

If you need Explorer-style users to have access to a specific warehouse table, define it in the semantic layer. If you need Developers to be able to poke at unlisted tables for investigation, leave them at the Developer tier.

## Permissions reference

Each of the role bundles below is built from the following individual permissions.

`save_content`: This is the ability to save a query result to a dashboard or modify an existing dashboard.

`schedule_content`: This is the ability to schedule a dashboard, artifact, or Proactive Agent for delivery in Slack or email.

`view_content`: This is the ability to view dashboards.

`explore_from_here`: This is the ability to continue analysis from an existing result or dashboard.

`edit_settings`: This is the admin permission to edit the settings of the workspace itself. With this permission, a user can grant him/herself any permission.

`change_branch`: This is the ability to change the branch the workspace is looking at. By default, the branch will always be the production branch.

`download_with_limit`: The ability to download data with a limit applied.

`download_without_limit`: The ability to download data without a limit applied (the max is 1 million in this case).

`see_sql`: The ability to see the SQL that was used to create the plot or table the user is looking at.

`run_sql`: The ability to run arbitrary SQL on the warehouse. This effectively gives the user access to all data that is in the warehouse (subject to the ad-hoc SQL tier above).

`chat`: The ability to chat with Zoë.

`data_model_edit`: The ability to edit the data model.

`create_workflow`: The ability to create a Proactive Agent (previously branded as a 'workflow').

`deploy_to_production`: The ability to deploy the data model from one branch to the production branch.

`create_dynamic_field`: The ability to create a dynamic field (does not include the ability to promote it to the data model).

`view_workspace_users`: The ability to view the names of other users in the workspace.

`workspace_management`: Grants the ability to create, archive, and manage workspaces and credentials across an organization.

## Roles

Each role below combines a set of the permissions above and maps to one of the ad-hoc SQL tiers. For the exact permissions each role includes, see the [permissions × roles matrix](#permissions-roles-matrix) at the bottom of the page.

### Organization Admin

The organization admin has every permission. Subject to the "enforce permissions for admins" toggle described above.

The organization admin also automatically has organization admin level access on *all* the workspaces inside of an organization. So, if a user has organization admin-level access on any of the workspaces inside of your organization, they will automatically have organization admin-level access on *all* of the workspaces inside of your organization.

In addition to all standard Admin capabilities, Organization Admins can:

* Manage workspaces across the organization: create new workspaces, archive existing ones, and configure SSO provisioning settings for each workspace.
* Manage credentials across the organization: view all credentials and copy them between workspaces.

When an Organization Admin creates a new workspace, they are automatically assigned the Organization Admin role in that workspace.

*Note: The Organization Admin role only appears as an option in the role selector for users who already have the workspace\_management permission. If your workspace is not part of an organization, this role will not be available.*

### Admin

The Admin role has every permission except `workspace_management`. Subject to the "enforce permissions for admins" toggle described above.

### Develop

Develop has every Admin permission except `edit_settings`. The typical role for a data engineer or analytics engineer maintaining the semantic layer and deploying changes to production.

### Develop without Deploy

Develop without Deploy has every Develop permission except `deploy_to_production`. Use this role when modelers should be able to make and validate changes on a development branch but production deploys should be reserved for a separate approver.

### Explore

The most common role and the recommended default for end users — analysts and stakeholders who consume data, ask Zoë questions, save content, and schedule deliveries.

### View

Like Explore but with downloads capped at the per-limit threshold (no `download_without_limit`). Use for consumers who shouldn't pull large extracts.

### Restricted

Restricted has only the `view_content` permission. This user can see dashboards but cannot ask Zoë questions or follow up.

*Note:* This user can change filters on dashboards, which means in terms of API access they have the ability to run queries that are not just the queries present on the dashboard. Use this role in conjunction with [data access controls](/data-modeling/access_grants), not instead of them.

### Embed roles

Three role bundles are available for embedded users — Embed, Embed with SQL, and Embedded with Scheduling — and are assigned automatically (they don't appear in the workspace role selector). For the permissions each embed role includes, see [Permissions in Embedding](/embedding/permissions_in_embedding).

## Permissions × roles matrix

Cross-reference any permission against any role. ✓ means the role includes that permission. Blank means it doesn't. For embed roles, see [Permissions in Embedding](/embedding/permissions_in_embedding).

| Permission               | Org Admin | Admin | Develop | Develop w/o Deploy | Explore | View | Restricted |
| ------------------------ | :-------: | :---: | :-----: | :----------------: | :-----: | :--: | :--------: |
| `view_content`           |     ✓     |   ✓   |    ✓    |          ✓         |    ✓    |   ✓  |      ✓     |
| `save_content`           |     ✓     |   ✓   |    ✓    |          ✓         |    ✓    |   ✓  |            |
| `schedule_content`       |     ✓     |   ✓   |    ✓    |          ✓         |    ✓    |   ✓  |            |
| `explore_from_here`      |     ✓     |   ✓   |    ✓    |          ✓         |    ✓    |   ✓  |            |
| `chat`                   |     ✓     |   ✓   |    ✓    |          ✓         |    ✓    |   ✓  |            |
| `download_with_limit`    |     ✓     |   ✓   |    ✓    |          ✓         |    ✓    |   ✓  |            |
| `see_sql`                |     ✓     |   ✓   |    ✓    |          ✓         |    ✓    |   ✓  |            |
| `create_workflow`        |     ✓     |   ✓   |    ✓    |          ✓         |    ✓    |   ✓  |            |
| `create_dynamic_field`   |     ✓     |   ✓   |    ✓    |          ✓         |    ✓    |   ✓  |            |
| `view_workspace_users`   |     ✓     |   ✓   |    ✓    |          ✓         |    ✓    |   ✓  |            |
| `download_without_limit` |     ✓     |   ✓   |    ✓    |          ✓         |    ✓    |      |            |
| `change_branch`          |     ✓     |   ✓   |    ✓    |          ✓         |         |      |            |
| `run_sql`                |     ✓     |   ✓   |    ✓    |          ✓         |         |      |            |
| `data_model_edit`        |     ✓     |   ✓   |    ✓    |          ✓         |         |      |            |
| `deploy_to_production`   |     ✓     |   ✓   |    ✓    |                    |         |      |            |
| `edit_settings`          |     ✓     |   ✓   |         |                    |         |      |            |
| `workspace_management`   |     ✓     |       |         |                    |         |      |            |

## Troubleshooting

### I have the role but I don't see a feature

Role permissions are necessary but not always sufficient — a feature can be gated by both a role permission and a workspace-level configuration. If your role includes the right permission and you still don't see the feature in the UI:

* **Schedule Delivery on a Proactive Agent or artifact.** Confirm the artifact has been saved (scheduling is not available on unsaved artifacts), and that the workspace has Proactive Agents enabled. If a delivery arrives without the artifact file attached, the artifact uses [Live Queries](/using-zenlytic/artifacts#delivering-artifacts-with-live-queries) — those deliveries include a preview image and a link instead.
* **Schedule Delivery on a dashboard.** Legacy dashboards have their own delivery setup — see [Dashboard Scheduled Delivery](/legacy/dashboard/dashboard-scheduled-delivery).
* **Chat with Zoë.** Confirm the workspace has chat enabled and that you have the `chat` permission for your role.
* **Edit the data model in Context Manager.** Confirm you're on a non-production branch, or that **Allow Edit Production** is enabled in workspace settings for your role.
* **Workspace-by-workspace inconsistency.** If a feature appears in some workspaces but not others, the missing workspace likely has the feature toggled off in settings. Compare workspace settings, or ask a workspace Admin to check.

If none of the above explains it, contact support — there may be a workspace-level feature flag we need to check.

### Organization Admin still can't see a feature

Organization Admin has every permission, so if a feature is missing for an Organization Admin, the cause is almost always **workspace-level configuration** (the feature is disabled in that workspace), not the role. Start by comparing settings against a workspace where the feature does appear.

## Related pages

* [Access Grants](/data-modeling/access_grants) — row-level and column-level access control in the data model
* [Workspace Groups and Permissions](/administration/workspace_groups_and_permissions) — grouping users and assigning roles at scale


# User Attributes

Assign user attributes for access control, connection overrides, and default-deny security patterns.

This section covers how to set user attributes. User attributes are how users are assigned permissions that control their access to data (using [access grants](/data-modeling/access_grants)).

To set a user attribute on a user, go to Workspace Settings, then go to Team Members then go to Attributes to define the attribute

<figure><img src="/files/L5HJwoBXU4CIRSvS4cKm" alt=""><figcaption></figcaption></figure>

Then make the user attribute you want in the pop up menu and pick its type

<figure><img src="/files/ygUPeHEUFLk9wVwmG7mM" alt=""><figcaption></figcaption></figure>

You can set a user attribute on either a group or an individual user. To set it on an individual user, click on Users, and set the attribute on the user. This example sets the user attribute `Department` to `blah` on this user.

<figure><img src="/files/IJZi1fWLqBdoIZoKxtuW" alt=""><figcaption></figcaption></figure>

Now that this user's `Department` attribute is set, their permissions will be determined by that (and any other attributes) set on that user.

> Important: If an access grant references a user attribute, users should have a value for that attribute. Leaving the attribute blank does not behave like a denied value. If a user does not have the referenced attribute at all, that grant is not triggered and does not block access. To make access default to denied, set a non-granting value on the All Users group, then set the allowed value only on the users or groups that should have access.

For example, since the user's attribute for `Department` has been set to `blah`, not one of the allowed options (`Executive`, `Finance`, `Marketing`) this user will not have access to anything restricted by this access grant.

![access-grants](/files/i66vW1CtLpkzd3BTFA1L)

For example, this user will *not* have access to this `email` field because the field has the `pii_access` access grant as one of the `required_access_grant` selections.

![access-grant-on-field](/files/SzomdeLUTjnXxZQu0kdV)

For more information on how to apply access grants and filters, look at the documentation on [access grants](/data-modeling/access_grants).

## User attributes populated automatically

There are certain user attributes that are populated automatically.

The following user attributes are populated automatically and cannot be overridden:

* `email`: the logged in user's email

## Reserved User Attributes

There are certain user attributes that have special behavior.

### zenlytic\_connection\_name

The `zenlytic_connection_name` user attribute has the special property that it will override the connection that is used to run queries on the data warehouse. You will set this property to the name of the credential, and that credential will be used in the query.

In the product, the user attribute is applied as the connection to use in all querying situations instead of:

* Testing the connection itself
* Listing databases when adding a new view
* Listing tables when adding a new view

### zenlytic\_connection\_database

The `zenlytic_connection_database` user attribute has the special property that it will override the "database" in the connection to the data warehouse. Not all warehouses handle the "database" idea in the same way, so this is exactly how that breaks down in each situation and for each database type.

In the product, the user attribute is applied as the database to use in all querying situations instead of:

* Testing the connection itself
* Listing databases when adding a new view
* Listing tables when adding a new view

The attribute only applies as the database chosen in the connection itself for:

* Postgres
* MySQL
* Redshift
* Azure Synapse
* SQL Server
* Trino

The attribute applies in the `USE DATABASE` clause for:

* DuckDB
* Snowflake

The attribute `does not apply` in databases where it is not applicable, which are:

* BigQuery
* Druid
* Databricks


# Workspace Groups And Permissions

Create workspace groups and use them to manage dashboard sharing and access.

> Create a group in Workspace Settings, name it, and add team members. This group can govern dashboard access in your workspace.

## Creating Workspace Groups

To create a group for sharing permissions, click on your account icon in the top right hand corner (green circle), and select 'Workspace Settings'. Navigate to the 'Team Members' section. Select the 'Groups' tab.

Create a group, name the group, and lastly, add desired team members to the group. This group can be used on the dashboard level to govern access to reports in your workspace. ​

<figure><img src="/files/msgUisvqyNFA7HQMY5iJ" alt=""><figcaption></figcaption></figure>

## Creating Dashboard Level Permissions

To create dashboard level permissions, on the dashboard page, click on the 'Share' button in the top right hand corner to select a group and the group's permission level.

<figure><img src="/files/YFMp2bQij7osV8aQAFpO" alt=""><figcaption></figcaption></figure>

<figure><img src="/files/YFMp2bQij7osV8aQAFpO" alt=""><figcaption></figcaption></figure>


# Workspace Manager

Manage workspaces across your organization, reuse connections, and control SSO provisioning from one place.

The Workspace Manager lets you create new workspaces, manage existing ones, and control how users are provisioned across your organization, all from a single, self-service interface.

***

### Who Can Use It

The Workspace Manager is available to **Organization Admins,** a role that sits above the existing Admin role. To see the Workspace Manager, you must be an Organization Admin in a workspace that belongs to an organization.

#### Organization Admin vs. Admin

There are now two levels of admin:

* **Organization Admin** — Can manage all workspaces across the organization: create and delete workspaces, copy database connections between them, control SSO provisioning settings, and promote other users to Organization Admin.
* **Admin** (Workspace Admin) — Can manage users and settings within a single workspace, just like before. Cannot perform cross-workspace operations or modify Organization Admin users.

Only an Organization Admin can change or remove another Organization Admin's role.

***

### Managing Workspaces

You can find the Workspace Manager from the navigation bar, next to Settings. The main page shows a table of all active workspaces in your organization. You can search by name to filter the list.

For each workspace, you can:

* **Toggle SSO User Provisioning** — When enabled, the workspace inherits the users from your main organization workspace. When disabled, users must be [invited manually](/administration/inviting-users).
* **Delete a workspace** — Removes the workspace from active use. You'll be asked to type the workspace name to confirm. Deleted workspaces are deactivated and hidden but not permanently destroyed. You cannot delete the workspace you are currently signed into.

***

### Creating a New Workspace

Click **"Create New Workspace"** to walk through a guided setup:

#### Step 1: Name and Provisioning

* Enter a name for the new workspace.
* Choose whether to enable **SSO User Provisioning** (off by default). When enabled, the new workspace inherits all the users from your main organization workspace. When left off, it starts empty and every member has to be [invited manually](/administration/inviting-users).

#### Step 2: Add Database Connections

You can set up database connections for the new workspace in two ways:

* **Copy from existing workspaces:** Browse all database connections across your organization and select the ones you want to reuse. They'll be securely copied into the new workspace.
* **Create a new connection:** Fill out a fresh database connection form. The connection is tested automatically before it's saved.

#### Step 3: Set Up GitHub

Choose how to manage the workspace's data model repository:

* **Managed Repository:** Zenlytic creates and manages the repository for you. One click to finish.
* **Connected Repository:** Link an existing GitHub repository by providing the URL and branch. You can optionally generate a deploy key or enter a personal access token. The connection is verified before completing setup.

This step can be skipped, but well need to be completed before you can use Zoë in your new workspace.

***

### Managing the Organization Admin Role

When you invite a new member or edit an existing member's role, you'll see **Organization Admin** as a role option. Regular Admins do not see this option.

A few rules apply:

* Only Organization Admins can assign or revoke the Organization Admin role.
* An Admin cannot change, demote, or remove an Organization Admin, that action is reserved for other Organization Admins.


# Data Modeling Overview

Learn how models, views, fields, and relationships work together to give Zoë reliable context.

To understand data modeling in Zenlytic, there are a few key concepts to grasp. If you've used data models like LookML before, these will be intuitive, and you'll be able to go straight to the implementation of your model. To better understand how to define context for Zoë, the AI analyst, see [Context Surfaces](/getting-started/context-surfaces).

Note: You can also use our automatic LookML -> ZenML converter [here](https://lookml-zenml.netlify.app/).

{% hint style="info" %}
**You don't have to author alone.** Ask Zoë in chat how to add a measure, write a calculation, or model a relationship and she'll recommend specific YAML and explain where it belongs. See [Ask Zoë for Data Model Recommendations](/data-modeling/asking-zoe-for-recommendations).
{% endhint %}

## Key concepts

* [Models](/data-modeling/model)
  * Models are references to a database connection. They serve as the data model's reference to the warehouses itself. They give your data model the ability to reference multiple data warehouses, and set some high level properties like the week start day or the timezone.
* [Views](/data-modeling/view)
  * Views directly represent an underlying database table. They contain both the [dimensions (columns)](/data-modeling/dimension) and [measures (aggregates)](/data-modeling/measure) inside of the table they reference. Views are organized into [topics](/legacy/topic) which define how they join together.
* [Dimensions](/data-modeling/dimension)
  * A dimension represents a column in the database table it's view references. You can also have groups of dimensions (like timeframes) which reference the same column with different transformations applied.
* [Measures (metrics)](/data-modeling/measure)
  * A measure (or metric) represents the aggregation of a dimension or dimensions inside the table its view references. Any valid aggregation in a SQL statement with a `group by` will work as a measure (e.g. `sum(sales)`).

## Examples

The best way to learn to to see examples. We have an example using our metrics yaml syntax.

* [Metrics Layer yaml example](https://github.com/Zenlytic/demo-data-model)

## Naming conventions

Naming is a crucial part of any data model and one of the most difficult aspects of maintaining a data model that can be understood by end users. Here are some Zenlytic naming conventions, both technically required and recommended.

### Technically Required

* The `name` field. Name fields must only contain letters, numbers, or the `_` character. They must be unique throughout your collection they are in, and despite how you may choose to enter them, they will always be lower-cased when referenced in Zenlytic. This syntax is required when naming objects in Zenlytic

### Recommendations

Naming can be challenging. This is especially true in a domain as complex as your company's data model. These are a few recommendations from our experience on how to make it easier.

* Plurals vs singulars: When you name views, be consistent with your choice of plural or singular words. For example, if you name the table with sales orders in it `orders` don't name the table with order lines `order_line`, you should name it `order_lines`. It doesn't matter if you choose to go with singular or plural name, just be consistent.
* Prefixes and suffixes: Often you'll have metrics that total or sum up a column, e.g. sales or revenue. Again, consistency is key. If you have a metric named `total_gross_revenue` don't also have one `sum_net_revenue` or just `net_revenue`, you should name that metric `total_net_revenue`. End users will be confused by inconsistency in prefixes or suffixes. Again, it is less important *which* prefixes you use (if any). Consistency is the most important aspect.
* Multiple versions: You will almost certainly have some data issue in your warehouse that duplicates some table or view. Use your data model to hide those tables from your end users. They don't care that they're getting data from the `company_ga_3` table, and you shouldn't make them care. Eliminate duplicate names by designing joins that combine previously separate data into one view.


# Ask Zoë for Data Model Recommendations

Use Zoë to recommend, draft, and save the smallest modeling changes that improve answers.

{% hint style="success" %}
**There is no separate "training" step for Zoë.** The way to make Zoë good at your data — including new and complex datasets — is to ask her in chat. She'll recommend context to add (descriptions, synonyms, measures, joins, skills, system prompt rules), explain where each change belongs, and with edits enabled save them to your repo. The rest of this page covers how that workflow works in practice.
{% endhint %}

You don't have to author your data model alone. Zoë can recommend changes directly from chat: new measures, new dimensions, new relationships, calculation logic, view and field documentation, workspace skills, updates to the system prompt, or restructuring something that isn't answering questions well. [If you've allowed her to](#turning-context-editing-on-or-off), she can also make those changes for you and save them to your repository on the current branch.

Ask in plain English. Either let Zoë draft a snippet for you to paste in [Context Manager](/data-modeling/context_manager), or tell her to make the change for you.

## When to ask Zoë instead of authoring from scratch

Good questions to bring to Zoë:

* **"How do I add a measure for X?"** — e.g. "How do I add a measure for repeat order rate?" or "How do I define customer lifetime value?"
* **"How should I write this calculation?"** — e.g. "Write me the SQL for days between first and second order" or "How do I compute rolling 30-day revenue?"
* **"How should these tables be joined?"** — e.g. "What's the right relationship between `orders` and `shipments`?"
* **"Why did you pick the wrong field?"** — Zoë can often diagnose why she chose the wrong field and recommend adding a `synonym`, `zoe_description`, or a new measure to prevent it next time. See also [Fixing Zoë's Mistakes](/getting-started/fixing-zoes-mistakes).
* **"What should I add to this view to make it more useful?"** — Zoë can look at a view and recommend missing measures, synonyms, or descriptions.
* **"Which tables should I import for \[use case]?"** — Zoë can read your warehouse's `information_schema` and suggest a starting set of tables based on the analysis you want to do, including tables you haven't imported yet.
* **"What data would I need to recreate this report?"** — paste a screenshot of an existing dashboard or report (Power BI, Tableau, Looker, etc.) and Zoë will identify the tables and fields you'd need. Because she can see your full warehouse schema, she can recommend new tables to bring in.

## Letting Zoë make the change for you

With Zoë's edits turned on for your workspace, you can ask her to "add the measure", "fix the join", "update the system prompt to say...", or "create a skill for our fiscal calendar", and she'll:

1. Read the current state of the relevant files.
2. Draft the smallest correct edit, such as a new field, an updated `zoe_description`, or a new skill.
3. Validate the data model so YAML errors are caught before anything is committed.
4. Commit and push the change to your repository on the current branch.
5. Run a sample query against any new or modified measure, dimension, or dimension group, so you can sanity-check the result.
6. Report back with what changed and suggest you re-ask the original question.

If validation fails, Zoë reads the error, fixes the referenced files, and validates again before saving, so no partial commits land.

The surfaces Zoë can edit:

* Data model YAML under `views/`, `models/`, `topics/`, and `dashboards/`, plus `zenlytic_project.yml`
* The workspace system prompt, for shared, always-on rules
* Workspace `skills/`, including `skills/<skill-name>/SKILL.md` and any supporting files

She follows the same authoring rules a human editor would: flat `fields:` lists, valid measure patterns, conservative use of `searchable: true`, and `zoe_description` rather than `description` for agent-only guidance. See [Context Surfaces](/getting-started/context-surfaces) for the full decision tree.

If you'd rather have Zoë just review without editing, ask her to "audit the model", "recommend changes", or "check whether she has enough context". She'll inspect the data model and report findings without saving anything, and only commits when you explicitly ask her to make the change.

## For complex datasets

Don't try to model everything before testing. The fastest way to get a complex or unfamiliar dataset working with Zoë is to build context iteratively:

1. **Import the tables.** Ask Zoë which ones to start with if you're not sure. Set `default_date` on time-series views — that one property is the biggest single win for temporal questions.
2. **Ask a real business question.** Not "explain everything" — something you actually want answered.
3. **When Zoë gets something wrong, ask her why.** "Why did you pick that field?" or "What context would help you answer this correctly?" She'll diagnose the specific cause and recommend the smallest fix.
4. **For domain-specific or multi-step logic** (fiscal calendar, custom segmentations, complex joins, industry-specific patterns), have Zoë create a [Skill](/using-zenlytic/skills) instead of stuffing it into individual descriptions.
5. **Repeat.** Each round narrows the gap between your data and Zoë's accuracy.

This works far better than building a full semantic model upfront. The complexity ends up encoded exactly where it's needed, not speculatively everywhere.

## Example: adding a measure

You ask:

> How do I add a measure for repeat purchase rate in the `orders` view?

Zoë might respond with something like:

```yaml
- name: repeat_purchase_rate
  field_type: measure
  type: number
  sql: "{% raw %}${number_of_repeat_customers} / nullif(${total_customers}, 0){% endraw %}"
  value_format_name: percent_1
  description: The share of customers who placed more than one order.
  zoe_description: Use this for retention questions. Numerator is customers with 2+ orders; denominator excludes null customer_ids.
```

…along with a note explaining that she used `type: number` with a ratio SQL expression (one of the two valid measure patterns — see [Measures](/data-modeling/measure) for the full rule), and a pointer to add synonyms like "retention rate" or "repeat rate" so she picks this measure on future questions.

## Example: asking about a relationship

You ask:

> How should I join the `orders` table to the `shipments` table?

Zoë will inspect both views and recommend a [relationship](/data-modeling/relationships) block for the model file with the right `relationship` cardinality and `sql_on` condition, plus a note if the join risks fan-out.

## Applying a recommendation yourself

If Zoë's edits are turned off, or you'd rather review the change before it lands, apply her snippet by hand:

1. Open [Context Manager](/data-modeling/context_manager).
2. Navigate to the file Zoë named (view, model, topic, system prompt, or skill).
3. Paste the snippet in the right place and save.
4. If the change is significant, deploy to production when you're ready.
5. Re-ask your original question to confirm the change works end-to-end.

## Turning context editing on or off

Zoë's edits are on by default for workspaces that have access to the feature. You can toggle the behavior per workspace at:

**Workspace Settings → Zoë → Context Editing**

* When the toggle is **on**, Zoë can save changes to your data model from chat, subject to the permission rules below.
* When the toggle is **off**, Zoë will still draft snippets when you ask, but she will not write them to your repository.

## Zoë inherits your permissions

When edits are turned on, Zoë's editing permissions match your own. The data model is governed by the same role-based rules whether you edit by hand in Context Manager or ask Zoë to do it from chat:

* If you are an **Explore**, **View**, or **Restricted** user (or any role without `data_model_edit`), Zoë cannot edit the data model. She'll draft recommendations and explain that you or a workspace admin needs to apply them.
* If you are **Develop**, **Develop without Deploy**, or **Admin**, Zoë can edit the data model on the branch you're currently on, as long as that branch isn't the production branch.
* Only workspace **Admins** and users with the **Develop** role can deploy a development branch to the production branch. Deployment happens in [Context Manager](/data-modeling/context_manager), not from chat.

See [User Roles](/administration/user_roles) for the full role and permission reference.

### Editing the production branch directly

You can allow Zoë to save edits on the production branch by turning on the **Allow Edit Production** toggle at **Workspace Settings → Git → Allow Edit Production**. With the toggle on, Zoë will save changes on the production branch for **Admin** and **Develop** users. With it off, she'll refuse production edits and ask you to switch to a development branch. The toggle is on by default and uses the same setting that controls manual production edits in Context Manager. See [Work with branches safely](/data-modeling/context_manager#work-with-branches-safely) for more on the toggle.

## What Zoë won't do

Even with edits turned on, Zoë holds the line on a few things:

* Save changes she isn't allowed to. If your role lacks `data_model_edit`, or you're on the production branch without the right permission and toggle, Zoë will recommend the change and tell you who can apply it instead.
* Recommend Memories or Topics for new context. Memories are legacy and being retired in favor of Skills. Topics are legacy and kept only for backwards compatibility. Zoë routes new context to view and field properties, skills, or the system prompt instead.
* Rewrite a whole file when a small edit will do. Zoë makes the smallest correct change to fix the issue you reported, rather than restructuring on speculation.

## Iterate based on what goes wrong

Zoë's edits and recommendations aren't always perfect on the first try. If a change doesn't produce the right answer when you test it, tell her what's wrong (for example, "that measure gave the wrong number, the denominator should exclude internal test accounts"). She'll refine the change, re-validate it, and commit the fix when you ask her to. This is the same iterative philosophy the whole data model is built on: add context to fix the specific error you observed, rather than trying to anticipate every edge case up front. See [Progressive Enrichment](/getting-started/progressive-enrichment) for the broader playbook.

## Related

* [Context Manager](/data-modeling/context_manager): where you apply Zoë's recommendations or review her commits
* [Context Surfaces](/getting-started/context-surfaces): when to use `description`, `zoe_description`, synonyms, or the system prompt
* [User Roles](/administration/user_roles): the role and permission reference Zoë inherits from
* [Fixing Zoë's Mistakes](/getting-started/fixing-zoes-mistakes) — diagnostic flow when Zoë gives a wrong answer
* [Measures](/data-modeling/measure) — valid/invalid aggregation patterns for measure SQL


# Context Manager

Manage model files, validate changes, compare branches, and deploy updates to production.

Use Context Manager to manage semantic model files, review changes, and deploy updates to production.

## Open Context Manager

Open Context Manager from the workspace navigation or from chat.

![Open Context Manager entry points](/files/fVHLIz8jkZuZBvMYM99A) ![Context Manager overview](/files/TqaaWD4JIkFDQnjXGiIb)

## Manage files

Use the file tree to organize and maintain your data model:

* Create files and folders
* Rename files and folders
* Open view and model files in the editor
* Access file actions from the three-dot menu

Use the three-dot menu to:

* Show documentation for view and model files
* Open database preview for view files

![Context tab file tree](/files/b58eVXXWqhpBI9ExvtCq) ![Three-dot menu actions](/files/T7g7Y4ec6X5pLxVK6LLG)

## Add to the data model

Use the **Add** button to create or upload assets:

* **Add view**
* **Add model**
* **Add skill**
* **Create file**
* **Create folder**
* **Upload file**

When you add a view, choose one of these options:

* Upload a CSV file
* Add from a database connection

Use an existing connection or create a new connection during setup.

![Add button options](/files/i3ofZG93wqOJx6TVOGhv) ![Add view modal](/files/lUYoVL6wIJIBQu7Zsk5G)

## Edit, validate, and review changes

Edit files directly in the text editor. Use the validation panel to review errors and warnings, then fix issues before deployment.

Open the diff view to compare branch changes against production before deployment.

![Editor with validation panel](/files/jgihlnMT3Gih5lzvX33O) ![Diff view](/files/0xAWyfMFIbih2oMAr5OM)

Review YAML key documentation by hovering over keys in the text editor.

![Tooltip with documentation](/files/Nd7BywF2GwqtDawPIwbL)

## Work with branches safely

Use the branch selector to work in non-production branches.

Disable the workspace setting that allows direct edits on the production branch to enforce a branch-based workflow.

![Branch selector](/files/M2tWk6xGNIOQ7EIBkNiC) ![Disable production edits setting](/files/OyTTFiZN7Gwzu8IXfS4E)

## Deploy to production

After you commit changes on a development branch, use the deploy action to publish to production.

You must resolve validation errors before deployment.

![Deploy action](/files/vx92K0Q4TaMi3bviyAbT)


# Model

Define warehouse connections, global settings, access grants, mappings, and relationships in a model file.

Models connect your data model to a warehouse. The model's `connection` property references the credential `name` configured in the Zenlytic interface.

Like all files in Zenlytic, model files are written in YAML.

## Properties

Models only have a few core properties:

`type`: (Required) The type of the file. For these model files is should always be `model`.

`name`: (Required) The name of the model. If you reference this model elsewhere this is the name you will use. Like all names, it follows [Zenlytic naming conventions](/data-modeling/data_modeling#naming-conventions)

`label`: The label of the model is what shows up to the end users of your data model. If not specified it defaults to the name of the model.

`connection`: (Required) This is the name of the database connection that is being referenced in Zenlytic. You will specify this name when you enter the database credentials in Zenlytic, and it follows [Zenlytic's conventions for names](/data-modeling/data_modeling#naming-conventions)

`fiscal_month_offset`: This controls the offset applied by Zenlytic to calculate "Fiscal" time frames. For example, if you set it to `1` then the `fiscal_quarter` will be set to start in `February` instead of `January`, which is the default. This takes any positive or negative integer. Default is `0`.

`week_start_day`: This controls which day of the week Zenlytic assumes your definition of "Week" starts on. The default value is `monday` (which is standard across ISO dates).

`timezone`: This controls which timezone Zenlytic uses when querying dates and times from your database. Zenlytic will automatically change the timezone from the database timezone to the timezone you set here. The default is to make no change to the timezone found in the database.

`default_convert_tz`: This field sets the default value for `convert_tz` in each [dimension group](/data-modeling/dimension_group) in this model. This defaults to `true` so if you set a timezone, it will be applied, unless you either set this value to `false` or set `convert_tz: false` on the field itself.

`access_grants`: This field is a list of [access grants](/data-modeling/access_grants). You can use access grants to control what data users of Zenlytic are allowed to see and access.

`mappings`: Mappings equate fields that mean the same thing but are in different, un-joinable tables. For example, you might have a `channel` field on the orders table and a `marketing_channel` field on the `marketing_spend` table, and they represent the same thing and have the same values. You can set up a mapping that connects those two fields in Zenlytic and leaves only one option for the end users to select. Zenlytic will dynamically figure out which field it should use or if it needs to use both. Find out more about mappings [in the join docs](/legacy/join#merged-results--mappings) or in the example below.

`relationships`: Relationships define joins that can happen between any two tables throughout views that are accessible in the model. These are visible to the agent whenever the user can access both views in the relationship, and help it make better decisions about complex joins.

## Examples

### Basic Example

Here is an example of a model that also sets a timezone for all queries to the database.

```yaml
version: 1
type: model
name: my_model
connection: my_connection
timezone: America/New_York
```

### Relationships

The relationships property defines join paths between views. Zoë uses these relationships (alongside identifiers and topics, for backwards compatibility) to understand how tables connect and to generate correct SQL joins.

Relationships are the preferred location for structured join definitions. For joins that are not obvious from matching column names, define them here so Zoë has explicit join context.

#### Relationship Properties

Each entry in the relationships list supports the following properties:

| Property     | Type   | Required | Description                                                                                                              |
| ------------ | ------ | -------- | ------------------------------------------------------------------------------------------------------------------------ |
| from\_table  | string | Yes      | The name of the source view.                                                                                             |
| join\_table  | string | Yes      | The name of the view to join to.                                                                                         |
| join\_type   | string | No       | The type of SQL join. Options: left\_outer, inner, full\_outer. Default: left\_outer                                     |
| relationship | string | No       | The cardinality of the join. Options: many\_to\_one, one\_to\_many, one\_to\_one, many\_to\_many. Default: many\_to\_one |
| sql\_on      | string | Yes      | The join condition using ${view\_name.field\_name} syntax. Supports multiple conditions with AND.                        |

#### Relationship Example

This example defines basic relationships without complex concepts.

```yaml
version: 1
type: model
name: my_model
connection: my_connection


relationships:
  - from_table: orders
    join_table: customers
    join_type: left_outer
    relationship: many_to_one
    sql_on: ${orders.customer_id} = ${customers.customer_id}


  - from_table: order_lines
    join_table: orders
    join_type: left_outer
    relationship: many_to_one
    sql_on: ${order_lines.order_id} = ${orders.order_id}


  - from_table: order_lines
    join_table: products
    join_type: left_outer
    relationship: many_to_one
    sql_on: ${order_lines.product_id} = ${products.product_id}

```

#### Multi-Column Joins

For joins that require matching on more than one column, use AND in the sql\_on condition:

```yaml
relationships:
  - from_table: inventory
    join_table: warehouse_costs
    join_type: left_outer
    relationship: many_to_one
    sql_on: ${inventory.warehouse_id} = ${warehouse_costs.warehouse_id}
            AND ${inventory.product_id} = ${warehouse_costs.product_id}
```

#### When to Use Relationships

* Non-obvious joins where column names don't match across views, or where the join requires multiple columns or type casting.
* Joins you want Zoë to know about so she can generate correct SQL when users ask questions spanning multiple tables.
* You do not need to add relationships for obvious joins where column names match naturally between views (e.g., both views have a customer\_id column with matching identifiers). Over-documenting obvious concepts can decrease Zoë's performance.

#### Relationship Types

| Type           | Description                                                                                                          |
| -------------- | -------------------------------------------------------------------------------------------------------------------- |
| many\_to\_one  | Multiple records in from\_table map to one record in join\_table. The most common type (e.g., order lines → orders). |
| one\_to\_many  | One record in from\_table maps to multiple records in join\_table.                                                   |
| one\_to\_one   | Each record in from\_table maps to exactly one record in join\_table.                                                |
| many\_to\_many | Multiple records on both sides. Use with caution — can cause fan-out if not handled carefully in queries.            |

#### Join Types

| Type        | Description                                                                                                                |
| ----------- | -------------------------------------------------------------------------------------------------------------------------- |
| left\_outer | Include all records from from\_table, with matched records from join\_table. Unmatched rows in join\_table appear as NULL. |
| inner       | Only include records that match in both tables.                                                                            |
| full\_outer | Include all records from both tables, with NULLs where there is no match.                                                  |

### Access Grants

This is an example of an access grant defined in a model. In this case, this access grant could be reused in a view or in fields to limit viewing to only users who have the their `department` user attribute equal to "Marketing". This model also sets the `week_start_day` property which tells which day to start weeks on (the default is monday).

The mapping example here maps the `marketing_spend.marketing_channel` to the `orders.channel` field so Zenlytic (and Zoë) know they are the same concept.

{% code overflow="wrap" %}

```yaml
version: 1
type: model
name: demo
week_start_day: sunday

# This defines the access grant
access_grants:
  - name: restrict_dept
    user_attribute: department
    allowed_values: ["Marketing"]

mappings:
  channel: 
    fields: [marketing_spend.marketing_channel, orders.channel]
    group_label: "Acquisition" # This controls the header under which the mapped field shows up in the UI
    description: "The channel the customer came to our site from"
```

{% endcode %}


# Relationships

Define non-obvious joins, cardinality, and join types so Zoë generates correct cross-table SQL.

Relationships are the recommended way to define joins between tables in Zenlytic. They are defined as a list on the [model](/data-modeling/model) file and are visible to Zoë when generating SQL whenever the user can access both the `from_table` and `join_table` views, so you don't need to group views into a topic for joins to work.

Relationships replace both [topics](/legacy/topic) and the `identifiers` block for the purpose of defining joins. Topics and identifiers continue to be supported for backward compatibility — see [Migrating from Memories and Topics](/migrations/migrating-from-memories-and-topics) for guidance on moving existing configuration.

## When to define a relationship

* **Non-obvious joins** — joins where column names don't match across views, where type casting is required, or where multiple columns need to line up. Zoë can't infer these from column names alone, so define them explicitly.
* **Joins with non-default cardinality or join type** — anything other than a `many_to_one` `left_outer` join that you want handled correctly for fan-out and filter semantics.

**Obvious joins don't need to be stored.** If a `customer_id` foreign key obviously maps to a `customer_id` primary key, Zoë will figure it out. Focus your relationship definitions on joins where the connection isn't clear from column names alone. Over-documenting obvious joins can decrease Zoë's performance.

## Schema

Relationships are a list on the model file:

```yaml
version: 1
type: model
name: my_model
connection: my_connection

relationships:
  - from_table: orders
    join_table: customers
    relationship: many_to_one
    join_type: left_outer
    sql_on: ${orders.customer_id} = ${customers.customer_id}
```

Each entry supports the following properties:

| Property       | Required | Description                                                                                        |
| -------------- | -------- | -------------------------------------------------------------------------------------------------- |
| `from_table`   | Yes      | The name of the source view.                                                                       |
| `join_table`   | Yes      | The name of the view to join to.                                                                   |
| `sql_on`       | Yes      | The join condition using `${view_name.field_name}` syntax. Combine multiple conditions with `AND`. |
| `relationship` | No       | The cardinality of the join: `many_to_one` (default), `one_to_one`, `one_to_many`, `many_to_many`. |
| `join_type`    | No       | The SQL join type: `left_outer` (default), `inner`, `full_outer`.                                  |

## Cardinality matters

The `relationship` property tells Zoë how many rows on each side of the join it should expect.

| Type           | Description                                                                                                                   |
| -------------- | ----------------------------------------------------------------------------------------------------------------------------- |
| `many_to_one`  | Multiple rows in `from_table` map to one row in `join_table`. The most common case (e.g., `order_lines` → `orders`). Default. |
| `one_to_one`   | Each row in `from_table` maps to exactly one row in `join_table`.                                                             |
| `one_to_many`  | One row in `from_table` maps to many rows in `join_table`. Can cause fan-out — use with care.                                 |
| `many_to_many` | Multiple rows on both sides. Easiest to produce fan-out; handle aggregation carefully.                                        |

{% hint style="warning" %}
**Fan-out warning.** `one_to_many` and `many_to_many` joins can cause rows to multiply and produce incorrect aggregate results. For these joins, aggregate in separate CTEs first or use Zenlytic's symmetric aggregate support via a `primary_key` on the view.
{% endhint %}

Cardinality is easier to get right when table and column names are human-readable. You can reason about a one-to-many join from `orders` to `line_items`, but you cannot reason about one from `tbl_a` to `tbl_b`. When table names are cryptic, add generous view descriptions to compensate.

## Worked example

A typical e-commerce model with orders, order lines, customers, and discounts:

{% code overflow="wrap" %}

```yaml
version: 1
type: model
name: my_model
connection: my_connection

relationships:
  - from_table: order_lines
    join_table: orders
    relationship: many_to_one
    join_type: left_outer
    sql_on: ${order_lines.order_id} = ${orders.order_id}

  - from_table: orders
    join_table: customers
    relationship: many_to_one
    join_type: left_outer
    sql_on: ${orders.customer_id} = ${customers.customer_id}

  - from_table: order_lines
    join_table: products
    relationship: many_to_one
    join_type: left_outer
    sql_on: ${order_lines.product_id} = ${products.product_id}

  - from_table: order_lines
    join_table: discounts
    relationship: many_to_many
    join_type: left_outer
    sql_on: ${order_lines.order_id} = ${discounts.order_id} and ${discounts.order_date} is not null
```

{% endcode %}

This replaces a corresponding topic definition and is visible to Zoë whenever the user can access both views in the relationship — you don't have to wrap it in a topic to use it.

## Multi-column joins

For joins that need more than one condition, combine them in `sql_on` with `AND`:

```yaml
relationships:
  - from_table: inventory
    join_table: warehouse_costs
    relationship: many_to_one
    join_type: left_outer
    sql_on: ${inventory.warehouse_id} = ${warehouse_costs.warehouse_id}
            AND ${inventory.product_id} = ${warehouse_costs.product_id}
```

## Natural-language context about joins

Relationships define the structure of joins, but Zoë often needs plain-language context about which join paths are valid, which are pitfalls, and which should happen conditionally. For that:

* Use the [view](/data-modeling/view) `description` or `zoe_description` to explain join paths that are specific to that table.
* Use the system prompt (Settings → Prompt) for universal join-routing rules that apply across all questions.

Common things to call out in prose:

* Which join paths are valid for common questions, and which are invalid.
* Fan-out pitfalls on specific one-to-many relationships.
* Granularity mismatches (see below).
* Conditional joins or joins that are only used to apply certain filters.

## Time-granularity mismatches

Tables at different time granularities — for example, daily vs. hourly — cannot be joined directly and produce correct results. The joined tables must first be aggregated to a common level (e.g., monthly) in separate CTEs, then combined in the final result.

If two tables in your model are at different granularities and users commonly ask questions that span them, add guidance to the system prompt or to the relevant view's `zoe_description` explaining the granularity mismatch and the recommended pattern. Relationships alone don't solve this — Zoë needs the prose context to construct the CTE-first query.


# Views

Define tables, default dates, descriptions, filters, and fields in reusable view files.

Views reference exactly one table in the database. In Zenlytic, they are organized into [topics](/legacy/topic) for usage that define how they join together.

Views, like all files in Zenlytic, are YAML text files.

## Properties

`type`: (Required) The type of the file. For these view files is should always be `view`.

`name`: (Required) The name of the view. If you reference this view elsewhere this is the name you will use. Like all names, it follows [Zenlytic naming conventions](/data-modeling/data_modeling#naming-conventions)

`model_name`: (Required) The name of the [model](/data-modeling/model) (e.g. database connection) the view references.

`label`: The label of the view is what shows up to the end users of your data model. If not specified it defaults to the name of the view.

`description`: The description of the view. This can help business users understand what the view represents and how it is created. This is also sent to Zoë (Zenlytic's AI Analyst) to give her context on how to use different views in your data model. Use this to provide Zoë view or table-level context.

`zoe_description`: The description of the view shown to Zoë. If not set, Zoë uses `description` instead. If set, this replaces `description` for Zoë only. End users will still see `description` in the UI. Use this to provide context to Zoë on how to use the view correctly.

{% hint style="info" %}
**View-level `description` and `zoe_description` are capped at 10,000 characters each** — plenty of room for join-path guidance, data caveats, and edge cases. Use `description` for user-facing documentation and `zoe_description` for agent-only instructions like which joins to prefer or pitfalls to avoid. See [Context Surfaces](/getting-started/context-surfaces) for when to use views vs. fields vs. the system prompt vs. skills.
{% endhint %}

`sql_table_name`: This is the table name in the database that the view references. For example, `prod.customers` would be a valid `sql_table_name`.

`derived_table`: This is a property that you can use to define transformed tables using a SQL statement. This SQL statement is run and is considered to be the "base" of the view. Note, we generally prefer using [dbt](https://getdbt.com) over derived tables for better testing and maintainability. This property has a nested property `sql` inside of the `derived_table` property that you use to define the SQL statement.

{% code overflow="wrap" %}

```yaml
...
name: my_view
derived_table: 
  sql: "select *, row_number() over (partition by customer_id order by order_date) as order_number from myschema.mytable"
...
```

{% endcode %}

Note: The filters in `always_filter` *will not* be applied if you are using this property to define the data for the view to sit on top of.

You can also reference any [referenceable attributes](/data-modeling/referenceable_attributes) and drop them into the derived SQL statement. For example, in this case we are dynamically applying a filter to the SQL query based on the user's user attribute for 'owned\_region'

```yaml

name: my_view
derived_table: 
  sql: >
    select 
      * 
    from myschema.mytable
    where '{{ user_attributes['owned_region'] }}' = mytable.region

```

`default_date`: This is the default date [dimension group](/data-modeling/dimension_group) without a time frame chosen for it. For example, if your dimension group is named `order` you would use the value `order` here, not `order_month` or `order_week` like you would reference elsewhere.

{% hint style="info" %}
**Set `default_date` on every view that has time-series measures.** It is the single most impactful structural property for temporal queries — it tells Zoë which date dimension to use for questions like "revenue this quarter" against this view. Prefer setting `default_date` on the view over setting `canon_date` on individual measures; `canon_date` should only be used when a specific measure genuinely needs a different date than the view default.
{% endhint %}

`sets`: This is a list of [sets](/data-modeling/set) that are defined in this view. Example syntax of the definition is below.

```yaml
  - name: set_name
    fields: [field_or_set, field_or_set]
```

`always_filter`: This is an optional list of filters which use the usual [field filter selection syntax](/data-modeling/field_filter) and will *always* be applied to the query. These filters are applied to the entire query, not just a metric or dimension, and if it is not possible to reference or join in the field needed for the filter it will result in an error.

Note: This set of filters *will not* be applied if you are using a derived table mentioned above instead of `sql_table_name`.

### Example below:

Here are two filters that will be applied to *all* queries that reference this view. One field `context_os` is present in the view, and does not need to specify its view name. The other field `is_churned` is *not* present in this view and must specify its view name. It will be joined in dynamically whenever this view is referenced to apply the filter.

```yaml
always_filter:
- field: customers.is_churned
  value: FALSE
- field: context_os
  value: -NULL
```

`access_filters`: This is an optional list of [access filters](/data-modeling/access_grants#access-filters) to apply to the view when it is queried.

Access filters can be used to apply row-level security against views. The following example shows how to make a specified column only visible to workspace members with a user attribute value:

```yaml
access_filters:
  - field: orders.product
    user_attribute: 'products'
```

`required_access_grants`: This is a list of [access grant](/data-modeling/access_grants#access-grants) names that are required to access this view. If you list multiple grants, they must all pass for the user to access this view. A missing user attribute on a grant is non-blocking for that grant, because the grant is not triggered. Note, these access grants will *always* be applied for this view in any join sequence.

`identifiers`: This is a list of [fields](/data-modeling/field) with additional information defining what kind of key (primary, foreign) they are to the table the view references.

Identifiers can be used to create a `join_as` view, which will allow a table to join into a topic more than once on different keys. More information is in the [joins](/legacy/join) section.

`fields`: This is a list of [fields](/data-modeling/field). Each field must have all required parameters included.

## Joins

Joins are defined in [topics](/legacy/topic).


# Fields

Understand the three field types that power dimensions, dimension groups, and measures.

Fields reference either columns in the database (dimensions and dimension groups) or aggregates computed in a `group by` statement (measures or metrics). There are three types of fields `dimension`, `dimension_group`, and `measure` (we also refer to measures as metrics and use the terms interchangeably). For all fields, their `field_type` (one of the three just listed) is a required property.

* [Dimensions](/data-modeling/dimension) are references to columns in your database table. They can either reference each other or raw columns in the database.
* [Dimension Groups](/data-modeling/dimension_group) are a special type of dimension used for timeframes (referencing the same date column but having slices for it daily, weekly, monthly, etc), and for intervals (referencing the difference between two date columns and slicing it days between, weeks between, months between, etc).
* [Measures (or metrics)](/data-modeling/measure) are reference dimensions or raw columns in the database and specify an aggregate on those columns. They can also reference other measures and perform operations referencing each other post-aggregation. E.g. if you have a measure `total_gross_revenue` and a measure `total_discounts` you can define a new measure like this to calculate total net revenue.

```yaml
name: total_net_revenue
field_type: measure
type: number
sql: ${total_gross_revenue} - ${total_discounts}
```

There will be more examples of each type of field in their respective documentation pages.

Fields are defined in [view](/data-modeling/view) files.


# Dimensions

Define reusable columns with labels, search behavior, access controls, and Zoë-specific guidance.

Dimensions are references to a column in the database or combinations of those references to columns. They let you define columns along with labels and descriptions so business users can make sense of the data. You can also use dimensions as building blocks for measures, so if something changes in your database table, you only have to update it in one spot.

## Properties

`name`: (Required) The name of the dimension. If you reference this dimension elsewhere in your data model you will use this value. Like all names, it follows [Zenlytic naming conventions](/data-modeling/data_modeling#naming-conventions)

`field_type`: (Required) The field type of the field. For dimensions this is always `dimension`.

`type`: The type of the field. For dimensions this is one of `string`, `yesno`, `tier` or `number`. The default is `string`.

`label`: The label of the dimension is what shows up to the end users of your data model. If not specified it defaults to the name of the dimension.

`description`: The description of the dimension. This is shown in the UI and can help end users understand what the field represents. When this is set and the `zoe_description` property is not set, this will be shown to Zoë. Use this to provide context to Zoë on how to use the field correctly.

`zoe_description`: The description of the dimension as shown to Zoë. If not set, Zoë uses `description` instead. If set, this replaces `description` for Zoë only. End users will still see `description` in the UI. Use this to provide context to Zoë on how to use the field correctly.

{% hint style="info" %}
**Field-level `description` and `zoe_description` are capped at 1,024 characters.** For longer guidance, move broader context up to the view's `description` or `zoe_description` (up to 10,000 characters) or into a [Skill](/using-zenlytic/skills). See [Context Surfaces](/getting-started/context-surfaces) for the full visibility/char-limit table.
{% endhint %}

`group_label`: The label of the view the field is put into in the left hand sidebar menu. If not specified it defaults to the name of the view the field is present in.

`primary_key`: A `true` indicates that this field is the primary key of the table. The default is (of course) `false`.

`hidden`: A `true` indicates that this field should be hidden in the user interface. If a field is hidden it can still be referenced in the data model, despite not appearing to end users as a selectable field. The default is false which shows the field in the UI.

`sql`: (Required) This is the SQL expression that generates the field value. It can be as simple as `${TABLE}.my_field_name` which just references a column in the database table, or something more advanced that references previously defined fields, like `case when ${channel} ilike '%owned' then 'Yes' else 'No' end`. Note: You can also use window functions in this property, if you specify the `window` property below as `true`.

You can also reference any [referenceable attributes](/data-modeling/referenceable_attributes) and drop them into the `sql` statement here. For example, you can use a passed user attribute to dynamically change the language used to translate the content for the user `LOOKUP(${TABLE}.product_name, '{{ user_attributes["user_lang"] }}' )`

`window`: This is a boolean that is true if the SQL expression in the `sql` property is a window function, and false otherwise. It defaults to `false`.

`value_format_name`: This is the format to use when displaying the field. Check out [field formatting](/data-modeling/formatting) to see available options. The default is `decimal_1`, which formats `12543.5524` to `12,543.6`.

`tags`: This is a list of strings that tag a field with special meaning. For instance, the `customer` tag indicates that this field is the unique identifier for a customer and Zenlytic will use that to know throughout your queries what you mean when you say "Customer".

`drill_fields`: This is a list of field names (dimensions or measures) to include in the drill query for the name of the tag (see below).

`searchable`: A yes (or true) means that you want Zenlytic to index the categories of this dimension for use in natural language search. For example, if you indexed the column `state` you'd be able to search for states just by typing "New York" without having to mention the state field.

{% hint style="warning" %}
**Reserve `searchable` for categorical columns.** The default category limit is **10,000 values per dimension**. Do not set `searchable: true` on high-cardinality columns such as IDs, timestamps, email addresses, or any column with many unique values — you'll hit the limit and get no useful context back. Use `searchable` on status, type, and category columns where the distinct values determine how the column is used.
{% endhint %}

`synonyms`: This is a list of strings phrases or words that you want to act as synonyms for natural language search. For example, if your measure is named `total_revenue` you might have synonyms of `['total sales', 'income']`. This works like a keyword search under the hood, to make fields with synonyms related to the question asked show up in context for Zoë.

`required_access_grants`: This is a list of [access grant](/data-modeling/access_grants) names that are required to access this field. If you list multiple grants, they must all pass for the user to access this field. A missing user attribute on a grant is non-blocking for that grant, because the grant is not triggered. Note, if the user has access to the field but does NOT have access to the view the field is defined in, the user will not be able to see the field.

`filters`: This is a list of [field filters](/data-modeling/field_filter), which have two properties, `field` and `value`. For example, the below field filter equates to the SQL where clause `where channel != 'Paid'`.

```yaml
- field: channel
  value: "-Paid"
```

`tiers`: For dimensions of type `tier`, specify the breakpoints for the various tiers. For example you might have a dimension `age` which you want to break into tiers, using `[0, 20, 30, 40, 50]` would partition the `age` dimension into groups depending in which range the age fell into between the buckets `[0,20)`, `[20,30)`, `[30,40)`, `[40,50)`, `50+`.

`link`: You can specify a link on a dimension with the option to impute the value of the cell clicked on in the link as a follow up question in Zenlytic. For example, with the link `https://myshopify.com/myfakestore/orders/{{value}}` on the order\_id dimension, when a user asks a follow up question by clicking on the order id, they'll have an option to drill into the above link where the order id they clicked on replaces `{{value}}` in the url (i.e. `https://myshopify.com/myfakestore/orders/112335499`).

`extra`: The extra property is like dbt `meta` property, and you can put whatever additional properties you want in here. For example, under this property you could add a property like this `maintainer: "jane doe"`

## Examples

This example shows several fields, the first of which is the table's primary key, the second of which is the order id with a special tag to denote to Zenlytic that it is an "order", and the third of which is a numeric column, with a label and description.

The dimension `order_id` is tagged as an 'order' which means it will show up in the Zenlytic UI with an option to "Drill into orders." If that option is selected, zenlytic will create a query filtered for the group selected and add that column, `order_id` and all fields (if any) defined in the `drill_fields` property. Since `order_id` also has the `link` specified, you will also see a follow up question to go to the link with the order id imputed in the link.

This is a view on top of the `order_lines` table which defines the `total_revenue` metric, and a drill defined on the `order_id`. This will result in a "Drill into orders" option in the Zenlytic UI. The link on the order will result in an option to "Go to external link" in the Zenlytic UI.

{% code overflow="wrap" %}

```yaml
version: 1
type: view
name: order_lines

sql_table_name: prod.order_lines
default_date: order

fields:
- name: order_line_id
  field_type: dimension
  type: string
  sql: ${TABLE}.order_line_id
  primary_key: yes
  hidden: yes

- name: order_id
  field_type: dimension
  type: number
  sql: ${TABLE}.order_id
  hidden: yes
  tags: ['orders']
  drill_fields: [marketing_channel, total_revenue]
  link: https://myshopify.com/myfakestore/orders/{{value}}

- name: price
  field_type: dimension
  type: number
  sql: ${TABLE}.item_price
  label: "Item price"
  description: "The price we currently have on the item in Shopify"

- name: marketing_channel
  field_type: dimension
  type: string
  sql: ${TABLE}.marketing_channel

- name: marketing_group
  field_type: dimension
  type: string
  sql: case when ${marketing_channel} = 'Direct' or ${marketing_channel} ilike '%email%' then 'Organic' else 'Paid' end

- name: total_revenue
  field_type: measure
  type: sum
  sql: ${TABLE}.revenue
```

{% endcode %}


# Dimension Groups

Create time and duration fields with reusable timeframes, intervals, and timezone behavior.

Dimension Groups are a particular type of dimension used for timeframes (referencing the same date column but having slices for it daily, weekly, monthly, etc), and for intervals (referencing the difference between two date columns and slicing it days between, weeks between, months between, etc).

{% hint style="warning" %}
**Avoid reserved words in dimension group names.** Dimension groups generate sub-fields for each timeframe (e.g., `date`, `week`, `month`). If you name a dimension group generically — for example `__time` or `date` — the generated sub-fields will be aliased as `day`, `month`, `time`, `order`, etc., which are reserved words in some SQL dialects and will produce query errors. Use descriptive names like `order_date`, `created_at`, or `shipped_at` instead.
{% endhint %}

## Properties

`name`: (Required) The name of the dimension group. If you reference this dimension group in the `default_date` property you will use this name. If you reference this dimension group elsewhere, in sets, other dimensions, etc you will use syntax as follows: `name_timeframe`. Like all names, it follows [Zenlytic naming conventions](/data-modeling/data_modeling#naming-conventions)

`field_type`: (Required) The field type of the field. For dimension groups this is always `dimension_group`.

`type`: (Required) The type of the field. For dimension groups this is one of `time` or `duration`.

`label`: The label of the dimension group is what shows up to the end users of your data model. If not specified it defaults to the name of the dimension group.

`description`: The description of the dimension group. This is shown in the UI and can help end users understand what the field represents. When this is set and the `zoe_description` property is not set, this will be shown to Zoë. Use this to provide context to Zoë on how to use the field correctly.

`zoe_description`: The description of the dimension group shown to Zoë. If not set, Zoë uses `description` instead. If set, this replaces `description` for Zoë only. End users will still see `description` in the UI. Use this to provide context to Zoë on how to use the field correctly.

`group_label`: The label of the view the field is put into in the left hand sidebar menu. If not specified it defaults to the name of the view the field is present in.

`hidden`: A `true` indicates that this field should be hidden in the user interface. If a field is hidden it can still be referenced in the data model, despite not appearing to end users as a selectable field. The default is false which shows the field in the UI.

`sql`: (Required, only for `type` = time) This is the SQL expression that generates the field value. It can be as simple as `${TABLE}.my_field_name` which just references a column in the database table, or something more advanced that references previously defined fields, like `case when ${channel} ilike '%owned' then 'Yes' else 'No' end`.

You can also reference any [referenceable attributes](/data-modeling/referenceable_attributes) and drop them into the `sql` statement here. For example, you can use the query attribute for which dimension group is selected to take advantage of specialized database extensions, like Timescale DB.

{% code overflow="wrap" %}

```yaml
- name: rainfall_at
  field_type: dimension_group
  type: time
  timeframes:
    - raw
    - date
    - week
    - month
  sql: >
    case 
      when '{{ query_attributes['dimension_group'] }}' = 'raw' then ${TABLE}.rain_date 
      when '{{ query_attributes['dimension_group'] }}' = 'date' then time_bucket('1 day', ${TABLE}.rain_date) 
      when '{{ query_attributes['dimension_group'] }}' = 'week' then time_bucket('1 week', ${TABLE}.rain_date) 
      when '{{ query_attributes['dimension_group'] }}' = 'month' then time_bucket('1 month', ${TABLE}.rain_date) 
      else null
    end
```

{% endcode %}

`required_access_grants`: This is a list of [access grant](/data-modeling/access_grants) names that are required to access this field. If you list multiple grants, they must all pass for the user to access this field. A missing user attribute on a grant is non-blocking for that grant, because the grant is not triggered. Note, if the user has access to the field but does NOT have access to the view the field is defined in, the user will not be able to see the field.

`synonyms`: This is a list of strings phrases or words that you want to act as synonyms for natural language search. For example, if your measure is named `total_revenue` you might have synonyms of `['total sales', 'income']`. This works like a keyword search under the hood, to make fields with synonyms related to the question asked show up in context for Zoë.

`timeframes`: (Required, only for `type` = time) This property is only for dimension groups of type `time`. It's a list of values which you want to make available to the end user. The options are [listed below](#timeframes).

`intervals`: (Required, only for `type` = duration) This property is only for dimension groups of type `duration`. It's a list of values which you want to make available to the end user. The options are [listed below](#intervals).

`convert_tz`: A yes (or true) indicates that you want the timezone to be converted, a no (or false) indicates you do not want to convert the timezone from the native timezone to the timezone you specified in your model.

`datatype`: This indicates the database type of the date column referenced by the dimension group. The options are `timestamp`, `datetime` and `date`. The default is `timestamp`.

`sql_start`: (Required, only for `type` = duration) This is the SQL expression that generates the field value for the start of the duration.

`sql_end`: (Required, only for `type` = duration) This is the SQL expression that generates the field value for the end of the duration.

`extra`: The extra property is like dbt `meta` property, and you can put whatever additional properties you want in here. For example, under this property you could add a property like this `maintainer: "jane doe"`

## Timeframes

{% hint style="info" %}
Fiscal date reporting

All `fiscal_` timeframes are based on the model's `fiscal_month_offset` property. This let's you set up your fiscal year/quarter/month reporting right in Zenlytic! Find out more information [here](/data-modeling/model).
{% endhint %}

The available timeframe options are:

<table><thead><tr><th width="242.55078125">Options</th><th width="503.6015625">Description</th></tr></thead><tbody><tr><td>raw</td><td>Shows the raw value and can be used in references, but is not used in the Zenlytic UI</td></tr><tr><td>time</td><td>Shows the raw timestamp</td></tr><tr><td>second</td><td>Shows the value truncated to the second</td></tr><tr><td>minute</td><td>Shows the value truncated to the minute</td></tr><tr><td>hour</td><td>Shows the value truncated to the hour</td></tr><tr><td>date</td><td>Shows the value truncated to the day</td></tr><tr><td>week</td><td>Shows the value truncated to the week</td></tr><tr><td>month</td><td>Shows the value truncated to the month</td></tr><tr><td>quarter</td><td>Shows the value truncated to the quarter</td></tr><tr><td>year</td><td>Shows the value truncated to the year</td></tr><tr><td>fiscal_month</td><td>Shows the value truncated to the fiscal month</td></tr><tr><td>fiscal_quarter</td><td>Shows the value truncated to the fiscal quarter.</td></tr><tr><td>fiscal_year</td><td>Shows the value truncated to the fiscal year</td></tr><tr><td>week_index</td><td>Shows the week of the year as an integer (alias of week_of_year below)</td></tr><tr><td>week_of_year</td><td>Shows the week of the year as an integer</td></tr><tr><td>week_of_month</td><td>Shows the week of the month as an integer</td></tr><tr><td>month_of_year</td><td>Shows the month of the year as a 3 character string ('Jan', 'Feb', 'Mar', etc)</td></tr><tr><td>month_of_year_full_name</td><td>Shows the month of the year as a string ('January', 'February', 'March', etc)</td></tr><tr><td>month_of_year_index</td><td>Shows the month of the year as an integer</td></tr><tr><td>fiscal_month_index</td><td>Shows the fiscal month of the year as an integer. The first fiscal month is the first month of the fiscal year.</td></tr><tr><td>fiscal_month_of_year_index</td><td>Shows the fiscal month of the year as an integer (alias of the fiscal_month_index)</td></tr><tr><td>month_name</td><td>Shows the month of the year as a 3 character string (alias of month_of_year)</td></tr><tr><td>month_index</td><td>Shows the month of the year as an integer (alias of month_of_year_index)</td></tr><tr><td>quarter_of_year</td><td>Shows the quarter of the year as an integer</td></tr><tr><td>fiscal_quarter_of_year</td><td>Shows the fiscal quarter of the year as an integer</td></tr><tr><td>hour_of_day</td><td>Shows the hour of the day as an integer</td></tr><tr><td>day_of_week</td><td>Shows the day of the week as a 3 character string ('Mon', 'Tue', 'Wed', etc)</td></tr><tr><td>day_of_month</td><td>Shows the day of the month as an integer</td></tr><tr><td>day_of_year</td><td>Shows the day of the year as an integer</td></tr></tbody></table>

## Intervals

The available interval options are:

<table><thead><tr><th width="159.71875">Options</th><th>Description</th></tr></thead><tbody><tr><td>second</td><td>The number of seconds between the <code>sql_start</code> and the <code>sql_end</code></td></tr><tr><td>minute</td><td>The number of minutes between the <code>sql_start</code> and the <code>sql_end</code></td></tr><tr><td>hour</td><td>The number of hours between the <code>sql_start</code> and the <code>sql_end</code></td></tr><tr><td>day</td><td>The number of days between the <code>sql_start</code> and the <code>sql_end</code></td></tr><tr><td>week</td><td>The number of weeks between the <code>sql_start</code> and the <code>sql_end</code></td></tr><tr><td>month</td><td>The number of months between the <code>sql_start</code> and the <code>sql_end</code></td></tr><tr><td>quarter</td><td>The number of quarters between the <code>sql_start</code> and the <code>sql_end</code></td></tr><tr><td>year</td><td>The number of years between the <code>sql_start</code> and the <code>sql_end</code></td></tr></tbody></table>

## Examples

This example shows several fields, the first of which is the table's primary key and the second of which is a dimension group for a date and the third of which is a duration dimension group. In the Zenlytic interface, you'll reference the dates defines in the second field like `order_date`, `order_month`, etc. You'll reference the third field like `days_between_first_order_and_this_order`, `months_between_first_order_and_this_order`, etc.

```yaml
version: 1
type: view
name: order_lines

sql_table_name: prod.order_lines
default_date: order

fields:
- name: order_line_id
  field_type: dimension
  type: string
  sql: ${TABLE}.order_line_id
  primary_key: yes
  hidden: yes

- name: order
  sql: ${TABLE}.order_at
  field_type: dimension_group
  type: time
  timeframes:
  - raw
  - date
  - week
  - month
  - quarter
  - year
  datatype: timestamp

- name: between_first_order_and_this_order
  field_type: dimension_group
  type: duration
  sql_start: ${TABLE}.first_order_date
  sql_end: ${order_raw}
  intervals: [day, week, month, quarter]
```


# Measures

Define metrics, valid aggregation patterns, filters, and non-additive logic for accurate analysis.

Measures (or metrics) are aggregations performed inside of a SQL `group by` statement. A simple one is `sum(sales)`, which you could specify in your data model with `type: sum` and `sql: ${TABLE}.sales`. They can get highly complex and are as flexible as your data warehouse's SQL syntax.

## Properties

`name`: (Required) The name of the measure (or metric). If you reference this measure (or metric) elsewhere in your data model you will use this value. Like all names, it follows [Zenlytic naming conventions](/data-modeling/data_modeling#naming-conventions)

`field_type`: (Required) The field type of the field. For measures (or metrics) this is always `measure`.

`type`: (Required) The type of the field. For measures this is one of `sum`, `average`, `count`, `count_distinct`, `sum_distinct`, `average_distinct`, `median` (if supported in your database), `max`, `min`, `cumulative`, or `number`. Note, both `sum_distinct` and `average_distinct` require you to pass a value to the `sql_distinct_key` property. `cumulative` requires you to pass the `measure` property.

`label`: The label of the measure (or metric) is what shows up to the end users of your data model. If not specified it defaults to the name of the measure (or metric).

`description`: The description of the measure (or metric). This is shown in the UI and can help end users understand what the field represents. When this is set and the `zoe_description` property is not set, this will be shown to Zoë. Use this to provide context to Zoë on how to use the field correctly.

`zoe_description`: The description of the measure (or metric) shown to Zoë. If not set, Zoë uses `description` instead. If set, this replaces `description` for Zoë only. End users will still see `description` in the UI. Use this to provide context to Zoë on how to use the field correctly.

`group_label`: The label of the view the field is put into in the left hand sidebar menu. If not specified it defaults to the name of the view the field is present in.

`hidden`: A `true` indicates that this field should be hidden in the user interface. If a field is hidden it can still be referenced in the data model, despite not appearing to end users as a selectable field. The default is false which shows the field in the UI.

`sql`: (Required) This is the SQL expression that generates the field value. It can be as simple as `${TABLE}.my_field_name` which just references a column in the database table, or something more advanced that references previously defined fields, like `case when ${channel} ilike '%owned' then 1 else 0 end`. Note: You can also use window functions in this property, if you specify the `window` property below as `true`.

You can also reference any [referenceable attributes](/data-modeling/referenceable_attributes) and drop them into the `sql` statement here. For example, you can use a passed user attribute to dynamically change the country the average uses when the measure hs `type: average` and `sql: case when country_detail.country='{{ user_attributes["country_options"] }}' then country_detail.rain end`

`window`: This is a boolean that is true if the SQL expression in the `sql` property is a window function, and false otherwise. It defaults to `false`.

`value_format_name`: This is the format to use when displaying the field. Check out [field formatting](/data-modeling/formatting) to see available options. The default is `decimal_1`, which formats `12543.5524` to `12,543.6`.

`synonyms`: This is a list of strings phrases or words that you want to act as synonyms for natural language search. For example, if your measure is named `total_revenue` you might have synonyms of `['total sales', 'income']`. This works like a keyword search under the hood, to make fields with synonyms related to the question asked show up in context for Zoë.

`required_access_grants`: This is a list of [access grant](/data-modeling/access_grants) names that are required to access this field. If you list multiple grants, they must all pass for the user to access this field. A missing user attribute on a grant is non-blocking for that grant, because the grant is not triggered. Note, if the user has access to the field but does NOT have access to the view the field is defined in, the user will not be able to see the field.

`sql_distinct_key`: This tells Zenlytic that the measure you are calculating here is duplicated, and what field or expression it is unique on. For example, if you have a sales amount that is tied to an order but present in a order lines table, you could set this value to `order_id` and the type to `sum_distinct` to correctly sum up the sales amount without double counting. See [symmetric aggregates](/data-modeling/symmetric_aggregates) for more information.

`measure`: This is only used when the metric has the type `cumulative`. A cumulative metric will sum up that metric over all time, and the measure property specifies which metric to aggregate over all time. For example, you could have a metric of type `sum` called `total_revenue` and create a cumulative metric referencing that named `cumulative_revenue` which calculates the `total_revenue` metric cumulatively.

`filters`: This is a list of [field filters](/data-modeling/field_filter), which have two properties, `field` and `value`. For example, the below field filter equates to the SQL where clause `where channel != 'Paid'`. Note, you *cannot* apply filters to measures of type `number`. You must apply your filters to the input measures, to achieve that result.

```yaml
- field: channel
  value: "-Paid"
```

`canon_date`: This is the date to use when trending this metric over time or applying a time period. It defaults to the `default_date` of the view the metric is in, but you can override it here. When you override it, just use the `name` of the date field (e.g. use `order_at` instead of `order_at_date` which also contains a dimension group).

`non_additive_dimension`: This property defines a dimension over which the metric cannot be aggregated (usually a time dimension). An example of this type of metric would be MRR (Monthly Recurring Revenue) where each customer in your database has their MRR as of a single day in the database. To get the right answer, you can't just sum up MRR over all days, you have to take MRR for each customer on the most recent day that customer had an MRR value and then sum *that*.

For example, let's look at a daily MRR table that includes one row per date of the account, the account's id, the account's plan type, and the plan's MRR in the following columns:

| record\_date | account\_id | plan\_type | mrr\_value |
| ------------ | ----------- | ---------- | ---------- |
| 2022-01-01   | 123         | Basic      | $20        |
| 2022-01-02   | 123         | Basic      | $50        |
| 2022-01-03   | 125         | Basic      | $20        |
| 2022-01-04   | 126         | Enterprise | $100       |

The Non Additive Dimension has three properties

* `name`: This references the fully qualified name of the field you're referencing (e.g. `record_date_raw`).
* `window_choice`: This is either `max` or `min` and indicated whether you want to choose the start of period value (min) or the end of period value (max).
* `window_aware_of_query_dimensions`: (Optional) This is either `true` or `false`. When `true`, it will include all group by dimensions in the metric's calculation. For example, when calculating inventory you might want the value to be `true` so that when grouping by product you get the most recent date for each product. In another example, you might want the value to be `false` if you are calculating account balances because you don't want the most recent date of an account type to influence the balance of a account holder's balance. The default is `true`.
* `nulls_are_equal`: (Optional) In the join between the date to filter on and the core query, this property controls if nulls should be considered equal. Default is false (it is recommended to not change this).
* `window_groupings` (Optional) This is an array of fully qualified field references, which tells Zenlytic which groups to consider specially when finding the start or end of the period
  * Example: If you have MRR, like our example here, you will want to use `account_id` as the window grouping because if you have `account_id` X who's most recently recorded day is 2023-01-02 and `account_id` Y who's most recently recorded day is 2023-01-04, you want to use the `mrr_value` from 2023-01-02 for `account_id` X and 2023-01-04 for `account_id` Y. Window groupings allow you to specify the `account_id` as a window grouping to achieve that end.

**Example 1 (MRR):**

{% code overflow="wrap" %}

```yaml
- name: account_id
  field_type: dimension
  type: string
  sql: ${TABLE}.id

- name: record
  field_type: dimension_group
  type: time
  sql: ${TABLE}.record_at
  timeframes: [raw, date, week, month, year]

- name: mrr
  field_type: measure
  type: sum
  sql: ${TABLE}.mrr_value
  non_additive_dimension:
    name: record_raw      # This is referencing the raw timestamp of the above dimension group
    window_choice: max
    window_groupings: [account_id]
```

{% endcode %}

**Example 2 (Inventory):**

{% code overflow="wrap" %}

```yaml
- name: snapshot
  field_type: dimension_group
  type: time
  sql: ${TABLE}.snapshot_at
  timeframes: [raw, date, week, month, year]

- name: beginning_of_period_inventory_levels
  field_type: measure
  type: sum
  sql: ${TABLE}.inventory_value
  non_additive_dimension:
    name: snapshot_date      # This is referencing the timestamp truncated to the date of the above dimension group
    window_choice: min
    window_aware_of_query_dimensions: true     # The default is true 
```

{% endcode %}

`extra`: The extra property is like dbt `meta` property, and you can put whatever additional properties you want in here. For example, under this property you could add a property like this `maintainer: "jane doe"`

## Valid and invalid measure patterns

A common source of errors in measure definitions is mismatching `type` with what's inside `sql`. There are only two valid patterns; double-aggregation and missing-aggregation are both invalid.

| Pattern                            | Valid? | Why                                                                        |
| ---------------------------------- | ------ | -------------------------------------------------------------------------- |
| `type: number` + `sql: SUM(field)` | Yes    | The aggregation is explicit in the SQL expression.                         |
| `type: sum` + `sql: field`         | Yes    | The `type` provides the aggregation; `sql` references the column.          |
| `type: number` + `sql: field`      | **No** | No aggregation. Zoë will silently wrap the SQL but verification will fail. |
| `type: sum` + `sql: SUM(field)`    | **No** | Double aggregation — `type: sum` wraps another `SUM()`.                    |

When defining a new measure, always use one of the two valid patterns. If you need a more complex aggregation (cumulative, window-based, distinct-key), use `type: number` with the full SQL expression and add a `zoe_description` explaining what it calculates.

{% hint style="warning" %}
**`canon_date` overuse.** Setting `canon_date` on many measures has been observed to cause incorrect SQL generation. Prefer setting `default_date` on the [view](/data-modeling/view) and only use `canon_date` on individual measures when they genuinely need a different date than the view default.
{% endhint %}

{% hint style="info" %}
**Where to document what a measure means.** Put user-facing descriptions on `description` and agent-only calculation notes on `zoe_description`. Both are capped at 1,024 characters. For longer guidance, put it in the view `description` / `zoe_description` (up to 10,000 characters) or in a [Skill](/using-zenlytic/skills). See [How to Steer Zoë's Answers](/tips-and-tricks/zoe_context_ingestion) for the full surface-vs-visibility table.
{% endhint %}

## Examples

The first measure takes the average of price for every order lines row. The second measure, sums up the price value, but it performs the sum uniquely based on each unique order\_id instead of every row in the table, which ensures there is no double counting.

```yaml
version: 1
type: view
name: order_lines

sql_table_name: prod.order_lines
default_date: order

fields:
- name: order_line_id
  field_type: dimension
  type: string
  sql: ${TABLE}.order_line_id
  primary_key: yes
  hidden: yes

- name: order_id
  field_type: dimension
  type: string
  sql: ${TABLE}.order_id
  hidden: yes

- name: price
  field_type: dimension
  type: number
  sql: ${TABLE}.item_price
  label: "Item price"
  description: "The price we currently have on the item in Shopify"

- name: avg_price
  field_type: measure
  type: average
  # This references the "price" dimension above to calculate the average
  sql: ${price} 

- name: total_price_order_level
  field_type: measure
  type: sum_distinct
  sql_distinct_key: ${order_id}
  sql: ${price} 

- name: number_of_orders
  field_type: measure
  type: count_distinct
  sql: ${order_id}

- name: cumulative_orders
  field_type: measure
  type: cumulative
  measure: number_of_orders
  description: "The unique cumulative number of orders"
  value_format_name: decimal_0
```


# Sets

Group reusable fields into named sets so you can reference them consistently.

Sets are collections of [fields](/data-modeling/field) that can be referenced throughout your data model. They're a convenient way to reference several fields over and over again instead of having to re-type the names.

Sets are always and only defined in [views](/data-modeling/view). Although they can contain fields that are outside of the view they're defined in, there must be a path to join the views together to be able to reference fields in other views in a single set.

## Properties

Sets have only two properties:

`name`: (Required) The name of the set. If you reference this set elsewhere this is the name you will use. Like all names, it follows [Zenlytic naming conventions](/data-modeling/data_modeling#naming-conventions)

`fields`: This is a list of fields that make up the set. There is a flexible syntax you can use to define the fields included in sets, which is discussed below.

## Field syntax

The syntax for specifying which fields to include in a list of fields is as follows.

You can include all available fields by using the special (case-sensitive) value `ALL_FIELDS*`.

You can include a single field by name by referencing its name. E.g. `customer_name` would include the field `customer_name`. If you want to include a field that is not in the base view, you'll need to specify the view name. For example, `customers.customer_name` would include that specific field, regardless of the view you are in.

You can un-include a single field by name by referencing its name with a negation before it. E.g. `-customer_name` would un-include the field `customer_name`. If you had two values specified, `[ALL_FIELDS*, -customer_name]` you would be including all available fields *except for* the `customer_name` field. As always, if you want to include a field that is not in the base view, you'll need to specify the view name. For example, `-customers.customer_name` would un-include that specific field, regardless of the view you are in.

You can include a set (even in the building of another set) by referencing its name and expanding it with the `*`. E.g. `my_set*` would include all fields defined in that set. If you are specifying fields in different views, you need to reference the view name for sets want to include or un-include. For example, `customers.my_set*` would include that all fields in that set.

You can un-include a set (even in the building of another set) by negating it, referencing its name and expanding it with the `*`. E.g. `-my_set*` would un-include all fields defined in that set. If you are specifying fields in different views, you need to reference the view name for sets want to include or un-include. For example, `-customers.my_set*` would un-include that all fields in that set.

These operations happen in order, so if you include a field early in your definition, then exclude it by excluding a set that the field is present in, the field will be excluded from the set. Vice versa, if you exclude the field early on in your definition, then later add it back in, it will be present in the set.

## Examples

Let's say we have a view with five (5) fields: `[customer_id, email, new_vs_repeat, state, city]`.

Let's define a set for the customer location. This only includes the `state` and `city` fields.

```yaml
name: customer_location
fields: [state, city]
```

Let's define a set for the customer without PII. This will include all fields in the view except for `email`.

{% code overflow="wrap" fullWidth="false" %}

```yaml
name: customer_no_pii
fields: [ALL_FIELDS*, -email]
```

{% endcode %}

Finally, let's define a set without PII and without location. We can use our existing building blocks for this one. In the first part of this definition we included the fields `customer_id`, `new_vs_repeat`, `state`, and `city`. Then we negated our set with `state` and `city`, which means our final set will only contain two fields `customer_id` and `new_vs_repeat`, which is exactly what we wanted.

```yaml
name: customer_no_pii_no_location
fields: [customer_no_pii*, -customer_location]
```


# Field Filters

Use filter syntax for fields and dashboards across strings, numbers, booleans, and dates.

Field filters can be attached to objects in several contexts. They can be used on fields (measures, dimensions, dimension groups), and dashboards (at the whole-dashboard level or the element level).

Their syntax is not entirely straightforward but is quite powerful.

## Properties

Field filters have only two (2) properties, with an optional third:

`field`: (Required) The name of the field to reference. If you reference this field inside a view, you do not need to use the syntax `view_name.field_name` but otherwise you will need to use that syntax to disambiguate the field. Note: for dimension groups, you will also need to include the extension in your reference (e.g. if your dimension group has name `order_at` and has an option `date` in its `timeframes` property, a valid reference would be `order_at_date`, NOT `order_at`)

`value`: (Required) This is the value used to determine the comparison the filter will use (equal to, greater than, etc) and the value tom compare against. The syntax is discussed in depth below.

## Syntax + Examples

If you've used LookML before this syntax will feel familiar to you, and you may be able to get by without even reading this guide. We'll go in more detail based on the type of filter.

Anytime when using the Zenlytic UI you can replicate this behavior using the `matches` option in the dropdown for filter comparison type.

## String (or text)

<table><thead><tr><th width="200.1796875">Example</th><th>Description</th></tr></thead><tbody><tr><td>Foo</td><td>Equals "Foo" exactly, <code>field_name = 'Foo'</code></td></tr><tr><td>Foo,Bar</td><td>Equals "Foo" or "Bar" exactly, <code>field_name in ('Foo', 'Bar')</code></td></tr><tr><td>%Foo%</td><td>Matches any string that contains "Foo" (not case sensitive), e.g. matches 'fast food', <code>field_name ilike '%Foo%'</code></td></tr><tr><td>Foo%</td><td>Matches any string that starts with "Foo" (not case sensitive), e.g. matches 'food' does not match 'fast food', <code>field_name ilike 'Foo%'</code></td></tr><tr><td>%Foo</td><td>Matches any string that ends with "Foo" (not case sensitive), e.g. matches 'tofoo' does not match 'food', <code>field_name ilike '%Foo'</code></td></tr><tr><td>NULL</td><td>Value is null, <code>field_name is null</code></td></tr><tr><td>-Foo</td><td>Not equal to "Foo" exactly, <code>field_name != 'Foo'</code></td></tr><tr><td>-Foo,-Bar</td><td>Not equal to "Foo" or "Bar" exactly, <code>field_name not in ('Foo', 'Bar')</code></td></tr><tr><td>-NULL</td><td>Value is not null, <code>field_name is not null</code></td></tr><tr><td>-%Foo%</td><td>Does not match any string that contains "Foo" (not case sensitive), <code>field_name not ilike '%Foo%'</code></td></tr><tr><td>-Foo%</td><td>Does not match any string that starts with "Foo" (not case sensitive), <code>field_name not ilike 'Foo%'</code></td></tr><tr><td>-%Foo</td><td>Does not match any string that ends with "Foo" (not case sensitive), <code>field_name not ilike '%Foo'</code></td></tr></tbody></table>

## Numeric

| Example | Description                                               |
| ------- | --------------------------------------------------------- |
| =100    | Equals 100 exactly, `field_name = 100`                    |
| !=100   | Not equal to 100 exactly, `field_name != 100`             |
| >=100   | Greater than or equal to 100 exactly, `field_name >= 100` |
| <=100   | Less than or equal to 100 exactly, `field_name <= 100`    |
| >100    | Greater than 100 exactly, `field_name > 100`              |
| <100    | Less than 100 exactly, `field_name < 100`                 |
| NULL    | Value is null, `field_name is null`                       |
| -NULL   | Value is not null, `field_name is not null`               |

## Boolean (True or False)

| Example | Description                                    |
| ------- | ---------------------------------------------- |
| TRUE    | The value evaluates to true, `field_name`      |
| FALSE   | The value evaluates to false, `not field_name` |

## Dates

These are by far the most complicated, but also some of the most powerful expressions for filtering.

Examples for all of these patterns will be given below in a table.

To start with the simplest pattern, you can make sure data is all before or after a explicit date.

Moving to a more complex pattern, you can say `this {interval}` or `last {interval}` or `{n} {interval}` or `{n} {interval} ago` when `interval` is one of these: "week", "month", "quarter", "year", and `n` can be any integer.

You can also use the above patterns and append "to date" to get rolling historic date windows. You can say `{interval} to date` or `last {interval} to date` or `{n} {interval} ago to date`.

Finally, you can also say `{n} {interval} ago for {n} {interval}` to have a extremely fine-grained filter for historical dates.

| Example                      | Description                                                                                                                                                                                                                                                                                                                               |
| ---------------------------- | ----------------------------------------------------------------------------------------------------------------------------------------------------------------------------------------------------------------------------------------------------------------------------------------------------------------------------------------- |
| "after 2021-02-03"           | This is any date on or after 2021-02-03                                                                                                                                                                                                                                                                                                   |
| "before 2021-02-03"          | This is any date on or before 2021-02-03                                                                                                                                                                                                                                                                                                  |
| "2021-02-03 until yesterday" | This is any date on or after 2021-02-03 up until the day before `current_date` in your warehouse. You can use any options listed in this syntax in the first or second slot here. The filter will take the beginning of the range of the first value (if it is a range), and the end of the range of the second value (if it is a range). |
| "today"                      | This is any date that has the same day as current\_date in your warehouse                                                                                                                                                                                                                                                                 |
| "yesterday"                  | This is any date that has the same day as the day before current\_date in your warehouse                                                                                                                                                                                                                                                  |
| "this week"                  | This is any date from the start of the current week (as defined in your [model](/data-modeling/model)) to now                                                                                                                                                                                                                             |
| "this month"                 | This is any date from the start of the current month to now                                                                                                                                                                                                                                                                               |
| "this quarter"               | This is any date from the start of the current quarter to now                                                                                                                                                                                                                                                                             |
| "this year"                  | This is any date from the start of the current year to now                                                                                                                                                                                                                                                                                |
| "last week"                  | This is any date from the start of the last complete week to the beginning of the current week                                                                                                                                                                                                                                            |
| "last month"                 | This is any date from the start of the last complete month to the beginning of the current month                                                                                                                                                                                                                                          |
| "last quarter"               | This is any date from the start of the last complete quarter to the beginning of the current quarter                                                                                                                                                                                                                                      |
| "last year"                  | This is any date from the start of the last complete year to the beginning of the current year                                                                                                                                                                                                                                            |
| "week to date"               | This is any date from the start of the current week (as defined in your [model](/data-modeling/model)) to now                                                                                                                                                                                                                             |
| "month to date"              | This is any date from the start of the current month to now                                                                                                                                                                                                                                                                               |
| "quarter to date"            | This is any date from the start of the current quarter to now                                                                                                                                                                                                                                                                             |
| "year to date"               | This is any date from the start of the current year to now                                                                                                                                                                                                                                                                                |
| "last week to date"          | This is any date from the start of the last complete week to same number of complete days from the start of that week that have been completed in the current week                                                                                                                                                                        |
| "52 weeks ago to date"       | This is any date from the start of 52 weeks ago to same number of complete days from the start of that week that have been completed in the current week                                                                                                                                                                                  |
| "12 months ago to date"      | This is any date from the start of the 12 months ago to same number of complete days from the start of that month that have been completed in the current month                                                                                                                                                                           |
| "1 year ago to date"         | This is any date from the start of the 1 year ago to same number of complete days from the start of that year that have been completed in the current year                                                                                                                                                                                |
| "1 year ago for 3 months"    | This is any date from the start of the 1 year ago to the end of 3 months from the start of that year                                                                                                                                                                                                                                      |
| "1 year ago for 30 days"     | This is any date from the start of the 1 year ago to the end of 30 days from the start of that year                                                                                                                                                                                                                                       |
| "2 years ago"                | 2 years ago from the start of the current year until one year after that date                                                                                                                                                                                                                                                             |
| "3 months ago"               | 3 months ago from the start of the current month until one month after that date                                                                                                                                                                                                                                                          |
| "3 months"                   | 3 months ago from the start of the current month to now                                                                                                                                                                                                                                                                                   |
| "30 days"                    | 30 days ago from the start of the current day to now                                                                                                                                                                                                                                                                                      |

## Examples

In a field you can optionally apply one or more of these filters. We see three filters applied here.

The first filter sets the numeric `order_number` equal to `1`. The second filter sets the string `first_order_source_category` *not* equal to `'Paid'`. The third filter sets the `order_date` to be in the `month to date` range.

```yaml
- field_type: measure
  name: number_of_organic_new_orders
  type: count
  sql: ${id}
  description: The total number of orders that are new and organic
  value_format_name: decimal_0
  filters:
    - field: order_number
      value: =1
    - field: first_order_source_category
      value: -Paid
    - field: order_date
      value: month to date
```


# Formatting

Format numbers, currencies, percentages, and images with supported value format names.

Passing the `value_format_name` parameter to your [field](/data-modeling/field) lets you easily format values in a way that's easy to read for business users.

{% hint style="warning" %}
**Use named formats only.** `value_format_name` must be one of the named formats in the table below (e.g., `usd`, `percent_0`, `decimal_2`). Literal format strings like `"$#,##0.00"` or `"0.0%"` are not supported and will break. If you need a format that isn't listed, contact Zenlytic support rather than passing a literal format string.
{% endhint %}

## Options

There are several options. Broadly speaking, there is a format type followed by a number of decimal places. For example, `decimal_1` formats the number like a decimal and rounds to one decimal place.

<table><thead><tr><th>Value Format Name</th><th width="281.20703125">Unformatted Value</th><th>Formatted Value</th></tr></thead><tbody><tr><td>decimal</td><td>12345.678</td><td>12346</td></tr><tr><td>decimal_0</td><td>12345.678</td><td>12,346</td></tr><tr><td>decimal_1</td><td>12345.678</td><td>12,345.7</td></tr><tr><td>decimal_2</td><td>12345.67812</td><td>12,345.68</td></tr><tr><td>decimal_3</td><td>12345.67812</td><td>12,345.678</td></tr><tr><td>decimal_4</td><td>12345.67812</td><td>12,345.6781</td></tr><tr><td>decimal_pct_0</td><td>3.456</td><td>3%</td></tr><tr><td>decimal_pct_1</td><td>3.456</td><td>3.5%</td></tr><tr><td>decimal_pct_2</td><td>3.456</td><td>3.46%</td></tr><tr><td>decimal_pct_3</td><td>3.4561</td><td>3.456%</td></tr><tr><td>decimal_pct_4</td><td>3.4561</td><td>3.4561%</td></tr><tr><td>percent_0</td><td>0.3456</td><td>35%</td></tr><tr><td>percent_1</td><td>0.3456</td><td>34.6%</td></tr><tr><td>percent_2</td><td>0.3456</td><td>34.56%</td></tr><tr><td>percent_3</td><td>0.345612</td><td>34.561%</td></tr><tr><td>percent_4</td><td>0.345612</td><td>34.5612%</td></tr><tr><td>eur</td><td>12345.678</td><td>€12.3k</td></tr><tr><td>eur_0</td><td>12345.678</td><td>€12,346</td></tr><tr><td>eur_1</td><td>12345.678</td><td>€12,345.7</td></tr><tr><td>eur_2</td><td>12345.678</td><td>€12,345.68</td></tr><tr><td>usd</td><td>12345.678</td><td>$12.3k</td></tr><tr><td>usd_0</td><td>12345.678</td><td>$12,346</td></tr><tr><td>usd_1</td><td>12345.678</td><td>$12,345.7</td></tr><tr><td>usd_2</td><td>12345.678</td><td>$12,345.68</td></tr><tr><td>image_from_url</td><td>https://mydomain.com/myimage</td><td>(Rendered Image)</td></tr></tbody></table>

## Examples

Here's an examples of a field with `value_format_name` as a property.

```yaml
- name: avg_price
  field_type: measure
  type: average
  sql: ${price}
  value_format_name: usd
```


# Symmetric Aggregates

Use distinct-key aggregates to avoid double counting when joins duplicate metric values.

Symmetric aggregates allow Zenlytic to calculate your metrics accurately even when there's a situation where the joins make that very difficult by duplicating the values to aggregate.

We could go in-depth into how we do this, but we're obviously not the first to do this, and Looker has already written the best piece of content about this [here](https://cloud.google.com/looker/docs/best-practices/understanding-symmetric-aggregates), which we strongly recommend checking out.

## Examples

You can use `distinct` aggregates to tell Zenlytic how to distinctly calculate your metric. For example, this measure is a sum, but uniquely for each `order_id`.

```yaml
- name: total_price_order_level
  field_type: measure
  type: sum_distinct
  sql_distinct_key: ${order_id}
  sql: ${price} 
```


# Table Calculation Syntax

Reference supported table calculation functions and arithmetic for post-query analysis.

This is a reference for the functions available to the table calculations, including examples of usage in practice.

`sum`: The sum function sums up the numeric column it operates on. For example, you could use this function like `[orders.total_revenue] / sum([orders.total_revenue])` to get the percent of the total for the total revenue column. This will divide each row of the total revenue column by the sum of it's total using this function.

| total revenue | fx (percent of total revenue) |
| ------------- | ----------------------------- |
| 5             | 36%                           |
| 3             | 21%                           |
| 6             | 43%                           |

`cumulativesum`: The cumulative sum function creates a running total of the column going in the sort order of the column. For example, if you used `cumulativesum([orders.total_revenue])` on the below table, you'd see this result. Note: You cannot pass an expression to the `cumulativesum` function, you can only pass the reference to the column itself (e.g. passing \[orders.total\_revenue] will work as expected, but passing \[orders.total\_revenue] \* 2 will not)

| total revenue | fx (cumulativesum of total revenue) |
| ------------- | ----------------------------------- |
| 5             | 5                                   |
| 3             | 8                                   |
| 6             | 14                                  |

`+ - * /`: You can use the arithmetic operations `+`, `-`, `*`, and `/` to combine scalar values or other columns. For example, you could multiply the total revenue column by `.78` then add in the shipping value `[orders.total_revenue] * .78 + [orders.total_shipping]`.

| total revenue | total shipping | fx (total revenue \* .78 + total shipping) |
| ------------- | -------------- | ------------------------------------------ |
| 5             | 0              | 3.9                                        |
| 3             | 2              | 4.34                                       |
| 6             | 1              | 5.68                                       |


# Referenceable Attributes

Use user and query attributes inside SQL for dynamic filtering and query behavior.

Referenceable attributes are attributes that can be used in queries either on views or dimensions, dimension groups or measures.

The include all user attributes that you pass in via the API (in embedding) or user attributes you have on the user that you've assigned through the UI.

In addition to those user attributes, these are also default user attributes that will be present on the user or query without any additions on your part.

## Defaults

These are two objects you can interact with that are populated by default.

### User Attributes

The first is the `user_attributes` object. This object will include all the values you pass, and will additionally include:

`email`: The email for the user making the query, as defined in their Zenlytic account.

### Query Attributes

The second is the `query_attributes` object. This object will show attributes of the query that is being run, and will include:

`dimension_group`: This is the dimension group of the query (only applicable for fields that are of `field_type: dimension_group`). It will be the value of the dimension group (e.g. `raw`, `date`, `week`, `month_of_year`, etc)


# Access Grants

Apply user-attribute-based column and row access controls with access grants and access filters.

Access control is managed in Zenlytic through two concepts.

1. [Access grants](#access-grants) cover *column-based* access control
2. [Access filters](#access-filters) cover *row-based* access control

## How access grants are evaluated

Access grants are checked against the user attribute named in the grant's `user_attribute` property.

If the user has a value for that attribute, the grant is evaluated by comparing the user's value with the grant's `allowed_values`. A matching value grants access. A non-matching value denies access.

If the user does not have that attribute at all, that grant is not triggered and does not block access. Missing attributes are not treated as denied values.

For default-deny behavior, give every governed user a default value that does not grant access. The usual pattern is to set a non-granting value on the All Users group, such as `revenue: no_revenue`, then set the granting value only on the users or groups that should have access, such as `revenue: has_revenue`.

```yaml
access_grants:
  - name: revenue_access
    user_attribute: revenue
    allowed_values: ["has_revenue"]
```

With this grant:

| User's `revenue` attribute | Result                                           |
| -------------------------- | ------------------------------------------------ |
| `has_revenue`              | Access granted                                   |
| `no_revenue`               | Access denied                                    |
| No `revenue` attribute     | Grant is not triggered and does not block access |

When multiple grants are listed in `required_access_grants`, all triggered grants must pass. A missing user attribute on a grant is non-blocking for that grant.

## Access grants

Access grants are restrictions for certain users on the ability to see various fields and query them in the Zenlytic interface. These access restrictions are based on access to *columns,* *views,* and *topics*. For row-based access control look at [access filters](#access-filters).

They are specified in [model](/data-modeling/model) files, like the following example:

```yaml
access_grants:
  - name: financial_grant
    user_attribute: department
    allowed_values: ["finance", "executive"]
  - name: pii_grant
    user_attribute: department
    allowed_values: ["finance", "customer_support"]
```

## Properties

`name`: (Required) The name of the access grants. If you reference this access grant elsewhere this is the name you will use. Like all names, it follows [Zenlytic naming conventions](/data-modeling/data_modeling#naming-conventions).

`user_attribute`: This is the name of the user attribute to access for comparison with `allowed_values`. If you defined a user attribute in the Zenlytic UI named `department` it might have values like `finance`, `marketing, finance`, or `ops` each assigned to an individual user. E.g. John Doe has a user attribute `department` which is `marketing, finance` and Jane Doe has a user attribute `department` which is `finance`. For more information, check out [user attributes](#user-attributes) below.

`allowed_values`: This is a list of values which, if any are equal to the requesting person's user attribute given in the property above, will grant them access to the data being restricted by the access grant. For example, John Doe has a user attribute `department` which is `marketing`. If `user_attribute` (the property above) is set to `department` and `allowed_values` is `["marketing", "finance"]` John *will* have access to the data. However, in the same scenario, if `allowed_values` is `["finance", "ops"]` he will not have access, and will not be able to even see the fields in his interface.

## Examples

Access grants are defined and applied as follows. They're defined in models, and can be applied to any topic, view, or field using the `required_access_grants` property. If you specify multiple access grants in that property they must *all* be true for that user to have access, except that a missing user attribute on a grant is non-blocking for that grant.

```yaml
version: 1
type: model
name: demo

# This defines the access grant
access_grants:
  - name: restrict_dept
    user_attribute: department
    allowed_values: ["Marketing", "Exec"]
  - name: exec_only
    user_attribute: department
    allowed_values: ["Exec"]
```

This is the view file that applies the `restrict_dept` access grant to restrict access to the entire view (every field in the view) to only people with the department "Marketing" or "Exec".

Additionally, it defines the `exec_only` access grant (used below) to ensure *only* users with the department "Exec" have access to the `email` field.

As a result, a user with the department "Finance" won't be able to access any field in this view, a user with the department "Marketing" will access every field except for the `email` field, and a user with the "Exec" department will access every field in the view, including the `email` field. A user with no `department` attribute would not be blocked by these grants, because the grants would not be triggered for that user.

```yaml
version: 1
type: view
name: sample_view
model_name: demo
required_access_grants: [restrict_dept]


fields:
  - name: number_of_orders
    field_type: measure
    type: count_distinct
    sql: ${TABLE}.order_id

  - name: email
    required_access_grants: [exec_only]
    field_type: dimension
    type: string
    sql: ${TABLE}.email
  
```

## Access filters

Access filters are restrictions for certain users on the ability to see various rows and query them in the Zenlytic interface. These access filters protect data access based on access to *rows* in a view. For column-based access control look at [access grants](#access-grants).

They are specified in [view](/data-modeling/view) files and apply to all queries that reference that view.

## Properties

`field`: (Required) The fully qualified name of the field used in the access filter. For example, if you're in the view `orders` just putting `product` for the `field` property will not work, you have to specify `orders.product`, the fully qualified name.

`user_attribute`: (Required) This is the name of the user attribute to access for comparison with `allowed_values`. If you defined a user attribute in the Zenlytic UI named `department` it might have values like `finance`, `marketing, finance`, or `ops` each assigned to an individual user. E.g. John Doe has a user attribute `department` which is `marketing, finance` and Jane Doe has a user attribute `department` which is `finance`. For more information, check out [user attributes](#user-attributes) below.

## Examples

Access filters are defined and applied as follows. They're defined in view, and apply to the view in which they're defined. If you specify multiple access filters they must *all* be true for that user to have access.

This is the view file that corresponds with a access filter using the `products` user attribute.

In this example, the user has a user attribute named `products` with the value `Blue Pants, White Shoes`. In the following access filter with this user attribute this user will have the where filter clause `orders.product is in ('Blue Pants', 'White Shoes')` force-added to all queries this user issues that include this view. If the user attribute's value was instead `Green shirt`, the where filter clause would be `orders.product = 'Green shirt'`.

Note: You have to fully qualify the `field` property for the access filter. In this example, just putting `product` for the `field` property will not work, you have to specify `orders.product`, the fully qualified name.

```yaml
version: 1
type: view
name: orders
model_name: demo

access_filters:
  - field: orders.product
    user_attribute: 'products'

fields:
  - name: product
    field_type: dimension
    type: string
    sql: ${TABLE}.product

```

## User attributes

You can set user attributes by going to the "Team Members" section of the workspace settings and adding user attributes there under the "User Attributes" header, for each team member.

![team-members](/files/Jou56POXu68rFO6R931W)

User attributes are strings that can handle [filter syntax](/data-modeling/field_filter) for specifying complex comparisons or inclusions in either access grants (column level security) or access filters (row level security).


# dbt MetricFlow Integration

Connect dbt Semantic Layer projects to Zenlytic and extend them with Zenlytic metadata.

To integrate Zenlytic's data model with your dbt models, define the dimensions and measures (metrics) in semantic models section of dbt. Follow this page to get started with [Metricflow (dbt Semantic Layer)](https://docs.getdbt.com/docs/get-started-dbt).

## Setup

If you want to see an end to end example, you can follow [this example](https://github.com/Zenlytic/demo-data-model/tree/metricflow) on top of a demo data model.

To start, you will need to connect your github repo that has your dbt semantic layer project.

Next, you'll need to add a `zenlytic_project.yml` file in the root of the repo. This file is what Zenlytic uses to find files in your repo. You'll want it to look like:

{% hint style="info" %}
Configuration File

{% code overflow="wrap" %}

```
# The name doesn't matter functionally.
name: demo_zenlytic_project

# To connect with metricflow, you'll need to add this line. 
# This tells Zenlytic to look for Metricflow files.
mode: metricflow

# This is the connection name for the warehouse creds you entered in the Zenlytic UI profile: `demo`

# If your metricflow files are not located in a subfolder to the `dbt_project.yml` file, you will need to specify this location.
metricflow-path: 'metricflow/'

# Zenlytic has a concept of "Topics" that Metricflow doesn't have. 
# We can make them automatically (default behavior) when this arg is
# `true`, and we will not make them, if it is false use_default_topics: `true`

# These are paths to file resources.

topic-paths:
- topics
view-paths:
- views
dashboard-paths:
- dashboards
model-paths:
- models
```

{% endcode %}
{% endhint %}

Once you have that `zenlytic_project.yml` file ready to go, Zenlytic will be able to see your files.

## Reading Metricflow Semantics

Zenlytic will handle all mappings for Metricflow native objects automatically. Here are a few ways you might want to extend Metricflow in Zenlytic.

### Models

The default model will act as nothing but a connection to the data warehouse (the `profile` property does that in the above file example). If you want to use more advanced options in the [model](/data-modeling/model), like [access controls](/data-modeling/access_grants) or changing the `week_start_day`, then you can create one (and only one) model file, and put that file in whatever directory you have in the `model-paths` options in the `zenlytic_project.yml` file.

### Topics

[Topics](/legacy/topic) are collections of tables (views) that can be joined together. You can choose to leave the `use_default_topics: true` and let Zenlytic automatically infer the topics based on your Metricflow join graph, or you can set it to `use_default_topics: false` and define the topics yourself for more granular control.

### Extra properties

For all objects, which are: Semantic Models (which map to [views](/data-modeling/view) in Zenlytic), dimensions (which map to [dimensions](/data-modeling/dimension) or [dimension groups](/data-modeling/dimension_group) in Zenlytic), measures and Metrics (which both map to [measures](/data-modeling/measure) in Zenlytic), you can pass through extra Zenlytic-specific properties using the dbt `meta` tag.

In every dbt `meta` tag, Zenlytic will look for a `zenlytic` property, which should include the properties you want to pass through, and will apply all of those properties to the object in Zenlytic.

For example, if you wanted to add an access control for the `email` dimension in Metricflow using your `pii_access` access grant, you would define it like so:

```yaml
- name: first_name
  type: categorical
  meta:
    zenlytic:
        required_access_grants: [pii_access]
```

The `required_access_grants: [pii_access]` property will get passed through to Zenlytic.

Likewise, in Semantic Models (what Zenlytic calls [views](/data-modeling/view)), you may want to be explicit about the schema the model is pointing to, beyond the default in the database credentials setting. You could do that like:

```yaml
semantic_models:
  - name: products        
    label: Product        
    model: ref('products')
    meta:
      zenlytic:
        sql_table_name: demo_prod.products
```

This will pass through the `sql_table_name: demo_prod.products` property tp the Zenlytic view, which will override the value inherited automatically from the `model: ref('products')` property.

## Limitations

Here let's talk through some limitations of Zenlytic's integration with Metricflow.

Zenlytic does *not* support the following concepts in Metricflow:

1. The `percentile` aggregation on a measure
2. The usage of [natural keys](https://docs.getdbt.com/docs/build/entities) in joins (using an array of fields to join instead of 1 field or custom SQL)
3. [Cumulative metrics](https://docs.getdbt.com/docs/build/cumulative)
4. [Conversion metrics](https://docs.getdbt.com/docs/build/conversion)
5. `offset_window` property in derived metrics
6. `Metric` and `Entity` parameterized [filter types](https://docs.getdbt.com/docs/build/ref-metrics-in-filters)

Have other questions? Reach out to our support in-application for more help.


# Adding a New Table

Add a warehouse table or CSV, configure metadata, and attach it to your model.

## 1. Go to Context Manager

Using the left-hand navigation, go to [Context Manager](/data-modeling/context_manager).

![add-new-table-context-manager](/files/puEWtcM1JLC8cbbIOk3O)

## 2. Click the "Add new table" button

Tables can be added by clicking the **"Add new table"** button in Context Manager.

Clicking the button will bring up the Add New Table modal.

![add-new-table-modal](/files/qSUUYI2kdyRB3SubkWqj)

## 3. Add a table from data warehouse or upload a CSV

The default tab is "Data Warehouse", which lets you select tables from existing database connections.

Alternatively, file upload is supported for CSVs. Only one table can be selected at a time, and only CSVs can be uploaded. CSV headers must only use alphanumeric characters, spaces, and underscores.

![add-new-table-file-upload](/files/u2nFPjoetDWnS1ekX3Wg)

## 4. Configure table metadata

After selecting a table or CSV to upload, table metadata like name, column data types, default date, and primary key can be configured.

![add-new-table-preview](/files/xacgBu0VXuKt6ZSLozdy)

## 5. Associate table with topic

If the table doesn't join to any existing topics in the data model, add it to a new topic.

![add-new-table-add-joins](/files/2aFi4vSqto4AZ0uiQye0)

If the table does join to an existing topic, add it to an existing topic. Additional joins can also be set up later.

![add-new-table-add-joins](/files/hlS8dMrD70jg4TzhtczL)

## 6. Add table

After associating the table with a topic, the table is added to the data model.

![add-new-table-success](/files/ENwrHRiADJ1jHhmfmT2F)


# Cache Refresh

Force-refresh the model cache after direct git changes so Zoë uses the latest context.

Zenlytic caches your data model to keep responses fast. When you edit the model through [Context Manager](/data-modeling/context_manager) in the UI, the cache is invalidated automatically. When changes are pushed **directly to the underlying git repository** — bypassing the UI — the cache does not know about them.

If you or a teammate pushed changes straight to git and Zoë still appears to be using the old data model, use **Pull from Remote** to rebuild the cache from the current state of the repo.

## How to pull from remote

1. Click your workspace name in the lower left of the screen.
2. In the menu that opens, click **Account Settings**.
3. In the panel that opens, under **Preferences**, click **Pull from Remote**.

<figure><img src="/files/rWmLzqLfdqNnqXq6prh2" alt="Workspace sidebar menu showing Workspace Manager, Account Settings, Feedback, and Log Out"><figcaption><p>Step 1–2: open the workspace menu and select Account Settings.</p></figcaption></figure>

<figure><img src="/files/Dlzn4rr7Mwzru5Bcd5MX" alt="Account Settings panel showing Pull from Remote under Preferences"><figcaption><p>Step 3: Pull from Remote lives under Preferences in Account Settings.</p></figcaption></figure>

After the pull completes, Zoë will pick up your latest changes on the next question.

## When you need to pull from remote

* A pull request was merged directly to the production branch in git.
* A teammate pushed model changes through an IDE or command line instead of the Zenlytic UI.
* You're integrating Zenlytic with a CI pipeline that commits model files automatically.

## When you don't need to pull from remote

* You edited the model in Context Manager and used **Deploy to production**.
* You switched branches in the UI (the UI already refreshes the cache for branch switches).


# Proactive Getting Started

Build reusable Zoë conversations, run them on demand, and share them across your workspace.

Proactive Agents allow us to build and run entire conversations with Zoë, and then enable others in the organization to re-use those conversations easily. With this feature, Zoë is more proactive and reusable for solving task-specific analyses than ever before.

Proactive Agents can be used to automate repetitive data processes, iterate on better Zoë prompts, and much more. Some examples include:

* Building narrative-based weekly business reviews that can be re-run periodically
* Automating a tedious manual process of reconciling CSVs against database data
* Demonstrating chains of thought and other Zoë prompting techniques to new users
* Saving exceptional conversational outputs from Zoë so that the reasoning steps can be reproduced and refined
* Getting lists of products or customers and then having Zoë produce personalized long form promotional content for each one

Proactive Agents are ideal for implementing tasks where you need one or all of the following characteristics:

* You need analytical tasks to be run automatically on a schedule and sent to you when completed
* You need precise control over the exact sequencing of analytical reasoning steps
* You need to query and transform data across multiple conceptual steps
* You need structured, predictable outputs and consistent, formatted results
* The task involves conditional logic - different behaviors should be taken based on intermediate results

## Navigating to Proactive Agents

1. To view your Proactive Agents and create new ones, from the left-hand navigational sidebar, click on ⚡Proactive Agents

<figure><img src="/files/vGJ16uREn32Zw8Q2OShp" alt=""><figcaption></figcaption></figure>

## Viewing Proactive Agents

By clicking the *Proactive Agents* option in the left-hand navigational sidebar, you will see a list of Proactive Agents that exist in your workspace. The three-dot menu reveals options to run, duplicate, or delete a Proactive Agent. When you click on a Proactive Agent's name or highlighted row, you will be navigated to the Proactive Agent Builder.

<figure><img src="/files/np57NnvyQY4WXxQfCtrn" alt=""><figcaption></figcaption></figure>

## Creating Proactive Agents

In the upper right-hand side of the screen, you can create new Proactive Agents by pressing *Create a New Agent*. This button will then navigate you to the Proactive Agent Builder.

<figure><img src="/files/dyAooVVkAbX9KQKmp8a1" alt=""><figcaption></figcaption></figure>

## Editing Proactive Agents

By default, the newly created Proactive Agent will be titled "New Proactive Agent" and contain no instruction details. We can click the Proactive Agent title and type to change the title. The new name will be saved with an outside click or "Enter" keypress.

Proactive Agents allow us to define a specific Zoe task that will be run as a conversation. Let's click through the form options on this *New Proactive Agent* page to get started. Click on the *Create Agent* then the *Test Run* button in the upper right-hand section to preview a run of our new Proactive Agent.

<figure><img src="/files/Whg7rvgryrKRVRz7aVZK" alt=""><figcaption></figcaption></figure>

When the Proactive Agent conversation preview has completed its run, we can inspect its output, run it again, or we can modify the Proactive Agent before running again.

![message-done](/files/QA8auXjZFI60J0LZnj6N)

## File Attachments

Files and workspace Artifacts can be added to Proactive Agent instructions as attachments by pressing the *Plus* icon button in the Instruction textarea's bottom left corner.

## Create Proactive Agent from an existing Conversation

From an existing chat, we can click the "Save as Proactive Agent" button in the three-dot dropdown menu to create a new Proactive Agent from the outline of an existing chat. It will be saved in the Proactive Agents tab, and you can navigate to it in the future by hovering over the left-hand navigation side bar and clicking on 'Proactive Agents'.

<figure><img src="/files/4aUYX9YATAAwLSe9EamN" alt=""><figcaption></figcaption></figure>


# Publish

Publish proactive agents so teammates can discover, run, and re-use approved workflows.

By default, Proactive Agents are private to you, however, you can allow others in our organization to run and extend Proactive Agents when they are ready. The following image shows the *Publish* popover that appears after clicking "Private"/"Shared" in the Proactive Agent Builder Header.

After pressing '+ Add Group', we can select a workspace 'group' and give the group an 'access level' of Viewer, Editor, and Owner. For example, I've given all users in my workspace the ability to View the following Proactive Agent. See the table below for more detail on Proactive Agent access levels.

<table data-header-hidden><thead><tr><th width="312.6796875"></th><th></th></tr></thead><tbody><tr><td><strong>Access Level</strong></td><td><strong>Description</strong></td></tr><tr><td>OWNER</td><td>can run, edit, and share the Proactive Agent</td></tr><tr><td>EDITOR</td><td>can run and edit the Proactive Agent, but not share</td></tr><tr><td>VIEWER</td><td>can run the Proactive Agent, but cannot edit or share</td></tr></tbody></table>

<figure><img src="/files/fcKSQ81HiCQIO8HuUutf" alt=""><figcaption></figcaption></figure>


# Schedule Delivery

Run proactive agents on a schedule and deliver the results to users automatically.

At the bottom of the Proactive Agent Builder, click "Add Destination" to create a new email or slack delivery destination for this Proactive Agent. By default, there will be a single delivery destination to the Proactive Agent's creator by email.

On this page we have multiple options for configuring our scheduled delivery, such as name, cadence (When and how frequently to send), and destination (Email or Slack). Once the scheduled delivery has been created, we can also edit or delete the scheduled delivery from this form. From the button in the upper-right, click "Test Run" to trigger the Proactive Agent delivery manually at any time.

When the "Always Deliver" option is disabled, the Proactive Agent will review the conversation outputs before deciding whether to send the result to the delivery destination.

<figure><img src="/files/bg0VJrnVGIwk00mtsVWj" alt=""><figcaption></figcaption></figure>


# Run History

Inspect past proactive agent runs, review outputs, and troubleshoot failures or unexpected results.

The *Run* *History* tab provides a list of previous runs of the currently selected Proactive Agent. By clicking on a run on the left-hand side, the conversation preview on the right-hand side will change to show that previous run's conversation history.

<figure><img src="/files/MqrGUqrfOETpLnwWeSwG" alt=""><figcaption></figcaption></figure>


# MCP Overview

Connect your AI tools in to Zenlytic, or connect Zoë out to the rest of your stack.

The [Model Context Protocol](https://modelcontextprotocol.io) (MCP) is an open standard for exposing tools to LLM-powered agents. Zenlytic supports MCP in both directions, depending on which side you want Zenlytic to play:

<figure><img src="/files/8dJI4KpNkaakZbxZr3tD" alt=""><figcaption></figcaption></figure>

## Which one do I need?

* *Want to ask Zoë questions from Claude, Cursor, or ChatGPT?* → **MCP Server**
* *Want Zoë to reach Tableau, Snowflake, dbt, or GitHub from chat?* → **MCP Client**

### [**MCP Server**](/mcp/connecting-to-zenlytic)

Your own AI tools (Claude.ai, Claude Code, ChatGPT) connect *in* to Zenlytic's MCP server to ask questions and query your governed business data.

<figure><img src="/files/9AH1TGJM7gtrFbbB7G7Q" alt=""><figcaption></figcaption></figure>

### [**MCP Client**](/mcp/client)

Zoë connects *out* to external MCP servers (Tableau, Snowflake, dbt, GitHub, and more), so she can pull data and trigger workflows from other systems directly from the Zenlytic chat experience.

<figure><img src="/files/EEFjOvn5Rn7zT5RjR4zU" alt=""><figcaption></figcaption></figure>


# MCP Server

Connect AI tools like Claude.ai, Claude Code, and ChatGPT to Zenlytic's MCP server so they can query your business data directly.

Zenlytic supports the [Model Context Protocol (MCP)](https://modelcontextprotocol.io), which lets AI tools like **Claude.ai**, **Claude Code**, and **ChatGPT** ask Zoe questions about your business data directly — no copy-pasting numbers back and forth. Once connected, you can ask your AI assistant things like "What was our revenue last quarter, broken out by region?" and it will query Zenlytic's governed semantic layer and return a real answer, grounded in your actual metrics.

This guide walks through connecting an MCP client to Zenlytic and what to expect once you do.

> This is the reverse of [MCP Client](/mcp/client): here, **Zenlytic is the MCP server** and your AI tool is the client. If you're instead looking to connect Zoë to an external MCP server, see [MCP Client](/mcp/client).

## What you get

Zenlytic exposes one tool to MCP clients: **`ask_zoe`**. Your AI assistant calls this tool whenever you ask it a question that requires querying your business data. Behind the scenes, it:

* Starts (or continues) a Zenlytic conversation with your question
* Waits for Zenlytic's AI analyst to answer, including running any needed queries
* Returns the answer, a link back to the full conversation in the Zenlytic app, and any resulting data/charts

Every conversation started this way shows up in Zenlytic's conversation history like any other, tagged as an **MCP** conversation, so you (and your workspace admins) can always see what was asked and how it was answered.

## Before you start

You'll need:

* A Zenlytic account with access to the workspace you want to query
* Chat permission in that workspace
* An MCP-capable client (Claude.ai, Claude Code, ChatGPT, or similar)
* Zenlytic's MCP URL for your workspace. URL: <https://mcp.zenlytic.com/mcp>

## Option 1: Connect with OAuth (recommended for most clients)

If your client supports MCP connectors with OAuth (this includes Claude.ai, Claude.ai, Claude Code, and ChatGPT Developer mode), this is the easiest path — you don't need to generate or manage any tokens yourself.

1. In your MCP client, add a new connector/server pointing at Zenlytic's MCP URL
2. Your client will open a browser window and redirect you to Zenlytic's login page.
3. Log in (if you aren't already), then pick the workspace you want to connect.
4. Approve the connection. Your client is now authorized — you won't need to log in again unless you revoke access.

## Option 2: Connect with a Personal Access Token (for static-config clients or when OAuth isn't available)

Some clients don't support the OAuth flow and instead want a static token in their config file.

1. In Zenlytic, go to **Workspace Settings → Personal Access Tokens** (`/workspace-settings/personal-access-tokens`).
2. Click **Create token**, give it a name (e.g. "Claude MCP"), and save it.
3. **Copy the token immediately** — it's only shown once, right after creation.
4. Add it to your MCP client's config as a bearer token. For example:

```json
{
  "mcpServers": {
    "zenlytic": {
      "url": "https://mcp.zenlytic.com/mcp",
      "headers": {
        "Authorization": "Bearer <your-personal-access-token>"
      }
    }
  }
}
```

5. Restart or reload your MCP client so it picks up the new server.

## Connecting from popular clients

The steps above are general — each client has its own place to add a connector and its own quirks. Follow the guide for your client:

* [Claude.ai](/mcp/connecting-to-zenlytic/claude-ai)
* [Claude Code](/mcp/connecting-to-zenlytic/claude-code)

## Using it

Once connected, just ask your AI assistant a data question naturally — for example:

> "Hey Zoe, who were our top 5 customers by revenue last month?"

Your assistant will recognize this needs live data, call `ask_zoe`, and return the answer along with a link you can click to open the full conversation (and any charts or query results) in Zenlytic.


# Claude.ai

Connect Claude.ai to Zenlytic's MCP server so Claude can query your business data directly.

Claude.ai support MCP custom connectors with OAuth out of the box, so this is one of the easiest clients to connect to Zenlytic. See [MCP Server](/mcp/connecting-to-zenlytic) for what you get once connected and general prerequisites.

## Before you start

You'll need Zenlytic's MCP URL for your workspace. URL: <https://mcp.zenlytic.com/mcp>

## Connect with OAuth (recommended)

1. Open **Settings → Connectors**
2. Click **Add**, then choose **Add custom connector**.
3. Paste in Zenlytic's MCP URL and click **Add**.
4. Click **Connect**, complete the OAuth login/approval flow in the browser window that opens, and pick your workspace.

Your connector is now authorized — you won't need to log in again unless you revoke access.

## Connect with a Personal Access Token (alternative)

If OAuth isn't available, you can authenticate with a static token instead:

1. In Zenlytic, go to **Workspace Settings → Personal Access Tokens** (`/workspace-settings/personal-access-tokens`), click **Create token**, and copy it immediately — it's only shown once.
2. In the **Add custom connector** dialog, open **Advanced settings**.
3. Add a request header named `Authorization` with the value `Bearer <your-personal-access-token>`, and mark it required.
4. Click **Add**, then **Connect**.

## Using it

Once connected, ask Claude a data question naturally, for example:

> "Hey Zoe, who were our top 5 customers by revenue last month?"

Claude will call the `ask_zoe` tool and return the answer along with a link back to the full conversation in Zenlytic.


# Claude Code

Connect Claude Code to Zenlytic's MCP server so it can query your business data directly from the command line.

Claude Code connects to remote MCP servers over HTTP transport from the command line. See [MCP Server](/mcp/connecting-to-zenlytic) for what you get once connected and general prerequisites.

## Before you start

You'll need Zenlytic's MCP URL for your workspace. URL: <https://mcp.zenlytic.com/mcp>

## Connect with OAuth (recommended)

1. Add the server:

```bash
claude mcp add --transport http zenlytic https://mcp.zenlytic.com/mcp
```

2. Inside Claude Code, run `/mcp`, select **zenlytic**, and click **Authenticate**.
3. Complete the OAuth login/approval flow in the browser window that opens, and pick your workspace.

Claude Code stores the token and refreshes it automatically, so you shouldn't need to re-authenticate unless you revoke access.

## Connect with a Personal Access Token (alternative)

If OAuth isn't available, add the server with a static bearer header instead:

1. In Zenlytic, go to **Workspace Settings → Personal Access Tokens** (`/workspace-settings/personal-access-tokens`), click **Create token**, and copy it immediately — it's only shown once.
2. Add the server with the token as a header:

```bash
claude mcp add --transport http zenlytic https://mcp.zenlytic.com/mcp \
  --header "Authorization: Bearer <your-personal-access-token>"

## Using it

Once connected, ask Claude Code a data question naturally, for example:

> "Hey Zoe, who were our top 5 customers by revenue last month?"

Claude will call the `ask_zoe` tool and return the answer along with a link back to the full conversation in Zenlytic.

## Troubleshooting

* **"Unauthorized" or repeated login prompts:** run `/mcp`, select **zenlytic**, and re-authenticate, or generate a new Personal Access Token.
* **Server not found:** double-check the URL with `claude mcp list`, and confirm it with your workspace admin.
* **Not sure what got asked/answered:** open Zenlytic and check your conversation history — MCP conversations appear there just like conversations started in the app.
```


# MCP Client

Connect Zoë to remote MCP servers so she can call external tools directly from chat.

> Looking to connect an AI tool like Claude.ai, Claude Code, or Cursor *to* Zenlytic instead? See [MCP Server](/mcp/connecting-to-zenlytic) — that page covers the reverse direction, where Zenlytic is the server.

Zenlytic acts as an **MCP client**: point Zoë at a compatible remote MCP server, and the tools that server advertises become available alongside Zoë's native ones. When enabled, Zoë can then pull data and trigger workflows from external systems directly from the Zenlytic chat experience.

## What you can do with MCP Connectors

* Pull live metadata, schemas, and lineage from your data warehouse or transformation layer.
* Read workbook, dataset, and report context from your BI tools so Zoë can ground answers in published assets.
* Expose internal APIs and operational workflows to Zoë through your own MCP server, with per-tool control over what she can call.
* Mix and match connections per conversation, so different chats can pull from different combinations of systems.

## How MCP works in Zenlytic

To set up a connection, register the server's HTTPS endpoint and any authentication headers in workspace settings, choose which of the discovered tools Zoë can access, and toggle the connection on per-conversation from the chat tool menu. When Zoë invokes one of your tools, Zenlytic forwards a `tools/call` request to your server, captures the response, and feeds the result back into the conversation.

## Before you begin

To connect any MCP server, confirm the following:

| Requirement              | Detail                                                                                                                                                                         |
| ------------------------ | ------------------------------------------------------------------------------------------------------------------------------------------------------------------------------ |
| **Feature flag**         | The `mcp-client` flag must be enabled for your workspace. If you don't see an **MCP** entry under **Workspace Settings → Extensions**, ask your Zenlytic contact to enable it. |
| **Workspace permission** | You need `admin` role to view, add, edit, delete, or refresh connections from Workspace Settings.                                                                              |
| **A reachable server**   | Your server (or the vendor's) must be publicly reachable over HTTPS from Zenlytic's infrastructure.                                                                            |

## Get started

1. Open **Workspace Settings → Extensions → MCP Connectors** in Zenlytic.

<figure><img src="/files/I1nAx5cPvThmESd912Hh" alt="MCP Connectors page with no MCPs added yet"><figcaption></figcaption></figure>

2. To connect one of the examples listed below, follow the linked setup guide.
3. To connect an MCP server, click **Add a New Connector**, fill in the name, Access grant, HTTPS endpoint URL, and any authentication headers, then click **Test Connection**.

<figure><img src="/files/uJST9TndPv74oiqUfMy6" alt="Adding MCP connection details"><figcaption></figcaption></figure>

4. Review the discovered tools and toggle off any that Zoë shouldn't be able to call.

<figure><img src="/files/LqFY0mCBwnVDOF21TPbI" alt="Testing MCP connection details"><figcaption></figcaption></figure>

5. Click **Add Connection** to save.

<figure><img src="/files/yahooZ4pSx7O4p622vlP" alt="Testing MCP connection details"><figcaption></figcaption></figure>

Once a connection is active, open any chat, toggle the connection on from the tool menu, and ask Zoë a question that uses it. Admins can manage, rotate credentials, refresh tools, or delete any MCP connection at any time from the MCP Connectors page in Workspace Settings.

## Example MCP Connectors

Connect Zoë to public MCP servers such as the following by adding connections in workspace settings:

* **DeepWiki** — `https://mcp.deepwiki.com/mcp` — ask questions, read structure, and pull docs for any public GitHub repo indexed on DeepWiki (no auth)
* **Hugging Face** — `https://huggingface.co/mcp` — search models, datasets, and Spaces on the HF Hub. Optionally pass an `Authorization: Bearer <HF_TOKEN>` header for higher limits and access to gated content
* **Cloudflare Docs** — `https://docs.mcp.cloudflare.com/mcp` — Q\&A over Cloudflare's product docs (no auth)
* **Context7** — `https://mcp.context7.com/mcp` — up-to-date, version-pinned library and framework documentation (Next.js, React, FastAPI, etc.). Requires a `CONTEXT7_API_KEY` header (free tier at [context7.com](https://context7.com))
* **Excalidraw** — `https://mcp.excalidraw.com/mcp` — create and edit Excalidraw diagrams directly from chat (no auth)
* **Fetch Webpage** — `https://refetch.cloud/mcp` — fetch and parse live webpage content into clean Markdown for Zoë to read. Requires an `X-API-Key` header (free tier at [refetch.cloud](https://refetch.cloud))
* **Crypto Prices** — `https://gateway.pipeworx.io/crypto/mcp` — look up live cryptocurrency prices and market data (no auth)

To discover more public servers, browse MCP directories like [PulseMCP](https://www.pulsemcp.com/) and [Remote MCP Servers](https://mcpservers.org/remote-mcp-servers). Use the following setup guides to connect Zoë to popular tools via their official MCP servers:

* [Tableau](/mcp/client/tableau) — read workbook, view, and data source metadata.
* [Power BI](/mcp/client/powerbi) — connect to workspaces, datasets, and reports.
* [Google](/mcp/client/google) — query tables and inspect schemas directly.
* [Looker](/mcp/client/looker) - query semantic models and dashboards.
* [dbt](/mcp/client/dbt) — explore models, metrics, exposures, and lineage.
* [Atlan](/mcp/client/atlan) — explore models, metrics, assets, and data glossaries.
* [Snowflake](/mcp/client/snowflake) — query Cortex Analyst, Cortex Search, Cortex Agents, SQL, and your own UDFs.
* [Reltio](/mcp/client/reltio) — search entities, traverse relationships, and invoke AgentFlow tools.
* [GitHub](/mcp/client/github) — browse repositories, triage issues and pull requests, and monitor Actions and security alerts.
* [Jira](/mcp/client/jira) — search and create Jira issues, run JQL queries, and interact with Confluence and Compass content.

These guides are provided for general reference, be prepared for some details to vary depending on your specific deployment or license. You can also bring your own MCP server. Any server that implements the streamable HTTP transport for protocol version `2025-03-26` and exposes `initialize`, `tools/list`, and `tools/call` endpoints will work.

## Workflow guides

End-to-end walkthroughs that combine an MCP connection with Zoë to solve a specific problem:

* [Audit a semantic layer with a repo MCP](https://github.com/Zenlytic/zenlytic-docs/tree/main/docs/mcp/audit-semantic-layer.md) — point Zoë at the repo that holds your Zenlytic data model so she can read every view at once and recommend the highest-leverage additions. Uses the GitHub MCP for a practical example, with DeepWiki as a read-only alternative for public repos.


# Tableau

Connect Zoë to Tableau's MCP server to browse workbooks, data sources, and metadata from chat.

Connect Zoë to a self-hosted [Tableau MCP server](https://github.com/tableau/tableau-mcp) so she can browse Tableau content and query data sources in natural language, right inside Zenlytic. Zenlytic acts as an MCP client and forwards your Tableau credentials to the server on every call, so Zoë's actions inherit the underlying Tableau identity's permissions. Authenticate with a Tableau Personal Access Token (PAT) or a static `Authorization` header.

> For Tableau Cloud customers, as part of the 2026.2 release, Tableau is planning to roll out a cloud-hosted service, available to all editions. The release will unlock the ability for Tableau Cloud customers to self-host Tableau MCP at scale using OAuth. A Tableau MCP deployment guide for Tableau Cloud customers will also be made available with the release.

## What Zoë can access

Through the Tableau MCP server, Zoë can:

* List and inspect workbooks, views, and projects on your Tableau Server site.
* Discover published data sources, browse their schemas, and execute queries via VizQL Data Service.
* Read metadata (descriptions, tags, lineage) from Tableau's Metadata API.

The exact tool surface depends on your Tableau MCP server's configuration. You can further narrow what Zoë sees with per-tool toggles in the Zenlytic connection modal.

## Prerequisites

* **A deployed Tableau MCP server with a public HTTPS URL.** Follow Tableau's [deployment guide for Tableau Server customers](https://github.com/tableau/tableau-mcp/blob/main/docs/getting-started.md) to install and expose the server. The endpoint typically ends in `/tableau-mcp` (for example, `https://tableau-mcp.example.com/tableau-mcp`).
* **Credentials to call the server.** Either a Tableau [Personal Access Token](https://help.tableau.com/current/server/en-us/security_personal_access_tokens.htm) (PAT) or a static credential expected by a proxy in front of your MCP server. See [Configure request headers](#configure-request-headers).
* **Zenlytic requirements.** The `mcp-client` flag enabled on your workspace and `admin` role. See [MCP Client](/mcp/client) for the full list.

## Set up the connection in Zenlytic

1. Open **Workspace Settings → Extensions → MCP** and click **Add Connection**.
2. Fill out the form:

* **Name** — a label that will appear in the chat tool menu, for example `Tableau`.
* **URL** — the full HTTPS endpoint of your Tableau MCP server, including the `/tableau-mcp` path.

3. Add credentials (see [Configure request headers](#configure-request-headers)).
4. Click **Test Connection**. Zenlytic opens an MCP session against the server and lists the tools it advertises.
5. Review the tool list and toggle off any tools Zoë shouldn't be able to call.
6. Click **Add Connection** to save.

## Configure request headers

Pick the path that matches your setup. Header values are masked in the Zenlytic UI and encrypted at rest.

### Option 1: Personal Access Token (PAT)

Use this when your Tableau MCP server is configured with passthrough authentication (`ENABLE_PASSTHROUGH_AUTH=true`). Zenlytic forwards a Tableau session token on every call, which the MCP server uses to talk to Tableau's REST APIs as you.

1. Create a PAT in Tableau, following [Personal Access Tokens — Tableau](https://help.tableau.com/current/server/en-us/security_personal_access_tokens.htm).
2. Sign into the Tableau REST API once with that PAT (`POST /api/{version}/auth/signin`) and copy the `token` returned in the response.
3. Add the header below in Zenlytic:

| Header           | Value                          |
| ---------------- | ------------------------------ |
| `X-Tableau-Auth` | The session token from step 2. |

Session tokens expire after a few hours of inactivity. When that happens, sign in again and overwrite the header value, or stand up a small proxy in front of the MCP server that refreshes the token automatically.

### Option 2: Authorization header

Use this when your Tableau MCP server sits behind a reverse proxy, gateway, or other auth layer that issues its own credentials.

| Header          | Value                                                                                              |
| --------------- | -------------------------------------------------------------------------------------------------- |
| `Authorization` | The credential your proxy expects, exactly as it expects it. For example: `Bearer YOUR_PROXY_KEY`. |

## Use the connection in chat

Once the connection has at least one selected tool, it appears in the chat tool menu. Toggle it on for any conversation where you want Zoë to have access to Tableau.

A few tips:

* **Be specific about content.** Naming the workbook, view, project, or data source explicitly produces more reliable tool calls than vague prompts.
* **Scope at the server when you can.** Tableau MCP's `INCLUDE_*` and `EXCLUDE_*` environment variables (such as `INCLUDE_PROJECT_IDS` and `INCLUDE_DATASOURCE_IDS`) narrow the tool surface upstream. Refresh the connection in Zenlytic after you change them.
* **Permissions follow the underlying identity.** Whichever Tableau identity authenticates the request is the one Zoë sees the world through — not the Zenlytic user asking the question.

## Troubleshooting

* `**401 Unauthorized`:\*\* The credentials are missing, malformed, or expired. For Option 1, sign into the Tableau REST API again and replace the `X-Tableau-Auth` value. For Option 2, double-check the `Authorization` value matches what your proxy expects.
* `**Authorization required. Use OAuth 2.1 flow.`\*\* The Tableau MCP server has OAuth enabled and won't accept static-header calls. Reconfigure the server with `DANGEROUSLY_DISABLE_OAUTH=true`, or front it with a proxy that handles the OAuth handshake.
* `**Method not allowed`:\*\* Expected if you open the URL in a browser — the server only accepts `POST`. If it shows up during **Test Connection**, verify the URL ends in `/tableau-mcp`.
* **Tools changed after a server upgrade:** Open the connection, click **Refresh Tools**, review the new set of tools, and **Save Changes**.


# Power BI

Connect Zoë to a Power BI MCP server to explore workspaces, datasets, and reports from chat.

Connect Zoë to the [remote Power BI MCP server](https://learn.microsoft.com/en-us/power-bi/developer/mcp/remote-mcp-server-get-started) — Microsoft's hosted MCP endpoint for Power BI semantic models — to let her chat with your published models in natural language. The server translates Zoë's prompts into DAX queries against the semantic models you point her at, executes them, and returns results. Authenticate with a static `Authorization` header.

## What Zoë can access

Through the Power BI remote MCP server, Zoë can:

* Discover and inspect tables, columns, measures, and relationships in any Power BI semantic model the connection's identity has **Build** access to.
* Generate and execute DAX queries against those models (for example, "Show me the top 10 products by sales last quarter").
* Read AI instructions and verified answers attached to optimized semantic models, which improves query quality.

The connection is scoped to whatever the underlying Microsoft Entra identity (user or service principal) can see in your instance — Zoë never has more access than that identity does.

## Prerequisites

Before you start, confirm the following:

* **Admin enabled the instance setting.** Your Power BI admin must turn on **"Users can use the Power BI Model Context Protocol server endpoint (preview)"** in the Power BI admin portal. Without this, the endpoint refuses calls from your instance.
* **Build permissions on at least one semantic model.** The identity you authenticate with needs **Build** permission on every semantic model you want Zoë to query.
* **(Recommended) Optimized semantic models.** Follow Microsoft's guide to [prepare your semantic models for AI](https://learn.microsoft.com/en-us/power-bi/create-reports/copilot-prepare-data-ai) — adding AI instructions and verified answers materially improves DAX generation quality.
* **Zenlytic requirements.** The `mcp-client` flag enabled on your workspace and `admin` role. See [MCP Client](/mcp/client) for the full list.

## Set up the connection in Zenlytic

1. Open **Workspace Settings → Extensions → MCP** and click **Add Connection**.
2. Fill out the form:

* **Name** — a label that will appear in the chat tool menu, for example `Power BI`.
* **URL** — the remote Power BI MCP endpoint, either Microsoft's directly or your proxy:
  * Direct: `https://api.fabric.microsoft.com/v1/mcp/powerbi`
  * Proxy: whatever HTTPS URL your gateway exposes.

3. Add the `Authorization` header (see [Configure request headers](#configure-request-headers)).
4. Click **Test Connection**. Zenlytic opens an MCP session against the server and lists the tools it advertises.
5. Review the tool list and toggle off any tools Zoë shouldn't be able to call.
6. Click **Add Connection** to save.

## Configure request headers

Add the following in the **Headers** section of the Zenlytic connection modal. Header values are masked in the UI and encrypted at rest.

| Header          | Value                                                                                                 |
| --------------- | ----------------------------------------------------------------------------------------------------- |
| `Authorization` | `Bearer YOUR_POWER_BI_ACCESS_TOKEN`. Include the `Bearer` scheme and a single space before the token. |

The endpoint accepts Microsoft Entra ID bearer tokens scoped to `https://api.fabric.microsoft.com/.default`. If you're going through an OAuth proxy instead of calling Microsoft directly, use whatever static credential the proxy expects (for example, `Bearer YOUR_PROXY_KEY` or `X-API-Key: YOUR_PROXY_KEY`).

### Use your user identity (testing)

For local development and testing, sign in with the [Azure CLI](https://learn.microsoft.com/en-us/cli/azure/install-azure-cli) and print a user-delegated access token:

```bash
az login
az account get-access-token --resource https://api.fabric.microsoft.com --query accessToken -o tsv
```

Tool calls made with this token run as your user account and inherit your Power BI permissions, including **Build** access on the semantic models Zoë needs to query.

### Use a service principal (production)

For production, [register an app in Microsoft Entra ID](https://learn.microsoft.com/en-us/entra/identity-platform/quickstart-register-app), create a client secret, then exchange the client credentials for an access token:

```bash
curl -X POST "https://login.microsoftonline.com/${TENANT_ID}/oauth2/v2.0/token" \
  -H "Content-Type: application/x-www-form-urlencoded" \
  -d "grant_type=client_credentials" \
  -d "client_id=${CLIENT_ID}" \
  -d "client_secret=${CLIENT_SECRET}" \
  -d "scope=https://api.fabric.microsoft.com/.default"
```

Two extra steps are easy to miss on the service principal path: your tenant admin must enable **"Allow service principals to use Power BI APIs"** under **Admin portal → Tenant settings → Developer settings**, and the service principal itself needs **Build** permission on every semantic model you want Zoë to query. If either is missing, the token mints fine but tool calls will fail with permission errors.

### Verify the token

Before saving the connection, sanity-check the token against the Fabric REST API — same auth as the MCP endpoint:

```bash
curl -H "Authorization: Bearer $TOKEN" https://api.fabric.microsoft.com/v1/workspaces
```

If your workspace list comes back, the token is good and the MCP server will accept it too. Entra ID access tokens expire after **one hour**.

## Use the connection in chat

Once the connection has at least one selected tool, it appears in the chat tool menu. Toggle it on for any conversation where you want Zoë to have access to Power BI tools.

A few specifics to share with your users:

* **You'll usually need a semantic model ID.** Most Power BI MCP tools operate on a single semantic model at a time. To query one, share the model ID with Zoë in your message — for example, "Using semantic model `00000000-1111-2222-3333-444444444444`, show me the top 10 products by sales." Find the ID in the Power BI service URL when you open the model.
* **Be specific in prompts.** The server generates DAX from natural language; questions that name tables, columns, or measures explicitly produce more reliable results than vague ones.
* **Permissions still apply.** Zoë can only see and query semantic models the connection's identity has Build access to — even if a user toggles the connection on, they won't see data they wouldn't see in Power BI directly.

## Troubleshooting

* `**401 Unauthorized` from Power BI:\*\* The access token is missing, malformed, or expired. Confirm the `Authorization` header includes the `Bearer` scheme with a single space, and mint a fresh token if it's been more than an hour since you last set it.
* **"Tenant setting not enabled" errors:** Your Power BI admin hasn't turned on **"Users can use the Power BI Model Context Protocol server endpoint (preview)"**. Until that's enabled, every call from your tenant is refused regardless of credentials.
* **"Insufficient permissions" on a specific semantic model:** The identity behind the token doesn't have **Build** permission on that model. Grant it in the Power BI service and try again.
* **Zoë can't find a model by name:** Share the semantic model ID explicitly in the prompt rather than relying on the name. IDs are GUIDs visible in the Power BI service URL.
* **DAX results look off:** Walk through Microsoft's [prepare your semantic models for AI](https://learn.microsoft.com/en-us/power-bi/create-reports/copilot-prepare-data-ai) checklist — most quality issues come from missing descriptions, ambiguous measure names, or lack of verified answers on the underlying model.


# Google

Connect Zoë to Google's BigQuery MCP server to inspect schemas and run SQL from chat.

Connect Zoë to [Google's BigQuery remote MCP server](https://docs.cloud.google.com/bigquery/docs/use-bigquery-mcp) — a Google-hosted MCP endpoint at `https://bigquery.googleapis.com/mcp` that exposes BigQuery metadata and SQL execution as MCP tools — so she can explore datasets and run SQL in natural language. Zenlytic acts as an MCP client and forwards a Google Cloud OAuth 2.0 access token to the server on every call, so Zoë's actions inherit the underlying IAM identity's BigQuery permissions. Authenticate with a static `Authorization` header.

> If you only need BigQuery as a data warehouse for the Zenlytic semantic layer, follow [BigQuery setup](/data-sources/bigquery_setup) instead. MCP is purpose-built for agentic, on-demand access from Zoë.

## What Zoë can access

Through the BigQuery remote MCP server, Zoë can:

* List projects, datasets, and tables visible to the connected identity.
* Inspect dataset and table schemas, including column types and descriptions.
* Run ad-hoc SQL with `execute_sql` (read/write) and `execute_sql_readonly` (read-only — blocks DML, DDL, and Python UDFs).

Tool calls run as the IAM identity behind the access token, so Zoë can only see and query what that identity has BigQuery permissions for. Google caps results at **3,000 rows** and query time at **3 minutes**, and Drive external tables aren't supported by either SQL tool.

## Prerequisites

* **The BigQuery API enabled** on your Google Cloud project.
* **A service account (or user) with the right IAM roles** on every project Zoë should reach:
  * `[roles/mcp.toolUser](https://docs.cloud.google.com/iam/docs/roles-permissions/mcp#mcp.toolUser)` — make MCP tool calls.
  * `[roles/bigquery.jobUser](https://docs.cloud.google.com/iam/docs/roles-permissions/bigquery#bigquery.jobUser)` — run BigQuery jobs.
  * `[roles/bigquery.dataViewer](https://docs.cloud.google.com/iam/docs/roles-permissions/bigquery#bigquery.dataViewer)` — query data.
* **A way to mint OAuth access tokens** scoped to `https://www.googleapis.com/auth/bigquery` for that identity (see `gcloud` CLI in [Configure request headers](#configure-request-headers)).
* **Zenlytic requirements.** The `mcp-client` flag enabled on your workspace and `admin` role. See [MCP Client](/mcp/client) for the full list.

## Set up the connection in Zenlytic

1. Open **Workspace Settings → Extensions → MCP** and click **Add Connection**.
2. Fill out the form:

* **Name** — a label that will appear in the chat tool menu, for example `BigQuery`.
* **URL** — `https://bigquery.googleapis.com/mcp`.

3. Add the `Authorization` header (see [Configure request headers](#configure-request-headers)).
4. Click **Test Connection**. Zenlytic opens an MCP session against the server and lists the tools it advertises.
5. Review the tool list and toggle off any tools Zoë shouldn't be able to call.
6. Click **Add Connection** to save.

## Configure request headers

| Header          | Value                                                                                            |
| --------------- | ------------------------------------------------------------------------------------------------ |
| `Authorization` | `Bearer YOUR_GCP_ACCESS_TOKEN`. Include the `Bearer` scheme and a single space before the token. |

BigQuery requires an IAM principal, so the MCP server only accepts OAuth 2.0 bearer tokens — API keys are not supported. For the full set of supported authentication methods, see Google's [Authenticate to Google and Google Cloud MCP servers](https://docs.cloud.google.com/mcp/authenticate-mcp) guide.

### Use your user identity (testing)

For local development and testing, authenticate as yourself with [Application Default Credentials](https://docs.cloud.google.com/mcp/authenticate-mcp#user_credentials_and_adc_for_mcp_servers), then print an access token:

```bash
gcloud auth application-default login
gcloud auth print-access-token --scopes=https://www.googleapis.com/auth/bigquery
```

Tool calls made with this token are attributed to your user account and inherit your permissions.

### Use an agent identity (production)

For production, Google recommends a dedicated [agent identity](https://docs.cloud.google.com/mcp/authenticate-mcp#agent_identity) — either a service account or an OAuth client — so the agent's actions are observable and permissioned independently of any individual user. To mint a token by impersonating a service account from the `gcloud` CLI:

```bash
gcloud auth print-access-token \
  --impersonate-service-account=YOUR_SA@YOUR_PROJECT.iam.gserviceaccount.com \
  --scopes=https://www.googleapis.com/auth/bigquery
```

Google access tokens expire after **one hour**. Header values are masked in the Zenlytic UI and encrypted at rest.

## Use the connection in chat

Once the connection has at least one selected tool, it appears in the chat tool menu. Toggle it on for any conversation where you want Zoë to have access to BigQuery.

A few tips:

* **Be specific about projects and datasets.** Including the full project ID and dataset name produces more reliable SQL than vague references. For example: "List the tables in dataset `analytics` in project `my-project-id`."
* **Mind the row and time caps.** Query results are capped at 3,000 rows and 3-minute execution time. Ask Zoë to add `LIMIT`s, `WHERE` filters, or aggregations for anything that would scan large tables.
* **Prefer `execute_sql_readonly` for production setups.** It blocks DML, DDL, and Python UDFs. To enforce this at the platform level, restrict access to the writable `execute_sql` tool with an [IAM deny policy](https://docs.cloud.google.com/mcp/control-mcp-use-iam#deny_read-write_mcp_tool_use).

## Troubleshooting

* `**401 Unauthorized` from BigQuery:\*\* The access token is missing, malformed, or expired (tokens last one hour). Mint a fresh one with `gcloud auth print-access-token` and replace the `Authorization` value.
* `**Permission denied` on a specific dataset:\*\* The identity behind the token is missing `roles/bigquery.dataViewer` (or equivalent) on that dataset. Grant it in Google Cloud IAM and try again.
* `**MCP tool calls not allowed`:\*\* The identity is missing `roles/mcp.toolUser`. Grant the role at the project level.
* **Query results look truncated:** You're hitting the 3,000-row cap. Ask Zoë to filter or aggregate further.
* **Drive external tables fail:** Known limitation — `execute_sql` and `execute_sql_readonly` don't support querying Google Drive external tables.


# Looker

Connect Zoë to Looker's MCP server to query semantic models, dashboards, and metadata from chat.

Connect Zoë to a self-hosted Looker MCP server — deployed via [MCP Toolbox for Databases](https://mcp-toolbox.dev/) on Google Cloud Run — so she can explore your Looker content (models, explores, fields, dashboards, and queries) without leaving Zenlytic. The MCP Toolbox container holds a Looker API3 credential and proxies Zoë's calls to your Looker instance. Authenticate with a static `Authorization` header containing a Google identity token.

> Looker doesn't publish an official hosted remote MCP endpoint. The supported path is to deploy [MCP Toolbox by Google](https://mcp-toolbox.dev/integrations/looker/samples/looker_cloud_run/) in Cloud Run and point Zenlytic at it. Most of the setup happens in Google Cloud and Looker, not in Zenlytic.

## What Zoë can access

Through the Looker MCP server, Zoë can call the Looker API surface that MCP Toolbox exposes through its `looker` and `looker-dev` toolsets to:

* List models, explores, and views in your Looker instance.
* Read field metadata, labels, and descriptions.
* Run ad-hoc queries against explores and return results.
* Look up dashboards and Looks the credential's user has access to.
* Inspect users, groups, and other admin objects via the Looker API (subject to the credential's permissions).

The exact tool surface depends on which prebuilt toolsets you enable when you deploy MCP Toolbox. Every Zoë action runs as the Looker user behind the API3 credential baked into Toolbox, so all users sharing the connection see the same scope of Looker content.

## Prerequisites

Before you start, confirm the following:

* A **Looker instance** with API access enabled and a **Looker API3 Client ID and Client Secret** for the user (typically a dedicated service account) whose permissions Zoë should inherit.
* A **Google Cloud project** where you can deploy services to **Cloud Run** and manage **Secret Manager** and **IAM**.
* A way to mint **Google identity tokens** scoped to your Cloud Run service URL (see `gcloud` CLI in [Configure request headers](#configure-request-headers)).
* **Zenlytic requirements.** The `mcp-client` flag enabled on your workspace and `admin` role. See [MCP Client](/mcp/client) for the full list.

## Create a Looker API3 credential

In your Looker instance, open **Admin → Users**, choose the user account Zoë should run as (create a dedicated service account if you don't already have one), and click **Edit Keys → New API3 Key**. Save the Client ID and Client Secret somewhere safe — you'll store both as Secret Manager secrets in the next step.

The MCP Toolbox container uses this credential to call the Looker API on every tool call, so Zoë's permissions in Looker are whatever this user can see and do.

## Deploy MCP Toolbox to Cloud Run

These steps adapt the [MCP Toolbox guide for Looker on Cloud Run](https://mcp-toolbox.dev/integrations/looker/samples/looker_cloud_run/) to use a baked-in API3 credential instead of client OAuth.

1. In **Google Cloud Console → Cloud Run**, click **Deploy container**.
2. Configure the container:

* **Container image URL** — `us-central1-docker.pkg.dev/database-toolbox/toolbox/toolbox:latest`
* **Service name** — `looker-mcp-toolbox` (or any name you prefer).
* **Region** — pick a region close to your Looker instance.
* **Authentication** — **Require authentication**. Zenlytic signs requests with a Google identity token; see [Configure request headers](#configure-request-headers).
* Note the **Endpoint URL**; you'll paste it into Zenlytic with `/mcp` appended.

3. Under **Service scaling**, choose **Auto** with a minimum of **1** instance to keep cold starts off the hot path. Set **Ingress** to **All**.
4. Open **Containers, Networking, Security**:

* **Container arguments** — add each on its own line:
  * `--prebuilt=looker,looker-dev` — loads the standard Looker toolset plus the `looker-dev` toolset for LookML / dev-mode editing.
  * `--port=8080` and `--address=0.0.0.0` — make Toolbox listen on the port and interface Cloud Run expects.
* **Variables & Secrets** —
  * `LOOKER_BASE_URL` — the URL of your Looker instance, for example `https://yourcompany.looker.com`.
  * `LOOKER_CLIENT_ID` — the Client ID from the API3 key. Store it as a Secret Manager secret and reference it here.
  * `LOOKER_CLIENT_SECRET` — the Client Secret from the API3 key. Store it as a Secret Manager secret and reference it here.
  * `LOOKER_USE_CLIENT_OAUTH` — `false`. Tells Toolbox to authenticate to Looker with the API3 credential above instead of expecting the caller to bring an OAuth token.

5. In **IAM**, grant the **Secret Manager Secret Accessor** role to the Cloud Run compute service account so the container can read the API3 secrets at startup.
6. Click **Done**, then **Create**.
7. Once the service is deployed, grant the identity you'll use to call it (your user account or a dedicated service account) the **Cloud Run Invoker** (`roles/run.invoker`) role on the Cloud Run service.

> Review the **Hardening Toolbox** section of the [MCP Toolbox CLI reference](https://mcp-toolbox.dev/reference/cli/) before using this in production. Tighten container arguments (logging level, allowed origins, request size limits, etc.), restrict ingress to known sources, and rotate the Looker API3 credential on a schedule.

## Set up the connection in Zenlytic

1. Open **Workspace Settings → Extensions → MCP** and click **Add Connection**.
2. Fill out the form:

* **Name** — a label that will appear in the chat tool menu, for example `Looker`.
* **URL** — your Cloud Run endpoint with `/mcp` appended, for example `https://looker-mcp-toolbox-abc123-uc.a.run.app/mcp`. Must use `https://`.

3. Add the `Authorization` header (see [Configure request headers](#configure-request-headers)).
4. Click **Test Connection**. Zenlytic opens an MCP session against the server and lists the tools MCP Toolbox advertises (based on the `--prebuilt` toolsets you enabled).
5. Review the tool list and toggle off any tools Zoë shouldn't be able to call.
6. Click **Add Connection** to save.

## Configure request headers

Add the following in the **Headers** section of the Zenlytic connection modal. Header values are masked in the UI and encrypted at rest.

| Header          | Value                                                                                                                                                               |
| --------------- | ------------------------------------------------------------------------------------------------------------------------------------------------------------------- |
| `Authorization` | `Bearer YOUR_GCP_IDENTITY_TOKEN`. Include the `Bearer` scheme and a single space before the token. Cloud Run validates the token's audience and invoker permission. |

Cloud Run expects a Google-issued **ID token** whose `audience` claim matches your service URL — not an OAuth access token. ID tokens expire after **one hour**.

### Use your user identity (testing)

For local development and testing, sign in with the [gcloud CLI](https://cloud.google.com/sdk/docs/install) and print an identity token scoped to your Cloud Run service:

```bash
gcloud auth login
gcloud auth print-identity-token --audiences=https://<your-cloud-run-url>
```

Tool calls made with this token are attributed to your user account. Your user needs `roles/run.invoker` on the Cloud Run service.

### Use a service account (production)

For production, mint an identity token by impersonating a dedicated service account so Zoë's traffic is observable independently of any individual user:

```bash
gcloud auth print-identity-token \
  --impersonate-service-account=YOUR_SA@YOUR_PROJECT.iam.gserviceaccount.com \
  --audiences=https://<your-cloud-run-url>
```

Two extra grants are easy to miss on the service-account path: the impersonated service account needs `roles/run.invoker` on the Cloud Run service, and your local identity needs `roles/iam.serviceAccountTokenCreator` on the service account. If either is missing, the token mints fine but tool calls fail with `403 Forbidden`.

### Verify the token

Before saving the connection, sanity-check the token against the Cloud Run service:

```bash
curl -I -H "Authorization: Bearer $TOKEN" https://<your-cloud-run-url>/mcp
```

Anything other than `401` or `403` means Cloud Run accepted the credential — the MCP endpoint will accept it too.

## Use the connection in chat

Once the connection has at least one selected tool, it appears in the chat tool menu. Toggle it on for any conversation where you want Zoë to have access to Looker tools. The toggle is per-conversation, so different chats can mix Looker with other MCP connections as needed.

A few specifics to share with your users:

* **One identity, one permission set.** Every user sharing the connection sees whatever Looker content the API3 credential's user can see. If you need different access for different teams, create separate Toolbox deployments backed by separate API3 credentials and wire each up as its own Zenlytic connection.
* **Be specific about models and explores.** Including the model name and explore name produces more reliable queries than vague references. For example: "In model `ecommerce`, query the `order_items` explore for total sales by month last year."

## Manage the integration

* **Rotate the identity token:** Mint a fresh token with `gcloud auth print-identity-token`, then **Edit** the connection in Zenlytic and overwrite the `Authorization` header value.
* **Rotate the Looker credential:** Generate a new API3 key in **Looker Admin → Users**, update the `LOOKER_CLIENT_ID` and `LOOKER_CLIENT_SECRET` secrets in Secret Manager, and roll a new Cloud Run revision. Delete the old API3 key once the new revision is healthy.
* **Refresh tools:** If you change `--prebuilt` toolsets or MCP Toolbox is upgraded in Cloud Run, the next call may fail with a "tools have changed" error. Open the connection, click **Refresh Tools**, review the new set, and **Save Changes**.
* **Update the Cloud Run deployment:** Push a new revision in Cloud Run if you need to change toolsets, environment variables, or the API3 secrets. The MCP URL stays the same.
* **Disable the integration:** Click **Delete** on the connection card to remove it immediately. Zoë stops seeing the Looker tools in any new conversation.

## Troubleshoot

* **`401 Unauthorized` from Cloud Run:** The identity token is missing, malformed, expired (tokens last one hour), or its audience doesn't match the Cloud Run URL. Mint a fresh one with `gcloud auth print-identity-token --audiences=https://<your-cloud-run-url>` and replace the `Authorization` value.
* **`403 Forbidden` from Cloud Run:** The identity behind the token doesn't have `roles/run.invoker` on the service. Grant it in Google Cloud IAM and try again.
* **`401 Unauthorized` from Looker (visible in Cloud Run logs):** The `LOOKER_CLIENT_ID` or `LOOKER_CLIENT_SECRET` is wrong, or the API3 key was disabled in Looker. Regenerate the key, update the Secret Manager secrets, and redeploy.
* **Tool list is empty:** Check the `--prebuilt` container argument — it must include at least one Looker toolset (`looker` or `looker-dev`).
* **Tool calls return permission errors from Looker:** The API3 user lacks the Looker permissions to do what Zoë asked. Grant the needed roles or permission sets in **Looker Admin → Roles**.
* **Can't reach the MCP endpoint at all:** Confirm the Cloud Run service has **Ingress: All** and that no VPC controls block your network. If you've intentionally restricted ingress, make sure Zenlytic's egress IPs are on the allow-list.


# dbt

Connect Zoë to dbt's MCP server to explore models, metrics, exposures, and lineage from chat.

Connect Zoë to the [dbt remote MCP server](https://docs.getdbt.com/docs/dbt-ai/setup-remote-mcp) to let her explore your transformation layer — models, metrics, lineage, and (optionally) ad-hoc SQL — without leaving Zenlytic. This integration uses **token-based authentication** with a dbt Personal Access Token (PAT) or service token.

> For semantic-layer-specific workflows, see [dbt MetricFlow integration](/data-modeling/dbt_metricflow). The MCP integration covers project-wide metadata and tool execution, while the MetricFlow integration focuses on querying semantic models.

## What Zoë can access

Through the dbt remote MCP server, Zoë can call the tool surfaces dbt exposes — including the Discovery, Administrative, and Semantic Layer APIs — to:

* Look up models, sources, seeds, snapshots, and exposures defined in your dbt project.
* Read descriptions, tests, tags, and column-level documentation from your manifest.
* Query metrics, dimensions, and entities through the dbt Semantic Layer.
* Trace lineage between dbt nodes.
* Run ad-hoc SQL against your warehouse with `execute_sql` (PAT-only — see [Choose a token type](#choose-a-token-type)).

## Prerequisites

Before you start, confirm the following:

* A **dbt Cloud** account with [AI features](https://docs.getdbt.com/docs/cloud/enable-dbt-copilot) enabled.
* A **production environment** in dbt Cloud (and a **development environment** if you plan to use `execute_sql` or Fusion tools).
* A **PAT or service token** with at minimum **Semantic Layer**, **Metadata**, and **Developer** permissions.
* The `mcp-client` flag enabled on your Zenlytic workspace and `admin` role. See [MCP Client](/mcp/client) for full prerequisites.

## Choose a token type

Token-based authentication accepts either a Personal Access Token or a service token. Pick based on what Zoë needs to do:

| If you need...                                           | Use...                                                                                            |
| -------------------------------------------------------- | ------------------------------------------------------------------------------------------------- |
| `execute_sql` (run ad-hoc warehouse queries through Zoë) | **PAT** — service tokens don't work with `execute_sql` or any tool that requires `x-dbt-user-id`. |
| Shared team setup, CI, or automation                     | **Service token** — easier to rotate and not tied to one user, but no `execute_sql`.              |
| Semantic Layer and Discovery only                        | Either works.                                                                                     |

> When using a service token, make sure it has at least the **Semantic Layer Only**, **Metadata Only**, and **Developer** permissions. PATs inherit the user's permissions; the user must have Semantic Layer and Developer access.

## Gather your dbt connection details

From your dbt Cloud account, collect:

1. **Host URL** — your dbt Cloud host, used to form the full MCP endpoint. Examples:

* Single-tenant: `https://cloud.getdbt.com/api/ai/v1/mcp/`
* Multi-cell: `https://ACCOUNT_PREFIX.us1.dbt.com/api/ai/v1/mcp/`
* See [dbt's Access, Regions, & IP addresses](https://docs.getdbt.com/docs/platform/about-platform/access-regions-ip-addresses) if you're unsure.

2. **Production environment ID** — find it on the **Orchestration** page in dbt Cloud. You'll pass it as `x-dbt-prod-environment-id`.
3. **Development environment ID** — only needed for `execute_sql` and Fusion tools. Same location in dbt Cloud.
4. **User ID** — only needed for `execute_sql` and Fusion tools. See [Find your user ID](https://docs.getdbt.com/faqs/Accounts/find-user-id).
5. **Token** — generate a [PAT](https://docs.getdbt.com/docs/dbt-apis/user-tokens) or [service token](https://docs.getdbt.com/docs/dbt-apis/service-tokens) per the table above.

## Set up the connection in Zenlytic

1. Open **Workspace Settings → Extensions → MCP** and click **Add Connection**.
2. Fill out the form:

* **Name** — a label that will appear in the chat tool menu, for example `dbt (prod)`.
* **URL** — the full MCP endpoint, for example `https://cloud.getdbt.com/api/ai/v1/mcp/`. Must use `https://` and include the `/api/ai/v1/mcp/` path.

3. Add the required headers (see [Configure request headers](#configure-request-headers)).
4. Click **Test Connection**. Zenlytic opens an MCP session and lists the tools the dbt server advertises.
5. Review the tool list and toggle off any tools Zoë shouldn't be able to call. Newly-discovered tools are pre-selected.
6. Click **Add Connection** to save.

## Configure request headers

The dbt remote MCP server is controlled through HTTP headers. Add each one in the **Headers** section of the Zenlytic connection modal. Header values are masked in the UI and encrypted at rest.

### Required for every connection

| Header                      | Value                                                                                                                                          |
| --------------------------- | ---------------------------------------------------------------------------------------------------------------------------------------------- |
| `Authorization`             | `Token YOUR_DBT_ACCESS_TOKEN` or `Bearer YOUR_DBT_ACCESS_TOKEN`. Include the scheme (`Token` or `Bearer`) and a single space before the token. |
| `x-dbt-prod-environment-id` | Your dbt production environment ID, as a number (for example `54321`).                                                                         |

### Required for `execute_sql`

Add these in addition to the headers above if you want Zoë to run SQL through dbt:

| Header                     | Value                                             |
| -------------------------- | ------------------------------------------------- |
| `x-dbt-dev-environment-id` | Your dbt development environment ID, as a number. |
| `x-dbt-user-id`            | Your dbt user ID, as a number. Requires a PAT.    |

### Required for Fusion tools

Fusion tools default to the production environment for model and table metadata. To use them, add:

| Header                       | Value                                                                                                                                                       |
| ---------------------------- | ----------------------------------------------------------------------------------------------------------------------------------------------------------- |
| `x-dbt-dev-environment-id`   | Your dbt development environment ID, as a number.                                                                                                           |
| `x-dbt-user-id`              | Your dbt user ID, as a number. Requires a PAT.                                                                                                              |
| `x-dbt-fusion-disable-defer` | Optional. Set to `true` to make Fusion tools use the development environment's models and metadata instead of deferring to production. Defaults to `false`. |

### Optional: disable specific tools or toolsets

Use these to narrow the surface dbt exposes, in addition to the per-tool toggles in the Zenlytic connection modal:

| Header                   | Value                                                                                                  |
| ------------------------ | ------------------------------------------------------------------------------------------------------ |
| `x-dbt-disable-tools`    | Comma-separated list of tool names to disable, for example `get_all_models,text_to_sql,list_entities`. |
| `x-dbt-disable-toolsets` | Comma-separated list of toolsets to disable, for example `semantic_layer,sql,discovery`.               |

> **Use numeric IDs, not full URLs.** The `x-dbt-prod-environment-id`, `x-dbt-dev-environment-id`, and `x-dbt-user-id` headers expect integers only. Pasting a full dbt URL (for example `https://cloud.getdbt.com/deploy/12345/projects/67890/environments/54321`) will cause the connection to fail.

## Use the connection in chat

Once the connection has at least one selected tool, it appears in the chat tool menu. Toggle it on for any conversation where you want Zoë to use dbt tools that turn. The toggle is per-conversation, so different chats can mix dbt with other MCP connections as needed.

## Manage the integration

* **Rotate the token:** Generate a new PAT or service token in dbt Cloud, then **Edit** the connection in Zenlytic and overwrite the `Authorization` header value. Old tokens remain valid in dbt until you revoke them there.
* **Refresh tools:** If dbt releases new tools or changes existing tool schemas, the next call fails with a "tools have changed" error. Open the connection, click **Refresh Tools**, review the new set of tools, and **Save Changes**.
* **Disable the integration:** Click **Delete** on the connection card to remove it immediately. Zoë stops seeing the dbt tools in any new conversation.

## Troubleshoot

* `**401 Unauthorized` from dbt:\*\* Confirm the `Authorization` header includes the scheme (`Token` or `Bearer` ) with a single space before the token, and that the token is still active in dbt Cloud.
* `**execute_sql` is not callable:\*\* You're authenticating with a service token. Switch the `Authorization` header to a PAT and add `x-dbt-user-id` and `x-dbt-dev-environment-id`.
* **"Invalid environment" errors:** Make sure the environment ID headers contain numeric IDs only, not full dbt URLs.
* **Tool list looks short:** Check the `x-dbt-disable-tools` and `x-dbt-disable-toolsets` headers — they remove tools before Zenlytic ever sees them. Per-tool toggles in the Zenlytic UI act on top of whatever dbt returns.
* **Connection works in Test Connection but fails in chat:** dbt's tool surface has likely changed since you saved. Open the connection in workspace settings and click **Refresh Tools**.


# Atlan

Connect Zoë to Atlan's MCP server to search data assets, glossaries, and lineage from chat.

Connect Zoë to [Atlan's hosted remote MCP server](https://docs.atlan.com/product/capabilities/atlan-ai/how-tos/atlan-mcp-overview) so she can search assets, explore lineage, read and update metadata, and create glossary terms in Atlan — without leaving Zenlytic. This integration uses **API-key authentication** against Atlan's hosted MCP endpoint.

## What Zoë can access

Through the Atlan remote MCP server, Zoë can:

* Search for assets across your Atlan catalog (tables, columns, dashboards, terms, and more).
* Explore upstream and downstream lineage between assets.
* Read asset metadata — owners, descriptions, certifications, classifications, and custom attributes.
* Update metadata on assets the API key has permission to edit.
* Create and manage glossary terms.

The exact tool surface is set by Atlan and may grow over time. See [Atlan MCP tools](https://docs.atlan.com/product/capabilities/atlan-ai/how-tos/atlan-mcp-overview) for the current list.

## Prerequisites

Before you start, confirm the following:

* An **Atlan tenant** with **Remote MCP enabled**. If you don't see Remote MCP options in your tenant, contact Atlan Support to turn it on.
* An Atlan user with **admin** access (or someone who can generate an API key for you) to issue an API key.
* The `mcp-client` flag enabled on your Zenlytic workspace and `admin` role. See [MCP Client](/mcp/client) for full prerequisites.

## Generate an Atlan API key

1. In Atlan, go to **Admin Settings → API Keys / Tokens**.
2. Create a new key with a descriptive name, for example `zenlytic-zoe-mcp`.
3. Scope the key to the **minimum permissions** Zoë needs:

* Read-only on assets and lineage is enough for search and exploration workflows.
* Add edit permissions only if you want Zoë to update metadata or create glossary terms on your behalf.

4. Copy the generated key immediately — Atlan only shows it once. Store it somewhere you can retrieve it during the next step (a password manager is ideal).

> **Use a dedicated key, not a personal one.** Tie the key to a service account or a clearly-named bot user so you can rotate or revoke Zoë's access independently of any human user.

## Set up the connection in Zenlytic

1. Open **Workspace Settings → Extensions → MCP** and click **Add Connection**.
2. Fill out the form:

* **Name** — a label that will appear in the chat tool menu, for example `Atlan (prod)`.
* **URL** — `https://mcp.atlan.com/mcp/api-key`. Must use `https://`.

3. Add the required header (see [Configure request headers](#configure-request-headers)).
4. Click **Test Connection**. Zenlytic opens an MCP session and lists the tools the Atlan server advertises.
5. Review the tool list and toggle off any tools Zoë shouldn't be able to call — for example, you may want to disable write tools (metadata updates, glossary creation) for read-only workflows. Newly-discovered tools are pre-selected.
6. Click **Add Connection** to save.

## Configure request headers

The Atlan API-key endpoint is controlled through HTTP headers. Add the header in the **Headers** section of the Zenlytic connection modal. Header values are masked in the UI and encrypted at rest.

### Required for every connection

| Header          | Value                                                                                                                                                           |
| --------------- | --------------------------------------------------------------------------------------------------------------------------------------------------------------- |
| `Authorization` | Your Atlan API key, pasted as-is. **Do not** prefix the value with `Bearer` or `Token` — Atlan's API-key endpoint expects the raw key, unlike most MCP servers. |

> **Use the API key, not a tenant URL or username.** Pasting your Atlan tenant URL (for example `https://yourcompany.atlan.com`) or a username into the `Authorization` header causes the connection to fail with a `401 Unauthorized`. The header value must be the API key you copied from **Admin Settings → API Keys / Tokens**.

## Use the connection in chat

Once the connection has at least one selected tool, it appears in the chat tool menu. Toggle it on for any conversation where you want Zoë to use Atlan tools that turn. The toggle is per-conversation, so different chats can mix Atlan with other MCP connections as needed.

## Manage the integration

* **Rotate the key:** In Atlan, **Admin Settings → API Keys / Tokens**, generate a new key, then **Edit** the connection in Zenlytic and overwrite the `Authorization` header value. Revoke the old key in Atlan once you've confirmed the new one works.
* **Refresh tools:** If Atlan adds new tools or changes existing tool schemas, the next call may fail with a "tools have changed" error. Open the connection, click **Refresh Tools**, review the new set of tools, and **Save Changes**.
* **Adjust permissions:** Edit the API key's permissions in Atlan if you need to broaden or restrict what Zoë can do. The change takes effect on the next request — no Zenlytic update needed.
* **Disable the integration:** Click **Delete** on the connection card to remove it immediately. Zoë stops seeing the Atlan tools in any new conversation. For belt-and-suspenders, also revoke the API key in Atlan.

## Troubleshoot

* **`401 Unauthorized` from Atlan:** Confirm the `Authorization` header contains the raw API key with no `Bearer` or `Token` prefix and no leading/trailing whitespace, and that the key is still active in **Admin Settings → API Keys / Tokens**.
* **`403 Forbidden` on a tool call:** The API key doesn't have permission for the action Zoë attempted. Either tighten the tool list in the Zenlytic connection modal so Zoë can't call that tool, or expand the key's permissions in Atlan.
* **`Tool list looks short`:** Remote MCP may not be enabled on your Atlan tenant, or the API key has limited scopes. Contact Atlan Support to confirm Remote MCP is on, and double-check the key's permissions.
* **Connection works in Test Connection but fails in chat:** Atlan's tool surface has likely changed since you saved. Open the connection in workspace settings and click **Refresh Tools**.
* **Can't reach the MCP endpoint:** Confirm outbound HTTPS to `mcp.atlan.com` is allowed from Zenlytic's network. If your Atlan tenant is on a private VPC or restricted egress, contact Atlan Support — the public `mcp.atlan.com` endpoint must be reachable from Zenlytic.


# Snowflake

Connect Zoë to Snowflake's MCP server to query Cortex tools, SQL, and custom functions from chat.

Connect Zoë to a [Snowflake-managed MCP server](https://docs.snowflake.com/en/user-guide/snowflake-cortex/cortex-agents-mcp) — a server object you create directly inside your Snowflake account — so she can query Cortex Analyst semantic views, search Cortex Search services, run SQL, invoke Cortex Agents, and call your own UDFs or stored procedures, all without leaving Zenlytic. Authenticate with a static `Authorization` header containing a Snowflake [Programmatic Access Token](https://docs.snowflake.com/en/user-guide/programmatic-access-tokens) (PAT).

## What Zoë can access

A Snowflake MCP server only exposes the tools you list in its specification when you create it. Depending on what you configure, Zoë can:

* **Cortex Analyst** — ask natural-language questions against a [semantic view](https://docs.snowflake.com/en/user-guide/views-semantic/overview); Snowflake returns the generated SQL and results.
* **Cortex Search** — query a Cortex Search Service over your unstructured data (documents, tickets, product catalogs).
* **SQL execution** — run ad-hoc SQL against the warehouse you configure on the tool.
* **Cortex Agents** — invoke a Cortex Agent that orchestrates multiple Snowflake capabilities behind a single tool call.
* **Custom UDFs and stored procedures** — expose any Python (or other) UDF or stored procedure in your account as a tool, with a typed input schema.

Every tool call runs as the Snowflake role attached to the PAT, so Zoë's permissions in Snowflake are whatever that role can see and do.

## Prerequisites

Before you start, confirm the following:

* A **Snowflake account** in a [supported region](https://docs.snowflake.com/en/user-guide/snowflake-cortex/cortex-agents-mcp) (the MCP server is generally available but **not supported in government regions**).
* An identity with **`CREATE MCP SERVER`** on the database/schema where you'll put the server, and the privileges below on each underlying object you want to expose (Cortex Search Service, semantic view, agent, UDF, or stored procedure).
* A **dedicated Snowflake role** scoped to the **least-privileged** set of grants Zoë needs. You'll attach this role to the PAT.
* A **warehouse** that has the privileges to run any SQL-execution or UDF/procedure tools you plan to expose.
* **Zenlytic requirements.** The `mcp-client` flag enabled on your workspace and `admin` role. See [MCP Client](/mcp/client) for the full list.

## Create the MCP server in Snowflake

The MCP server is a first-class Snowflake object. You define which tools it exposes in a YAML specification, then create it with SQL. MCP clients (including Zenlytic) discover and invoke those tools through the server's HTTPS endpoint.

### Pick which tools to expose

Snowflake supports five tool types in an MCP server specification:

| Type                          | Use it to expose...                                                                                          |
| ----------------------------- | ------------------------------------------------------------------------------------------------------------ |
| `CORTEX_ANALYST_MESSAGE`      | A semantic view, queried with natural language. Semantic **views** only — semantic models are not supported. |
| `CORTEX_SEARCH_SERVICE_QUERY` | A Cortex Search Service.                                                                                     |
| `SYSTEM_EXECUTE_SQL`          | Ad-hoc SQL execution against a configured warehouse.                                                         |
| `CORTEX_AGENT_RUN`            | A Cortex Agent.                                                                                              |
| `GENERIC`                     | A user-defined function or stored procedure, with an explicit input schema.                                  |

### Create the server

Run the following in a worksheet from a role that has `CREATE MCP SERVER` on the target schema. The example exposes one Cortex Search service and one Cortex Analyst semantic view:

```sql
CREATE OR REPLACE MCP SERVER zenlytic_mcp
  FROM SPECIFICATION $$
    tools:
      - name: "product-search"
        type: "CORTEX_SEARCH_SERVICE_QUERY"
        identifier: "ANALYTICS.SEARCH.PRODUCT_SEARCH_SVC"
        description: "Cortex Search service for all products."
        title: "Product Search"

      - name: "revenue-semantic-view"
        type: "CORTEX_ANALYST_MESSAGE"
        identifier: "ANALYTICS.SEMANTIC.REVENUE_VIEW"
        description: "Semantic view for all revenue tables."
        title: "Revenue semantic view"
  $$;
```

Add additional tools to the same `tools:` list as needed. A few common configurations:

```yaml
# SQL execution against a specific warehouse.
- title: "SQL Execution Tool"
  name: "sql_exec_tool"
  type: "SYSTEM_EXECUTE_SQL"
  description: "Execute SQL queries against the connected Snowflake database."
  config:
    read_only: true
    query_timeout: 600
    warehouse: "ZENLYTIC_WH"

# Cortex Agent.
- title: "Sales Agent"
  name: "sales_agent"
  type: "CORTEX_AGENT_RUN"
  identifier: "ANALYTICS.AGENTS.SALES_AGENT"
  description: "Agent that answers sales-pipeline questions."

# Python UDF, exposed as a tool with a typed input schema.
- title: "Multiply by ten"
  name: "multiply_by_ten"
  identifier: "ANALYTICS.AGENTS.MULTIPLY_BY_TEN"
  type: "GENERIC"
  description: "Multiplies the input value by ten."
  config:
    type: "function"
    warehouse: "ZENLYTIC_WH"
    input_schema:
      type: "object"
      properties:
        x:
          description: "A number to be multiplied by ten."
          type: "number"
```

For the full reference — including stored-procedure examples and a worked end-to-end specification — see [Snowflake's MCP server documentation](https://docs.snowflake.com/en/user-guide/snowflake-cortex/cortex-agents-mcp).

### Grant access to the role on the PAT

The role attached to your PAT (see [Generate a Programmatic Access Token](#generate-a-programmatic-access-token)) needs `USAGE` on the MCP server **and** the underlying privilege on every tool you exposed. Granting access to the server alone is not enough — Snowflake checks each tool individually.

| Privilege | Object                  | Why                                                                           |
| --------- | ----------------------- | ----------------------------------------------------------------------------- |
| `USAGE`   | MCP server              | Connect with the server and discover tools.                                   |
| `USAGE`   | Cortex Search Service   | Invoke a `CORTEX_SEARCH_SERVICE_QUERY` tool.                                  |
| `SELECT`  | Semantic view           | Invoke a `CORTEX_ANALYST_MESSAGE` tool.                                       |
| `USAGE`   | Cortex Agent            | Invoke a `CORTEX_AGENT_RUN` tool.                                             |
| `USAGE`   | UDF or stored procedure | Invoke a `GENERIC` tool.                                                      |
| `USAGE`   | Warehouse               | Run any `SYSTEM_EXECUTE_SQL` or `GENERIC` tool that specifies that warehouse. |

For example:

```sql
GRANT USAGE ON MCP SERVER analytics.public.zenlytic_mcp TO ROLE zenlytic_mcp_role;
GRANT USAGE ON CORTEX SEARCH SERVICE analytics.search.product_search_svc TO ROLE zenlytic_mcp_role;
GRANT SELECT ON SEMANTIC VIEW analytics.semantic.revenue_view TO ROLE zenlytic_mcp_role;
GRANT USAGE ON WAREHOUSE zenlytic_wh TO ROLE zenlytic_mcp_role;
```

### Inspect or update the server

```sql
SHOW MCP SERVERS IN SCHEMA analytics.public;
DESCRIBE MCP SERVER analytics.public.zenlytic_mcp;
```

To change the tool list, re-run `CREATE OR REPLACE MCP SERVER` with the updated specification. To remove the server, run `DROP MCP SERVER analytics.public.zenlytic_mcp;`.

## Generate a Programmatic Access Token

PATs replace passwords for programmatic access to Snowflake. Each PAT is tied to a single Snowflake user and a single role, which is the role Zoë will run as in Snowflake.

1. In Snowsight, open **Admin → Users & Roles → Users** and select the dedicated service user you want Zoë to run as (create one if you don't have one). Avoid using a personal user account so you can rotate or revoke Zoë's access independently.
2. Open the **Programmatic access tokens** tab and click **Generate new token**.
3. Set the token's **Role** to the least-privileged role you granted MCP access to above — for example, `ZENLYTIC_MCP_ROLE`. Do not use `ACCOUNTADMIN` or other broadly-privileged roles.
4. Set an expiration that matches your rotation policy.
5. Copy the generated token immediately — Snowflake only shows it once. Store it in your secrets manager.

For details and CLI options, see [Snowflake's Programmatic Access Token guide](https://docs.snowflake.com/en/user-guide/programmatic-access-tokens).

## Set up the connection in Zenlytic

1. Open **Workspace Settings → Extensions → MCP** and click **Add Connection**.
2. Fill out the form:

* **Name** — a label that will appear in the chat tool menu, for example `Snowflake (prod)`.
* **URL** — the MCP server endpoint for the server you created, in the format:

  ```
  https://<account_url>/api/v2/databases/<database>/schemas/<schema>/mcp-servers/<server_name>
  ```

  For example: `https://acme-analytics.snowflakecomputing.com/api/v2/databases/ANALYTICS/schemas/PUBLIC/mcp-servers/ZENLYTIC_MCP`. See Snowflake's [account identifiers guide](https://docs.snowflake.com/en/user-guide/admin-account-identifier) for the right host format. Must use `https://`.

  > **Use hyphens, not underscores, in the hostname.** Snowflake's MCP server has connection issues with hostnames that contain underscores. If your account identifier contains an underscore, use the hyphenated form (for example `acme-analytics`, not `acme_analytics`).

3. Add the required headers (see [Configure request headers](#configure-request-headers)).
4. Click **Test Connection**. Zenlytic opens an MCP session against your Snowflake server and lists the tools it advertises.
5. Review the tool list and toggle off any tools Zoë shouldn't be able to call. Newly-discovered tools are pre-selected.
6. Click **Add Connection** to save.

## Configure request headers

Add the following in the **Headers** section of the Zenlytic connection modal. Header values are masked in the UI and encrypted at rest.

| Header                                 | Value                                                                                         |
| -------------------------------------- | --------------------------------------------------------------------------------------------- |
| `Authorization`                        | `Bearer YOUR_SNOWFLAKE_PAT`. Include the `Bearer` scheme and a single space before the token. |
| `X-Snowflake-Authorization-Token-Type` | `PROGRAMMATIC_ACCESS_TOKEN`. Tells Snowflake to validate the bearer credential as a PAT.      |

### Verify the token

Before saving the connection, sanity-check the PAT against Snowflake's REST API:

```bash
curl -X POST \
  -H "Authorization: Bearer $PAT" \
  -H "X-Snowflake-Authorization-Token-Type: PROGRAMMATIC_ACCESS_TOKEN" \
  -H "Content-Type: application/json" \
  -d '{"jsonrpc":"2.0","id":1,"method":"tools/list"}' \
  https://<account_url>/api/v2/databases/<database>/schemas/<schema>/mcp-servers/<server_name>
```

A `200` response that lists your tools means the PAT, role grants, and URL are all wired up correctly — the MCP server will accept the same credentials.

## Use the connection in chat

Once the connection has at least one selected tool, it appears in the chat tool menu. Toggle it on for any conversation where you want Zoë to have access to Snowflake. The toggle is per-conversation, so different chats can mix Snowflake with other MCP connections as needed.

A few specifics to share with your users:

* **One role, one permission set.** Every user sharing the connection sees whatever Snowflake content the PAT's role can see. If you need different access for different teams, create a separate MCP server (or reuse one) with a separate PAT scoped to a different role, and wire each up as its own Zenlytic connection.
* **Be specific in prompts.** Naming the semantic view, search service, or agent explicitly produces more reliable tool calls than vague references. For example: "Using the `revenue-semantic-view` tool, show me revenue by product category last quarter."
* **SQL execution can write.** A `SYSTEM_EXECUTE_SQL` tool with `read_only: false` lets Zoë run DML and DDL. Set `read_only: true` in the tool config (or omit the tool) unless you've explicitly decided Zoë should write to the warehouse.

## Manage the integration

* **Rotate the PAT:** In Snowsight, **Admin → Users & Roles → Users → \[your user] → Programmatic access tokens**, generate a new token, then **Edit** the connection in Zenlytic and overwrite the `Authorization` header value. Revoke the old PAT in Snowflake once you've confirmed the new one works.
* **Add or remove tools:** Re-run `CREATE OR REPLACE MCP SERVER` in Snowflake with the updated specification, grant the role any new privileges it needs, then open the connection in Zenlytic and click **Refresh Tools**.
* **Refresh tools:** If you change the MCP server's specification, the next call may fail with a "tools have changed" error. Open the connection, click **Refresh Tools**, review the new set, and **Save Changes**.
* **Adjust permissions:** Grant or revoke privileges on the role attached to the PAT in Snowflake. Changes take effect on the next request — no Zenlytic update needed.
* **Disable the integration:** Click **Delete** on the connection card to remove it immediately. Zoë stops seeing the Snowflake tools in any new conversation. For belt-and-suspenders, also drop the MCP server or revoke the PAT in Snowflake.

## Limitations

Inherited from Snowflake's MCP server:

* **Tools only.** The MCP server does not support resources, prompts, roots, notifications, version negotiation, life-cycle phases, or sampling.
* **No streaming.** Only non-streaming responses are supported.
* **Cortex Analyst uses semantic views, not models.** A `CORTEX_ANALYST_MESSAGE` tool must point at a semantic **view**.
* **Not available in government regions.**

## Troubleshoot

* **`401 Unauthorized` from Snowflake:** The PAT is missing, malformed, expired, or the `X-Snowflake-Authorization-Token-Type: PROGRAMMATIC_ACCESS_TOKEN` header is missing. Confirm the `Authorization` header is `Bearer <PAT>` (with a single space), the type header is set, and the PAT is still active in Snowsight.
* **`403 Forbidden` on a tool call:** The role attached to the PAT doesn't have the privilege required to invoke that tool (`USAGE` on the Search service or agent, `SELECT` on the semantic view, `USAGE` on the UDF/procedure or warehouse). Grant the missing privilege and retry — no Zenlytic update needed.
* **Connection times out or refuses TLS:** Confirm the account identifier in the URL uses hyphens, not underscores. Snowflake MCP endpoints have known connection issues with underscored hostnames.
* **Tool list looks short or empty:** Re-check the MCP server specification with `DESCRIBE MCP SERVER` and confirm the role on the PAT has `USAGE` on the server. The server returns only the tools the caller has privileges to see.
* **Connection works in Test Connection but fails in chat:** The MCP server's specification has likely changed since you saved. Open the connection in workspace settings and click **Refresh Tools**.
* **`Semantic model is not supported` error from a Cortex Analyst tool:** The tool's `identifier` points at a semantic model, not a semantic view. The Snowflake-managed MCP server only supports semantic views with Cortex Analyst.


# Reltio

Connect Zoë to Reltio's MCP server to search entities, relationships, and AgentFlow tools from chat.

Connect Zoë to the [Reltio AgentFlow MCP server](https://docs.reltio.com/developer-resources/ai-integrations/reltio-model-context-protocol-mcp-server-at-a-glance/reltio-agentflow-mcp-server) — Reltio's hosted MCP endpoint for AgentFlow tool orchestration — so she can search entities, explore relationships, and invoke other AgentFlow tools against your Reltio tenant directly from Zenlytic chats. Authenticate with a static `Authorization` header containing a Reltio OAuth 2.0 access token minted from a service account's client credentials.

## What Zoë can access

Through the Reltio AgentFlow MCP server, Zoë can call the tools Reltio exposes for your tenant — typically entity search and lookup, relationship traversal, match candidate retrieval, activity history, and other AgentFlow operations against the data Reltio manages. The exact tool surface is set by Reltio and may grow over time; retrieve the current list with the [MCP Metadata API](https://docs.reltio.com/developer-resources/ai-integrations/reltio-model-context-protocol-mcp-server-at-a-glance/mcp-metadata-api) or by clicking **Test Connection** in Zenlytic.

Every tool call runs as the Reltio identity attached to the access token, so Zoë's permissions in Reltio are whatever that identity can see and do.

## Prerequisites

Before you start, confirm the following:

* A **Reltio tenant** with **AgentFlow** and the **MCP server** enabled. If you don't see the MCP endpoint at `https://<namespace>.reltio.com/ai/tools/mcp/`, contact Reltio Support to turn it on.
* Your assigned Reltio **namespace** (the subdomain that prefixes `.reltio.com` in your tenant URL).
* A **dedicated service account** in Reltio scoped to the **least-privileged** set of permissions Zoë needs. You'll mint client credentials against this account.
* **Zenlytic requirements.** The `mcp-client` flag enabled on your workspace and `admin` role. See [MCP Client](/mcp/client) for the full list.

## Create Reltio client credentials

The Reltio AgentFlow MCP server uses OAuth 2.0 client credentials. Each client ID/secret pair is tied to a Reltio service account, and the role assigned to that account is the role Zoë will run as in Reltio.

1. In Reltio, follow [Creating client credentials](https://docs.reltio.com/reltio/whats-new-and-notable/whats-new-at-a-glance/platform-changes-at-a-glance/enhance-your-security-with-single-sign-on-sso-and-prepare-for-multi-factor-authentication-mfa/migrating-service-accounts-from-password-to-client-credentials-authentication/creating-client-credentials) to generate a `client_id` and `client_secret` for the service account you want Zoë to run as. Avoid using a personal user account so you can rotate or revoke Zoë's access independently.
2. Scope the service account's role to the **minimum permissions** Zoë needs — read-only on entities and relationships is enough for search and exploration workflows.
3. Copy the generated client secret immediately — Reltio only shows it once. Store it in your secrets manager.

## Mint an access token

Zenlytic doesn't run the OAuth client credentials flow on your behalf, so you mint the access token outside Zenlytic and paste it into the connection.

Exchange the client credentials for an access token:

```bash
curl -X POST "https://auth.reltio.com/oauth/token?grant_type=client_credentials" \
  -H "Authorization: Basic $(echo -n "${CLIENT_ID}:${CLIENT_SECRET}" | base64)" \
  -H "Content-Type: application/x-www-form-urlencoded" \
  -H "Accept: application/json"
```

The response is a JSON document with an `access_token` field. Copy that value — it's what you'll paste into the `Authorization` header in the next step.

> **Reltio does not support refresh tokens.** Access tokens expire and must be regenerated by re-running the request above. Plan a rotation cadence that matches the token lifetime and update the Zenlytic connection each time you mint a fresh token.

## Set up the connection in Zenlytic

1. Open **Workspace Settings → Extensions → MCP** and click **Add Connection**.
2. Fill out the form:

* **Name** — a label that will appear in the chat tool menu, for example `Reltio (prod)`.
* **URL** — the Reltio AgentFlow MCP endpoint for your tenant: `https://<namespace>.reltio.com/ai/tools/mcp/`. Replace `<namespace>` with your assigned Reltio namespace. Must use `https://`.

3. Add the required header (see [Configure request headers](#configure-request-headers)).
4. Click **Test Connection**. Zenlytic opens an MCP session against the Reltio server and lists the tools it advertises.
5. Review the tool list and toggle off any tools Zoë shouldn't be able to call. Newly-discovered tools are pre-selected.
6. Click **Add Connection** to save.

## Configure request headers

Add the following in the **Headers** section of the Zenlytic connection modal. Header values are masked in the UI and encrypted at rest.

| Header          | Value                                                                                               |
| --------------- | --------------------------------------------------------------------------------------------------- |
| `Authorization` | `Bearer YOUR_RELTIO_ACCESS_TOKEN`. Include the `Bearer` scheme and a single space before the token. |

### Verify the token

Before saving the connection, sanity-check the token against the Reltio MCP endpoint:

```bash
curl -X POST \
  -H "Authorization: Bearer $TOKEN" \
  -H "Content-Type: application/json" \
  -d '{"jsonrpc":"2.0","id":1,"method":"tools/list"}' \
  https://<namespace>.reltio.com/ai/tools/mcp/
```

A `200` response that lists your tools means the token, service account permissions, and namespace are wired up correctly — the MCP server will accept the same credentials.

## Use the connection in chat

Once the connection has at least one selected tool, it appears in the chat tool menu. Toggle it on for any conversation where you want Zoë to use Reltio tools. The toggle is per-conversation, so different chats can mix Reltio with other MCP connections as needed.

A few specifics to share with your users:

* **One service account, one permission set.** Every user sharing the connection sees whatever Reltio data the service account's role can see. If you need different access for different teams, mint a separate access token from a separate service account scoped to a different role and wire it up as its own Zenlytic connection.
* **Be specific in prompts.** Naming the entity type, attribute, or tool explicitly produces more reliable tool calls than vague references — for example, "Search for contacts with last name `Smith` in the `California` region."
* **Tokens expire.** When Zoë starts returning `401 Unauthorized` errors mid-conversation, the token has expired. Mint a new one and update the connection's `Authorization` header.

## Manage the integration

* **Rotate the access token:** Re-run the `curl` command in [Mint an access token](#mint-an-access-token), then **Edit** the connection in Zenlytic and overwrite the `Authorization` header value with the fresh token. Because Reltio doesn't issue refresh tokens, this is a routine operation rather than an exception — script it on the cadence that matches your token lifetime.
* **Rotate the client secret:** In Reltio, generate a new client secret for the service account, mint a fresh access token with the new credentials, and update the Zenlytic `Authorization` header. Revoke the old client secret in Reltio once you've confirmed the new one works.
* **Refresh tools:** If Reltio adds new tools or changes existing tool schemas, the next call may fail with a "tools have changed" error. Open the connection, click **Refresh Tools**, review the new set of tools, and **Save Changes**.
* **Adjust permissions:** Edit the role attached to the service account in Reltio if you need to broaden or restrict what Zoë can do. The change takes effect on the next request — no Zenlytic update needed.
* **Disable the integration:** Click **Delete** on the connection card to remove it immediately. Zoë stops seeing the Reltio tools in any new conversation. For belt-and-suspenders, also revoke the client credentials in Reltio.

## Troubleshoot

* **`401 Unauthorized` from Reltio:** The access token is missing, malformed, or expired. Confirm the `Authorization` header includes the `Bearer` scheme with a single space, and mint a fresh token if it's been longer than the token lifetime since you last set it. Reltio doesn't support refresh tokens, so expired tokens must be regenerated from the client credentials.
* **`403 Forbidden` on a tool call:** The role attached to the service account doesn't have permission for the action Zoë attempted. Either tighten the tool list in the Zenlytic connection modal so Zoë can't call that tool, or expand the role's permissions in Reltio.
* **Tool list looks short or empty:** AgentFlow or the MCP server may not be enabled on your Reltio tenant, or the service account's role has limited permissions. Contact Reltio Support to confirm the MCP server is on, and double-check the role's permissions.
* **`Invalid namespace` or DNS errors when saving:** The `<namespace>` in the URL doesn't match a Reltio tenant. Confirm the value with your Reltio administrator and ensure the URL is exactly `https://<namespace>.reltio.com/ai/tools/mcp/` (trailing slash included).
* **Connection works in Test Connection but fails in chat:** Either the access token expired between test and use, or Reltio's tool surface has changed since you saved. Mint a fresh token, then open the connection in workspace settings and click **Refresh Tools**.
* **Can't reach the MCP endpoint:** Confirm outbound HTTPS to `<namespace>.reltio.com` and `auth.reltio.com` is allowed from Zenlytic's network. If your Reltio tenant is on a private VPC or restricted egress, contact Reltio Support — the public AgentFlow MCP endpoint must be reachable from Zenlytic.


# Github

Connect Zoë to GitHub's MCP server to browse repos, issues, pull requests, and Actions from chat.

Connect Zoë to the [GitHub-hosted remote MCP server](https://github.com/github/github-mcp-server) — GitHub's official endpoint for AI tools — so she can browse repositories, read code, triage issues and pull requests, monitor GitHub Actions, and investigate security alerts directly from Zenlytic chats. Authenticate with a static `Authorization` header containing a GitHub [Personal Access Token](https://github.com/settings/personal-access-tokens/new) (PAT).

## What Zoë can access

The GitHub remote MCP server groups tools into **toolsets**. When no toolset filter is configured, Zoë gets the **default** toolset:

* `context` — information about the authenticated user and the current GitHub context.
* `repos` — browse repositories, list branches and tags, read files, search code and commits.
* `issues` — list, read, create, update, and search issues, sub-issues, and labels.
* `pull_requests` — list, read, create, review, update, and merge pull requests.
* `users` — search users.

Optional toolsets you can enable per-connection include `actions` (Actions workflows and CI/CD), `code_security` (code scanning alerts), `copilot` (Copilot coding agent and code reviews), `dependabot` (Dependabot alerts), `discussions`, `gists`, `git` (repository trees), `labels`, `notifications`, `orgs`, `projects`, `secret_protection`, `security_advisories`, `stargazers`, `copilot_spaces`, and `github_support_docs_search`. See [Available Toolsets](https://github.com/github/github-mcp-server#available-toolsets) for the full list and tool inventory.

Every tool call runs as the GitHub user who owns the PAT (and is scoped by the PAT's permissions), so Zoë's reach into GitHub is exactly what that token can see and do.

## Prerequisites

Before you start, confirm the following:

* A **GitHub.com** account or a **GitHub Enterprise Cloud** tenant (with or without data residency). The remote MCP server **does not support GitHub Enterprise Server**.
* A **dedicated GitHub user account** scoped to the **least-privileged** set of permissions Zoë needs. You'll mint the PAT against this account.
* For organization-owned content, any applicable [organization policies](https://github.com/github/github-mcp-server/blob/main/docs/policies-and-governance.md) that allow MCP access.
* **Zenlytic requirements.** The `mcp-client` flag enabled on your workspace and `admin` role. See [MCP Client](/mcp/client) for the full list.

## Generate a GitHub Personal Access Token

PATs replace passwords for programmatic access to GitHub. Each PAT is tied to a single GitHub user, and the scopes you select are exactly what Zoë can do in GitHub.

1. Sign in to your GitHub account, then open [Settings → Developer settings → Personal access tokens → Fine-grained tokens](https://github.com/settings/personal-access-tokens/new).
2. Give the token a recognizable name (for example `zenlytic-mcp`), set an expiration that matches your rotation policy, and pick the **resource owner** (your user account or the organization that owns the repositories Zoë should reach).
3. Select the **repositories** the token can access. Limiting access to a specific set of repositories is recommended over **All repositories**.
4. Grant the **minimum permissions** Zoë needs for the toolsets you plan to enable. Common starting points:

* **Repository permissions** — `Contents: Read-only` and `Metadata: Read-only` cover the `repos` and `git` toolsets.
* **Issues: Read and write** — required for the `issues` toolset.
* **Pull requests: Read and write** — required for the `pull_requests` toolset.
* **Actions: Read-only** — required for the `actions` toolset.
* **Code scanning alerts**, **Dependabot alerts**, **Secret scanning alerts** — required for the corresponding security toolsets.
* **Administration: Read-only** — required for `get_teams` and `get_team_members` in the `context` toolset.

5. Click **Generate token** and copy the value immediately — GitHub only shows it once. Store it in your secrets manager.

> Classic PATs work too, but fine-grained tokens are recommended because you can scope them to specific repositories and grant just the permissions you need. If you use a classic PAT, the minimum scopes are `repo`, `read:org`, and `read:packages`; add `notifications`, `security_events`, `gist`, or `project` for the matching toolsets.

## Set up the connection in Zenlytic

1. Open **Workspace Settings → Extensions → MCP** and click **Add Connection**.
2. Fill out the form:

* **Name** — a label that will appear in the chat tool menu, for example `GitHub`.
* **URL** — the GitHub remote MCP endpoint:

  ```
  https://api.githubcopilot.com/mcp/
  ```

  For **GitHub Enterprise Cloud with data residency**, replace the host with your tenant's Copilot API host — for example `https://copilot-api.<your-subdomain>.ghe.com/mcp`. Must use `https://`.

3. Add the `Authorization` header (see [Configure request headers](#configure-request-headers)).
4. Optionally restrict the toolset (see [Customize the toolset](#customize-the-toolset)).
5. Click **Test Connection**. Zenlytic opens an MCP session against the GitHub server and lists the tools it advertises.
6. Review the tool list and toggle off any tools Zoë shouldn't be able to call. Newly-discovered tools are pre-selected.
7. Click **Add Connection** to save.

> Enabling write access means Zoe can create, modify, or delete real data in your connected systems. A miscommunication or unexpected instruction could trigger hard-to-reverse data loss or expose sensitive data to the wrong place. Use read-only mode unless you specifically need write capabilities. Add the `X-MCP-Readonly: true` Header to disable every write tool, regardless of which toolsets are enabled.

## Configure request headers

Add the following in the **Headers** section of the Zenlytic connection modal. Header values are masked in the UI and encrypted at rest.

| Header          | Value                                                                                      |
| --------------- | ------------------------------------------------------------------------------------------ |
| `Authorization` | `Bearer YOUR_GITHUB_PAT`. Include the `Bearer` scheme and a single space before the token. |

### Verify the token

Before saving the connection, sanity-check the PAT against the GitHub MCP endpoint:

```bash
curl -X POST \
  -H "Authorization: Bearer $PAT" \
  -H "Content-Type: application/json" \
  -H "Accept: application/json, text/event-stream" \
  -d '{"jsonrpc":"2.0","id":1,"method":"tools/list"}' \
  https://api.githubcopilot.com/mcp/
```

A `200` response that lists the available tools means the PAT, scopes, and URL are wired up correctly — the MCP server will accept the same credentials.

## Customize the toolset

By default, the GitHub MCP server exposes the `context`, `repos`, `issues`, `pull_requests`, and `users` toolsets. To narrow or expand the surface Zoë sees, change the URL path or add a header in the Zenlytic connection modal:

* **Restrict via URL path** — append `/x/<toolset>` to the endpoint. For example, `https://api.githubcopilot.com/mcp/x/repos` exposes only the `repos` toolset. Use `https://api.githubcopilot.com/mcp/x/repos/readonly` to also enforce read-only mode.
* **Restrict via header** — add `X-MCP-Toolsets` with a comma-separated list, for example `repos,issues,pull_requests,actions`. The value `all` enables every available toolset.
* **Read-only mode** — add `X-MCP-Readonly: true` to disable every write tool, regardless of which toolsets are enabled.
* **Insiders mode** — opt into early-access tools with `X-MCP-Insiders: true` (or use the `https://api.githubcopilot.com/mcp/insiders` URL).

You can also toggle individual tools off after **Test Connection** lists them, which works regardless of how the toolset is configured upstream. See [Remote Server Documentation](https://github.com/github/github-mcp-server/blob/main/docs/remote-server.md) for advanced configuration.

## Use the connection in chat

Once the connection has at least one selected tool, it appears in the chat tool menu. Toggle it on for any conversation where you want Zoë to use GitHub tools. The toggle is per-conversation, so different chats can mix GitHub with other MCP connections as needed.

A few specifics to share with your users:

* **One PAT, one permission set.** Every user sharing the connection sees whatever GitHub content the PAT can see. If you need different access for different teams, mint a separate PAT scoped to a different set of repositories and wire it up as its own Zenlytic connection.
* **Be specific in prompts.** Naming the owner, repo, and resource explicitly produces more reliable tool calls than vague references. For example: "In `acme-co/web`, list the open pull requests targeting `main` and summarize the failing checks."
* **Write tools can change GitHub.** Tools like `create_pull_request`, `issue_write`, and `merge_pull_request` make real changes against the repositories the PAT can access. Toggle them off, scope the PAT to read-only permissions, or set the `X-MCP-Readonly: true` header unless you've explicitly decided Zoë should write to GitHub.

## Manage the integration

* **Rotate the PAT:** In GitHub, open [Settings → Developer settings → Personal access tokens](https://github.com/settings/tokens), regenerate or create a fresh token, then **Edit** the connection in Zenlytic and overwrite the `Authorization` header value. Revoke the old PAT in GitHub once you've confirmed the new one works.
* **Change toolsets or permissions:** Update the PAT's permissions in GitHub or update the URL path / `X-MCP-Toolsets` header in Zenlytic, then click **Refresh Tools** on the connection.
* **Refresh tools:** If GitHub adds new tools or changes existing tool schemas, the next call may fail with a "tools have changed" error. Open the connection, click **Refresh Tools**, review the new set, and **Save Changes**.
* **Adjust repository access:** Edit the **resource owner** or selected repositories on the PAT in GitHub if you need to broaden or restrict what Zoë can reach. The change takes effect on the next request — no Zenlytic update needed.
* **Disable the integration:** Click **Delete** on the connection card to remove it immediately. Zoë stops seeing the GitHub tools in any new conversation. For belt-and-suspenders, also revoke the PAT in GitHub.

## Limitations

Inherited from GitHub's remote MCP server:

* **No OAuth in Zenlytic.** Zenlytic does not yet support OAuth-based MCP connections. The PAT path described here is the supported authentication method.
* **GitHub Enterprise Server is not supported on the remote server.** GHES customers must self-host the local Docker-based GitHub MCP server, which Zenlytic cannot currently reach.
* **Organization policies can block access.** Org admins can disable PAT access or restrict the GitHub MCP server through [policies and governance](https://github.com/github/github-mcp-server/blob/main/docs/policies-and-governance.md). Confirm the relevant policies are enabled if `tools/list` returns an empty result for org content.
* **Lockdown mode filters public-repo content.** If the server is running in lockdown mode, comments and content from users without push access to the repository are filtered out of public-repo responses.

## Troubleshoot

* **`401 Unauthorized` from GitHub:** The PAT is missing, malformed, or expired. Confirm the `Authorization` header is `Bearer <PAT>` (with a single space) and that the token is still active in **Settings → Developer settings → Personal access tokens**.
* **`403 Forbidden` on a tool call:** The PAT doesn't have the permission required to invoke that tool (for example, `Issues: Write` for `issue_write`, or `Actions: Read` for the `actions_*` tools). Grant the missing permission on the PAT and retry — no Zenlytic update needed.
* **Tool list looks short or empty:** The PAT's scopes only enable a subset of toolsets, or the URL path / `X-MCP-Toolsets` header is narrower than expected. Widen the PAT permissions or remove the restriction and click **Refresh Tools**.
* **Org-owned repositories or teams are invisible:** SSO or fine-grained PAT authorization may be missing. Open the PAT in GitHub and click **Configure SSO** (for classic PATs) or confirm the **resource owner** is the organization (for fine-grained PATs). Org admins may also need to approve the token under **Organization settings → Personal access tokens**.
* **Connection works in Test Connection but fails in chat:** Either the PAT expired between test and use, or GitHub's tool surface has changed since you saved. Generate a fresh token if needed, then open the connection in workspace settings and click **Refresh Tools**.
* **GitHub Enterprise Server URL is rejected or unreachable:** The remote server does not support GHES. GHES customers must self-host the local GitHub MCP server, which Zenlytic cannot reach today.


# Jira

Connect Zoë to Jira's MCP server to search issues, run JQL, and work with Atlassian content.

Connect Zoë to the [Atlassian Rovo remote MCP server](https://github.com/atlassian/atlassian-mcp-server) — Atlassian's official hosted endpoint for AI tools — so she can search and create Jira issues, run JQL queries, and interact with Confluence and Compass content directly from Zenlytic chats. Authenticate with a static `Authorization` header containing a Base64-encoded Atlassian API token.

> Zenlytic does not currently support OAuth-based MCP connections. The API token path described here is the supported authentication method. API token authentication must be enabled by an Atlassian organization admin before it can be used.

## What Zoë can access

The Atlassian Rovo MCP server exposes tools across Jira, Confluence, and Compass. With the default configuration, Zoë can:

* **Jira** — search issues using JQL, read issue details, create issues and stories, bulk-create issues from notes, and update existing tickets.
* **Confluence** — summarize pages, create new pages, and browse accessible spaces.
* **Compass** — create service components, bulk-import from CSV or JSON, and query service dependencies.

All tool calls run as the Atlassian user whose API token is configured, so Zoë's reach into Atlassian is exactly what that user can see and do. Zoë cannot access content the token's owner cannot access.

## Prerequisites

Before you start, confirm the following:

* An **Atlassian Cloud** site with Jira (and optionally Confluence or Compass). The Rovo remote MCP server **does not support Jira Server or Jira Data Center**.
* A **dedicated Atlassian account** scoped to the least-privileged set of Jira projects and Confluence spaces Zoë needs. You'll create the API token against this account.
* An **Atlassian organization admin** who has enabled API token authentication in the Rovo MCP server settings. Admins can toggle this under **admin.atlassian.com → Security → Atlassian Rovo MCP server → Authentication**.
* **Zenlytic requirements.** The `mcp-client` flag enabled on your workspace and `admin` role. See [MCP Client](/mcp/client) for the full list.

## Create an Atlassian API token

API tokens replace passwords for programmatic access to Atlassian Cloud. Each token is tied to a single Atlassian user account.

1. Sign in to the Atlassian account you want Zoë to run as, then open [Atlassian ID → Security → API tokens](https://id.atlassian.com/manage-profile/security/api-tokens).
2. Click **Create API token**, give it a recognizable label (for example `zenlytic-mcp`), and click **Create**.
3. Copy the token value immediately — Atlassian only shows it once. Store it in your secrets manager.
4. Base64-encode your credentials in `email:token` format. On macOS or Linux:

   ```bash
   echo -n "you@example.com:YOUR_API_TOKEN" | base64
   ```

   Copy the resulting string. You'll use it as the `Authorization` header value in the next step.

> Use a dedicated service account rather than a personal account so that the connection doesn't break when someone leaves your organization or rotates their personal token.

## Set up the connection in Zenlytic

1. Open **Workspace Settings → Extensions → MCP** and click **Add Connection**.
2. Fill out the form:
   * **Name** — a label that will appear in the chat tool menu, for example `Jira`.
   * **URL** — the Atlassian Rovo MCP endpoint:

     ```
     https://mcp.atlassian.com/v1/mcp
     ```
3. Add the `Authorization` header (see [Configure request headers](#configure-request-headers)).
4. Click **Test Connection**. Zenlytic opens an MCP session against the Atlassian server and lists the tools it advertises.
5. Review the tool list and toggle off any tools Zoë shouldn't be able to call. Newly-discovered tools are pre-selected.
6. Click **Add Connection** to save.

> Enabling write access means Zoë can create or modify real Jira issues, Confluence pages, and Compass components. Use read-only toggles on write tools unless you specifically need Zoë to make changes.

## Configure request headers

Add the following in the **Headers** section of the Zenlytic connection modal. Header values are masked in the UI and encrypted at rest.

| Header          | Value                                                                                                   |
| --------------- | ------------------------------------------------------------------------------------------------------- |
| `Authorization` | `Basic BASE64_ENCODED_EMAIL_AND_TOKEN`. Include the `Basic` scheme and a single space before the value. |

A `200` response that lists the available tools means the credentials and URL are wired up correctly.

## Use the connection in chat

Once the connection has at least one selected tool, it appears in the chat tool menu. Toggle it on for any conversation where you want Zoë to use Jira tools. The toggle is per-conversation, so different chats can mix Jira with other MCP connections as needed.

A few specifics to share with your users:

* **One account, one permission set.** Every user sharing the connection sees whatever Jira content the API token's account can access. If you need different access for different teams, create a separate Atlassian account with the appropriate project permissions and wire it up as its own Zenlytic connection.
* **Be specific in prompts.** Naming the Jira project key and issue key (for example: "In project `ACME`, find all open bugs assigned to the backend team") produces more reliable tool calls than vague references.
* **Write tools make real changes.** Tools like issue creation and update run against live Jira data. Toggle them off in the connection modal unless you've deliberately decided Zoë should write to Jira.

## Manage the integration

* **Rotate the API token:** In [Atlassian ID → Security → API tokens](https://id.atlassian.com/manage-profile/security/api-tokens), revoke the old token and create a new one, re-encode `email:new_token` in Base64, then **Edit** the connection in Zenlytic and overwrite the `Authorization` header value.
* **Change permissions:** Adjust the Atlassian account's project roles or space permissions in your Atlassian admin console. Changes take effect on the next tool call — no Zenlytic update needed.
* **Refresh tools:** If Atlassian adds new tools or changes existing tool schemas, the next call may fail with a "tools have changed" error. Open the connection, click **Refresh Tools**, review the new set, and **Save Changes**.
* **Disable the integration:** Click **Delete** on the connection card to remove it immediately. Zoë stops seeing the Jira tools in any new conversation. Also revoke the API token in Atlassian ID for belt-and-suspenders.

## Limitations

* **Atlassian Cloud only.** Jira Server and Jira Data Center are not supported by the Rovo remote MCP server.
* **No OAuth in Zenlytic.** Zenlytic does not yet support OAuth-based MCP connections. The API token Basic auth path described here is the only supported authentication method.
* **API token auth must be admin-enabled.** An Atlassian org admin must explicitly enable API token authentication in the Rovo MCP server settings before this setup will work.
* **Token scope is user-wide.** API tokens aren't restricted to specific Atlassian sites or projects. All access is governed by the Atlassian account's existing project roles and space permissions.

## Troubleshoot

* **`401 Unauthorized`:** The `Authorization` header is missing, malformed, or the API token has been revoked. Confirm the header value is `Basic <base64>` (with a single space) and that the token is still active in [Atlassian ID → Security → API tokens](https://id.atlassian.com/manage-profile/security/api-tokens). Re-encode `email:token` and replace the header value.
* **`403 Forbidden` on a tool call:** The Atlassian account doesn't have the Jira project role or Confluence space permission required for that action. Grant the needed role in your Atlassian admin console and retry.
* **`403 Forbidden` on all calls / API token auth not accepted:** API token authentication is disabled in your organization's Rovo MCP server settings. Ask an Atlassian org admin to enable it under **admin.atlassian.com → Security → Atlassian Rovo MCP server → Authentication**.
* **Tool list is empty or missing Jira tools:** The Atlassian account may not have access to any Jira projects, or the Rovo MCP server settings restrict which products are exposed. Confirm the account has at least one Jira project role.
* **Connection works in Test Connection but fails in chat:** The API token may have been revoked between test and use. Generate a fresh token, re-encode, and update the `Authorization` header.


# Integrations Overview

Compare supported warehouse connections and choose the right setup guide for your data source.

Zenlytic integrates with the following data warehouses:

* Snowflake
  * Zenlytic pulls table and column level comments automatically on table import.
* BigQuery
  * Zenlytic pulls table and column level comments automatically on table import.
* Redshift
* Postgres
* MySQL
* Databricks SQL Warehouse
  * Zenlytic pulls table and column level comments automatically on table import.
* Druid
* DuckDB (MotherDuck)
* Trino
* SQL Server
* Azure Synapse Analytics


# Bigquery Setup

Create a BigQuery service account, connect it in Zenlytic, and verify warehouse access.

> **Note:** Alternatively to creating a service account, you can use [Workload Identity Federation to connect to BigQuery](/authentication-and-security/google_workload_identity_federation).

To connect Zenlytic to BigQuery, you'll need to create a service account and download the JSON key file. Here's how to do it:

## Step 1: Create a Service Account

1. Go to the [Google Cloud Console](https://console.cloud.google.com/)
2. Navigate to "IAM & Admin" > "Service Accounts"
3. Click "Create Service Account"
4. Give it a name (e.g., "zenlytic-service-account")
5. Click "Create and Continue"
6. For the role, select "BigQuery Admin" (or a more restrictive role if needed)
7. Click "Continue" and then "Done"

## Step 2: Create and Download the Key

1. Find your service account in the list and click on it
2. Go to the "Keys" tab
3. Click "Add Key" > "Create New Key"
4. Choose "JSON" format
5. Click "Create" - this will download the JSON key file

## Step 3: Add the Connection in Zenlytic

1. In Zenlytic, go to Settings > Data Sources
2. Click "Add Data Source"
3. Select "BigQuery" from the list
4. Enter a name for your connection
5. Upload the JSON key file you downloaded
6. Click "Test Connection" to verify it works
7. Click "Save"

![Bigquery Setup 1](/files/UuAbYfoeraPqwb1NLGLj)

## Step 4: Configure Permissions

Make sure your service account has the necessary permissions:

* **BigQuery Admin** or **BigQuery Data Viewer** role
* Access to the datasets you want to query
* If using a custom project, ensure the service account has access to that project

## Step 5: Test Your Connection

Once connected, you can test by:

1. Going to the Explore section
2. Selecting your BigQuery connection
3. Browsing available datasets and tables
4. Running a simple query to verify everything works

![Bigquery Setup 2](/files/GoZs8awvUpgZLIc2tMpf)

![Bigquery Setup 3](/files/BwNZKyJAcbwSDZJRHlm0)

![Bigquery Setup 4](/files/Zcf8Lhm3Mov6aoEG8BEq)

![Bigquery Setup 5](/files/kh3Cr4iaP81aliYKxvdO)

![Bigquery Setup 6](/files/HcUIbkU9yLrPKV2v9Uyd)

![Bigquery Setup 7](/files/1cY2HTYnV9MsxTHJn7SY)

![Bigquery Setup 8](/files/4Us11jX6ozUQHeaRQwFH)


# Snowflake Setup

Connect Snowflake to Zenlytic with the right role, warehouse, database, and authentication settings.

> Connect your Snowflake data warehouse to Zenlytic

This document will help you connect your Snowflake data warehouse to Zenlytic to access modern, LLM-powered business intelligence.

## Connection Name

First, you'll name your connection. This name is how Zenlytic's [model](/data-modeling/model) connects the credentials you'll enter in the next step to your data warehouse. You can name the credential whatever you want, but we usually recommend naming it something like `my_company_name` to keep things simple.

## Account

The account in Snowflake is how we know which Snowflake warehouse to connect to. To get this value look at the URL for your Snowflake (e.g. `https://blah12345.us-east-1.snowflakecomputing.com/console`) and take the part after `https://` and before `snowflakecomputing.com`.

![Snowflake Setup 1](/files/ootqYyRniDVPqJRVWTqc)

In this example, you'd enter `blah12345.us-east-1` for your account.

## Username

This is the username of your user in Snowflake. This can be found in the upper right hand of the page when you're logged in.

![Snowflake Setup 2](/files/sBLP7c2qkcX9xXMmLMBc)

In this example, the username is `pblankley`

## Password

This is the password associated with the user you logged in with. Enter the value in the input.

## Warehouse

Warehouses in Snowflake are units of compute, not a place to store data. The default warehouse is `COMPUTE_WH`, but you can use whichever warehouse you want. To see warehouse options for your role, select from the drop-down in the Snowflake UI.

![Snowflake Setup 3](/files/iL1k8DJpB6DCedpIyglI)

In this example, we'll use the `REPORT_WH` warehouse.

## Database

Here you'll select the snowflake database you want to use as a default in Zenlytic. You can always use data from other databases. This one just acts as a default. You can also see database options in the drop-down in the Snowflake UI.

![Snowflake Setup 3](/files/iL1k8DJpB6DCedpIyglI)

In this example, we're using the `ZENLYTIC` database.

## Role (optional)

The role in Snowflake is the set of permissions you want your user to have. This field is optional, and if you leave it blank, Snowflake will use your user's default role. You can find roles your user has access to in the upper right of the Snowflake UI.

![Snowflake Setup 3](/files/iL1k8DJpB6DCedpIyglI)

In this example, we're using the `REPORTER` role. Note: if the role you select doesn't have access to certain data in your warehouse, Zenlytic will be unable to access that data as well.

## Schema (optional)

This is the schema you want to use as a default. This field is optional and is usually left blank.

## SSH Key Pair Connection

We also offer the ability to connect with an ssh key pair in addition to username / password as shown above. To connect, contact your Zenlytic rep to get the public key to use when creating the access in Snowflake.

## IP Whitelisting

If you use IP whitelisting in your data warehouse, whitelist the following IP addresses:

```
184.73.175.163 
18.209.132.30
```

## I need to create a user for Zenlytic

Look at this section if you need to create a new user for Zenlytic to use when accessing Snowflake.

### Step 1: Create a Snowflake User

1. Log into your Snowflake account as an admin
2. Go to "Users" in the admin panel
3. Click "Create User"
4. Set a username (e.g., "zenlytic\_user")
5. Set a secure password
6. Assign appropriate roles (typically "PUBLIC" and any custom roles needed)

### Step 2: Grant Permissions

Run the following SQL commands to grant necessary permissions:

{% code overflow="wrap" %}

```sql
-- Grant usage on warehouse
GRANT USAGE ON WAREHOUSE <your_warehouse_name> TO ROLE <your_role_name>;

-- Grant usage on database
GRANT USAGE ON DATABASE <your_database_name> TO ROLE <your_role_name>;

-- Grant usage on schema
GRANT USAGE ON SCHEMA <your_database_name>.<your_schema_name> TO ROLE <your_role_name>;

-- Grant select on all tables in schema
GRANT SELECT ON ALL TABLES IN SCHEMA <your_database_name>.<your_schema_name> TO ROLE <your_role_name>;
```

{% endcode %}

## Advanced Settings

*You can ignore this section if you're not using a Snowflake Share directly.*

Advanced settings in Snowflake deal with situations where you're running analysis directly on data you've received via a Snowflake Share.

**Zenlytic Database Name**

Create a database and enter that database name (e.g. `zenlytic_database`)

**Zenlytic Schema Name**

Create a schema and enter that schema name (e.g. `zenlytic_schema`)


# Redshift Setup

Connect Amazon Redshift to Zenlytic, configure credentials, and test query access.

To connect Zenlytic to Amazon Redshift, you'll need to configure the connection with your database credentials. Here's how to do it:

## Step 1: Gather Connection Information

You'll need the following information from your Redshift cluster:

* **Host**: Your Redshift cluster endpoint
* **Port**: Usually 5439 (default Redshift port)
* **Database**: The database name
* **Username**: A database user with appropriate permissions
* **Password**: The password for the user

## Step 2: Create a Database User (if needed)

If you don't have a dedicated user for Zenlytic, create one:

```sql
CREATE USER zenlytic_user WITH PASSWORD 'your_secure_password';
GRANT USAGE ON DATABASE your_database TO zenlytic_user;
GRANT SELECT ON ALL TABLES IN SCHEMA public TO zenlytic_user;
```

## Step 3: Add the Connection in Zenlytic

1. In Zenlytic, go to Settings > Data Sources
2. Click "Add Data Source"
3. Select "Redshift" from the list
4. Enter the connection details:
   * **Host**: Your Redshift cluster endpoint
   * **Port**: 5439 (or your custom port)
   * **Database**: Your database name
   * **Username**: Your database username
   * **Password**: Your database password

![Redshift Setup 1](/files/HN732W7ybL4ukdXdBVdG)

## Step 4: Configure Security Group

Make sure your Redshift security group allows connections from Zenlytic's IP addresses:

* **184.73.175.163**
* **18.209.132.30**

## Step 5: Test Your Connection

1. Click "Test Connection" to verify it works
2. If successful, click "Save"
3. You should now be able to see your Redshift tables in Zenlytic

![Redshift Setup 2](/files/9V1qCd5emiileHzXjTPK)

## Troubleshooting

If you encounter connection issues:

1. Verify the host endpoint is correct
2. Check that the security group allows connections from Zenlytic's IPs
3. Ensure the user has the necessary permissions
4. Verify the database name and credentials are correct


# Postgres Setup

Connect PostgreSQL to Zenlytic, supply database credentials, and verify schema access.

To connect Zenlytic to PostgreSQL, you'll need to configure the connection with your database credentials. Here's how to do it:

## Step 1: Gather Connection Information

You'll need the following information from your PostgreSQL database:

* **Host**: Your PostgreSQL server hostname or IP address
* **Port**: Usually 5432 (default PostgreSQL port)
* **Database**: The database name
* **Username**: A database user with appropriate permissions
* **Password**: The password for the user

## Step 2: Create a Database User (if needed)

If you don't have a dedicated user for Zenlytic, create one:

```sql
CREATE USER zenlytic_user WITH PASSWORD 'your_secure_password';
GRANT CONNECT ON DATABASE your_database TO zenlytic_user;
GRANT USAGE ON SCHEMA public TO zenlytic_user;
GRANT SELECT ON ALL TABLES IN SCHEMA public TO zenlytic_user;
```

## Step 3: Add the Connection in Zenlytic

1. In Zenlytic, go to Settings > Data Sources
2. Click "Add Data Source"
3. Select "PostgreSQL" from the list
4. Enter the connection details:
   * **Host**: Your PostgreSQL server hostname
   * **Port**: 5432 (or your custom port)
   * **Database**: Your database name
   * **Username**: Your database username
   * **Password**: Your database password

![Postgres Setup 1](/files/u9e3SxbKM7evlHGKicwO)

## Step 4: Configure Firewall/Security

Make sure your PostgreSQL server allows connections from Zenlytic's IP addresses:

* **184.73.175.163**
* **18.209.132.30**

## Step 5: Test Your Connection

1. Click "Test Connection" to verify it works
2. If successful, click "Save"
3. You should now be able to see your PostgreSQL tables in Zenlytic

## Troubleshooting

If you encounter connection issues:

1. Verify the host and port are correct
2. Check that the firewall allows connections from Zenlytic's IPs
3. Ensure the user has the necessary permissions
4. Verify the database name and credentials are correct
5. Check that PostgreSQL is configured to accept remote connections


# Mysql Setup

Connect MySQL to Zenlytic, configure credentials, and confirm table access for modeling.

To connect Zenlytic to MySQL, you'll need to configure the connection with your database credentials. Here's how to do it:

## Step 1: Gather Connection Information

You'll need the following information from your MySQL database:

* **Host**: Your MySQL server hostname or IP address
* **Port**: Usually 3306 (default MySQL port)
* **Database**: The database name
* **Username**: A database user with appropriate permissions
* **Password**: The password for the user

## Step 2: Create a Database User (if needed)

If you don't have a dedicated user for Zenlytic, create one:

```sql
CREATE USER 'zenlytic_user'@'%' IDENTIFIED BY 'your_secure_password';
GRANT SELECT ON your_database.* TO 'zenlytic_user'@'%';
FLUSH PRIVILEGES;
```

## Step 3: Add the Connection in Zenlytic

1. In Zenlytic, go to Settings > Data Sources
2. Click "Add Data Source"
3. Select "MySQL" from the list
4. Enter the connection details:
   * **Host**: Your MySQL server hostname
   * **Port**: 3306 (or your custom port)
   * **Database**: Your database name
   * **Username**: Your database username
   * **Password**: Your database password

![Mysql Setup 1](/files/VURQwscRfo8aPavL4x9I)

## Step 4: Configure Firewall/Security

Make sure your MySQL server allows connections from Zenlytic's IP addresses:

* **184.73.175.163**
* **18.209.132.30**

## Step 5: Test Your Connection

1. Click "Test Connection" to verify it works
2. If successful, click "Save"
3. You should now be able to see your MySQL tables in Zenlytic

## Troubleshooting

If you encounter connection issues:

1. Verify the host and port are correct
2. Check that the firewall allows connections from Zenlytic's IPs
3. Ensure the user has the necessary permissions
4. Verify the database name and credentials are correct
5. Check that MySQL is configured to accept remote connections
6. Ensure the user is allowed to connect from any host (`'%'`)


# Sql Server Setup

Connect SQL Server to Zenlytic, configure connection details, and validate warehouse access.

To connect Zenlytic to SQL Server, you'll need to configure the connection with your database credentials. Here's how to do it:

## Step 1: Gather Connection Information

You'll need the following information from your SQL Server instance:

* **Host**: Your SQL Server hostname or IP address
* **Port**: Usually 1433 (default SQL Server port)
* **Database**: The database name
* **Username**: A database user with appropriate permissions
* **Password**: The password for the user

## Step 2: Create a Database User (if needed)

If you don't have a dedicated user for Zenlytic, create one:

```sql
CREATE LOGIN zenlytic_user WITH PASSWORD = 'your_secure_password';
USE your_database;
CREATE USER zenlytic_user FOR LOGIN zenlytic_user;
GRANT CONNECT TO zenlytic_user;
GRANT SELECT ON SCHEMA::dbo TO zenlytic_user;
```

## Step 3: Add the Connection in Zenlytic

1. In Zenlytic, go to Settings > Data Sources
2. Click "Add Data Source"
3. Select "SQL Server" from the list
4. Enter the connection details:
   * **Host**: Your SQL Server hostname
   * **Port**: 1433 (or your custom port)
   * **Database**: Your database name
   * **Username**: Your database username
   * **Password**: Your database password

![Sql Server Setup 1](/files/1Jp669MpGxkO1ElUOJMx)

## Step 4: Configure Firewall/Security

Make sure your SQL Server allows connections from Zenlytic's IP addresses:

* **184.73.175.163**
* **18.209.132.30**

## Step 5: Test Your Connection

1. Click "Test Connection" to verify it works
2. If successful, click "Save"
3. You should now be able to see your SQL Server tables in Zenlytic

## Troubleshooting

If you encounter connection issues:

1. Verify the host and port are correct
2. Check that the firewall allows connections from Zenlytic's IPs
3. Ensure the user has the necessary permissions
4. Verify the database name and credentials are correct
5. Check that SQL Server is configured to accept remote connections
6. Ensure SQL Server Browser service is running (if using named instances)


# Azure Synapse Setup

Connect Azure Synapse to Zenlytic, authenticate securely, and test query access.

To connect Zenlytic to Azure Synapse Analytics, you'll need to configure the connection with your database credentials. Here's how to do it:

## Step 1: Gather Connection Information

You'll need the following information from your Azure Synapse workspace:

* **Server**: Your Azure Synapse server name
* **Database**: The database name
* **Username**: A database user with appropriate permissions
* **Password**: The password for the user
* **Port**: Usually 1433 (default SQL Server port)

## Step 2: Create a Database User (if needed)

If you don't have a dedicated user for Zenlytic, create one:

```sql
CREATE USER zenlytic_user WITH PASSWORD = 'your_secure_password';
GRANT CONNECT TO zenlytic_user;
GRANT SELECT ON SCHEMA::dbo TO zenlytic_user;
```

## Step 3: Add the Connection in Zenlytic

1. In Zenlytic, go to Settings > Data Sources
2. Click "Add Data Source"
3. Select "Azure Synapse" from the list
4. Enter the connection details:
   * **Server**: Your Azure Synapse server name
   * **Database**: Your database name
   * **Username**: Your database username
   * **Password**: Your database password
   * **Port**: 1433 (or your custom port)

![Azure Synapse Setup 1](/files/sYjm1uHaaeqBHZYgSneM)

## Step 4: Configure Firewall Rules

Make sure your Azure Synapse firewall allows connections from Zenlytic's IP addresses:

* **184.73.175.163**
* **18.209.132.30**

## Step 5: Test Your Connection

1. Click "Test Connection" to verify it works
2. If successful, click "Save"
3. You should now be able to see your Azure Synapse tables in Zenlytic

## Troubleshooting

If you encounter connection issues:

1. Verify the server name is correct
2. Check that the firewall allows connections from Zenlytic's IPs
3. Ensure the user has the necessary permissions
4. Verify the database name and credentials are correct
5. Check that Azure Synapse is running and accessible


# Databricks Setup

Connect a Databricks SQL warehouse to Zenlytic and verify access to your catalogs and tables.

To connect Zenlytic to Databricks, you'll need to configure the connection using a personal access token. Here's how to do it:

## Step 1: Create a Personal Access Token

1. Log into your Databricks workspace
2. Go to User Settings (click your username in the top right)
3. Click on "Developer" tab
4. Click "Generate New Token"
5. Give it a name (e.g., "Zenlytic Integration")
6. Set an expiration date
7. Click "Generate"
8. Copy the token (you won't be able to see it again)

![Databricks Setup 1](/files/mMjhOUOaw6uizYNSoJ6M)

## Step 2: Get Your Workspace URL

1. In your Databricks workspace, look at the URL in your browser
2. It should look like: `https://your-workspace.cloud.databricks.com`
3. Copy this URL

![Databricks Setup 1](/files/mMjhOUOaw6uizYNSoJ6M)

## Step 3: Add the Connection in Zenlytic

1. In Zenlytic, go to Settings > Data Sources
2. Click "Add Data Source"
3. Select "Databricks" from the list
4. Enter the connection details:
   * **Workspace URL**: Your Databricks workspace URL
   * **Personal Access Token**: The token you generated
   * **HTTP Path**: Usually `/sql/1.0/warehouses/<warehouse-id>`

![Databricks Setup 2](/files/iL3X5mwgBQ3nLc32mmtq)

## Step 4: Configure HTTP Path

To find your HTTP path:

1. Go to SQL Warehouses in Databricks
2. Click on your warehouse
3. Look for the "Connection Details" section
4. Copy the HTTP Path

![Databricks Setup 3](/files/u0R3lsmfXdBk19FKBZRu)

## IP Whitelisting

If you use IP whitelisting in your data warehouse, whitelist the following IP addresses:

```
184.73.175.163 
18.209.132.30
```

## Step 5: Test Your Connection

1. Click "Test Connection" to verify it works
2. If successful, click "Save"
3. You should now be able to see your Databricks tables in Zenlytic


# Druid Setup

Connect Apache Druid to Zenlytic, configure the connection, and validate query access.

> Connect your Apache Druid data warehouse with Zenlytic

This document will help you connect your Apache Druid data warehouse to Zenlytic to access modern, LLM-powered business intelligence.

## Connection Name

First, you'll name your connection. This name is how Zenlytic's [model](/data-modeling/model) connects the credentials you'll enter in the next step to your data warehouse. You can name the credential whatever you want, but we usually recommend naming it something like `my_company_name` to keep things simple.

## Host

The host in Druid is how we know where you're hosting your data warehouse. This can be an IP address or a URL if you're hosting Druid on cloud resources you own.

In this example, you'd enter `44.33.25.5` for your account.

## Port

This is the port to use to connect to your Druid data warehouse. The default value is `8082`.

In this example, the port is `8082`

## Username

This is the username of your user in Druid.

In this example, the username is `pblankley`

## Password

This is the password associated with the user you logged in with. Enter the value in the input.

## Advanced Settings

### Path (optional)

This is the path in your Druid instance to submit SQL API statements to. The default is `/druid/v2/sql/`, and you rarely have to change this value.

In this example, we'll use the default `/druid/v2/sql/` path.

### Scheme (optional)

This is the method of connecting to your Druid data warehouse. The default is `http` and you rarely have to change this.

In this example, we'll use the default `http` scheme.

### IP Whitelisting

If you use IP whitelisting in your data warehouse, whitelist the following IP addresses:

```
184.73.175.163 
18.209.132.30
```


# Trino Onboarding

Connect Trino to Zenlytic, configure credentials, and confirm access to your catalogs and schemas.

> How to set up a Trino data warehouse in Zenlytic

This document will help you connect your Trino data warehouse to Zenlytic to access modern, LLM-powered business intelligence.

## Connection Name

First, you'll name your connection. This name is how Zenlytic's [model](/data-modeling/model) connects the credentials you'll enter in the next step to your data warehouse. You can name the credential whatever you want, but we usually recommend naming it something like `my_company_name` to keep things simple.

## Host

The host in Trino is how we know where you're hosting your data warehouse. This can be an IP address or a URL if you're hosting Trino on cloud resources you own.

In this example, you'd enter `44.33.25.5` for your account.

## Port

This is the port to use to connect to your Trino data warehouse. The default value is `8080`.

In this example, the port is `8080`

## Username

This is the username of your user in Trino.

In this example, the username is `pblankley`

## Password

This is the password associated with the user you logged in with. Enter the value in the input.

## Catalog

This is the catalog you want to set as the default. A catalog in Trino references a data source (e.g. a Postgres database). All catalogs can be referenced in subsequent queries, but a default is required.

In this example, the catalog is `postgresql`

## Advanced Settings

### Scheme (optional)

This is the method of connecting to your Trino data warehouse. The default is `http`, but it can be changed to `https`.

In this example, we'll use the default `http` scheme.

### IP Whitelisting

If you use IP whitelisting in your data warehouse, whitelist the following IP addresses:

```
184.73.175.163 
18.209.132.30
```


# Motherduck Setup

Connect MotherDuck to Zenlytic, provide credentials, and verify access to DuckDB data.

To connect Zenlytic to MotherDuck, you'll need to configure the connection using a service token. Here's how to do it:

## Step 1: Create a Service Token

1. Log into your MotherDuck account
2. Go to Settings > Service Tokens
3. Click "Create Service Token"
4. Give it a name (e.g., "Zenlytic Integration")
5. Set appropriate permissions (read access to your databases)
6. Click "Create"
7. Copy the token (you won't be able to see it again)

## Step 2: Add the Connection in Zenlytic

1. In Zenlytic, go to Settings > Data Sources
2. Click "Add Data Source"
3. Select "MotherDuck" from the list
4. Enter the connection details:
   * **Service Token**: The token you generated
   * **Database**: Your database name (optional, can be specified later)

![Motherduck Setup 1](/files/YkTU4MF60LA9eISFGCXy)

## Step 3: Test Your Connection

1. Click "Test Connection" to verify it works
2. If successful, click "Save"
3. You should now be able to see your MotherDuck tables in Zenlytic

## Troubleshooting

If you encounter connection issues:

1. Verify the service token is correct
2. Check that the token has the necessary permissions
3. Ensure the database name is correct (if specified)
4. Verify your MotherDuck account is active


# Microsoft Entra Zenlytic

Set up Microsoft Entra SSO for Zenlytic and map the claims users need to sign in.

## How to setup Microsoft Entra to Authenticate in Zenlytic

This document will guide you through the process of enabling Microsoft Entra (formerly Active Directory) as a single sign-on (SSO) option for signing in to Zenlytic.

### Outcome

* You'll have a custom sign in page with an option to `Sign in with Microsoft Entra`.
* You'll be able to control access to Zenlytic via Microsoft Entra

### 1. First Steps

To begin the process, reach out to your Zenlytic contact and let them know you'd like to use Microsoft Entra SSO.

You'll work with them to decide on the Zenlytic subdomain (e.g. `mycompany.zenlytic.com`)

After that conversation, they will provide you with these two important values for future use:

1. `Identifier (Entity ID)`
2. `Reply URL (Assertion Consumer Service URL)`

### 2. Creating an Entra Application for Zenlytic

Go to the `Enterprise application` section in Microsoft Entra and click `New Application`

![New Application](/files/Cd9KHS3Z9E4xrVwySyva)

Click the `Create your own application` button.

Here we'll give it a name, for example `zenlytic-client-app`, then select the `Non-gallery option`.

Then click the Create button.

![Create Own Application](/files/5F1bNHYtKGnL3KpX9ySn)

### 3. Configuring your Zenlytic Application

Before continuing, ensure that you have obtained these values from your Zenlytic contact:

1. `Identifier (Entity ID)`
2. `Reply URL (Assertion Consumer Service URL)`

Now go to your newly created application under the `Enterprise applications` section. Go ahead and click the name to open it.

![Enterprise Applications](/files/Qbhup6v4a4rEhnBNacP8)

We'll select the Single sign-on section, then choose SAML as the single sign-on method

![Single Sign-on](/files/DNqJzAj7YuliSOw1Y4Mz)

Click the `Edit` button for `Basic SAML Configuration`

![Basic SML](/files/Xvu5ECo4F8W0p3zMLYiD)

Choose `Add identifier` for the `Identifier (Entity ID)` section and enter the Entity ID that the Zenlytic support team gave you.

Now under `Reply URL (Assertion Consumer Service URL)`, enter the value the Zenlytic support gave you.

Your form should look similar to this:

![Basic SML Config Example](/files/qBte6i4eBcaJUCtoN64Q)

Hit the Save button and hit the `X` button.

### 4. Manage Attributes and Claims

In this section, you'll configure what you send to Zenlytic when a user signs in. We'll need to make a few adjustments to ensure Zenlytic is using the correct fields for a user.

Click the `Edit` button for `Attributes & Claims`

![Attributes & Claims](/files/3mt0bBgyJGxWXBflpPfX)

* Zenlytic requires these fields to be mapped:
  * `emailaddress`
  * `givenname`
  * `name`
  * `surname`

By default, your mappings will look something like this:

![Manage Claim](/files/6EbKFk46Gl0G6cu3gn0A)

In the past we've seen some users have varying `namespaces` for their claims. So just in case, we'll clear those values out.

Click on each of the claims under `Additional Claims`, and clear out the `Namespace value`

![Manage Claim](/files/N81gvVmwkDIrhJBFGIfs)

Your claim section should now look similar to this:

![Attributes & Claims](/files/DCoxTtwIHBYiZx0WgvpQ)

It's important to note that your company may be using non-default values to represent your users. Specifically, we've seen some customers not have a value for the `user.mail` field.

If we hit issues later on in the process, we'd recommend reaching out to an admin on your Entra account about this, or reach out to Zenlytic and we'll walk you through which value to use there. Please check out the Debug section of this article for additional notes.

#### You may optionally include these fields:

`zenlytic_role`

When a user first signs into Zenlytic using Entra, this will be the access level they are granted.

Must be one of these values:\
\- admin\
\- develop\
\- develop\_without\_deploy\
\- explore\
\- view

​`zenlytic_user_attributes`

Allows you to manually control access to data.\
Read about how user attributes work here in [User Attributes](/administration/user_attributes).\
Should follow this format. An array of key/value pairs.\
\- Ex: `[{\"department\": \"Engineering\"}]`

> **💡 Tip:** For help with setting up custom Entra attributes, check out the [How-To section for this optional step](#how-to-set-up-custom-claims-in-entra)

Now click the X button to return back to your Application

You may be taken back to the this screen, if so just go back to your application by clicking this section:

![Application Screen](/files/7DLpZ9usXZGSuMiHyuMp)

### 5. Providing Zenlytic your App Federation Metadata Url

* Copy this Url and you'll need to send it to your Zenlytic contact.

![Federation Metadata](/files/aJSBlF0czsKHlVIJc6R7)

Once we receive that url, we'll finish up the rest of the setup on our end and let you know when you're all set!

### 6. Adding Users/Groups to Zenlytic

With your application selected, click the "Users and Groups" tab.\
Now click the "Add user/group" button.\
Assign whomever you'd like to have access to Zenlytic.

![Federation Metadata](/files/KLYKfK68zKnrNq9wXw59)

### 7. On Completion

* **Requirements:** Make sure you've sent your Zenlytic contact the `App Federation Metadata Url` for your application.

Your Zenlytic contact will let you know when your SSO onboarding is ready for use. Once you hear from them, you'll now be able to use your company specific login page:

`mycompany.zenlytic.com/login`

## Optional Steps

### How-to Set up Custom Claims in Entra

For the full list of available custom claims and their formats, see the [SSO Custom Claims Reference](/authentication-and-security/sso-custom-claims-reference).

First we'll go back to the `Single sign-on` section for our App and click `Edit` on `Attributes & Claims`

![Single Sign-on](/files/Q1AiKKoGle6nLlKFFgrd)

Now click Add new claim

![Add New Claim Attributes](/files/636KwoBmxTDh4drZsbaH)

We'll set up the `zenlytic_role` field, so in the `Name` input, type `zenlytic_role`

![Manage Claim](/files/3rr13j8RlwBbM3ywC4xx)

Now open `Claim Conditions` and select Any for your `User type`

![Claim Conditions](/files/dkRuerTrCrqxJ8QUcvab)

Now under `Scoped Groups`, select the user group that you'd like to set the `zenlytic_role` for.

In our case, we've created a group called `Zenlytic Admin` which denotes user that should have full access to Zenlytic.

![Select Groups](/files/RhAJUqqWS57z29Hm41qf)

Select `Attribute` in `Source`

![Attribute](/files/wUFTVAIznonR2193Ejho)

Now type in the value that you wish this user group to have for `zenlytic_role`. In our case, we want it to have `admin`. Make sure to hit enter after typing your value.​

![User Type](/files/yezfmeGw4aXKrMlVUcUl)

Lets say we want all other users to have the lowest level of access, view, you would just add another condition, where here my `Scoped Group` is a group called `All Users`.

![User Type](/files/SXmSzu6n43yPr5oJ4EkR)

### Debug Steps

Feel free to reach out to your Zenlytic contact or <support@zenlytic.com> if you encounter issues during setup.

If you're attempting to sign in to Zenlytic using Entra, and you're seeing errors about permissions, ensure that your Entra user has the appropriate permissions in Entra.

You can adjust a user/group role by going to the Users tab and then assigning them a proper role.

![User Role Setting](/files/cJDipzzDoc2L0aEWAIsN)

If you're seeing an error saying that `email` is a required value in the claim mapping, make sure your user has a valid email in the `Contact Information` section for that user.

![Contact Information](/files/YIrGrNrzpBN85Tw82Uun)

If your company does not provide a value for that field, please make sure to map the field you do use in the Attributes and Claims section.


# Snowflake with Microsoft Entra

Configure Snowflake authentication with Microsoft Entra so Zenlytic users can sign in through SSO.

This document will guide you through the process of enabling Microsoft Entra (formerly Active Directory) as an authentication option with Snowflake.

## Outcome

* You'll have a custom sign in page with an option to Sign in with Microsoft Entra.
* You'll be able to control access to Zenlytic via Microsoft Entra

## Prerequisites

* Before continuing make sure you understand the full process outlined here in [Snowflake's guide](https://docs.snowflake.com/en/user-guide/oauth-azure#label-configure-oauth-resource-in-microsoft-idp). This guide mostly comprises Snowflake's, with some extra context added in some potentially confusing areas.

## Understanding the Requirements

Zenlytic needs access to both of the flows listed in Snowflake's guide:

1. The authorization server can grant the OAuth client an access token on behalf of the user.
2. The authorization server can grant the OAuth client an access token for the OAuth client itself.

## Step 1: Configure Zenlytic in Microsoft Entra ID

### Create the OAuth Resource

1. Navigate to the [Microsoft Azure Portal](https://portal.azure.com/) and authenticate.
2. Navigate to Microsoft Entra ID.
3. Click on **App Registrations**.
4. Click on **New Registration**.
5. Enter `Zenlytic Snowflake`, or similar value as the **Name**.
6. Verify the **Supported account types** is set to **Single Tenant**.
7. Leave **Redirect URI** empty
8. Click **Register**.

### Expose the API

1. Click on **Expose an API**.
2. Click on the **Add** link next to **Application ID URI** to set the `Application ID URI`.

   > **Important**
   >
   > The Application ID URI must be unique within your organization's directory, such as `https://your.company.com/4d2a8c2b-a5f4-4b86-93ca-294185f45f2e`.
   >
   > **Tip:** You can use a unique ID generator such as [UUID Generator](https://www.uuidgenerator.net/) for the second part of the URL.
3. Now we'll add the scope for the web app client, click on **Add a scope** to add a scope representing the Snowflake role.
   * Enter the scope by having the name of the Snowflake role with the `session:scope:` prefix. For example, for the Snowflake Analyst role, enter `session:scope:analyst`.
   * Select who can consent.
   * Enter a **display name** for the scope (e.g.: Account Admin).
   * Enter a **description** for the scope (e.g.: Can administer the Snowflake account).
   * Click **Add Scope**.
4. And now we'll add the scope for the api
   * Click on **Manifest**.
   * Locate the `appRoles` element.
   * Enter an **App Role** with the settings below.

| Setting            | Description                                                                                                               |
| ------------------ | ------------------------------------------------------------------------------------------------------------------------- |
| allowedMemberTypes | Application                                                                                                               |
| description        | A description of the role                                                                                                 |
| displayName        | A friendly name for users to view                                                                                         |
| id                 | A unique ID. You can use the `[System.Guid]::NewGuid()` function from PowerShell to generate a unique ID if needed.       |
| isEnabled          | Set to `true`                                                                                                             |
| origin             | Set to `Application`                                                                                                      |
| value              | Set to the name of the Snowflake role with the `session:role:` prefix. For the Analyst role, enter `session:role:analyst` |

The App Role manifests as follows.

```json
"appRoles":[{
    "allowedMemberTypes": [ "Application" ],
    "description": "Account Administrator.",
    "displayName": "Account Admin",
    "id": "3ea51f40-2ad7-4e79-aa18-12c45156dc6a",
    "isEnabled": true,
    "origin": "Application",
    "value": "session:role:analyst"
}]
```

5. Click Save

### Set up Redirect URI

1. Go to the home page of your new `Zenlytic Snowflake` **App Registration** and click **Add a Redirect URI**

![Redirect URI](/files/lukKs8CltYVDvNrF2pgp)

2. Click Add a Platform
3. Choose Single-page application

![Single Page Application](/files/hbXljAMj1deqaILp5sLn)

4. Under the **Redirect URIs** section, enter `https://<your_company_subdomain>.zenlytic.com`\
   a. Ex: `https://mycompany.zenlytic.com`\
   b. If you're not sure what your subdomain is, reach out to your Zenlytic contact or [email support](mailto:support@zenlytic.com)
5. Select **Access tokens (used for implicit flows)** and **ID tokens (used for implicit and hybrid flows)**

   <figure><img src="/files/9WQEXSy256ljdHgB7GY7" alt=""><figcaption></figcaption></figure>
6. Click **Configure**

## Step 2: Create the OAuth Client

1. In the **Overview** section of your `Zenlytic Snowflake` application, copy the `ClientID` from the **Application (client) ID** field.
2. Click on **Certificates & secrets** and then **New client secret**.
3. Add a description of the secret.
4. Select the time period that you feel comfortable with. Once this secret expires, Zenlytic will lose the ability to authenticate with Snowflake. You'll need to generate and share with Zenlytic a new secret before that expires to avoid downtime.
5. Click **Add**. Copy the secret for later.
6. Now we need to configure Delegated permissions for Zenlytic
   * Click on **API Permissions**.
   * Click on **Add Permission**.
   * Click on **My APIs**.
   * Click on the **Snowflake OAuth Resource** that you created in [Step 1: Configure Zenlytic in Microsoft Entra ID](#step-1-configure-zenlytic-in-microsoft-entra-id)

     <figure><img src="/files/dLASeEeb6XEvzqv5jsQm" alt=""><figcaption></figcaption></figure>
   * Click on the **Delegated Permissions** box.
   * Check on the Permission related to the Scopes defined in the Application that you wish to grant to this client.
   * Click **Add Permissions**.
   * Choose the permission you wish to grant Zenlytic
   * Click **Add Permission**.
7. Now we need to configure API permissions for Applications as follows.
   * Click on **API Permissions**.
   * Click on **Add Permission**.
   * Click on **My APIs**.
   * Click on the **Snowflake OAuth Resource** that you created in [Step 1: Configure Zenlytic in Microsoft Entra ID](#step-1-configure-zenlytic-in-microsoft-entra-id)

     <figure><img src="/files/dLASeEeb6XEvzqv5jsQm" alt=""><figcaption></figcaption></figure>
   * Click on the **Application Permissions**.
   * Check on the **Permission** related to the Roles manually defined in the `Manifest` of the Application that you wish to grant to this client.
   * Click **Add Permissions**.
   * Choose the permission you wish to grant Zenlytic
   * Click **Yes**.

## Step 3: Next Steps

1. You'll now need to make sure your Entra instance and Snowflake have the appropriate security integrations. Follow the guide [here](https://docs.snowflake.com/en/user-guide/oauth-azure#collect-azure-ad-information-for-snowflake).
2. Next, you'll need to send your Zenlytic contact the appropriate information outlined [here](/authentication-and-security/microsoft_entra_snowflake/entra-snowflake-what-to-send).
3. Reach out to your Zenlytic contact or <support@zenlytic.com> with any questions/issues about the process


# Snowflake with Entra - What to Send

Send the required Snowflake and Entra details so Zenlytic can finish your SSO setup.

Before continuing, complete the setup process in this document to configure Zenlytic as an OAuth provider for Snowflake and Microsoft Entra.

## The following items are a prerequisite to send to Zenlytic

1. Application (client) ID
2. Directory (tenant)
3. Application ID URI
4. Client Secret

## Step by Step

1. Inside of your Zenlytic Snowflake App Registration, navigate to the Overview section.

![entra-snowflake-what-to-send\_image\_1.png](/files/BiyM74R58VccGDrFSkvN)

2. Copy and save the Application (client) ID from the Application (client) ID field.

![entra-snowflake-what-to-send\_image\_2.png](/files/EygFCjwkJwnlPe63jY39)

3. Now navigate to the Directory (tenant) ID section and copy the value.

![entra-snowflake-what-to-send\_image\_3.png](/files/7p1NDS67nOqYrsn8jjU5)

4. In the Application ID URI section, copy the value.

   a. **TIP**: Make sure to keep this information secure and share it only with your Zenlytic contact.

![entra-snowflake-what-to-send\_image\_4.png](/files/U8NnasyHCJDDXCBPiljB)


# Okta Zenlytic

Set up Okta SSO for Zenlytic and map the claims users need to authenticate correctly.

## Zenlytic: Single Sign-On with Okta

1. Key Features
2. Prerequisites
3. Guided Setup
4. Upon Completion
5. Debugging

## Supported Feature

With the Zenlytic integration, leverage the power of Okta's Single Sign-On capabilities, and enjoy the following:

* Service Provider (SP)-Initiated Authentication (SSO) Flow
  * This authentication flow occurs when the user attempts to log in to the application from Zenlytic.
* Automatic account creation in Zenlytic on initial SSO.

## Prerequisites

Before getting started make sure to:

* Have the Zenlytic application installed in your Okta instance.
* Be aware that the Okta Single Sign-On integration is exclusively available for Workspaces on the Enterprise plan.
* Discuss with your Zenlytic contact to create a unique `Company ID` for your company, for example, company.zenlytic.com.
* Ensure the email addresses of Workspace members align perfectly with their Okta accounts.

Ready to dive in? Follow the steps below.

## Guided Setup

Once the Zenlytic application is installed, gather the necessary information to share with Zenlytic and tweak one of the App-settings as directed below.

**Recording Values**

1. Go to the Okta admin page, click on the Zenlytic application, and select the Sign On tab.
2. Make note of the values of Client ID and Client secret. You can click on the eye button to reveal these values.
3. Spot a section with a link titled 'OpenID Provider Metadata'? Click on it. In the JSON document that appears, search for a key named “issuer” and record the corresponding URL.

**Attribute Mapping**

Zenlytic requires the following attribute mappings:

1. email
2. family\_name
3. given\_name
4. name

Optionally, you may choose to set values for:

1. zenlytic\_role

   a. When your user signs in for the first time, they will be granted the specified access level\
   b. Values include:\
   \- admin\
   \- develop\
   \- develop\_without\_deploy\
   \- explore\
   \- view
2. zenlytic\_user\_attributes\
   a. Allows you to manually control access to data.\
   b. Read about how user attributes work [here](/administration/user_attributes).\
   c. Must be a valid array of key-value pairs\
   d. Ex: `[{\"department\": \"Engineering\"}]`\
   These may already be set up, but make sure those are showing up in the Okta Profile Editor.\
   ​

![Okta Profile Editor](/files/LrWQlIiyOXHWR10a2PCP)

## Configuration

As a prerequisite, you should have received your company's unique `Company ID`.

In Okta, under the Zenlytic app, just make sure that you set the field labeled `Company ID` to your company's unique ID.

Deliver the Information to Zenlytic

Got all the information at hand (outlined below)? Fabulous! Now, email it to [**support@zenlytic.com**](mailto:support@zenlytic.com).

* Client ID
* Client Secret
* Issuer URL
* `Company ID`

Relax and let Zenlytic's support team take over from here. They will handle your request and reach out once the integration is configured.

## Upon Completion

Once the setup process is complete, you will be provided with your company's Zenlytic login url.

For example, if your `Company ID` is "mycompany", then your login url will be `https://mycompany.zenlytic.com/login`.

Your Zenlytic contact will have added you as the admin to your Zenlytic Workspace.

As the admin, you are responsible for manually adding your team members to your Zenlytic Workspace.

This can be done via `Workspace Settings -> Team Members -> Invite Member`.

Once added, the user may use the `Sign In with Okta` functionality.

When you go to your company's custom login url, you'll see the `Sign In With Okta` button. Click that, and you'll be ready to go!

Reach out to [**support@zenlytic.com**](mailto:support@zenlytic.com) if you want to add or remove other sign in options for your users, like email/password, Google, etc.

## Debugging

If you're having issues logging into Zenlytic, make sure you have the `Name` value set up in your `Attribute Mapping`. This may automatically already be set up in your Okta instance:

​

<figure><img src="/files/TpDAr4S4Gu8pB4pxzKrR" alt=""><figcaption></figcaption></figure>


# Google Workload Identity Federation

Use workload identity federation to connect BigQuery without storing long-lived service account keys.

These are the steps a customer needs to take to enable Workload Identity Federation (WIF) to let Zenlytic (hosted in AWS) connect their BigQuery instance (hosted in GCP).

1. Enable the required APIs: **Security Token Service (STS)**, **IAM Service Account Credentials**, and **BigQuery** APIs
2. Create a Workload Identity Pool. You can create this via the console, following these instructions. First, navigate to Workload identity federation and begin the process to create a workload identity pool

![google\_workload\_identity\_federation\_image\_1.png](/files/5EX5MnkykZdFBarX57W7)

After clicking Get Started, fill out the next screen

![google\_workload\_identity\_federation\_image\_2.png](/files/4veFDZUQPRNrE4poUAgQ)

3. Next, create the provider and add it to the Pool. Select AWS, and use the Zenlytic AWS account id 734818345323

![google\_workload\_identity\_federation\_image\_3.png](/files/6xh4pZAGegQJHWxa6d7q)

4. Configure the following two attribute mappings, then click Save at the bottom of the screen.

| Attribute            | Mapping expression                              |
| -------------------- | ----------------------------------------------- |
| `google.subject`     | `assertion.arn.extract('assumed-role/{role}/')` |
| `attribute.aws_role` | `assertion.arn.extract('assumed-role/{role}/')` |

{% hint style="warning" %}
**Important:** `google.subject` appears grayed out in the screenshot below as a placeholder — you must explicitly fill it in with the expression above. Do not leave it empty or set it to `assertion.arn`.

GCP enforces a **127-byte limit** on `google.subject`. Setting it to `assertion.arn` (the full role ARN including the session UUID) can exceed this limit. Using `assertion.arn.extract('assumed-role/{role}/')` maps only the role name (\~46 bytes), well within the limit.
{% endhint %}

![google\_workload\_identity\_federation\_image\_4.png](/files/1LmUftHTfKIBtDuBByH3)

5. Get the principle value to add permissions to in GCP. You will need to follow the format in these [Google Cloud Workload Identity Federation documentation](https://cloud.google.com/iam/docs/workload-identity-federation?_gl=1*1a70t2e*_ga*MTA2MzMwNDkwMS4xNzQ4NTMzOTU2*_ga_WH2QY8WWF5*czE3NDg1MzM5NTYkbzEkZzEkdDE3NDg1Mzg1NTEkajQ1JGwwJGgw#impersonation) from Google, which will be:

{% code overflow="wrap" %}

```bash
principalSet://iam.googleapis.com/projects/<PROJECT_NUMBER>/locations/global/workloadIdentityPools/<POOL_ID>/attribute.aws_role/<ATTRIBUTE_VALUE>
```

{% endcode %}

You will fill in those values with the values you have from this process so far, and one value from the Zenlytic team.

* `<PROJECT_NUMBER>` is the project number of your GCP project. (e.g. `123456789`)
* `<POOL_ID>` is the id of the pool you've created (note the light grey text in step 2, for this example the value is zenlytic-aws-federation-pool)
* `<ATTRIBUTE_VALUE>` you will confirm this with your Zenlytic account contact, but the value will follow a pattern like this, which corresponds to the special purpose AWS role Zenlytic will use to call out to your resources (e.g. `<company_name>-gcp-wif-prod`). We recommend keeping this name short to stay well within GCP's 127-byte limit for `google.subject`.

Using those values, the final principle would be

{% code overflow="wrap" %}

```bash
principalSet://iam.googleapis.com/projects/123456789/locations/global/workloadIdentityPools/zenlytic-aws-federation-pool/attribute.aws_role/mycompany-gcp-workload-identity-federation-role-prod
```

{% endcode %}

6. Give that principle access to the resources in BigQuery you would like it to have. For example, in the IAM screen, click **"Grant Access"**

![google\_workload\_identity\_federation\_image\_5.png](/files/hGQfQKZP7yAMBhkruem2)

Then paste the full url of the principle that you defined earlier in the principle option and hit enter. After you do that, you can give the principle the required roles for BigQuery.

Finally, click Save.

7. Download the config for the principle to connect. In the Workload Identity Pool, click Grant Access to get started

![google\_workload\_identity\_federation\_image\_7.png](/files/pVP3onr84E79m05YNLAu)

Then leave the first option checked, and click Download config

![google\_workload\_identity\_federation\_image\_8.png](/files/WwX9xkmlmE3bvw8rfc5U)

Select the Zenlytic AWS **zenlytic-aws provider**, and click Download config

![google\_workload\_identity\_federation\_image\_9.png](/files/RYsJ1vvlmKzbhcPzd9WX)

You will put this config into Zenlytic to configure the connection to BigQuery, after adding the project\_id to the json.

8. Finally, the json will look like

{% code overflow="wrap" %}

```json
{
	"project_id": "<your-project-id>", // NOTE: You must add this line
  "universe_domain": "googleapis.com",
  "type": "external_account",
  "audience": "//iam.googleapis.com/projects/33333333333/locations/global/workloadIdentityPools/zenlytic-aws-federation-pool/providers/zenlytic-aws",
  "subject_token_type": "urn:ietf:params:aws:token-type:aws4_request",
  "token_url": "https://sts.googleapis.com/v1/token",
  "credential_source": {
    "environment_id": "aws1",
    "region_url": "http://169.254.169.21/latest/meta-data/placement/availability-zone",
    "url": "http://169.254.169.21/latest/meta-data/iam/security-credentials",
    "regional_cred_verification_url": "https://sts.{region}.amazonaws.com?Action=GetCallerIdentity&Version=2011-06-15"
  }
}
```

{% endcode %}


# Enforce SSO-Only Login

Restrict workspace login to SSO so users cannot authenticate with passwords or magic links.

In SSO-enabled workspaces, the default username and password sign-in path on the workspace login page can be disabled by request. After Zenlytic applies the change, the workspace login page shows only your configured SSO provider as a sign-in option. This is a configuration Zenlytic applies on your behalf — it is not a self-serve setting in the workspace UI.

## What it does

By default, Zenlytic workspaces accept sign-ins from both:

* The **default Cognito provider** (username and password), and
* Any **SSO providers** you've configured (Microsoft Entra, Okta, etc.).

When the default Cognito provider is disabled for your workspace, username/password sign-in is no longer available on the workspace login page.

<figure><img src="/files/V3CfQzBnli5oEDe16eCW" alt="Zenlytic Welcome Back sign-in page showing only the Continue With Microsoft Entra button, with no username or password fields"><figcaption><p>The Zenlytic sign-in page in a workspace with the default Cognito provider disabled — only the configured SSO provider is offered.</p></figcaption></figure>

## Prerequisites

* At least one SSO provider must be configured and verified working. See:
  * [Microsoft Entra Zenlytic](/authentication-and-security/microsoft_entra_zenlytic)
  * [Okta Zenlytic](/authentication-and-security/okta_zenlytic)
* **Strongly recommended:** before requesting the change, confirm at least one administrator can successfully sign in via SSO.

## How to request the change

To have the default Cognito provider disabled for your workspace:

1. Contact your Zenlytic account team or <support@zenlytic.com>.
2. Confirm which workspace(s) you want the change applied to.
3. Confirm at least one administrator account can sign in via SSO.

Zenlytic will apply the change on your behalf.

## Recovery

If your IdP becomes unavailable after the default Cognito provider is disabled on the workspace login page, administrators can still sign in by going to [app.zenlytic.com](https://app.zenlytic.com) directly with their username and password, then switching into the affected workspace from the workspace selector. The workspace-level setting only removes the Cognito option from the workspace login page — existing username/password credentials still authenticate at the top-level app entry point.

**Recommendation:** Admin and Organization Admin users should keep both an SSO login and a username/password login on file, so they always have a backup sign-in path if the IdP is ever unavailable.

## Related

* [Microsoft Entra Zenlytic](/authentication-and-security/microsoft_entra_zenlytic)
* [Okta Zenlytic](/authentication-and-security/okta_zenlytic)
* [Login Troubleshooting](/authentication-and-security/login_troubleshooting)


# IP Whitelisting

Limit Zenlytic access by source IP to enforce network-level controls for your workspace.

These are the IP addresses to whitelist for a Zenlytic deployment in the US. This is the default deployment area if not specified in your contract.

```
184.73.175.163 
18.209.132.30
```

These are the IP addresses to whitelist for a Zenlytic deployment in the EU. Note: These are for EU deployments only.

```
3.68.145.43 
52.29.218.72
```


# Login Troubleshooting

Diagnose common Zenlytic login failures across SSO, credentials, permissions, and workspace configuration.

> Issues logging in? Read this doc

## "Network Error" in red text

If you see `"Network Error"` in red text, that can be due to a VPN on your computer not being activated as expected. Some work VPNs will block Zenlytic if your work VPN is not activated.

To fix this error, activate your VPN like you do to connect to other resources at your company.

## Username/password sign-in is missing

If your workspace previously accepted username/password sign-in and that option is no longer available, your workspace may have been configured for SSO-only login. See [Enforce SSO-Only Login](/authentication-and-security/enforce-sso-only). Sign in via your configured SSO provider instead, or contact your workspace administrator.


# Connecting To Github With A Deploy Key

Connect Zenlytic to GitHub with a deploy key so it can read your model repository.

## Commit identity and repository rules

Zenlytic writes to your repo every time a user saves model files from Context Manager. Every commit Zenlytic creates uses a fixed identity:

* **Author:** the email of the Zenlytic user who made the change
* **Committer:** `Zenlytic <hello@zenlytic.com>` on every commit, regardless of who made the change
* **Signature:** none — Zenlytic does not sign its commits

{% hint style="warning" %}
If your organization enforces rules on commit metadata, allow `hello@zenlytic.com` **before** you connect. Otherwise branch creation will succeed but every save will fail — these rules apply to every branch, not only protected ones. That's why creating a branch from Context Manager can succeed (no commit is created yet) while the first save fails (a commit is created).
{% endhint %}

Check these settings in GitHub, at both the organization and repository level (a clean repo-level ruleset doesn't rule out an organization-level one):

| Setting                                    | Where to find it                       | What to do                 |
| ------------------------------------------ | -------------------------------------- | -------------------------- |
| Restrict commit metadata (committer email) | Rulesets                               | Allow `hello@zenlytic.com` |
| Require signed commits                     | Rulesets, or classic branch protection | Disable for this repo      |

Metadata restrictions (including committer email pattern) require **GitHub Enterprise Cloud or Enterprise Server** — this option won't appear under Rulesets on GitHub Free, Pro, or Team.

The push itself still authenticates with the deploy key you install below — your access control is unchanged. Only the commit metadata carries the Zenlytic service identity.

**Symptom if this isn't configured:** "Save Model Files Unsuccessful / Failed to save model" in Context Manager on every branch. The underlying push is rejected with a rule violation naming the committer email `hello@zenlytic.com`.

## Connecting your repository

**Step 1:** In Zenlytic, you'll first go into Settings, then Workspace Settings

![Github Deploy Key 1](/files/xGAMCV2WAmaFCl3e7Lhn)

**Step 2:** Next, find your git repo details (these will be in Github).

Make sure to use the "SSH" format of the git URL. The format looks like `git@github.com:<YOUR_ORGANIZATION>/<YOUR_REPO>.git`, and you can find it here in your Github repo under the "Code" button with the SSH tab as shown below.

![Github Deploy Key 2](/files/bOvXrjlVHk0MZPUgZ45H)

**Step 3:** Now that you have that URL and the branch you want to use as your production branch, return to Zenlytic. In this example, we pasted our Github repo url (SSH format) and our production branch, which was: `master`.

![Github Deploy Key 3](/files/BbdGtyolPCGH4NoLbpL9)

**Step 4:** Next we need to generate the SSH key we'll use to connect. Hit the "Generate Deploy Key" button, then the "Confirm" button, and copy the public SSH key generated.

![Github Deploy Key 4](/files/Wh2atCZCmLasGUDiChYR)

**Step 5:** Then hit Copy Deploy Key.

![Github Deploy Key 5](/files/ZV0fNAgG7FnnSJAFInGE)

**Step 6:** Now that you have the deploy key copied return to Github and go to "Settings."

![Github Deploy Key 6](/files/gP6k7HjC3YMnj6lI8m2J)

**Step 7:** Then go to Deploy Keys in the left-hand menu.

![Github Deploy Key 7](/files/P6Tdq2mOXGjfLDYYT9Jo)

**Step 8:** Then, click "Add new" and give your deploy key a name. Finally, paste that SSH key and click "Add Key."

![Github Deploy Key 8](/files/1G6MVQZJcTxBC5lobMWt)

**Step 9:** Then click "Save" in the Zenlytic UI. If this saves without an error, you can close the window. You're fully connected to Github!

![Github Deploy Key 9](/files/wlCCq8eKjkX1ntVrcrLy)


# SSO Custom Claims Reference

Detailed information on SSO JWT claims.

When users sign in to Zenlytic through an SSO provider (Microsoft Entra, Okta, etc.), the identity provider can include custom claims in the JWT token. These claims allow you to control workspace access, user roles, and data-level permissions directly from your identity provider.

This page documents all supported custom claims, their format, behavior, and how they interact with each other.

***

### Overview of Available Claims

<table><thead><tr><th width="263.94921875">Claim Name</th><th width="235.25">Purpose</th><th width="174.33203125">Used At</th><th>Required</th></tr></thead><tbody><tr><td><code>zenlytic_workspaces</code></td><td>Controls which workspaces a user can access and their role in each</td><td>Every sign-in</td><td>No</td></tr><tr><td><code>zenlytic_role</code></td><td>Sets the user's role across all default-provisioned workspaces</td><td>First sign-in only</td><td>No</td></tr><tr><td><code>zenlytic_user_attributes</code></td><td>Sets user attributes for data-level access control</td><td>First sign-in only</td><td>No</td></tr></tbody></table>

> **Important:** There are two provisioning modes, and they are mutually exclusive. You must choose one:
>
> * **Claim-based provisioning** — Use `zenlytic_workspaces` to explicitly control which workspaces each user can access.
> * **Default provisioning** — Omit `zenlytic_workspaces` entirely. Users are auto-provisioned into all workspaces marked as "provision by default" in the organization. Use `zenlytic_role` and `zenlytic_user_attributes` to control their role and data access.
>
> If `zenlytic_workspaces` is present on the token, `zenlytic_role` and `zenlytic_user_attributes` are ignored.

***

### `zenlytic_workspaces`

Controls exactly which workspaces a user has access to within an organization, and what role they have in each workspace.

#### Format

This claim supports two formats:

**Comma-separated string:**

```
workspace_id:role, workspace_id:role
```

**SAML list (used by Cognito when receiving multi-valued SAML attributes):**

```
[workspace_id%3Arole, workspace_id%3Arole]
```

The SAML list format is produced automatically when your identity provider (e.g. Microsoft Entra) sends workspace assignments as a multi-valued SAML attribute. When values are synced with our IdP, they are wrapped in brackets, URL-encodes the colons as `%3A`, and joins them with commas. Both formats are accepted interchangeably.

**Examples:**

```
workspace-9e49r:develop, workspace-1geh0y:view
[workspace-9e49r%3Adevelop, workspace-1geh0y%3Aview]
```

Both grant `develop` role in `workspace-9e49r` and `view` role in `workspace-1geh0y`.

#### Valid Roles

| Role Name                | Description                                                        |
| ------------------------ | ------------------------------------------------------------------ |
| `organization_admin`     | Full access including workspace management across the organization |
| `admin`                  | Full access to the workspace except workspace management           |
| `develop`                | All admin permissions except editing workspace settings            |
| `develop_without_deploy` | Same as develop, without the ability to deploy to production       |
| `explore`                | Can view dashboards, explore data, download, and chat with Zoe     |
| `view`                   | Same as explore but without unlimited downloads                    |
| `restricted`             | Can only view dashboards; no chat, no explore, no downloads        |

Roles are case-insensitive (`Develop`, `DEVELOP`, and `develop` are all valid).

For a full description of the permissions each role grants, see User Roles.

#### Behavior

**On first sign-in (signup):**

* The user is created and provisioned into exactly the workspaces listed in the claim.
* Each workspace entry specifies the role for that workspace.
* Workspaces marked "provision by default" in the organization are **not** used. The claim is the sole source of truth.
* The user's initial active workspace is set to the first workspace in the claim.

**On every subsequent sign-in:**

* Zenlytic syncs the user's workspace access to match the current claim value. This means:
  * **Workspaces added to the claim** since the last sign-in are granted to the user.
  * **Workspaces removed from the claim** since the last sign-in are revoked, even if access was originally granted by invitation.
  * **Role changes** in the claim are applied to the user's existing workspace access.
* Only workspaces within the SSO provider's organization are affected. Workspaces in other organizations the user has access to are never touched.

**Absent claim (not set on the token):**

* If the claim is not present at all, claim-based provisioning is not active. The user falls through to default provisioning behavior.

#### Validation Rules

* Each entry must contain a colon (`:`) separating workspace ID and role. Entries without a colon are silently skipped.
* The role must be one of the valid roles listed above. Entries with unrecognized roles are silently skipped.
* The workspace must exist, belong to the SSO provider's organization, and not be archived. Invalid workspaces are silently skipped.
* Duplicate workspace IDs resolve to the highest-permissioned role. For example, if a workspace appears with both `view` and `develop`, the user receives `develop`. The role hierarchy from lowest to highest is: `restricted` → `view` → `explore` → `develop_without_deploy` → `develop` → `admin` → `organization_admin`

***

### `zenlytic_role`

Sets the user's role when they are provisioned into workspaces via default provisioning (i.e., when `zenlytic_workspaces` is **not** present).

#### Format

A single role name as a string.

```
develop
```

#### Valid Values

`admin`, `develop`, `develop_without_deploy`, `explore`, `view`

> Note: `organization_admin` and `restricted` are not supported for this claim.

#### Behavior

* **Only applies on first sign-in (signup).** This claim is not read on subsequent sign-ins.
* The role is applied to every workspace the user is auto-provisioned into.
* If the role value is invalid or cannot be resolved, Zenlytic falls back to the workspace's configured default role. If no default role is set, the user receives the `explore` role.
* **Ignored when `zenlytic_workspaces` is present.** Use the per-workspace role in the workspaces claim instead.

***

### `zenlytic_user_attributes`

Sets user attributes on the user's workspace memberships for data-level access control (e.g., restricting which rows or fields a user can see).

#### Format

A JSON-encoded array of key-value pair objects.

```
[{"key": "department", "value": "Engineering"}, {"key": "region", "value": "US"}]
```

> Note: This value is a JSON **string** — the entire array must be serialized as a single string value in the JWT claim.

#### Behavior

* **Only applies on first sign-in (signup).** This claim is not read on subsequent sign-ins. To update user attributes after initial provisioning, use the Zenlytic UI or API.
* The attributes are applied to every workspace the user is auto-provisioned into.
* User attributes work with Access Grants to control data access. See User Attributes for more detail.
* If an access grant references an attribute and the user does not have that attribute, the grant is not triggered and does not block access. For default-deny behavior, make sure users receive a non-granting default value for each governed attribute during provisioning, or set that value afterward in Zenlytic.
* If the JSON cannot be parsed, the attributes are set to empty and a warning is logged.
* **Ignored when `zenlytic_workspaces` is present.**

***

### How the Claims Interact

#### Decision Flow

When a user signs in via SSO, Zenlytic evaluates the claims in the following order:

```
Is zenlytic_workspaces present on the token?
 |
 ├── YES → Claim-based provisioning
 |         • Workspace access and roles come from the claim
 |         • zenlytic_role is IGNORED
 |         • zenlytic_attributes is IGNORED
 |         • Synced on every sign-in
 |
 └── NO  → Default provisioning
           • User is provisioned into organization's default workspaces
           • zenlytic_role sets the role (first sign-in only)
           • zenlytic_user_attributes sets data access (first sign-in only)
```

#### Compatibility Matrix

| Claim Combination                                                    | Supported | Notes                                                             |
| -------------------------------------------------------------------- | --------- | ----------------------------------------------------------------- |
| `zenlytic_workspaces` alone                                          | Yes       | Full control over workspace access and roles per workspace        |
| `zenlytic_role` alone                                                | Yes       | Sets role in all default-provisioned workspaces                   |
| `zenlytic_user_attributes` alone                                     | Yes       | Sets data access attributes in all default-provisioned workspaces |
| `zenlytic_role` + `zenlytic_user_attributes`                         | Yes       | Sets both role and data access in default-provisioned workspaces  |
| `zenlytic_workspaces` + `zenlytic_role`                              | No        | Error on signup. On login, `zenlytic_role` is ignored.            |
| `zenlytic_workspaces` + `zenlytic_user_attributes`                   | No        | Error on signup. On login, `zenlytic_user_attributes` is ignored. |
| `zenlytic_workspaces` + `zenlytic_role` + `zenlytic_user_attributes` | No        | Error on signup. On login, only `zenlytic_workspaces` is used.    |

***

### Configuration by Identity Provider

#### Microsoft Entra

Custom claims configuration occurs in the **Attributes & Claims** section of your Zenlytic Enterprise Application. Detailed setup instructions appear in the How-to Set up Custom Claims in Entra documentation.

For `zenlytic_workspaces`, we recommend using a **multi-valued directory extension property**. This allows each workspace assignment to be a separate value in Entra, which Cognito automatically receives as a SAML list.

**Setup overview:**

1. Create a multi-valued directory extension property on your Zenlytic app registration using Microsoft Graph API:

   ```
    POST https://graph.microsoft.com/v1.0/applications/{app-object-id}/extensionProperties { "name": "zenlyticWorkspaces", "dataType": "String", "isMultiValued": true, "targetObjects": ["User"] }
   ```
2. Assign workspace values to users as an array:

   ```
   PATCH https://graph.microsoft.com/v1.0/users/{user-id} { "extension_{appId}_zenlyticWorkspaces": [ "workspace-abc123:develop", "workspace-def456:view" ] }
   ```
3. In the Entra admin center, go to **Enterprise applications** → your Zenlytic app → **Single sign-on** → **Edit** on **Attributes & Claims** → **Add new claim**:
   * **Name:** `zenlytic_workspaces`
   * **Source:** select the directory schema extension from your app registration

Our IdP receives the multi-valued SAML attribute and serializes it as `[workspace-abc123%3Adevelop, workspace-def456%3Aview]` in the JWT. Zenlytic parses this automatically.

#### Okta

Custom claims are configured in the **Profile Editor** for your Zenlytic application in Okta. See the Okta Zenlytic setup guide for details.

Add the attribute `zenlytic_workspaces` to your Okta app's profile and map it to the appropriate value for each user or group.

***

### Examples

#### Example 1: Single workspace, develop role

User should have develop access to workspace 42.

```
zenlytic_workspaces = "42:develop"
```

#### Example 2: Multiple workspaces, different roles

User is an admin in the production workspace and has view-only access to the staging workspace.

```
zenlytic_workspaces = "42:admin, 99:view"
```

#### Example 3: Revoking all access

User should no longer have access to any workspaces in the organization, but their account should remain.

```
zenlytic_workspaces = ""
```

#### Example 4: Default provisioning with role and attributes

User should be provisioned into all default workspaces with the `view` role and restricted to the Marketing department.

```
zenlytic_role = "view"
zenlytic_attributes = "[{\"key\": \"department\", \"value\": \"Marketing\"}]"
```

Do **not** set `zenlytic_workspaces` in this case.

#### Example 5: SAML list format from Entra

When using a multi-valued directory extension in Microsoft Entra, Cognito produces the claim in SAML list format:

```
zenlytic_workspaces = "[workspace-9e49r%3Adevelop, workspace-1geh0y%3Aview]"
```

This is equivalent to `workspace-9e49r:develop, workspace-1geh0y:view` and is parsed identically.

#### Example 6: Duplicate workspace with different roles

If a user is assigned the same workspace with multiple roles (e.g. from overlapping group assignments in your identity provider):

```
zenlytic_workspaces = "workspace-9e49r:view, workspace-1geh0y:admin, workspace-9e49r:develop"
```

Workspace `workspace-9e49r` appears twice. Zenlytic picks the highest-permissioned role. The user receives `develop` (not `view`) for that workspace.


# Embedding Overview

Embed Zenlytic content with private or signed access, depending on your users and authentication model.

Embedded analytics is the process of taking content you've created in Zenlytic, and making it available to users via an iframe in a separate application. There are two ways to embed Zenlytic content in your application.

### Private Embedding

* This type of embedding is most useful for internal applications within a company (e.g. embedding a Zenlytic dashboard or chat interface in Notion or Confluence where you have company documentation)
* Private embedding is an iframe with the embedded url of the content you want to embed. All users must have a Zenlytic account of their own with a username and password.
* Users must log into their Zenlytic account in the iframe before seeing content. If the user is not logged in, they will see a login screen inside of the iframe.

### Signed Embedding

* This type of embedding is best for external applications (e.g. embedding a Zenlytic dashboard on usage of your SaaS platform into an admin panel for your own users and scoping user's access to content to only their data within your system).
* Signed embedding lets you provide a seamless authentication experience for your end customers. In this method, you use Zenlytic API credentials to hit an endpoint, which returns a signed URL for the embedded content you've selected to display to the user.
* You can apply permissions for the signed url using row-based and column-based [access grants](/data-modeling/access_grants) that are added to the signed url when you request it. The signed URL is placed in the iframe, which is displayed in your application.


# Private Embedding

Embed Zenlytic for internal users who authenticate with their own Zenlytic accounts inside the iframe.

Private embedding enables the integration of Zenlytic content directly into your application using an iframe. This method is designed for scenarios where analytics are embedded within a controlled, authenticated environment. It leverages Zenlytic's existing authentication mechanism to ensure that only authorized users with Zenlytic accounts can access the embedded analytics.

If you require a more advanced or customizable embedded solution, check out our [signed embedding](/embedding/signed_embedding) documentation page.

## **Use Cases**

Private embedding is ideal for:

* Internal dashboards within enterprise applications.
* Analytics in customer portals where users have Zenlytic accounts.
* Situations where embedding needs to be straightforward and secure within Zenlytic's existing authentication framework.

## **Implementation Guide**

### Step 1: Set up the iframe

Create an iframe within your application's user interface and ensure the iframe is sized appropriately for the analytics content.

### Step 2: Application Authentication

The embedded analytics will employ the user's authentication from their Zenlytic account. Any row-based or column-based access controls you have assigned to that user will apply. If the user is not already signed into Zenlytic, they will see a login screen on the iframe, which they can use to sign in.

### Step 3: Embedding Analytics Content

Point the iframe's src attribute to the URL of the analytics content. You can copy the whole iframe by going to the three dot menu on the dashboard you want to embed.

![embed-content-menu](/files/g0qT8GtR2HCBE65ODcUo)

URL's add the `/embed` segement to the url for the embedded view. You can add this to the url in your browser to preview how the embedded dashboard will appear to your embedded user. Here is an example iframe and the URL for embedding a certain dashboard:

{% code overflow="wrap" %}

```yaml
<iframe src="https://app.zenlytic.com/embed/dashboards/73b64533-c027-43b8-b8a8-606345212343" style="height:700px;width:100%;border:none;" title="Dashboard" description="Zenlytic Dashboard"></iframe>
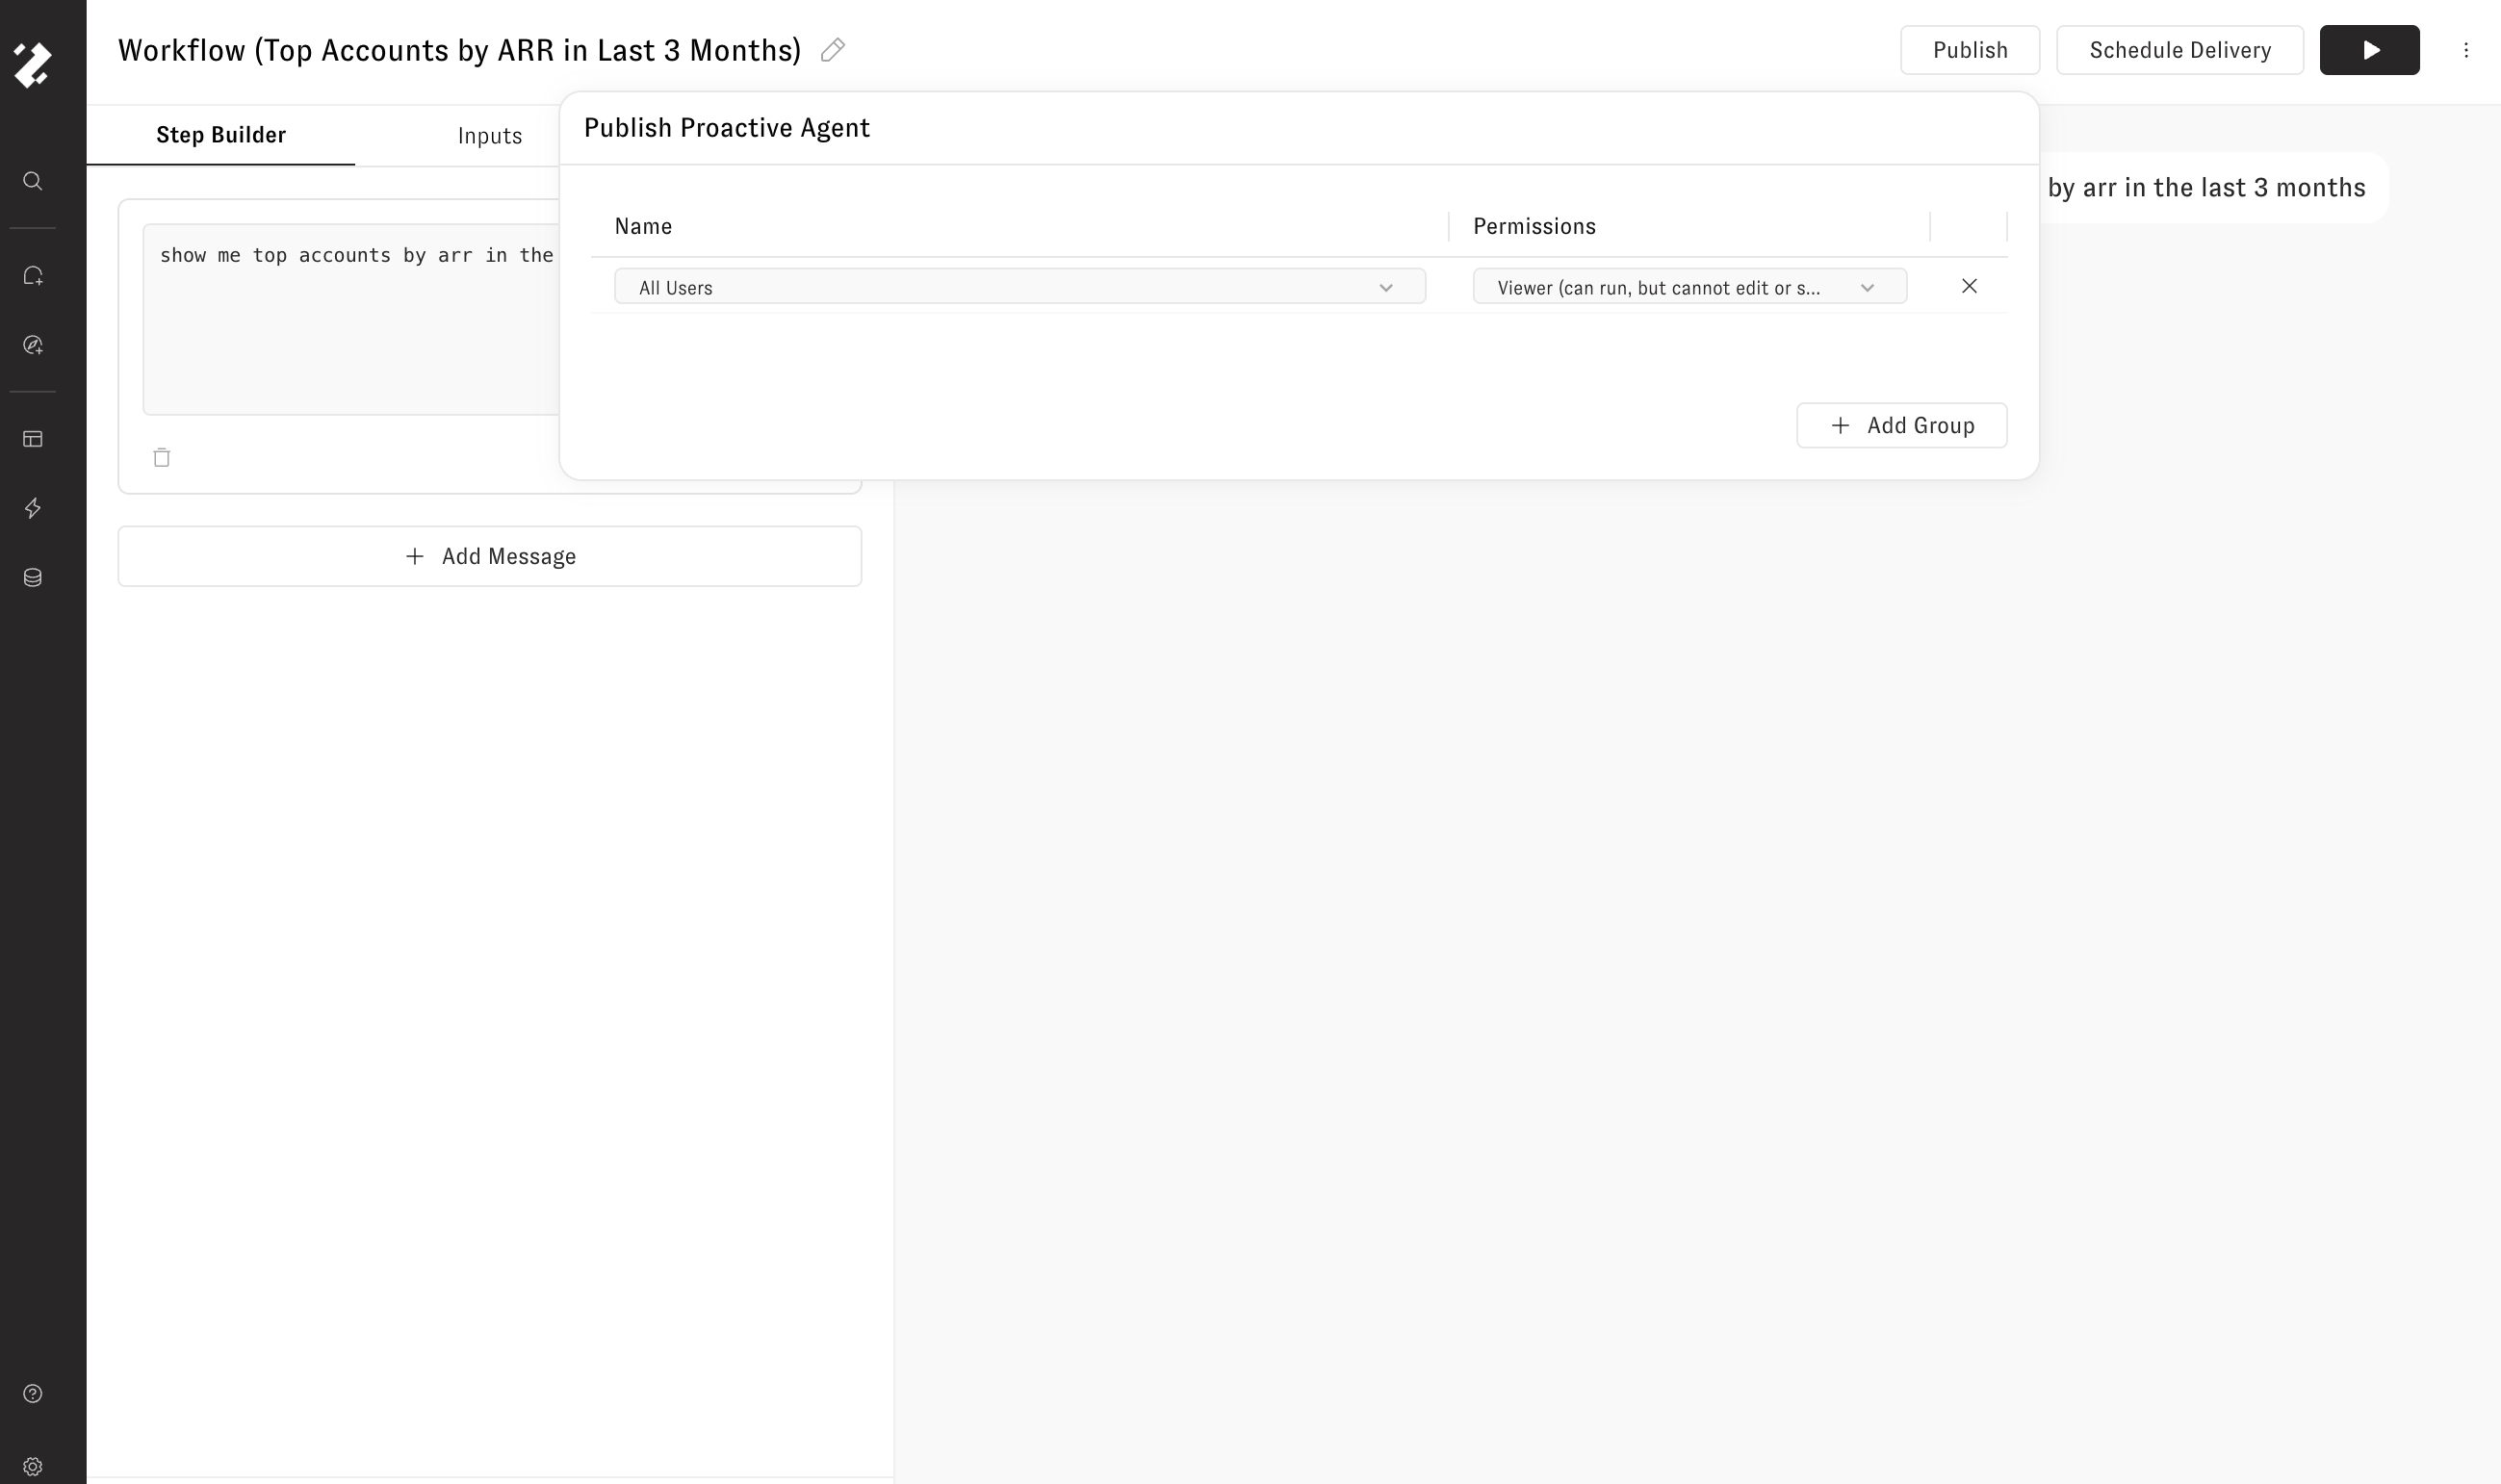
```

{% endcode %}

Similarly, if you want to embed a chat window, you can use the iframe

{% code overflow="wrap" %}

```yaml
<iframe src="https://app.zenlytic.com/embed/chat" style="height:700px;width:100%;border:none;" title="Data Chat" description="Zenlytic Chat"></iframe>
```

{% endcode %}

## Embedded UI Settings

You can additionally set some other settings and system prompt context for Zoë in the Embedded settings page in the UI. These settings will apply to all of your tenants.

![embedded-ui-settings](/files/WdClJQfaW45E98bfVeK4)

You can also change the name of Zoë to any name you would like using the Chat Agent Name setting.


# Signed Embedding

Generate signed embed URLs for external users and apply row and column access controls.

Signed embedding provides a seamless and secure way to integrate Zenlytic content into your application using dynamically generated signed URLs. This method is especially suitable for scenarios where smooth experience and controlled access to analytics data are paramount. The signed URL ensures that each embedded analytics instance is secure, time-limited, and tailored to individual user permissions.

## **Use Cases**

Signed embedding is particularly useful in:

* External-facing applications where enhanced customization is crucial.
* Situations where access to analytics needs to be controlled on a per-session basis.
* Environments where analytics content needs to be securely shared to the user base of an application.

## **Implementation Guide**

{% hint style="info" %}
Signed URl Security

Protect this signed URL as you would an access token or password credentials - do not write it to disk, do not pass it to a third party, and only pass it through a secure HTTPS encrypted transport
{% endhint %}

### **Generating Signed URLs**

1. **API Request for a Signed URL**
   * Make a request to the API endpoint to obtain a signed URL.
   * Include necessary authentication credentials (client\_id and client\_secret you receive from your Zenlytic representative) and user-specific parameters in the request.
   * See details in [API Reference](#api-reference) below
2. **Parameters for iframe**

   * Signed URL retrieved in the previous step
   * Pass the url to the iframe like in the examples below

   <pre class="language-html" data-overflow="wrap"><code class="lang-html">&#x3C;iframe src="&#x3C;MY_SIGNED_URL>" allow="microphone *; clipboard-write *" style="height:700px;width:100%;border:none;" title="Dashboard" description="Zenlytic Dashboard">&#x3C;/iframe>
   </code></pre>

   The `microphone` permission allows the Transcribe voice feature to work as expected. The `clipboard-write` permission allows the Copy to clipboard buttons under each message to work as expected. Please note, the presence of these permissions on the iframe will allow the native browser's "Ask for permission" popups to appear, they do not automatically give embedded users' consent to those actions.
3. **To request a chat embedded url, you'd change the `target_url` to** `https://app.zenlytic.com/chat`

   <pre class="language-html" data-overflow="wrap"><code class="lang-html">&#x3C;iframe src="&#x3C;MY_SIGNED_URL>" allow="microphone *; clipboard-write *" style="height:700px;width:100%;border:none;" title="Dashboard" description="Zenlytic Dashboard">&#x3C;/iframe>
   </code></pre>
4. **Handling URL Expiry**

* Implement logic to handle the expiry of a signed URL, refreshing the url you receive from the endpoint.

## **API Reference**

### **Endpoint**

* **URL:** `https://api.zenlytic.com/api/v1/embed/signed_url`
* **Purpose:** To generate a signed URL for embedding analytics.

### **Request**

* **Method:** `POST`
* **Headers:** Include basic authentication header. You will need to base64 encode your credentials in the form `client_id:client_secret`, then pass under the `Authorization` header with the `Basic` prefix. Python code to create the header is given below:

{% code overflow="wrap" %}

```python
import base64

def create_basic_auth_header(client_id, client_secret):
    # Concatenate the client ID and client secret
    credentials = f"{client_id}:{client_secret}"
    
    # Encode the credentials using base64
    credentials_encoded = base64.b64encode(credentials.encode()).decode()
    
    # Create the Basic Auth header
    auth_header = f"Basic {credentials_encoded}"
    
    return auth_header

# Example usage
client_id = "your_client_id_here"
client_secret = "your_client_secret_here"
auth_header = create_basic_auth_header(client_id, client_secret)
print(auth_header)
```

{% endcode %}

## **Body Parameters**

### **Structure**

* `external_user_id`: (Required) The identifier of the user for whom the analytics is being embedded. This is the user's unique identifier in *your* system.
* `target_url`: (Required) The complete url in your Zenlytic interface for the content you want to embed. For example, `https://app.zenlytic.com/dashboards/73b64533-c027-43b8-b8a8-6069534235413` or `https://app.zenlytic.com/chat`.
* `user_attributes`: (Optional) The user\_attributes to use when applying row and column level permissions for this user. If your access grants rely on user attributes, pass an explicit value for every attribute referenced by those grants. A missing attribute does not behave like a denied value; the grant is not triggered and does not block access. If you have already requested for a given `external_user_id` then make another request with different `user_attributes` passed, the most recent user\_attributes will be used. The format of user attributes is:

{% code overflow="wrap" %}

```
{
  "department": "Marketing",
  "account_id": 1327789
}
```

{% endcode %}

* `extra_prompt_context`: (Optional) This is extra context added to Zoë to make your user's experience customized. You could say things like "Only speak to me in French" or "Always address me as Doctor." This is only visible to Zoë, not to the user.
* `chat_header_message`: (Optional) This is the welcome header that Zoë shows to the user. For example, you could have Zoë say "Welcome Paul," or send " " to not display this value.
* `chat_welcome_message`: (Optional) This is the initial message that Zoë shows to the user. For example, you could have Zoë say "How can I help you find your data today?"
* `chat_initial_prompts`: (Optional) This is an array of initial prompts to display in Zoë. This helps a user see example questions they can ask. For example, \["What were sales in 2023?", "How many customers joined in the last week?"]
* `first_name`: (Optional) The first name of the user in your system. Defaults to 'Embedded'.
* `last_name`: (Optional) The last name of the user in your system. Defaults to 'User'.
* `role_name`: (Optional) The role you want the user to assume in the application. Options are `embed`, `embed_with_sql`, and `embedded_with_scheduling` Defaults to `embed`. See [user role details](/administration/user_roles) for more information

## **Example Body Parameters**

{% code overflow="wrap" %}

```json
{
    "external_user_id": "237645tgfghe6",
    "target_url": "https://app.zenlytic.com/chat",
    "user_attributes": {
        "account_id": 1327789
    },
    "extra_prompt_context": "Always address me in French",
    "chat_header_message": "Welcome Paul,",
    "chat_welcome_message": "How can I help you today?",
    "chat_initial_prompts": ["What are my sales in the last month?", "How many customers joined in the last week?"],
    "role_name": "embed"
}
```

{% endcode %}

### **Example Request**

{% code overflow="wrap" %}

```python
import requests

data = {
    "external_user_id": "237645tgfghe6",
    "target_url": "https://app.zenlytic.com/chat",
    "user_attributes": {
        "account_id": 1327789
    }
}
headers = {
    "Authorization": "Basic mdfiothisisanexampleqewnqjo3eiqjdfqi3oirfqqj301r0j2oqfioewiq3i=",
    "Content-Type": "application/json"
}
url = "https://api.zenlytic.com/api/v1/embed/signed_url"
requests.post(url, headers=headers, data=data)
```

{% endcode %}

### **Response**

* **Structure**
  * `signed_url`: The generated URL for embedding.
  * `expires_in`: Expiry in seconds from now.
* **Example Response**

  {% code overflow="wrap" %}

  ```json
  {
      "signed_url": "https://app.zenlytic.com/embed/chat?userID=12345&userJWT=abc123",
      "expires_in": 86400
  }
  ```

  {% endcode %}

### **Error Handling**

* **Common Errors**
  * Authentication failures. This will occur if you do not pass the client\_id and client\_secret correctly, or if those credentials are invalidated.
  * Missing or invalid parameters.
  * Server-side errors in URL generation.

### **Customization**

To dynamically change the database chosen in the query, you can set the`zenlytic_connection_database` user attribute. See additional docs on the behavior of this attribute [here](/administration/user_attributes#zenlytic_connection_database).

To dynamically change the connection chosen in the query, you can set the `zenlytic_connection_name` user attribute. See additional docs on the behavior of this attribute [here](/administration/user_attributes#zenlytic_connection_name).

Note: You cannot set both of these properties at the same time.

## Embedded UI Settings

You can additionally set some other settings and system prompt context for Zoë in the Embedded settings page in the UI. These settings will apply to all of your tenants.

![embedded-ui-settings](/files/WdClJQfaW45E98bfVeK4)

You can also change the name of Zoë to any name you would like using the Chat Agent Name setting.

## **Communication**

### Zenlytic Embedded iframe Events

Zenlytic provides an event system for embedded iframes to communicate with the parent application. Currently, we support one event: `questionRunFinished`. Additional events can be added upon request.

### Listening for Events

To handle events from the Zenlytic iframe, add an event listener to the window object. Here's an example of how to properly listen for and handle events:

{% code overflow="wrap" %}

```javascript
window.addEventListener('message', (message) => {
  if (message.origin !== 'https://app.zenlytic.com') {
    // Ignore messages not from Zenlytic
    return;
  }
  
  switch (message.data.type) {
    case 'questionRunFinished':
      console.log(`Question ${message.data.detail.id} finished running!`);
      // Handle the event here
      break;
    // Add cases for future events as they become available
  }
});
```

{% endcode %}

### Supported Events

`questionRunFinished`

This event is triggered when a question in the embedded iframe finishes running.

Event details include:

{% code overflow="wrap" %}

```
id: The ID of the question that finished
slices: An array of column IDs representing slices in the question
metrics: An array of column IDs representing metrics in the question
filters: An array of filters applied to the question
time_periods: The current and compare time periods for the question
row_limit: The row limit set for the question
sql: The SQL query used to generate the question result
compare_query: The SQL query used for comparison (if applicable)

```

{% endcode %}

### Security Note

Always verify that the origin of the message is `https://app.zenlytic.com` (or your custom domain, if you are an enterprise customer) before processing the event to ensure the message comes from Zenlytic.

For any questions or requests for additional events, please contact Zenlytic support.

### **Troubleshooting**

* **Invalid URL Errors:** Ensure all required parameters are correctly included in the API request.
* **Expired URL Access Attempts:** Implement automatic URL regeneration or user prompts for re-authentication.
* **Access Denied Errors:** Verify user permissions and roles to ensure they align with the access rights of the analytics content.


# Permissions in Embedding

Control embedded access with user attributes, access grants, and signed URL permissions.

Permissions for embedded users in Zenlytic come in two layers:

* The **role bundle** that determines which Zenlytic features (chat, scheduling, downloads, SQL visibility, etc.) an embedded user can access.
* **Access controls** — access filters for row-level security and access grants for column-level security — that govern which data they can see.

This page covers both.

## Role bundles for embedded users

Three role bundles are available for embedded users. They aren't selectable in the workspace role picker — they're assigned automatically through the embedding APIs. For the full role and permission reference for non-embed users, see [User Roles](/administration/user_roles).

### Embed

The default permission set for embedded users.

### Embed with SQL

Same as Embed plus `see_sql`.

### Embedded with Scheduling

Same as Embed plus `schedule_content` and `see_sql`.

### Permissions × embed roles matrix

✓ means the role includes that permission. Blank means it doesn't.

| Permission            | Embed | Embed with SQL | Embedded with Scheduling |
| --------------------- | :---: | :------------: | :----------------------: |
| `view_content`        |   ✓   |        ✓       |             ✓            |
| `explore_from_here`   |   ✓   |        ✓       |             ✓            |
| `download_with_limit` |   ✓   |        ✓       |             ✓            |
| `chat`                |   ✓   |        ✓       |             ✓            |
| `see_sql`             |       |        ✓       |             ✓            |
| `schedule_content`    |       |                |             ✓            |

All other Zenlytic permissions are unavailable to embed roles.

## Access controls

You can control data access in Zenlytic via [access filters (row-based) and access grants (column-based)](/data-modeling/access_grants). The sections below walk through configuring access grants for embedded sessions.

## Setting up the access permissions

To start, you'll define the logic to determine when an access grant is allowed or not allowed. For example, with these definitions, which are found in the [model](/data-modeling/model) file:

```yaml
version: 1
type: model
name: demo
connection: demo_snowflake

access_grants:
- name: events_access
  user_attribute: events
  allowed_values:
  - has_events

- name: revenue_access
  user_attribute: revenue
  allowed_values:
  - has_revenue

- name: sessions_access
  user_attribute: sessions
  allowed_values:
  - has_sessions

...
```

In this example, if you pass the user attribute `{"revenue": "has_revenue"}` the session will have access to all tables governed by the `revenue_access` access grant. Similarly, if you pass the user attribute with any other value besides `"has_revenue"` the session will *not* have access to the tables governed by that access grant (e.g. `{"revenue": "no_revenue"}`).

When using access grants in embedding, pass an explicit value for every user attribute referenced by your grants. Do not omit the attribute for users who should be denied. If the attribute is missing, the grant is not triggered and does not block access. Instead, pass a non-granting value such as `"no_revenue"`.

You can restrict a view or a field with an access grant by name, by adding the property `required_access_grants` with an array of the grants the user must possess. If you list multiple grants, they must all pass for the user to have access, except that a missing user attribute on a grant is non-blocking for that grant:

```yaml
required_access_grants:
- revenue_access
```

## Full Example

Using the above model as our model, consider the following four views:

```yaml
name: orders
type: view
model_name: demo
default_date: order_created_at

required_access_grants:
- revenue_access

fields:
...
```

```yaml
name: events
type: view
model_name: demo
sql_table_name: DEMO_PROD.EVENTS
default_date: event_timestamp

required_access_grants:
- events_access
```

```yaml
name: pg_orders
type: view
model_name: pg_demo
sql_table_name: demo.public.orders
default_date: order_created_at

required_access_grants:
- revenue_access
```

```yaml
name: sessions
type: view
model_name: demo
sql_table_name: wcb.sessions
default_date: session_date

required_access_grants:
- sessions_access
```

When requesting the signed API for the session if you pass the set of user\_attributes:

```yaml
{
    "events": "has_events",
    "revenue": "no_revenue",
    "sessions": "no_sessions"
}
```

Which looks like this in Postman

![has-events-request](/files/P9gd6F7GRoPnINPpKfte)

The session that is generated will NOT have access to any of `pg_orders`, `orders`, or `sessions`. It will only have access to the `events` table (assuming these four tables are the only ones in our model). Zoë will not be able to see those three tables the user does not have access to, and will have no idea that they exist.

![zoe-just-events](/files/BDSnC1lSB6sZlgMADwjv)

Conversely, if you pass the following user\_attributes:

```yaml
{
    "events": "no_events",
    "revenue": "has_revenue",
    "sessions": "has_sessions"
}
```

![no-events-request](/files/Iayuama7yFlf5dLyRMPM)

The user will have access to the `pg_orders`, `sessions`, and `orders` tables, but will NOT have access to the `events` table.

![zoe-no-events](/files/6rDa9mha7baN5WKGHiMZ)

You can apply similar logic to fields as well to define more granular permissions inside of tables.


# Embedding Styles

Customize the embedded experience with layout, navigation, and style options that match your product.

You can control UI customization in Zenlytic's embedded environment via a JSON that maps to CSS styles in the Zenlytic embedded product.

{% hint style="info" %}
Embedded styles ONLY apply in embedding
{% endhint %}

The styles you define here will *ONLY* be visible in the embedded application itself. You won't see the chat UI change, unless you are looking at the embedded version of the chat UI.

## Defining styles

You will find the JSON input for defining styles in the Style section of the workspace settings. Only admins in the workspace will have access to this section.

![embedding-style-settings](/files/cBhqleE4F0YQXcg2SCbL)

To start, you'll see a json that is structured like this:

```yaml
{
	"avatar": {
		"background_color": "brand.90",
		"color": "gray.800"
	},
	"chat": {
		"accordion": {
			"background_color": "gray.40",
			"border_radius": "base",
			"color": "gray.800",
			"icon": {
				"color": "gray.300"
			},
			"panel": {
				"background_color": "gray.20"
			}
		},
		"background_color": "gray.20",
		"chat_agent_avatar": {
			"background": "transparent",
			"src": "<link>"
		},
		"chatbox": {
			"background_color": "white",
			"border_color": "gray.60",
			"border_radius": "lg",
			"disabled": {
				"background_color": "gray.20"
			},
			"icon": {
				"color": "gray.300"
			}
		},
		"color": "gray.800",
		"explore_chat_toggle": {
			"background_color": "white",
			"border_color": "gray.60",
			"border_radius": "full",
			"icon": {
				"active": {
					"background_color": "gray.40",
					"color": "gray.800"
				},
				"color": "gray.400"
			}
		},
		"feedback": {
			"menu": {
				"background_color": "white",
				"color": "gray.800",
				"secondary_color": "gray.500",
				"submit_button": {
					"background_color": "white",
					"border_color": "gray.60",
					"color": "gray.800",
					"hover": {
						"background_color": "gray.30"
					}
				},
				"textarea": {
					"background_color": "gray.20",
					"border_color": "gray.60",
					"border_radius": "base",
					"color": "gray.800"
				}
			},
			"response_text": {
				"color": "gray.700"
			},
			"submission_buttons": {
				"active": {
					"color": "gray.700"
				},
				"color": "gray.300",
				"hover": {
					"background_color": "gray.50"
				}
			}
		},
		"loading_indicator": {
			"color": "gray.30",
			"secondary_color": "gray.300"
		},
		"message": {
			"background_color": "white",
			"border_radius": "lg"
		},
		"secondary_color": "gray.300",
		"suggestion": {
			"background_color": "white",
			"border_color": "gray.60",
			"border_radius": "full",
			"color": "gray.800"
		},
		"welcome_text": {
			"color": "gray.500"
		}
	},
	"embed_menu": {
		"background_color": "white",
		"border_color": "gray.60",
		"color": "gray.800",
		"icon": {
			"color": "gray.300"
		}
	},
	"nav": {
		"background_color": "gray.700",
		"border_color": "gray.600",
		"color": "gray.100",
		"hover": {
			"color": "gray.600"
		},
		"icon": {
			"color": "gray.200"
		},
		"logo_image": {
			"rectangle": "<link>/zenlyticLogoWhiteTransparent.svg",
			"square": "<link>/zenlyticLogoMarkWhiteTransparent.png"
		},
		"search_buttons": {
			"background_color": "gray.700"
		},
		"search_input": {
			"background_color": "gray.800",
			"color": "gray.300",
			"placeholder_color": "gray.500"
		},
		"search_panel": {
			"background_color": "gray.700",
			"color": "gray.300"
		},
		"search_result": {
			"description": {
				"color": "gray.300"
			},
			"hover": {
				"background_color": "gray.600"
			},
			"title": {
				"color": "white"
			}
		},
		"secondary_color": "gray.300"
	}
}
```

Each key in the JSON corresponds to the associated styles in that portion of the application. For example, if you change the key `"chat" -> "background_color"` from `"gray.20"` to `"#000000"`, you'll see the background color of the chat interface change from a light gray to black.

Since, the styles are only changed in the embedding environment, you'll have to change the url for chat that you are looking at to see the the styles applied.

For example, if I make that change, and then go to the `/chat` route, I will not see the change in style applied.

![embedded-style-not-applying](/files/tdZHaXyAOBsKFUVAtpoZ)

However, if I emulate the embedded environment by going to the `/embed/chat` route instead, I will see the styles applied as I expect.

![embedded-style-applying](/files/mASOW6pmGZHMr6gk4DYY)

To develop and test changes, you should have one tab open to the workspace settings, where you can make changes to the JSON object that governs the styles, and another tab open to `/embed/chat` where you can refresh the page after making changes to the JSON to see how those changes impact the embedded UI.


# Proactive Agents in Embedding

Run proactive agents inside embedded Zenlytic experiences and pass users into reusable workflows.

You can add [Proactive Agents](/proactive-agents/getting-started) to the embedding experience by creating the Proactive Agents in the UI, and then sharing those Proactive Agents with "all users" as Viewer (which only gives the ability to *run* the Proactive Agent).

<figure><img src="/files/81nFB5BKbDDJvRIDhodM" alt=""><figcaption></figcaption></figure>

Once you have those Proactive Agents created and shared, you will see the lightning bolt option in the embedded UI to run the Proactive Agents.

{% hint style="info" %}
Use the right role

Only the `embedded_with_scheduling` role has access to Proactive Agents, so you will not see the option to run Proactive Agents if you only use the `embed` role.
{% endhint %}

In the chat UI, that will look like this

![workflow-in-chat](/files/LMzeneeIcQ7DDyTvtMST)

## Running automatically

To run Proactive Agents without making the user pick which Proactive Agent they want to run, you will pass query parameters to select the Proactive Agent you want to use.

You can get the Proactive Agent ID from the 3 dot menu or the URL from the Proactive Agent Builder page. You will pass query parameters like this to run a Proactive Agent

`https://app.zenlytic.com/chat?workflowId=<my-proactive-agent-id>`

That will kick off the run of the Proactive Agent. If the Proactive Agent requires inputs, it will open a modal asking the user for the inputs. If it does not require inputs, the Proactive Agent will start running immediately.

Note: you can also run a normal chat question via query parameters as well. To do that you will pass query parameters in the URL like this:

`https://app.zenlytic.com/chat?q=hello`

This will initiate the conversation with the user's question `"hello"`.


# Migrating from Memories and Topics

Move from legacy memories and topics to skills and relationships without breaking existing behavior.

Zenlytic is consolidating two legacy configuration surfaces onto newer, more capable replacements:

* **Memories** are being replaced by **Skills**. Memories you have today will migrate automatically in a future release — you don't need to do anything. For new context, prefer Skills.
* **Topics** (and the related `identifiers` block on views) are being replaced by **Relationships** defined on the model file. Existing topics continue to work, but we no longer recommend adding new context to them.

Both legacy surfaces remain supported, so nothing breaks while you migrate. This page shows side-by-side examples of what the new surfaces look like and when to move existing context over.

## Memories → Skills

Memories let you save a canned question-and-answer pattern that Zoë retrieves when a similar question is asked. Skills cover the same use cases plus broader ones — complex analysis patterns, fiscal calendars, brand style guides — and you decide when they load rather than relying on semantic match.

### Before (Memory)

Created through **Add to memory** in chat or **Settings → Memory → New Text memory**:

> **User question**: "What was our revenue last quarter?"
>
> **Zoë response**: "Use the `total_net_revenue` measure from the `orders` view, grouped by `order_quarter`, filtered to the most recent complete quarter."

### After (Skill)

Created in the **Context Manager**:

* **Name**: Revenue Reporting
* **Description**: How to answer revenue and sales questions across the business.
* **Instructions**:

  > When a user asks about revenue, use `total_net_revenue` from `orders`. For quarterly reporting, group by `order_quarter` and default to the most recent complete quarter unless the user specifies otherwise. Gross revenue is `total_gross_revenue`; only use it when the user explicitly asks for gross.

Skills are broader than memories by design. A single skill can cover an entire topic area, an industry-specific calendar, or a multi-step workflow, with no hard character limit. See [Skills](/using-zenlytic/skills).

Migrated skills include metadata like a skill ID, migration ID, and migration timestamp in their front matter. You can safely remove these, but we recommend leaving them in as a record of when the content was migrated. Only `name` and `description` are required; see [Skill properties](/using-zenlytic/skills#skill-properties).

### When to move a memory today

You do not need to move existing memories — they will be migrated automatically. But if you are actively adding new context, create a skill instead:

* Short Q\&A patterns → one skill per topic area
* Brand, formatting, and tone rules → the built-in Brand Style Guide skill
* Complex recurring analysis → a dedicated skill with detailed instructions

## Topics → Relationships

Topics let you group views and define how they join. Relationships move join definitions onto the model file, which makes them always visible to Zoë without requiring users to select a topic, and avoids the implicit-join fan-out gotcha that topics have.

### Before (Topic)

A topic that joins `customers`, `orders`, and `discounts`:

{% code overflow="wrap" %}

```yaml
type: topic
label: Order lines
base_view: order_lines
model_name: my_model

views:
  orders:
    join:
      join_type: left_outer
      relationship: many_to_one
      sql_on: ${order_lines.order_id} = ${orders.order_id}

  customers:
    join:
      join_type: left_outer
      relationship: many_to_one
      sql_on: ${orders.customer_id} = ${customers.customer_id}

  discounts:
    join:
      join_type: left_outer
      relationship: many_to_many
      sql_on: ${order_lines.order_id} = ${discounts.order_id} and ${discounts.order_date} is not null
```

{% endcode %}

### After (Relationships on the model file)

The same joins, defined once on the model file and available globally:

{% code overflow="wrap" %}

```yaml
version: 1
type: model
name: my_model
connection: my_connection

relationships:
  - from_table: order_lines
    join_table: orders
    relationship: many_to_one
    join_type: left_outer
    sql_on: ${order_lines.order_id} = ${orders.order_id}

  - from_table: orders
    join_table: customers
    relationship: many_to_one
    join_type: left_outer
    sql_on: ${orders.customer_id} = ${customers.customer_id}

  - from_table: order_lines
    join_table: discounts
    relationship: many_to_many
    join_type: left_outer
    sql_on: ${order_lines.order_id} = ${discounts.order_id} and ${discounts.order_date} is not null
```

{% endcode %}

See [Relationships](/data-modeling/relationships) for the full schema and more examples.

### `join_as` (multiple joins to the same table)

If your existing model uses `identifiers` with `join_as` to join a view in twice (e.g., `requestor_users` and `assigned_users` against the same `cx_users` table), the same pattern is supported directly on relationships using `join_as`, `join_as_label`, and `join_as_field_prefix`. No per-view identifier block is required.

### Do I have to migrate?

No. Existing topics and identifiers continue to be read by Zoë and will keep working. You only need to move if:

* You want the join to be globally visible to Zoë without requiring a topic selection.
* You're hitting the topic implicit-join fan-out gotcha and want explicit cardinality handled once on the model.
* You're starting a new model from scratch — in that case, skip topics entirely.

### Obvious joins don't need to be migrated — or defined at all

If the join is obvious from column names (e.g., `orders.customer_id` → `customers.customer_id`), Zoë figures it out without an explicit relationship. You only need to define relationships for non-obvious joins, multi-column joins, or joins that need a specific `join_type` or `relationship` other than the default.

## Summary table

| Legacy surface        | Replacement                                                | Status                                                   |
| --------------------- | ---------------------------------------------------------- | -------------------------------------------------------- |
| Memories              | [Skills](/using-zenlytic/skills)                           | Auto-migrates in a future release. Usable now.           |
| Topics                | [Relationships](/data-modeling/relationships) on the model | Supported indefinitely. Not recommended for new context. |
| `identifiers` on view | `join_as` on relationships                                 | Supported indefinitely. Not recommended for new context. |


# Working with Zoë

Legacy overview page that points to the current guides for steering Zoë and fixing mistakes.

{% hint style="info" %}
**This page has moved.** The canonical homes for steering-Zoë guidance are now:

* [Context Surfaces](/getting-started/context-surfaces) — where to put descriptions, `zoe_description`, synonyms, `searchable`, Skills, and the system prompt.
* [Fixing Zoë's Mistakes](/getting-started/fixing-zoes-mistakes) — a diagnostic router from an observed error to the minimal context addition that fixes it.
  {% endhint %}

For per-topic references, see the rest of the Tips & Tricks section:

* [How to Steer Zoë's Answers](/tips-and-tricks/zoe_context_ingestion)
* [Naming Conventions](/tips-and-tricks/naming-conventions)
* [Descriptions and Synonyms](/tips-and-tricks/descriptions-and-synonyms)
* [Entity Drills](/tips-and-tricks/entity-drills)
* [Time Metrics](/tips-and-tricks/time-metrics)
* [Voice Commands](/tips-and-tricks/voice-commands)
* [Data Indexing](/tips-and-tricks/data-indexing)


# Using Zenlytic (legacy)

Get answers with Zoë, Explore your data directly, and use dashboards to revisit and investigate saved views.

{% hint style="danger" %}
**This page describes a legacy version of the product.** The standalone Explore interface no longer exists. [Zoë](/using-zenlytic/zoe) is now how you get answers in Zenlytic — see that page for the current chat experience. The rest of this page is kept for historical reference only.
{% endhint %}

## Using Zenlytic (legacy)

Zenlytic is a LLM-powered AI data analyst (Zoë) that helps you go from facts to decisions. There are two primary ways to get answers in Zenlytic.

### How to get answers

* [**Zoë**](/using-zenlytic/zoe)
  * Zoë is an AI data analyst who uses your cognitive layer to answer questions about your data for you. She can answer questions about anything you can query using the [explore](/legacy/exploring) interface, create rich [Artifacts](/using-zenlytic/artifacts) (apps, documents, spreadsheets, presentations, and more) to answer complex data science questions, and integrates with both Slack and Microsoft Teams.
* [Explore](/legacy/exploring)
  * The explore question is a general purpose interface where you can answer the "What" questions that lead into the "Why" questions. For example, you could look at number of customers by acquisition channel who have spent more than $200 in the last 3 months in this question type. You can [slice](/legacy/exploring#slicing) and [filter](/legacy/exploring#filtering) key metrics easily.

### Dashboards

You can also access saved views of your data using dashboards. To get to the list of your company's dashboards, you can click on the Dashboards option in the top navigation bar. Then to go to a dashboard, click on it's name.

<figure><img src="/files/XjDwkXekWMteOOp5FVfb" alt=""><figcaption></figcaption></figure>

When you're on a dashboard page, you can click the three dots on any of the plots to go into an interactive interface to ask follow up questions about the plot.

<figure><img src="/files/wHAh0S91dWMQOHpKEJZN" alt=""><figcaption></figcaption></figure>


---

[Next Page](/llms-full.txt/1)